Table of Contents
Advertisement
Advertisement
Chapters
Table of Contents

Related Manuals for Western Digital WD ShareSpace


Summary of Contents for Western Digital WD ShareSpace
- Page 1 WD ShareSpace ™ Network Storage System User Guide...
-
Page 2: Important Safety Instructions
12. In accordance with workstation regulation standards, do not place this device in the visual field of the user due to the glossy front of the case. WARNING! The WD ShareSpace uses a lithium battery, type CR2032. There is danger of an explosion if the battery is incorrectly replaced. Replace only with the same or equivalent battery type recommended by the manufacturer. -
Page 3: Table Of Contents
Step 2: Access WD ShareSpace on the Network ....10 WD ShareSpace File Storage ....... 16 How to Back Up Computers on a Network . - Page 4 Media Devices ......... . . 44 Using iTunes with WD ShareSpace ... . .49 iTunes Media Server Overview .
- Page 5 Network Storage Manager: Basics ... . .60 Configuring WD ShareSpace ....... 60 Network Storage Manager Features .
-
Page 6: Wd Service And Support
WD SHARESPACE USER MANUAL WD Service and Support Should you encounter any problem, please give us an opportunity to address it before returning this product. Most technical support questions can be answered through our knowledge base or e-mail support service at support.wdc.com. If the answer is not available or, if you prefer, please contact WD at the best telephone number shown below. -
Page 7: Registering Your Wd Product
WD SHARESPACE USER MANUAL Registering Your WD Product Your WD product includes 30 days of free technical support during the applicable warranty period for your product. The 30-day period commences on the date of your first telephone contact with WD technical support. Register online at register.wdc.com. -
Page 8: Overview
Format and Configuration WD ShareSpace is preformatted for maximum reliability as a RAID 5 volume (for four-drive systems) or for maximum capacity as a single large, spanned volume (for two-drive systems). In RAID 5, one quarter of the capacity is used to store parity information needed to restore data in the event of a drive failure. -
Page 9: Kit Contents
WD SHARESPACE USER MANUAL Kit Contents Network storage system Drive mounting rails with four or two drives (only included with two-drive systems) Installation CD with Quick Install Guide Ethernet cable AC adapter application software and power cords and user manual... -
Page 10: System Requirements
WD SHARESPACE USER MANUAL System Requirements For optimum performance, the following system and network requirements are recommended. Compatibility may vary depending on user’s hardware configuration and operating system. Important: For highest performance and reliability, it is recommended that you install the latest updates and service pack (SP). For Macintosh, go to the Apple menu and select Software Update. -
Page 11: Recording Your Wd Product Information
WD SHARESPACE USER MANUAL Recording Your WD Product Information In the following table, write the serial number and model number of your new WD product found on the label on the bottom of the device. Also, write the purchase date and other notes such as your operating system and version. -
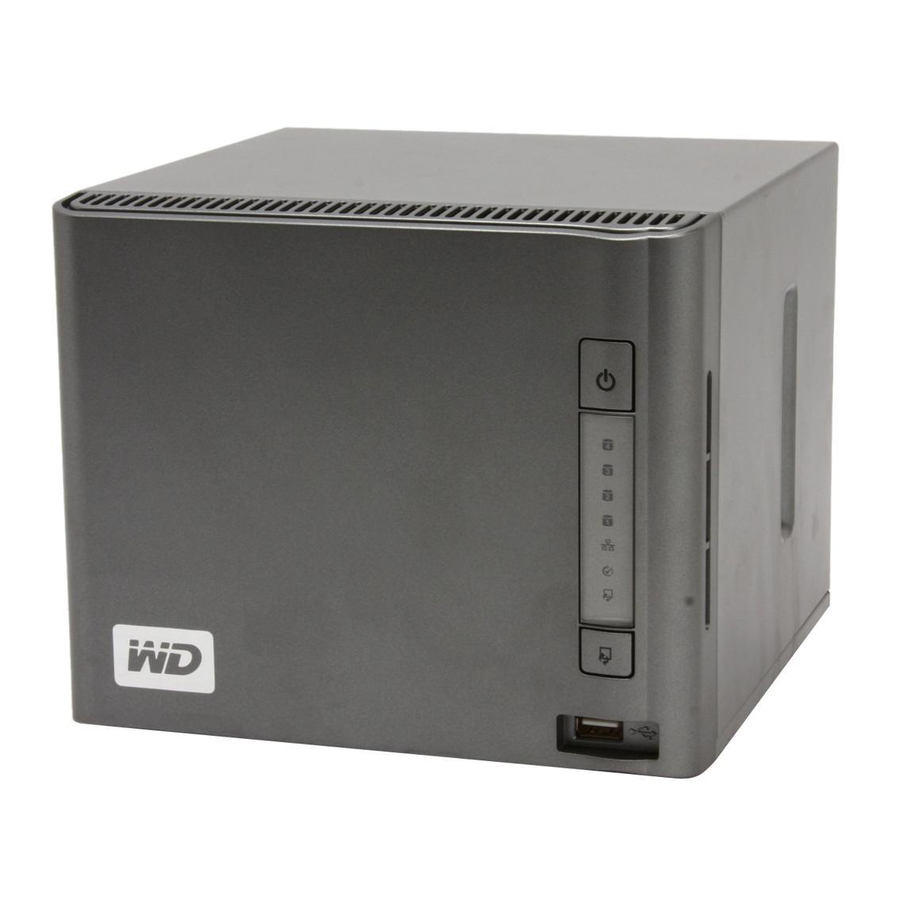
Page 12: Led Indicators
• System initialize operation in progress Flashing • One flash per second—system is formatting a USB drive • One flash per second (backup)—USB device to WD ShareSpace • Two flashes per second (backup)—WD ShareSpace to USB device • System initialize operation completed... -
Page 13: Usb Backup Button
WD SHARESPACE USER MANUAL USB Backup Button The USB backup button allows you to back up data from a USB drive to the device or from the device to a USB drive. The USB backup feature only works on the front USB port (port 1). -
Page 14: Wd Sharespace Basic Setup
WD SHARESPACE USER MANUAL WD ShareSpace Basic Setup Step 1: Connect WD ShareSpace to the Network Follow the steps below to connect the network storage system to a small home/office network. 1. Connect one end of the Ethernet cable into the Ethernet port located on the back of the device. -
Page 15: Step 2: Access Wd Sharespace On The Network
WD SHARESPACE USER MANUAL Step 2: Access WD ShareSpace on the Network You can easily find your WD ShareSpace on the local area network (LAN) using WD Discovery™. Follow the appropriate procedure below: • Windows 2000/XP/Vista on page 10 •... - Page 16 WD SHARESPACE USER MANUAL 5. If you have connected the WD ShareSpace properly as shown in the Connect screen, click Next. 6. The Application Installer screen opens, displaying a list of options. Click WD Discovery Tool. Once the WD Discovery Tool installation is complete, it will automatically launch and the WD Discovery icon will display on your desktop.
- Page 17 You can now drag and drop files into the shared folders using Finder. 7. To make the shared drive icon permanent on your desktop, create an alias: Note: Before creating an alias, click Finder>Preferences and make sure Connected Servers is checked. WD SHARESPACE BASIC SETUP - 12...
- Page 18 1. Turn on your computer and wait for the operating system to load. 2. On the menu bar, click Go>Connect to Server. 3. Click Browse and double-click the WD ShareSpace. 4. On the Connect to Server screen, click Connect. 5. Type “admin” in both the Name and Password fields and select the Remember this password in my keychain checkbox.
- Page 19 (a) Click the item you want to alias (for example, Public). (b) While holding down the Ctrl or Cmd key and the Option key simultaneously, drag the item to where you want the alias to appear. The alias displays at the new location. WD SHARESPACE BASIC SETUP - 14...
- Page 20 USER MANUAL Congratulations! Your WD ShareSpace is now ready for use and is accessible as a drive letter in My Computer (Windows) or a shared drive icon on the desktop (Macintosh). You can now drag and drop files into your WD ShareSpace and move files from your WD ShareSpace to any computer in your network that has been set up according to the instructions above.
-
Page 21: Wd Sharespace File Storage
USER MANUAL WD ShareSpace File Storage You can access and store content on WD ShareSpace via network shares. Shares are folders that can be used to organize and store files on your WD ShareSpace network storage system. Shares can be shared with everyone (public) or with selected users on your network (private). -
Page 22: How To Back Up Computers On A Network
Anywhere Backup, each one enabling you to activate the software on five computers. Select the files you want to back up, and then set the WD ShareSpace and forget it; every time you save a change it’s automatically backed up. - Page 23 WD SHARESPACE USER MANUAL 8. Close all other open applications, and then click Next to continue. 9. If you accept the terms of the agreement, click I Agree to continue. 10. After WD Anywhere Backup has finished installing, click Finish to begin using WD Anywhere Backup.
- Page 24 Note: The WD Anywhere Backup icon now displays on your desktop, and WD Anywhere Backup is listed in Program Files. Macintosh Leopard 1. Turn on your computer and wait for the operating system to load. 2. Click the WD ShareSpace icon on the desktop. HOW TO BACK UP COMPUTERS ON A NETWORK - 19...
- Page 25 WD SHARESPACE USER MANUAL 3. Double-click the WD Mac Tools icon. 4. Double-click WD_Anywhere_Backup.dmg. 5. On the WD Anywhere Backup screen, click the WD Anywhere Backup icon. 6. On the verification dialog box, click Continue. HOW TO BACK UP COMPUTERS ON A NETWORK - 20...
- Page 26 WD SHARESPACE USER MANUAL 7. On the first screen of the Install WD Anywhere Backup wizard, click Continue. 8. On the Software License Agreement screen, click Continue. 9. To accept the software license agreement, click Agree. 10. To install the software, click Install.
- Page 27 WD SHARESPACE USER MANUAL 11. Enter “admin” in the Name and Password fields. 12. When a screen verifying successful installation appears, click Close. 13. Now you can begin backing up your data. Click Restore and continue with “One-Click Backup” on page 28.
- Page 28 USER MANUAL Macintosh Tiger 1. Turn on your computer and wait for the operating system to load. 2. Double-click the WD ShareSpace icon. 3. Double-click the WD Mac Tools icon. HOW TO BACK UP COMPUTERS ON A NETWORK - 23...
- Page 29 WD SHARESPACE USER MANUAL 4. Double-click the WD Anywhere icon. 5. Click the WD Anywhere Backup icon. 6. Click Continue. HOW TO BACK UP COMPUTERS ON A NETWORK - 24...
- Page 30 WD SHARESPACE USER MANUAL 7. On the Install WD Anywhere Backup screen, click Continue. 8. Review the software license agreement, and click Continue. 9. To accept the software license agreement, click Agree. HOW TO BACK UP COMPUTERS ON A NETWORK - 25...
- Page 31 WD SHARESPACE USER MANUAL 10. Click Upgrade to install WD Anywhere Backup. 11. On the Authenticate screen, enter “admin” in both the Name and Password fields. Click OK. 12. When the software has been installed successfully, click Close. HOW TO BACK UP COMPUTERS ON A NETWORK - 26...
- Page 32 WD SHARESPACE USER MANUAL 13. You can now create plans for backing up your data. Click Restore and continue with “One-Click Backup” on page 28. HOW TO BACK UP COMPUTERS ON A NETWORK - 27...
-
Page 33: Configuring Wd Anywhere Backup
When you first install WD Anywhere Backup, the WD Anywhere Backup Configuration screen displays. Note: The screen below only appears when you have WD ShareSpace attached to your computer’s local area network. 1. You have two options: •... - Page 34 WD SHARESPACE USER MANUAL 2. A message displays a list of files that will not be backed up. For information on backing up those files, see “How to Create a Customized Backup Plan” on page 31. Click OK. 3. A message explains that initial backup will use moderate resources on your computer.
- Page 35 WD SHARESPACE USER MANUAL The WD Anywhere Backup screen displays the progress of the backup. When the backup has finished, a backup complete message displays. 5. To create another backup, click Create. HOW TO BACK UP COMPUTERS ON A NETWORK - 30...
- Page 36 WD SHARESPACE USER MANUAL How to Create a Customized Backup Plan Creating and customizing a backup plan allows you to automatically safeguard against data loss. 1. If WD Anywhere Backup is not already running, click the WD Anywhere Backup icon on the desktop.
- Page 37 WD SHARESPACE USER MANUAL 4. Click Network Places and locate your WD ShareSpace on your local area network. Click Next. 5. Click All Items from SmartPicks. HOW TO BACK UP COMPUTERS ON A NETWORK - 32...
- Page 38 WD SHARESPACE USER MANUAL 6. The SmartPicks screen displays, listing common file types that you can back up. Select each file type you want to back up. When finished, click Next. 7. Name your backup plan and click Next. You can create additional backup plans by repeating the steps above.
- Page 39 WD SHARESPACE USER MANUAL 8. A confirmation screen displays. Click Done. 9. A message explains that initial backup will use moderate resources on your computer. To pause the backup, click Pause until System Idle. 10. To keep the backup running in the background, click Continue.
- Page 40 WD SHARESPACE USER MANUAL When the backup finishes, the Backup Complete screen displays. Or, close the screen and click the WD Anywhere Backup icon and select Show backup status. As files are backed up, a small notification window appears. HOW TO BACK UP COMPUTERS ON A NETWORK - 35...
- Page 41 WD SHARESPACE USER MANUAL Editing a Plan Click the menu icon to add or remove files to and from backup plans, keep multiple revisions of files on hand for recall, and remove entire plans. Restoring a Backup Plan You can restore a backup plan in the event that you have accidentally deleted a file, want to compare file versions, or have lost all data due to a hard drive crash on your computer.
- Page 42 WD SHARESPACE USER MANUAL 5. Click Restore. HOW TO BACK UP COMPUTERS ON A NETWORK - 37...
-
Page 43: Mionet Remote Access
MioNet also enables you to share a folder of pictures on your WD ShareSpace with friends (no upload required) or a folder of documents with your business colleagues. - Page 44 WD SHARESPACE USER MANUAL 6. Click MioNet Services. The MioNet home screen displays. 7. Click Create Account (upper right). 8. Complete the registration form and click Submit to create an account. MIONET REMOTE ACCESS - 39...
-
Page 45: Using Mionet
WD SHARESPACE USER MANUAL 9. When MioNet finds the WD ShareSpace you are registering, enter a name for the device and click OK. A confirmation message displays. Click OK. 10. MioNet displays a list of the public folders stored on your WD ShareSpace, with the exception of the shares created on MioNet. - Page 46 4. Double-click any file to open it locally. Depending on the operating system, you may be able to drag and drop files from your WD ShareSpace to the remote computer and vice versa. MIONET REMOTE ACCESS - 41...
-
Page 47: How To Play/Stream Video, Music & Photos
How to Play/Stream Video, Music & Photos Media Server Overview WD ShareSpace is designed to serve as your home's central media hub. It enables you to stream photos, music, and videos to your home entertainment center and/or other PCs on your home network. -
Page 48: Media Storage
USER MANUAL Media Storage You can access and store media content on WD ShareSpace via network shares. Shares are folders that can be used to organize and store files on your WD ShareSpace network storage system. Shares can be shared with everyone (public) or with selected users on your network (private). -
Page 49: Media Devices
WD SHARESPACE USER MANUAL Media Devices Now that you have copied your files to their corresponding folders, you can use a variety of media devices to stream media. The following types are discussed in this section: • Windows Media Player 11 (Windows Vista) on page 44. - Page 50 WD SHARESPACE USER MANUAL 3. Click Private, and then click Next. 4. Launch Windows Media Player (Start > All Programs > Windows Media Player) 5. Click Library > Media Sharing. HOW TO PLAY/STREAM VIDEO, MUSIC & PHOTOS - 45...
- Page 51 5. Use the music player navigation buttons on the screen to play your music files. 6. To view your pictures or play video content that are on your WD ShareSpace, go back to step 3 and repeat the steps, selecting the appropriate media (Picture or Video).
- Page 52 Digital Picture Frames The following are general steps for setting up digital photo frames: 1. Ensure that your WD ShareSpace is connected to your home’s local network and is powered on. 2. Follow the user instructions provided with your wireless digital photo frame to proceed through any initial setup or installation of drivers.
- Page 53 The following are general steps for using a network music player to access WD ShareSpace: 1. Connect WD ShareSpace to your local area network and power on the device. 2. Connect and configure your network music player on your home’s wired or wireless network switch or router.
-
Page 54: Using Itunes With Wd Sharespace
‘/Public/Shared Music’ folder if it has been deleted or given another name. Storing Content See “Step 2: Access WD ShareSpace on the Network” on page 10 for instructions on moving your media files to WD ShareSpace’s ‘/Public/Shared Music’ default folder. - Page 55 WD SHARESPACE USER MANUAL 3. Double-click an audio file to play. The audio file is streamed in iTunes, and audio files from the network storage system are displayed under the Shared list. USING ITUNES WITH WD SHARESPACE - 50...
-
Page 56: External Usb Drive Sharing & Backup
USB drive to the network storage system or back up data from the network storage system to a USB drive. You have to select your destination and source as described in “USB to WD ShareSpace Backup” on page 109. Important: When backing up data, always connect the USB drive directly to USB port 1 located on the front panel. - Page 57 (this could take up to 30 seconds). 2. Press and hold the USB backup button only until the WD ShareSpace light turns off. While the backup is in progress, the USB LED will flash once per second.
- Page 58 WD SHARESPACE USER MANUAL 2. Connect a USB drive to the USB port (Port 1) located on the front panel of the WD ShareSpace, and wait for a few seconds for the USB backup LED to light steadily. 3. Press and hold the USB backup button until the USB backup LED on the front of the unit begins to flash.
-
Page 59: Using Wd Discovery (Windows Only)
Off” on page 58. Mapping a Network Drive To access and store data on WD ShareSpace after setting up the device, you must first map a network drive to one or more of the default shares. Install the WD Discovery application on each Windows XP or Vista computer in your network to easily map a network drive, browse network shares, or create a desktop shortcut. - Page 60 WD SHARESPACE USER MANUAL 3. Click the device you want to map in the Network Drives Found list and click Map Network Drive in the Things to Do list. 4. In the authentication screen, enter your User Name and Password. The default for both is “admin.”...
- Page 61 WD SHARESPACE USER MANUAL Automatic Drive Mapping 1. After completing step 4 of “Windows 2000/XP/Vista” on page 54, click Yes. All share folders available on the device will be mapped as network drives automatically. Available drive letters are assigned backwards from Z.
-
Page 62: Browse Network Shares
WD SHARESPACE USER MANUAL Browse Network Shares To access data on a share using WD Discovery: Use WD Discovery to easily browse network shares without having to manually enter drive paths. 1. Ensure that the device is powered on and connected to the network. -
Page 63: Desktop Shortcut Creation
Click OK. Turning Identify LED On or Off Users with multiple WD ShareSpace devices can use the blue Identify LED feature to find out which WD ShareSpace in the network is currently being accessed via WD Discovery. WD Discovery allows you to turn on or turn off Identify LED on a networked WD ShareSpace device. - Page 64 4. The Identify LED on the target device is turned on. The LED icon appears to the left of the device name in WD Discovery. To turn off the Identify LED on a remote networked WD ShareSpace device: 1. Ensure that the device is powered on and connected to the network.
-
Page 65: Network Storage Manager: Basics
Storage Manager, and enter basic settings. For instructions on configuring advanced settings, see “Network Storage Manager: Advanced” on page 78. Configuring WD ShareSpace Follow the instructions below to configure your WD ShareSpace for Windows or Mac. Windows 2000/XP/Vista Note: Follow steps 1-6 below only if you have already installed WD Discovery Tool as instructed on page 10. - Page 66 WD SHARESPACE USER MANUAL 7. The WD Discovery screen displays. Click WDShareSpace in the Network Drives Found list and click Configure. 8. The login page appears. Continue device setup by following the instructions for “Setting up the Device” on page 62.
- Page 67 WD SHARESPACE USER MANUAL Setting up the Device Follow the steps below to continue setting up the device for all operating systems. Note: You will only have to perform the setup the first time you log in to Network Storage Manager.
-
Page 68: Click Next
My Network Places. To connect more than one storage device to the same network, you must specify a unique device name for each storage device. Caution: Renaming WD ShareSpace forces all the network computers to remap their shared network resources. Change the device name only when necessary. - Page 69 WD SHARESPACE USER MANUAL and most special characters except double-quote ("). The first and last characters cannot be a space. The password is case sensitive. 7. Retype the new password in the Confirm Password field. Click Next. Note: If you forget your admin password, you must reset the device to its default configuration using the reset button.
- Page 70 Note: If you are using Windows 2000, XP, or Vista, you may notice a warning notice bar display during the final initialization of your WD ShareSpace. The bar warns that the Internet Explorer has blocked an Active X controller message. This warning disappears on its own, or you can click the X button to the right of the bar.
- Page 71 WD SHARESPACE USER MANUAL 4. The login page appears. Type in the administrator name and password (the default password is “admin” unless it has already been changed by the administrator). In the Tool list, click Network Storage Manager. In the Language list, click the language for your region.
-
Page 72: Network Storage Manager Features
WD SHARESPACE USER MANUAL Network Storage Manager Features The web-based management utility includes the following features: • LAN access—the device supports local area network access of the web-based user interface, enabling management from anywhere in the network. • Secured access—the device can be accessed and configured by the web-based, password protected user interface over SSL (Secure Socket Layer). -
Page 73: User Interface Overview
WD SHARESPACE USER MANUAL User Interface Overview The web-based user interface is designed to logically access and manage the features of the device. Upon logging in, the web user interface defaults to Basic Mode. Basic Mode provides access to the most common device configuration options. -
Page 74: Basic Mode
WD SHARESPACE USER MANUAL Toolbar The toolbar located on the upper right of the Network Storage Manager user interface includes the following commands. Function Description Advanced Allows you to switch the user interface from basic to Advanced Mode. Basic Allows you to switch the user interface from advanced to Basic Mode. - Page 75 Device Name Use this option to enter or change a device name and/or a description of the device. The device name is the name by which your WD ShareSpace is identified on the LAN. 1. Click Device Name in Basic Mode home screen.
- Page 76 WD SHARESPACE USER MANUAL 2. Deselect Enable to set the time manually. 3. To synchronize the date and time automatically, click Enable. 4. Click Submit. Network The device’s network mode is set to DHCP Client by default, which is appropriate for most environments.
- Page 77 3. Click Submit. Users Creating users allows the administrator to control access to data on WD ShareSpace across the network by creating user accounts with specific permissions. The administrator can also edit and delete user accounts in the Users menu.
- Page 78 Folder Shares Shares are folders that can be used to organize and store files on your WD ShareSpace network storage system. Shares can be shared with everyone (public) or with selected users on your network (private). The device comes preconfigured with three shares: •...
- Page 79 WD SHARESPACE USER MANUAL how to use Twonky media, see “Media Server” on page 114. For more information on how to use the iTunes service, see “iTunes” on page 115. • Download—for saving files using Downloader (see “Scheduled Downloads” on page 127).
- Page 80 WD SHARESPACE USER MANUAL 4. Enter a brief description in the Description field. 5. Click Submit. To delete existing shares: WARNING: Deleting a share erases all data on the share. All files and folders on the share will be lost.
- Page 81 Restart MioNet - Stops MioNet if it is running and starts it again. • Reset MioNet - Resets all MioNet account information on the WD ShareSpace. If the ShareSpace is registered to a MioNet account, that registration is erased so that the unit is now unregistered.
- Page 82 WD SHARESPACE USER MANUAL Shutdown/Reboot The Shutdown/Reboot options allow you to perform a system reboot or shutdown. To perform network storage system shutdown: 1. Click Shutdown/Reboot in the Basic Mode home screen. 2. On the Shutdown/Reboot page, click Shutdown. 3. Click OK.
-
Page 83: Network Storage Manager: Advanced
WD SHARESPACE USER MANUAL Network Storage Manager: Advanced Advanced Mode provides access to additional options not available in the Basic Mode. When in Basic Mode, click Advanced Mode on the toolbar to view Network Storage Manager in Advanced Mode. The Advanced Mode page include six tabs, each having several icons providing more management options for maximum flexibility and security of the device. -
Page 84: System Tab
WD SHARESPACE USER MANUAL System Tab The System tab allows you to set the system date and time, set up alerts, change the admin password, perform software or firmware upgrades, create a backup copy of the system files, restore system to factory defaults, generate and set up an SSL certificate, or perform system reboot or shutdown. - Page 85 HTTP. All traffic between the managing computer and the WD ShareSpace is encrypted. HTTPS provides a more secure means of configuring your device, but it may affect the responsiveness of the user interface.
- Page 86 WD SHARESPACE USER MANUAL drive, volume, network, and USB status; and user and group events. These alerts help the system administrator(s) manage and detect events or errors. To set up automatic e-mail notifications: 1. Click Enable next to Email Notification. The page displays additional fields.
- Page 87 WD SHARESPACE USER MANUAL 4. In the Email Recipients field, enter the e-mail address where you want to send an e-mail message when an event occurs. Up to five e-mail addresses can be used at a time. 5. Click Send Test Mail to send a test alert and confirm your settings are correct.
- Page 88 WD SHARESPACE USER MANUAL Admin Password The Admin Password icon on the System tab allows you to change the administrator’s password. To change the administrator's password: 1. In the Old Password field, enter the old password. 2. In the New Password field, enter the new password. The maximum length of the password is 16, including alphabetic, numeric, underscore, space, and most special characters except double-quote (").
- Page 89 WD SHARESPACE USER MANUAL 1. Click Check For New Firmware. 2. Click Download if new firmware is available. 3. Click Upgrade. Wait for the update process to complete. WARNING! Do not interrupt a firmware upgrade in progress; doing so may cause the device to malfunction or render it unable to boot.
- Page 90 WD SHARESPACE USER MANUAL Manual The Manual option allows you to install the firmware manually. 1. Before attempting a manual update, check support.wdc.com for firmware availability. 2. If a new firmware file is available, download it from support.wdc.com. After your firmware has been updated, the device will reboot. The web user interface redirects to the System Information page after the update is completed.
- Page 91 WD SHARESPACE USER MANUAL Configuration The Configuration icon allows you to save or restore system configuration settings or revert to factory default settings. To back up the current system configuration settings: 1. On the Restore Configuration page, click Save Current Configuration.
- Page 92 WD SHARESPACE USER MANUAL To restore the device to factory defaults: Important: Save the current configuration prior to restoring the factory default settings. Performing a factory default reset will erase all settings in the network storage system. System configuration will reset the device to default factory settings. All information and data will be lost.
- Page 93 WD SHARESPACE USER MANUAL To turn on the system identification LED: System Identification identifies the location of the device. If you have multiple devices installed, you can use this function to turn on the identification LED and know which device you are configuring.
- Page 94 WD SHARESPACE USER MANUAL To enable HDD standby: If the HDD Standby function is enabled, the hard drives go into standby mode to save power after a fixed period of no activity. This period varies from 125 seconds to 375 seconds.
- Page 95 WD SHARESPACE USER MANUAL Note: During a power failure, the system will shut down after TIMEOUT seconds have expired, or the remaining battery percentage reaches 15% or less, or the remaining battery runtime drops to or below 5 minutes. A value of '0' disables the Timeout timer.
- Page 96 WD SHARESPACE USER MANUAL Shutdown/Reboot The Shutdown/Reboot menu allows you to perform system reboot or shutdown. To perform network storage system shutdown: 1. Click Shutdown/Reboot in the System tab home screen. 2. On the Shutdown/Reboot page, click Shutdown. 3. Click OK.
-
Page 97: Network Tab
WD SHARESPACE USER MANUAL Network Tab The Network tab provides access to the following configuration options: • • Services • Workgroup • Remote Access The LAN icon on the Network tab allows access to all network configuration options including setting the connection method, changing the IP address, netmask, gateway, and DNS (Domain Name Service) server IP address, as well as changing the MTU size to enable jumbo frames. - Page 98 WD SHARESPACE USER MANUAL 2. If your network link speed is 1000 Mbps, the MTU field will be available. Enter the MTU (Maximum Transmission Unit) value for the jumbo frame. The default MTU setting is 1500 bytes. Any value larger than this is considered a jumbo frame. The network card on the client computer must support jumbo frames.
- Page 99 WD SHARESPACE USER MANUAL • Universal Plug and Play (UPnP) is a set of computer network protocols that simplifies the implementation of networks in the home by allowing devices to connect seamlessly. • File Transfer Protocol (FTP) is a network protocol used to transfer data from one computer to another through a network.
- Page 100 USER MANUAL To access data via FTP: You can access data in a shared folder on WD ShareSpace with a widely used FTP client software program. An FTP client software program must be installed on the computer you are using to access the device, and FTP service must be enabled on the network storage system (see “To enable other network services:”...
- Page 101 WD SHARESPACE USER MANUAL 3. Click Submit. To join a domain (Windows 2003 Server only): 1. Click Domain Member. 2. Enter the fully qualified domain name in the Domain Name field. 3. Enter the domain administrator IP address in Domain Controller IP Address field.
- Page 102 USER MANUAL Remote Access WD ShareSpace comes with MioNet enabled by default. If MioNet is not already installed on the client computer, follow the instructions under “Configuring WD ShareSpace” on page 60. The Remote Access icon allows you to control the MioNet service on the storage device.
-
Page 103: Storage Tab
WD SHARESPACE USER MANUAL Storage Tab The Storage tab provides all necessary options required for individual storage disk configuration and maintenance. This tab also includes an option to change the system’s RAID configuration, set a share name, and format and safely remove the USB drives connected to the system. - Page 104 WD SHARESPACE USER MANUAL Drive status messages include the following: • Good—Indicates the hard drive is accessible and functioning normally. • Failed—Indicates a fatal error has occurred on the hard drive(s). See “Replacing a Drive” on page 132 for drive replacement instructions.
- Page 105 WD SHARESPACE USER MANUAL Note: If the volume RAID type is Span and there are new disks in the system, the Extend icon appears on the side of the Manage Volume table. Volume status messages include the following: • Good—Indicates the volume is accessible and hard drive is functioning normally.
- Page 106 WD SHARESPACE USER MANUAL To modify the volume: 1. Click the Manage Volume tab. 2. Click the Modify icon next to the volume you want to modify. The Volume & Raid Management page appears. 3. Select a RAID level. 4. Click Submit.
- Page 107 WD SHARESPACE USER MANUAL Manage Volume Options The table below shows available volumes for systems containing one to four drives. manual manual manual manual extend extend extend extend Manage Volume span span span span available options available available + 2 Drives...
- Page 108 • Two Mirror - Two Mirror mode is available when four drives are installed in the WD ShareSpace. In this mode, two independent RAID 1 volumes are created. • Span (Spanned) - Combines drives into a linear fashion to create one large logical volume.
- Page 109 WD SHARESPACE USER MANUAL on the first physical drive. As the volume fills, files written later are written toward the “end” of the volume, on the second drive. Like RAID 0, no data redundancy is provided. If one of the drives fails, all data is lost.
- Page 110 Folder Shares Shares are folders that can be used to organize and store files on your WD ShareSpace. They can be shared with everyone (public) or with selected users on your network (private). The device comes preconfigured with three shares: •...
- Page 111 WD SHARESPACE USER MANUAL The Folder Shares menu provides access to a list of available shares. USB share naming corresponds to the following configuration: usb-<port number>share<partition number> To create a share: 1. Click the Add icon 2. Enter a share name in the Share field. The share name can contain up to 32 characters, including alphabetic, numeric, or underscore.
- Page 112 The USB Shares icon provides three tabs—USB Disk, USB to WD ShareSpace Backup, and WD ShareSpace to USB Backup. Use these tabs to format a USB drive, remove a USB drive, and perform backup operations from a USB drive to the network storage system and vice-versa.
- Page 113 WD SHARESPACE USER MANUAL USB Disk Use the USB Disk tab to format or safely disconnect a USB drive or to configure auto backup. (See “USB Auto Backup Feature” on page 51.) To format a USB drive: 1. Connect a USB drive to the device.
- Page 114 Use the USB to ShareSpace Backup tab to set a destination share for a different USB drive backup. To set a destination share name for the USB drive to WD ShareSpace backup: 1. On the USB Shares page, select the USB to WD ShareSpace Backup tab.
- Page 115 WD SHARESPACE USER MANUAL WD ShareSpace to USB Backup Use the WD ShareSpace to USB Backup tab to set a source share for this backup method. To set a source share name for WD ShareSpace to USB drive backup: 1. On the USB Shares page, select the WD ShareSpace to USB Backup tab.
- Page 116 WD SHARESPACE USER MANUAL Manage Quota The Manage Quota tab in the Quota Management menu provides the quota information for each volume and allows administrators to modify the quota settings. Note: Use the Manage Quota tab to enable quota globally, and use the DataVolume User Quota tab to enable quota per person.
- Page 117 Password. This menu provides configuration options for selecting the Downloads target share and changing the Downloader login password. This login provides non- administrator users with a method to download files directly to the WD ShareSpace. NETWORK STORAGE MANAGER: ADVANCED - 112...
- Page 118 WD SHARESPACE USER MANUAL Set up Destination Share Use the Setup Destination Share tab to choose the target share for the Downloader utility. For more information on how to use the Downloader utility, refer to “Scheduled Downloads” on page 127.
-
Page 119: Media Tab
The server is pre-set, so you can just transfer your multimedia content to the respective shared folders on your WD ShareSpace (described on the next page), and you are ready to stream and view content on your home entertainment center, game consoles (for example, Xbox 360, Playstation 3, or DLNA 1.5 Digital Media Adapters). - Page 120 WD SHARESPACE USER MANUAL iTunes Enable the iTunes Server Service and customize the service settings using the iTunes menu. iTunes Server Service allows iPod and iTunes users to share and play music on the network storage system. Note: iTunes service is enabled by default.
- Page 121 WD SHARESPACE USER MANUAL 2. Click WDShareSpace under the Shared section of the left pane. If you have copied music to the /Public/Shared Music folder and it is in a format supported by iTunes, it should be listed in the right pane.
-
Page 122: Users Tab
WD SHARESPACE USER MANUAL Users Tab The Users tab provides access to the following configuration options: • Users • Groups • Folder Share Permissions • USB Share Permissions Users The Users icon on the Users tab allows administrators to create, edit, and delete user accounts from Access Control list management. - Page 123 WD SHARESPACE USER MANUAL Note: The password can contain up to 16 characters, including alphabetic, numeric, underscore, space, and most special characters except double-quote ("). The first and last characters cannot be a space. The password is case sensitive. 2. Click Grant Administration Rights to provide the user with administrative rights.
- Page 124 WD SHARESPACE USER MANUAL Groups The Groups icon on the Users tab allows the administrator to create, edit, and delete a group from Access Control list management. To create a group: 1. Click the Add icon 2. Assign a new group name.
- Page 125 WD SHARESPACE USER MANUAL 2. Click OK. Folder Share Permissions The Folder Shares menu allows you to set the access control for each user or group in the Access list. • Public Access • Full Access • Read Only •...
- Page 126 WD SHARESPACE USER MANUAL 8. Click Submit. Note: Public shares can be accessed using the administrator name and password as well as a guest name and password. The guest name and password are both “guest.” USB Share Permissions The USB Shares icon on the Users tab allows you to set access control for the two USB ports on the back of the device.
- Page 127 WD SHARESPACE USER MANUAL When there is a conflict in the access rights of the user and group, the device uses the following rules to handle the conflict: • Deny Access will have the highest priority. • Full Access + Read Only = Full Access.
-
Page 128: Status Tab
WD SHARESPACE USER MANUAL Status Tab The Status tab provides access to the following configuration options. • System Status • System Logs System Status The System Status icon on the Status tab displays general information about the system: device name, version, current date/time, system uptime, IP address, volume usage, and volume RAID type if RAID is functioning properly. - Page 129 WD SHARESPACE USER MANUAL System The System tab displays system logs on the device. The System Log records events that occur in the system. You can obtain information from the following conditions or errors that may occur in the system components, and hardware or software components.
- Page 130 WD SHARESPACE USER MANUAL CIFS The CIFS (Common Internet File System) tab displays logs of file and services requested on the device for connections that use this protocol. The FTP (File Transfer Protocol) tab displays logs of the requests and records transferred between the device and client computers for connections that use this protocol.
- Page 131 WD SHARESPACE USER MANUAL Settings The Settings tab assigns the order and number of log entries that appear on the Logs page. To configure the log settings: 1. On the Settings tab, click Show log entries in reverse order to display the most recent entries at the top.
-
Page 132: Scheduled Downloads
WD SHARESPACE USER MANUAL Scheduled Downloads Downloader is a powerful tool for managing download tasks directly to the unit. This tool is great for when you want to download very large or multiple large files from the Internet and do not want to sit and wait for the download to complete. All you have to do is identify the URL of the files you want to download from the Internet and set it in the Download function on your WDShareSpace. -
Page 133: Downloader Features
WD SHARESPACE USER MANUAL Downloader Features Downloader includes the following features: • Download faster with instantaneous “start” • Simultaneous download of multiple files from the Internet • Files are automatically stored to a user-defined destination folder in WD ShareSpace. •... -
Page 134: Settings Tab
WD SHARESPACE USER MANUAL Command icons The Downloader Tasks tab includes the following commands: Icon Command Description Creates a download task. Start Starts a specific download task. Stop Ends the download task. Delete Deletes download task from the table. Help Displays the online guide. - Page 135 WD SHARESPACE USER MANUAL Using Downloader To create a download task: 1. On the Tasks page, click Add 2. Enter the full web address from which you want to download the file in the URL field. 3. If a user name and password is required to download the file, click User name and password are required, then enter the user name and password.
- Page 136 WD SHARESPACE USER MANUAL To change the order of the download queue: 1. Use the arrow buttons to change the order of download tasks or to make a task conditional on a previous task. 2. Select a task in the Tasks table, and then click Move Up or Move Down 3.
-
Page 137: Replacing A Drive
WD SHARESPACE USER MANUAL Replacing a Drive WD ShareSpace is a limited user-serviceable product which allows replacement of any or all internal hard drives in the enclosure. Important: Only WD hard drive assemblies can be inserted into the WD ShareSpace enclosure. - Page 138 WD SHARESPACE USER MANUAL 5. Remove the system cover. (a) Loosen the two captive screws on the rear of the system cover. (b) Slide the cover towards the back of the system until the tabs on the cover disengage from the slots on the unit.
- Page 139 WD SHARESPACE USER MANUAL (b) Remove the drive from the drive carrier. 8. Remove the new hard drive from its packaging. 9. Install the new drive into the drive carrier. (a) Insert the new drive into the drive carrier. (b) Flex the left and right-side rail and insert the pins into the drive’s mounting holes.
- Page 140 WD SHARESPACE USER MANUAL (b) Slide the cover toward the front of the unit until it is fully closed. (c) Tighten the captive screws on the rear of the unit. 12. Reconnect the cables and power on the unit. 13. The drive starts the rebuild process automatically. The RAID rebuild may take up to 34 hours depending on RAID mode and drive capacity and activity.
-
Page 141: Troubleshooting
WD SHARESPACE USER MANUAL Troubleshooting For any issue, first ensure that you are using the latest firmware for WD ShareSpace. The latest firmware includes the latest network and SATA disk drivers. See “Update (Firmware)” on page 83 for instructions. First steps checklist •... - Page 142 WD SHARESPACE USER MANUAL 5. Continue holding the reset button for about seven seconds until the HDD LEDs on the front panel light up. After 14 seconds, the HDD LEDs turn amber. 6. Release the reset button by removing the paperclip. The device will automatically reboot.
- Page 143 WD SHARESPACE USER MANUAL Specific problems and corrective actions The following contains specific problems that may arise during the use of your server. Possible solutions are listed for each problem. Power indicator does not light. Do the following: • Make sure the power button on the control panel is turned on.
- Page 144 1. Click Start > Run. 2. Type \\WDShareSpace, and then click OK (if the device name was changed, type \\yournewdevicename). 3. The WD ShareSpace directory displays (Public, Configuration, and Download folders). Double-click the Configuration folder. 4. Double-click index.html. The configuration login screen displays.
- Page 145 WD SHARESPACE USER MANUAL My router has failed. How do you map the drive letter without WD Discovery Tool? Do the following: 1. Double-click My Computer. 2. Click My Network Places. 3. On the Tools menu, point to Map Network Drive.
-
Page 146: System Events
WD SHARESPACE USER MANUAL System Events The following table describes the event types that are recorded in the system log. Event type and Event Event Critical Warning Event ID state value System events Startup [none] Abnormal Shutdown [none] ... - Page 147 WD SHARESPACE USER MANUAL Event type and Event Event Critical Warning Event ID state value Volume [1,2] Volume has more than 10% free capacity Volume [1,2] Volume has more than 5% free capacity Volume [1,2] Volume has reached 80% capacity ...
- Page 148 WD SHARESPACE USER MANUAL Event type and Event Event Critical Warning Event ID state value [Group ID] Group modified Other events Volume [1,2] Volume extend failed Volume [1,2] Volume resync failed * A fan failed event is issued when the device temperature is greater or equal to 40°C (104°F).
-
Page 149: Glossary
WD SHARESPACE USER MANUAL Glossary CIFS — Common Internet File System. The recommended file sharing protocol for Windows platform allows users to access shares through My Network Places. Mac OS X or later also supports the CIFS protocol. See also Protocol. - Page 150 Hub — In a network, a device joining communication lines at a central location, providing a common connection to all devices on the network. Identity LED — Indicates which WD ShareSpace in the network is currently being accessed via WD Discovery.
- Page 151 WD SHARESPACE USER MANUAL Mirroring — The process of generating an exact copy of saved data from one drive to another drive within a RAID 1 system. Each drive can be accessed and read separately. A mirrored drive can be removed from a system while the other drive(s) are still active.
- Page 152 WD SHARESPACE USER MANUAL RAID 1 — RAID protocol in which two copies of the data are instantaneously recorded — each on separate hard drives. RAID 1 ensures the protection of users' data because in the event that one of the hard drives fails, the other hard drive(s) will continue to read and write data until the faulty hard drive is replaced and rebuilt to once again safely mirror the data.
- Page 153 In this mode, two independent RAID 1 volumes are created. Twonky Media Server — A server application that searches for all the media (for example, videos, photos, and music) stored on the WD ShareSpace connected to your home network.
-
Page 154: Appendix
WD SHARESPACE USER MANUAL Appendix Regulatory Compliance FCC Class B Information This device has been tested and found to comply with the limits of a Class B digital device, pursuant to Part 15 of the FCC Rules. These limits are designed to provide reasonable protection against harmful interference in a residential installation. -
Page 155: Environmental Compliance (China)
WD SHARESPACE USER MANUAL Environmental Compliance (China) Warranty Information Obtaining Service WD values your business and always attempts to provide you the very best of service. If this Product requires maintenance, either contact the dealer from whom you originally purchased the Product or visit our product support website at support.wdc.com for information on how to obtain service or a Return Material... -
Page 156: Gnu General Public License ("Gpl")
WD SHARESPACE USER MANUAL Limited Warranty WD warrants that the Product, in the course of its normal use, will be free from defects in material and workmanship for a period of three (3) years, unless otherwise required by law, and will conform to WD’s specification therefor. This limited warranty period shall commence on the purchase date appearing on your purchase receipt. - Page 157 WD. WD reserves the right to change specifications at any time without notice. Western Digital, WD, the WD logo, My Book, WD Caviar and MioNet are registered trademarks in the U.S. and other countries; and World Edition, Green, and WD Discovery are trademarks of Western Digital Technologies, Inc. Other marks may be mentioned herein that belong to other companies.
-
Page 158: Index
MY BOOK WORLD EDITION USER MANUAL Index admin login password e-mail notifications change 83 setup 81 audio Environmental compliance (China) 150 streaming in iTunes 49, 115 ESD precautions 132 Auto backup 51 Europe, CE compliance 149 backup button 8 FCC Class B information 149 backup data features system to USB hard drive 52... - Page 159 117 using 60 network storage system Macintosh using 132 installing WD Anywhere Backup 19 Macintosh Leopard accessing WD ShareSpace 19 obtaining service 150 Macintosh Tiger one-click backup 28 accessing WD ShareSpace 23 manage RAID 103 configure 104 permissions...
- Page 160 UPS service usb shares 107 enabling 89 107, 109 usb disk USB Disk tab 108 WD ShareSpace to USB backup USB hard drive volumes 99 disconnect 108 103, 99 manage RAID system 79 format 108 admin password 83...
- Page 161 LED 58 WD ShareSpace 57 using shares 51 Windows 65 configuring MioNet 38 installing WD Anywhere Backup 17 Windows Media Player 44 Windows XP accessing WD ShareSpace 10 workgroup create 95 workgroup menu 95 Xbox 360 46 INDEX – 156...
Need help?
Do you have a question about the WD ShareSpace and is the answer not in the manual?
Questions and answers