Otto Bock Discovery Instructions For Use Manual
Hide thumbs
Also See for Discovery:
- Instructions for use manual (60 pages) ,
- Service manual (35 pages) ,
- Instructions for use manual (38 pages)
Table of Contents
Advertisement
Discovery
Bedienungsanleitung...................................................1
Instructions for Use....................................................19
Instruction for use ......................................................37
Manual de instruções ................................................55
© Otto Bock HealthCare · 647G162 – 01.06 – Printed in Germany
Advertisement
Table of Contents

Related Manuals for Otto Bock Discovery


Summary of Contents for Otto Bock Discovery
- Page 1 Discovery Bedienungsanleitung...........1 Instructions for Use............19 Instruction for use ............37 Manual de instruções ..........55 © Otto Bock HealthCare · 647G162 – 01.06 – Printed in Germany...
-
Page 2: Table Of Contents
Instructions for Use for Discovery Contents Page 1 Preface..............................20 2 Intended Use............................20 3 Declaration of Conformity........................20 4 Service and Repairs ..........................20 5 Safety Instructions ...........................21 6 Delivery / Preparing the Mobility Base for Use ..................23 Exchanging / Shifting the Interface Adapters ..................23 Seat Depth............................23... -
Page 3: Preface
4 Service and Repairs Service and repairs on the Discovery mobility base may only be carried out by Otto Bock dealers. If you have any problems, please contact your dealer. Any necessary repairs will be made exclusively with authentic Otto Bock spare parts there. -
Page 4: Safety Instructions
5 Safety Instructions Please read the Instructions for Use first! Before using the product, you should become familiar with the handling, function and use of the product. To avoid potentially dangerous situations such as tipping, you should become familiar with your new mobility base with seating shell on level ground first. - Page 5 It is possible, however, to use your Discovery mobility base with seating shell for transportation in a vehicle for the disabled, provided that the Otto Bock safety elements as well as appropriate restraint systems are used. For further information please refer to our brochure 'Using your wheelchair/ mobility base with seating shell or stroller/ buggy for transportation in motor vehicles', order number 646D158.
-
Page 6: Delivery / Preparing The Mobility Base For Use
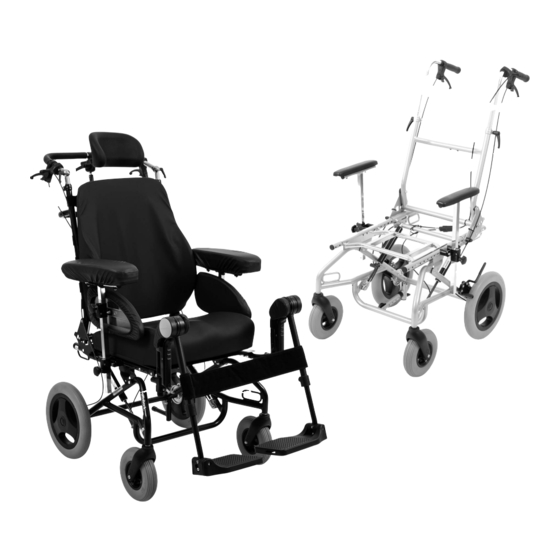
6 Delivery / Preparing the Mobility Base for Use The original package contains the following components: • Mobility base for seating shells • Instructions for Use and tools required • Accessories as ordered Carefully remove the transport safety snaps and packaging material. Figure 1 Figure 2 Exchanging / Shifting the Interface Adapters... -
Page 7: Mounting Of Seating Systems
Mounting of Seating Systems When using seating systems of other manufacturers, please observe the corresponding manufacturer’s instructions for use. Otto Bock will assume no liability for combinations with interface adapters not listed under 'Exchanging / Shifting the Interface Adapters'. Figure 5 Figure 6 Removing and Mounting Seating Systems equipped with the 'Horacek' Seating Shell Interface (Fig. -
Page 8: Static Stability Check
7 Checking Static Stability before using the Mobility Base with Seating Shell After mounting a seating system, the stability of the entire product must be checked. If static stability is less than 10°, the EN 12183 standard stipulates that the user and/or attendant are informed on this in a clear warning note to allow the user/ attendant to take corresponding precautions for the user's safety. -
Page 9: Standard Equipment
Standard Equipment Figure 11 Figure 12 Height Adjustable Pushbar (Fig. 11) It can be adjusted vertically to a more comfortable height for the person pushing the chair. To do this, open the clamping levers on the right and left of the back tubes (Fig. 11, item A), move the pushbar to the desired height and re-tighten the clamping levers until they are snug. -
Page 10: Accessories
9 Accessories The mobility base for seating shells is designed as a modular assembly system, which means that certain accessories may be used with it. The following options and accessories may make it easier to use your mobility base with seating shell. Figure 15 Figure 16 Storage Bag (Fig. -
Page 11: Footrest Assemblies Mounted To The Seat Tube
Footrest Assemblies Mounted to the Seat Tube Figure 19 Figure 20 Components of the Footrest Assemblies The footrest assemblies consist of the following components: - Footrest receiver (Fig. 19, item B) - Footrest holder (Fig. 19, item C) - Calf band (Fig. 19, item D) - Footrest bar (Fig. - Page 12 Figure 23 Figure 24 Calf Band (Fig. 23) The calf band serves to support the lower legs at calf height to prevent the feet from slipping to the rear off the footplates. Hook & loop closures allow length adjustment of the calf band. For removing the footrest, you first have to pull the calf band upward and out of the calf band holder on one side.
-
Page 13: Footrest Assembly For Seating Shell Interface
Figure 27 Figure 28 Footrest Assembly for Seating Shell Interface (Fig. 27) The footrest assembly is mounted to the seating shell interface. To do this, loosen the Allen head screws at the seating shell interface (Fig. 27, item A) and move the knee angle to the desired position. Firmly re-tighten the Allen head screws. -
Page 14: Back Guide For Seating Shell Back
The anti-tipper engages in 2 positions: 1. Rearwards oriented (active setting of the anti-tipper, functional) 2. Approx. 90° position (setting required when using the storage bag or when clearing obstacles or simply when the anti-tipper is not needed). Attention: It is absolutely necessary that the anti-tipper be in functional position when tilting the seating unit to the rear or when adjusting the angle between seat and back to more than 90°! Figure 31 Figure 32... -
Page 15: Tray
Figure 33 Figure 34 Tray (Fig. 33) The tray can only be used in conjunction with armrests. Make sure that both armrests are at equal height. Coming from the front, slide the tray onto the armrests. The user of the seating shell should still have enough space thanks to the cutout. It is recommended that angle adjustable armrests are used. -
Page 16: Maintenance, Cleaning And Care
10 Maintenance, Cleaning and Care The correct function of the mobility base with seating shell should be checked before every use. The checks listed in the following table must be carried out by the user at the indicated intervals. Failure to carry out these simple checks may lead to problems arising that could invalidate the warranty. - Page 17 Cleaning and Care To clean your mobility base, use a mild detergent. Some components of your mobility base need to be serviced from time to time to ensure smooth operation. Hair or dirt particles may accumulate between the caster wheel and fork making it difficult for the caster wheels to rotate.
-
Page 18: Terms Of Warranty
11 Terms of Warranty The Otto Bock Warranty applies only when the product is used according to the specified conditions and for the intended purposes, following all manufacturer’s recommendations (also see our general terms of sales, delivery and payment). -
Page 19: Technical Data
W = B + A²+B²) A = overall length, B = overall width, W = turning radius Example: Discovery with frame width 36 cm and 12" wheels. A = 75 cm, B = 55 cm turning radius = 146 cm Air Pressure Table The rear wheel sizes are printed on the sidewalls of the tires. - Page 20 Otto Bock HealthCare GmbH Sälzerstraße 16 · D-56235 Ransbach-Baumbach Otto Bock HealthCare GmbH has been certified by the German Society for the Certification of Quality Assurance Systems (DQS) in accordance with DIN EN ISO 9001 standard, reg. no. 779 (management system)
Need help?
Do you have a question about the Discovery and is the answer not in the manual?
Questions and answers