Otto Bock Discovery Instructions For Use Manual
Hide thumbs
Also See for Discovery:
- Instructions for use manual (60 pages) ,
- Service manual (35 pages) ,
- Instructions for use manual (38 pages)

Related Manuals for Otto Bock Discovery


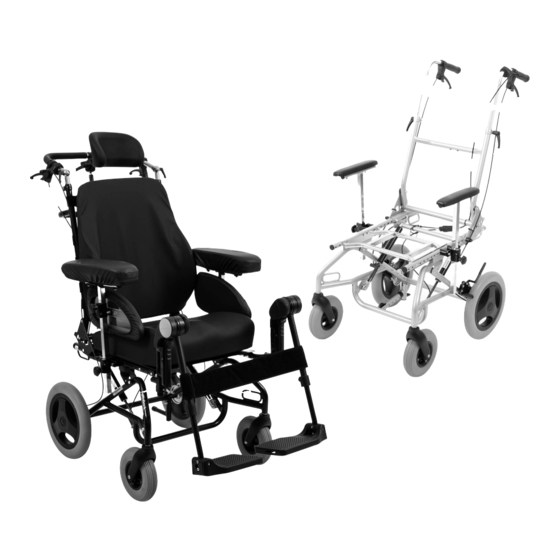
Summary of Contents for Otto Bock Discovery
- Page 1 Discovery Instructions for use (qualified personnel) ..............
- Page 2 Discovery...
-
Page 3: Table Of Contents
Warning labels ............................. Delivery ................................. Scope of delivery ..........................Options ............................... 4.2.1 Discovery for Leckey KIT seat & Leckey Mygo Max (HR32040450) ............. 4.2.2 Discovery with Care Chair equipment version ..................4.2.3 Custom fabrication version with 22"/24" drive wheels ................Storage ............................... - Page 4 Adjusting the anti-tipper ........................6.15.1 Discovery Care Chair with 12"/22"/24" rear wheels ................6.15.2 Discovery Standard, Discovery for Leckey KIT seat & Leckey Mygo Max or custom fabrication versions with 12"/22"/24" rear wheels ........................6.15.2.1 Adjustment for 12" rear wheels ......................
-
Page 5: Foreword
2 Intended use 2.1 Indications for use The Discovery mobility base for seating shells is intended exclusively for the adaptation of orthopaedic seating sys tems (e.g. seating shells) for people who are unable to walk or have walking impediments. It can be operated either by the user or by an attendant. -
Page 6: Safety
Damage to the product caused by transportation using incorrect packaging ► Use only the original packaging for delivery of the product. INFORMATION While installing add-on drives on the product is generally not permitted, it can be reviewed by our Custom Fabric ation department on request. Discovery... -
Page 7: Safety Instructions For Assembly
Accidents/falling due to poor traction, reduced braking force or lack of manoeuvrability ► Ensure that the tyres have sufficient tread depth. ► Ensure that the knee lever wheel lock is properly adjusted (approx. 5 mm gap to the tyres, technical changes reserved). Discovery... -
Page 8: Nameplate And Warning Labels
* JJJJ = year of manufacture; WW = week of manufacture; PP = production site; XXXX = sequential production number ** YYYY = year of manufacture; MM = month of manufacture; DD = day of manufacture Discovery... -
Page 9: Warning Labels
4.2.1 Discovery for Leckey KIT seat & Leckey Mygo Max (HR32040450) The Discovery for Leckey KIT seat & Leckey Mygo Max (HR32040450) is a preconfigured version of the Discovery mobility base for seating shells and includes the following special features and options: •... -
Page 10: Preparation For Use
6) Verify the stability of the assembled product. INFORMATION: Inform the user and the attendants if the static stability is found to be less than 10°. In this case, determine additional safety measures together with the user and attendants to ensure the safety of the user. Discovery... -
Page 11: Settings
The tools required for adjustments and maintenance tasks as well as the torque values for screw connections are listed in the section "Appendices" (see Page 33). 6.1.1 Settings during preassembly If the seating shell / seating system has already been preassembled, the following sections can be omitted: Discovery... -
Page 12: Adjusting The Seat Depth
• "Leckey Squiggles" type (360 mm frame width required) • "Leckey KIT seat" and "Leckey Mygo Max" types (Discovery HR32040450 required) • "Dräger" type The removal and attachment of seating shells / seating systems on the interface adapters is described in more detail in the included instructions for use (user). - Page 13 9) Reinsert all screw connections in their original positions and firmly tighten them to a torque of 10 Nm (see fig. 6, item 1; see fig. 7, item 2). 10) Remount the seating shell / seating system with the seating shell interface. Discovery...
-
Page 14: Removing/Installing A Seat Plate (Option)
2) Insert the clamping plate into the guide plate, narrow side first (see fig. 10, item 3). 3) Turn the clamping plate 90° so that it engages sideways in the guide plate. (see fig. 10, item 3). 4) Firmly tighten the clamping screw on the back guide (see fig. 10, item 2). Discovery... -
Page 15: Adjusting The Position Of The Seat Bars
► For transfemoral amputees, shift the seating centre of gravity forward. This improves the stability of the mobil ity base for seating shells. Checking the seating centre of gravity is required in order to ensure that the seat angle can be adjusted easily when the user is seated. Discovery... - Page 16 Seat tilts far forward when it is unlocked; Slide the seat and interface adapter back high holding forces required during seat adjustment Seat tilts far backward when it is unlocked; Slide the seat and interface adapter forward high holding forces required during seat adjustment Discovery...
-
Page 17: Attaching/Removing The Back Straps (Option)
7) Slide the plastic clamps on the back straps as close as possible to the back tubes (see fig. 17, item 1). 8) Position the back padding on the back straps at the desired height. Secure the back padding against sliding by pressing it onto all of the double sided hook-and-loop strips on the back straps. Discovery... -
Page 18: Adjusting The Head Support (Option)
2) Slide the head support and holder along the cross tube of the back frame to the desired position (see fig. 22, item 2). 3) Insert the screw connections into the appropriate slots between the head support holder and the cross tube of the back frame and firmly tighten them (see fig. 22, item 1). Discovery... -
Page 19: Adjusting The Legrests (Option)
The legrest is mounted on the seating shell interface. The depth of the legrest can be continuously adjusted on the side attachments of the seating shell interface. 1) Loosen the screw connections on both sides between the seating shell interface and the legrest bars (see fig. 25, item 1). 2) Slide the legrest and the bars to the desired depth. Discovery... -
Page 20: Adjusting The Lower Leg Length
2) Swing the footplate to the desired height and the desired angle (see fig. 27). INFORMATION: Verify sufficient ground clearance. 3) Slide the legrest and legrest fixture to the desired depth. 4) Firmly tighten the clamping screws (see fig. 27, item 1/2). Discovery... -
Page 21: Adjusting The Support Angle
INFORMATION: Set the same angle on the left and right joint so that the footplate is correctly posi tioned. 3) Firmly tighten the clamping screw on the left and right joint of the footplate to a torque of 10 Nm (see fig. 29, item 1). Discovery... -
Page 22: Adjusting The Armrests (Option)
INFORMATION: Shift the left and right arm supports to the same depth. 4) Insert the screw connections into the appropriate holes on the bottom of the arm support and carefully tighten them. 5) Firmly push the cover caps into the open holes on the bottom of the arm support. Discovery... -
Page 23: Adjusting The Distance Between The Armrests With Long Arm Support
Adjusting the armrest height and the armrest angle is described in more detail in the included instructions for use (user). 6.11 Adjusting the clothing protector (option) The height of the clothing protector can be adjusted. Adjusting the height and position of the clothing protector is described in more detail in the enclosed instructions for use (user). Discovery... -
Page 24: Belts / Belt Systems (Option)
INFORMATION: The free end of the lap belt must be pulled through the anchor point at least 100 mm. Secure or shorten excessively long ends of the lap belt so that these do not drag on the ground or get caught in the wheels. 60° Discovery... -
Page 25: Adjusting The Wheel Adapter With 22"/24" Drive Wheels (Custom Fabrication Version)
Smaller wheelbase; tipping resistance decreases; mobility base for seating shells is easier to tip back wards when crossing obstacles; lower forces required for tipping The permissible positions of the wheel adapter on the main frame are determined by the wheel size: Discovery... -
Page 26: Adjusting The Brakes
1) Loosen the screw connections on the slotted hole in the clamping plate (see fig. 42, item 1). 2) The knee lever wheel lock is continuously adjustable in the slotted hole (see fig. 42, item 2). Set the gap between the tyre and wheel lock bolt to approx. 5 mm when the wheel lock is disengaged (see fig. 43). Discovery... -
Page 27: Adjusting The Braking Force Of The Drum Brake (Option)
1) Loosen the counter nut (see fig. 45, item 1) and back off the adjustment screw until a scraping noise can be heard when the rear wheel is rotated. 2) Screw in the adjustment screw (see fig. 45, item 2) until the scraping noise at the rear wheel disappears and the wheel runs freely. Discovery... -
Page 28: Adjusting The Anti-Tipper
When 22"/24" rear wheels are installed, the length and height of the anti-tipper can be adjusted separately (see next section). 6.15.2 Discovery Standard, Discovery for Leckey KIT seat & Leckey Mygo Max or custom fabrica tion versions with 12"/22"/24" rear wheels... -
Page 29: Adjustment For 12" Rear Wheels
3) Insert the screw connection into the appropriate hole on the joint of the anti-tipper and firmly tighten it (see fig. 47, item 3). 7 Delivery 7.1 Final inspection A final check must be carried out before the wheelchair can be handed over: Discovery... -
Page 30: Transport To The Customer
The product is suitable for re-use. Similar to second-hand machines or vehicles, products that are being re-used are subject to increased strain. Fea tures and functions must not change in a way that could endanger users or other persons within the product’s lifespan. Discovery... -
Page 31: Legal Information
► Note that not all adjustment possibilities can be used with all wheelchair versions. Furthermore, the adjust ment combinations are limited by the compact frame geometry. ► Technical changes and tolerances are reserved by the manufacturer. General information Discovery Max. load 110 kg (242 lbs) Max. load when using a leg support with continuous 50 kg (110 lbs) - Page 32 At full tilt, with 12" drive wheels: 470 mm (18.5") Discovery with seat plate without seat cushion; other seating systems vary Depending on the type of leg support, maximum value with elevating leg support Discovery Standard with 360 mm frame width and 12" drive wheels; in accordance with ISO 7176-5 Discovery...
-
Page 33: Appendices
The adjustment range can be limited to 15° with the custom fabrication version with 22"/24" drive wheels and lashing points. Discovery Standard without leg supports, arm supports and seating unit; the specified weights vary according to the selected options and model. - Page 34 Appendices • Thread diameter M4: 3 Nm • Thread diameter M5: 5 Nm • Thread diameter M6: 10 Nm • Thread diameter M8: 25 Nm Discovery...
- Page 35 · www.ottobock.de 143441 Moscow Region/Krasnogorskiy Rayon info@ottobock.com.co · www.ottobock.com.co Russian Federation Otto Bock Healthcare Products GmbH Otto Bock de Mexico S.A. de C.V. T +7 495 564 8360 · F +7 495 564 8363 Brehmstraße 16 · 1110 Wien · Austria Prolongación Calle 18 No. 178-A info@ottobock.ru · www.ottobock.ru F +43 1 5267985...
- Page 36 Ihr Fachhändler | Your specialist dealer Otto Bock Mobility Solutions GmbH Lindenstraße 13 · 07426 Königsee-Rottenbach/Germany www.ottobock.com...
Need help?
Do you have a question about the Discovery and is the answer not in the manual?
Questions and answers