
Related Manuals for Vista VFS-221WHDA


Summary of Contents for Vista VFS-221WHDA
- Page 1 Installation Manual MManualManual Set up and user manual for the VFS-221WHDA Monitor...
- Page 2 RG41 5TP, England. UK +44 (0) 118 912 5000 Vista Technical Helpline: +44 (0) 118 912 5125 Note: You should be at the equipment and ready with details before calling Vista Technical Support. Conventions Used in this Manual Boldface or button icons highlight command entries. The following WARNING,...
- Page 3 This apparatus is manufactured to comply with the radio interference. A Declaration of Conformity in accordance with the following EU standards has been made. The manufacturer declares that the product supplied with this document is compliant the provisions of the EMC Directive 2004/108/EC, the CE Marking Directive 93/68 EEC and all associated amendments.
-
Page 4: Important Safeguards
IMPORTANT SAFEGUARDS 1. READ AND RETAIN INSTRUCTIONS Read the instruction manual before operating the equipment. Retain the manual for future reference. 2. CLEANING Turn the unit off and unplug from the power outlet before cleaning. Use a damp cloth for cleaning. Do not use harsh cleansers or aerosol cleaners. 3. -
Page 5: Ce Compliance Statement
12. SERVICING Do not attempt to service the video monitor or equipment yourself as opening or removing covers may expose you to dangerous voltage or other hazards. Refer all servicing to qualified service personnel. 13. DAMAGE REQUIRING SERVICE Unplug the equipment from the wall outlet and refer servicing to qualified service personnel under the Following conditions: A. -
Page 6: Table Of Contents
TABLE OF CONTENTS INTRODUCTION --------------------------------------------------------------------------------------- 7 FUNCTIONAL SPECIFICATIONS ----------------------------------------------------------------- 8 CONNECTIONS & SETUP ------------------------------------------------------------------------- 9 CONTROLS & INDICATORS ----------------------------------------------------------------------- 10 OSD MENU OPERATION --------------------------------------------------------------------------- 11 MODE ADJUST ----------------------------------------------------------------------------------------- 12 RELIABILITY -------------------------------------------------------------------------------------------- 22 MECHANICAL------------------------------------------------------------------------------------------- 22 DIMENSIONS ------------------------------------------------------------------------------------------- 23... -
Page 7: Introduction
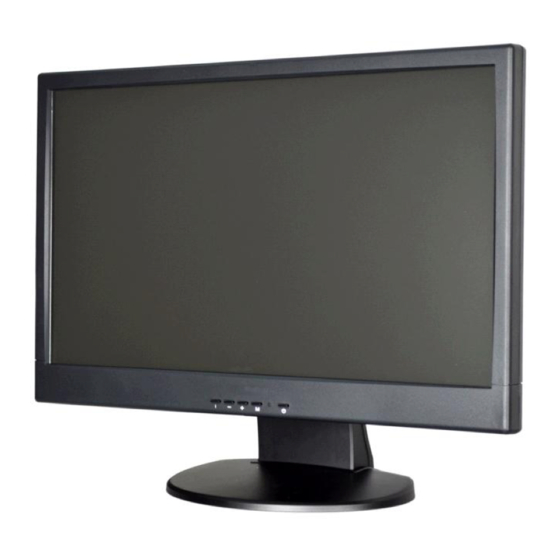
INTRODUCTION This introduction is used to define the performance of the VFS-221WHDA colour TFT LCD monitor. The VFS-221WHDA comes with non-reflective glass screen, a desk mount and also has a VESA 100 mount on the rear. For mounting bracketry, please speak to your account manager. -
Page 8: Functional Specifications
FUNCTIONAL SPECIFICATIONS Power Supply The power supply spec is listed below: AC INPUT AC power input range: 100 – 240 V, 50-60Hz, 1.8amps max. Power efficiency: ≥80% DC INPUT DC JACK power input: 12V +/-10% 3.5A max. Video Characteristics Composite Video (CVBS): 1.0 Vp-p (0.5 –... -
Page 9: Connections & Setup
CONNECTIONS & SET-UP VIDEO/AUDIO CVBS: BNC x2, OUT x1, IN x1 AUDIO: Stereo Audio RCA Jack R/L IN x1 AUDIO: Stereo Phone Jack IN x1 VGA: D-SUB Input 15 pins connector. DVI-D: DVI-D input connector. HDMI: HDMI Input connector AHD / TVI: BNC x2, OUT x1, IN x1 POWER DC JACK: DC12V in, 5.5Ø... -
Page 10: Controls & Indicators
CONTROLS & INDICATORS A: “i” Channel button Press the button to select input signal. B/C: “-“ / “+” buttons Press the buttons to scrolling the cursor to desired function. Press the buttons to adjust the value of selected function in sub OSD menu. D: “M”... -
Page 11: Osd Menu Operation
OSD MENU OPERATION VOLUME: Press button to enter the function and press - / + buttons to adjust the volume value, then press MENU (M) button to exit OSD menu.. FREEZE: Press button to enter the function and press any button to release the function. -
Page 12: Mode Adjust
MODE ADJUST PC mode MAIN ADJUST, COLOUR ADJUST, IMAGE ADJUST (VGA only), INFORMATION, LANGUAGE, SETUP MENU, RECALL, AUDIO CONTROL, EXIT Press MENU (M) button to enable MAIN MENU. Press - / + buttons to select an item, then Press MENU (M) button to enter the function or next sub menu. - Page 13 MAIN ADJUST: Press - / + buttons to select an item, then press MENU (M) button to enter item or function. Press - / + buttons to adjust the value, then press MENU (M) button to exit. VIVID MODE Select the VIVID MODE (0~3 and USER) 0: NORMAL, 1: TEXT, 2: PHOTO, 3: MOVIE BRIGHTNESS: Adjust the brightness value CONTRAST: Adjust the contrast value...
- Page 14 COLOUR ADJUST: Press MENU (M) button to enter the sub-menu Set the color temperature of the LCD monitor for the CIE coordinate 9300˚k or 6500˚k or USER MODE Press - / + buttons to select an item Press MENU button to select adjust item, Press - / + buttons to adjust the value...
- Page 15 IMAGE ADJUST (VGA only): Press MENU (M) button to enter the sub-menu Press - / + buttons to select an item Press MENU button to select adjust item Press - / + buttons to adjust the value Press MENU button to return AUTO ADJUST: Press MENU buttons to auto adjust the H.
- Page 16 LANGUAGE: Press MENU (M) button to enter the sub-menu Press - / + buttons to select language Press MENU (M) button to enter SETUP MENU: Press MENU (M) button to enter the sub-menu Press - / + buttons to select an item Press MENU (M) button to select adjust item...
- Page 17 AUTO SHIFT: Adjust AUTO SHIFT ON/OFF OFF – No Function ON – Every one hour there will one scan line from bottom to top to prevent panel sticking. AUTO SHIFT line EXIT: Press MENU (M) button to return to the main menu RECALL: Recall the Brightness, Contrast, Sharpness, Saturation, Tint, Volume value of the mode data and DLC = DISABLE, Vivid Mode = USER, OSD Timeout = 15, Green Mode = OFF, Auto Shift = OFF, CVBS1 LPF = OFF,...
- Page 18 AUDIO CONTROL: Press MENU (M) button to enter the sub-menu Press - / + buttons to select an item Press MENU (M) button to select adjust item Press - / + buttons to adjust the value(ON or OFF) Press MENU (M) button to return CVBS1: Setting the audio input source in CVBS1 channel CVBS2: Setting the audio input source in CVBS2 channel...
- Page 19 Video/HDMI mode MAIN ADJUST, COLOR ADJUST, SCAN SETTING, INFORMATION, LANGUAGE, SETUP MENU, RECALL, AUDIO CONTROL, EXIT Press MENU (M) button to enable MAIN MENU. Press - / + buttons to select an item, then Press MENU (M) button to enter the function or next sub menu.
- Page 20 MAIN ADJUST: Press - / + buttons to select an item Press MENU (M) button to select adjust item, Press - / + buttons to adjust the value Press MENU (M) button to return VIVID MODE: Select the VIVID MODE, Select the VIVID MODE (0~3 and USER) 0: NORMAL, 1: TEXT, 2: PHOTO, 3: MOVIE BRIGHTNESS: Adjust the brightness value CONTRAST: Adjust the contrast value...
- Page 21 NR: Noise reduction - LOW / MID / HIGH MPEG NR: MPEG Noise reduction - LOW / MID / HIGH DLC: Dynamic Luminance Control - DISABLE / ENABLE VOLUME: Adjust the volume value EXIT: Press MENU (M) button to return to the main menu SCAN SETTING: Press MENU (M) button to enter the sub-menu...
-
Page 22: Reliability
INFORMATION: Press MENU (M) button to get the signal information RECALL: Recall the Brightness, Contrast, Sharpness, Saturation, Tint, Volume value of the mode data and 3D Comb = ENABLE, NR = MID, Vivid Mode = USER, OSD Timeout = 15, Green Mode = OFF, Image Refresh = OFF, then press MENU (M) button to return to the main menu... -
Page 23: Dimensions
DIMENSIONS UNIT: mm Model VFS-221WHDA... - Page 24 VFS-221WHDA_Manual / V1.0 / 2015-07-31 (subject to change without notice)
Need help?
Do you have a question about the VFS-221WHDA and is the answer not in the manual?
Questions and answers