
Related Manuals for Vista VFS132WHDA


Summary of Contents for Vista VFS132WHDA
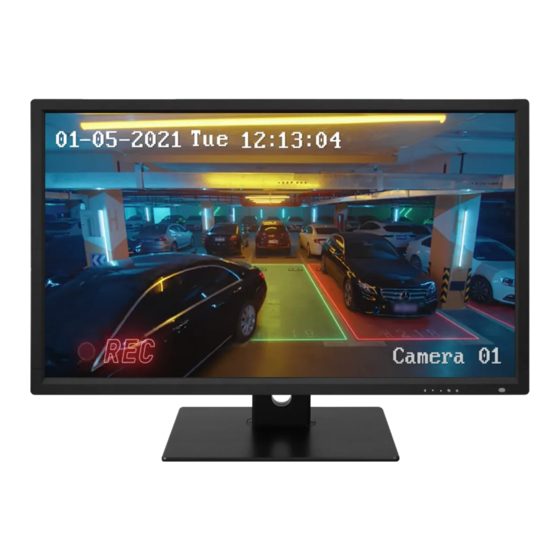
- Page 1 VFS132WHDA Installation and User manual Installation and user instructions for: VFS32WHDA...
-
Page 2: Table Of Contents
TABLE OF CONTENTS ⚫ CE information ------------------------------------------------------------------------ 1 ⚫ Safety precautions -------------------------------------------------------------------- 1 ⚫ Before you begin ------------------------------------------------------------------- 2 Scope -------------------------------------------------------------------------------------- 4 Functional specification ------------------------------------------------------------- 4 Controls and indicators -------------------------------------------------------------- 7 OSD Menu -----------------------------------------------------------------------------10 Regulatory Info ------------------------------------------------------------------- 23 Mechanical -------------------------------------------------------------------24 ⚫... -
Page 3: Ce Information
CE INFORMATION The product must be installed according to the currently valid installation regulations for EMC to guarantee the designed use and to prevent EMC problems. The device supplied with this manual is according to the EC, EMC Directive, 2014/30/EU & LVD 2014/35/EU SAFETY PRECAUTIONS 1. -
Page 4: Before You Begin
Before You Begin Read these instructions before installing or operating this product. Note: This installation should be made by a qualified service person and should conform to local codes. This manual provides installation and operation information. To use this document, you must have the following minimum qualifications: ... - Page 5 This apparatus is manufactured to comply with the radio interference. A Declaration of Conformity in accordance with the following EU standards has been made. The manufacturer declares that the product supplied with this document is compliant the provisions of the EMC Directive 2014/30/EU, the CE Marking Directive 93/68 EEC and all associated amendments.
-
Page 6: Scope
1. Scope This specification is used to define the performance of VFS32WHDA color TFT LED monitor. This system also supports both video input and PC input. In video input mode, the system can automatically detect the CVBS, AHD and TVI signal. In PC mode, this system can support up to 1920 x 1080 VESA standard. - Page 7 2.5 Environmental Temperature Operating: 0 0 C to +40 0 C Storage: -20 0 C to +60 0 C Humidity Operating: 10% to 85% (non-condensing) Storage: 10% to 95% (non-condensing) 2.6 EDID This series of displays support EDID, but does not support DDC2B function.
- Page 8 2.7 Connectors A B C D E A. AUDIO OUTPUT: Phone Jack, Stereo. B. AUDIO INPUT: Phone Jack, Stereo. C. AHD/TVI/CVBS OUT – Analog HD - AHD / TVI 2.0 & Analog SD – CVBS (PAL / NTSC) Loop through output. D.
-
Page 9: Controls And Indicators
Set up sequence 1. Make sure the power of PC and/or Video source were turned off. 2. Plug the Video signal and VGA cable to monitor. 3. Turns the PC and/or Video source power on. 4. Plug the AC power cord onto AC Socket. (Use reverse sequence to tear down the monitor) 3. - Page 10 B. “ ”Down buttons ⚫ Press the buttons to scrolling the cursor to desired function. ⚫ Press the buttons to decrease the value of selected function in sub OSD menu. C. “ ”Up button ⚫ Press the buttons to scrolling the cursor to desired function. ⚫...
- Page 11 Remote control Power: Power On or Off the monitor Mute: Mute the audio Key Lock: Lock and unlock push buttons Menu/ Left/ Right/ Up/ Down/ OK/ Exit: Monitor OSD control : Hot key for volume control Auto: VGA mode picture Adjust VIDEO: Select Video source S-VIDEO: Select S-Video source Info: Display Monitor source information...
-
Page 12: Osd Menu
4. OSD Menu Hot key : Quick adjust keys from front panel hot keys: VOLUME: Press button to select the function and press buttons to adjust the volume , then press to exit OSD menu. KEY LOCK:Push for 6 sec to enable this function. KEY UN-LOCK:Push for 6 sec to disable this function. - Page 13 VGA & HDMI Mode OSD Menu structure: to select the VIDEO (AHD/TVI/CVBS), S-VIDEO, VGA or HDMI the menu structure within each varies, refer to sections below on how to set-up each option. VGA Mode: Press to bring up the MAIN MENU Page. The following page will appear Press to select an icon, then Press to change the values in the sub...
- Page 14 MAIN ADJUST: 1. Press to select an icon. 2. Press to select item, 3. Press to adjust the value Press to return VIVID MODE:Select the VIVID MODE (0~3 and USER) USER, 0: TEXT, 1: PHOTO, 2: MOVIE, 3: GAME BRIGHTNESS:Adjust the brightness value CONTRAST:Adjust the contrast value BACKLIGHT:Adjust the backlight value VOLUME:Adjust the volume...
- Page 15 COLOR ADJUST: Set the color temperature of the LED monitor for the CIE coordinate 9300˚k or 6500˚k or USER MODE. 1. Press to select an icon 2. Press to select adjust item, 3. Press to adjust the value. 4. Press to return USER COLOR:Adjust the color temperature.
- Page 16 IMAGE ADJUST (VGA ONLY): 1. Press to select an icon 2. Press to select adjust item 3. Press to adjust the value 4. Press to return AUTO ADJUST:Press to auto adjust the H. Position. Position, Phase, Clock H. POSITION:Adjust the horizontal position value. V.
- Page 17 LANGUAGE:Press to enter the sub-menu 1. Press to select language 2. Press to enter SETUP MENU: 1. Press to select an icon 2. Press to select adjust item 3. Press to adjust the value 4. Press to return OSD TIMEOUT:Adjust the OSD Show time (5 ~120 sec) GREEN MODE:Off or On (5 min~10 min) OFF –...
- Page 18 AUTO SHIFT :Adjust AUTO SHIFT function ON/OFF OFF – No Function ON – Every one hour there will one scan line from top to bottom ( Every 1 second down one scan line) to prevent panel sticking. AUTO SHIFT Scan Line EXIT:Press to return to the main menu RECALL:...
- Page 19 Video Mode: Press to bring up the MAIN MENU Page. The following page will appear Press to select an icon, then Press to change the values in the sub menu. MAIN MENU 1. Press to select an icon 2. Press to select item 3.
- Page 20 VIVID MODE:Select the VIVID MODE (0~3 and USER) USER, 0: TEXT, 1: PHOTO, 2: MOVIE, 3: GAME BRIGHTNESS:Adjust the brightness value. CONTRAST:Adjust the contrast value. SHARPNESS:Adjust Image sharp. SATURATION:Adjust Image saturation. TINT:Adjust Image tint. (Without PAL). BACKLIGHT:Adjust the backlight value VOLUME:Adjust the volume .
- Page 21 COLOR ADJUST: Set the color temperature of the LED monitor for the CIE coordinate 9300˚k or 6500˚k or USER MODE 1. Press to select an icon 2. Press to select adjust item, 3. Press to adjust the value 4. Press to return USER COLOR:Adjust the color temperature.
- Page 22 SCAN SETTING: 1. Press to select Underscan / Overscan state. 2. Press to return INFORMATION: Press to get the timing information LANGUAGE:Press to enter the sub-menu 1. Press to select language 2. Press to enter...
- Page 23 SETUP MENU: 1. Press to select an icon 2. Press to select adjust item 3. Press to adjust the value 4. Press to return OSD TIMEOUT:Adjust the OSD Show time (5 ~120 sec) GREEN MODE:Off or On (5 min~10 min) OFF –...
- Page 24 3:2 PULL DOWN: Select ON/OFF of 3:2 Pull Down. EXIT:Press to return to the main menu. RECALL: Brightness, Contrast, Sharpness, Saturation, Tint, Volume, Vivid Mode, User Color, OSD Timeout, Green Mode, Auto Shift, Backlight return to default Value.
-
Page 25: Regulatory Info
5. Regulatory Agency 5.1 Safety Approvals This series design shall meet the standards of the following domestic and foreign agencies: CE LVD : EN60950-1 5.2 EMI/EMS Emission Approvals This series design shall meet following EMI/EMS specifications: FCC Compliance: FCC Rules and Regulations, Part 15, subpart B, Class B. CE COMPLIANCE: EN55032 class B, EN55024, EN50130-4... -
Page 26: Mechanical
6. Mechanical 6.1 Cabinet Material: Plastic Finish: Black 6.2 Dimensions (mm) 6.3 Packaging Dimensions (WxHxD) 850 x 655 x 180 mm... -
Page 27: Wall Mount Notes
Wall Mount Notes: VESA Hole:200x100 mm... -
Page 28: Base Assembly Installation
Base Assembly Installation Assembling Base and Neck Screw TYPE 4 * 12 mm x 4 PCS... - Page 29 Norbain SD Inspired Easthampstead RD Bracknell RG12 1YQ...
Need help?
Do you have a question about the VFS132WHDA and is the answer not in the manual?
Questions and answers