Table of Contents
Advertisement
Quick Links
Advertisement
Table of Contents

Related Manuals for Interlogix UltraView IP PTZ 36X


Summary of Contents for Interlogix UltraView IP PTZ 36X
- Page 1 UltraView IP PTZ 36X Camera User Manual P/N 1071693C • ISS 06JUN12...
- Page 2 © 2012 UTC Fire & Security. All rights reserved. Trademarks and patents Interlogix, TruVision brand and logo are trademarks of UTC Fire & Security. Other trade names used in this document may be trademarks or registered trademarks of the manufacturers or vendors of the respective products.
-
Page 3: Table Of Contents
PTZ channel 37 Park action 38 Home preset position 38 Preset position 39 Limit PTZ movement 40 Preset tour settings 42 Shadow Tour settings 44 Privacy masking 46 Time task 47 Clearing customized settings 49 UltraView IP PTZ 36X Camera User Manual... - Page 4 Searching recorded video for playback 66 Playing back recorded files 68 Viewing logs 69 Searching for logs 69 Archiving recorded files 70 Using predefined presets 71 Controlling a PTZ camera 72 Appendix A Pin definitions 73 Index 75 UltraView IP PTZ 36X Camera User Manual...
-
Page 5: Introduction
The dome camera is ideal for all surveillance requirements in a wide variety of locations such as roads, airports, railway stations, harbors, stadiums, scenic areas and parking lots. This is the user manual for UltraView IP PTZ 36X camera models: UVP-N120P-36X(-P) UVP-N120S-36X(-P) (North America only) ... - Page 6 Low-speed movement ensures high image stability Preset positioning tolerance less than 0.1° Built-in zoom lens High sensibility and high resolution Auto focus Automatic gain control Auto white balance Auto IR cut filter UltraView IP PTZ 36X Camera User Manual...
-
Page 7: Installation
Otherwise, the camera may be smeared or damaged. • Servicing: Do not attempt to service this camera yourself. Any attempt to dismantle or remove the covers from this product will invalidate the warranty UltraView IP PTZ 36X Camera User Manual... -
Page 8: Before You Begin
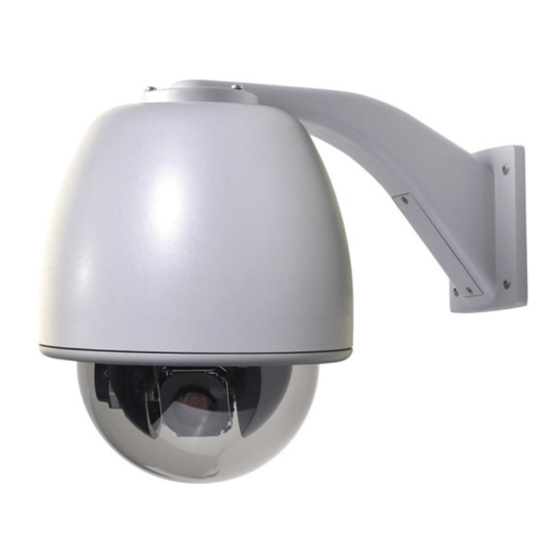
If you need to return the unit, you must ship it in the original box. The camera is shipped with the following items: Dome camera User manual Quick Start Guide Camera description Figure 1: Camera dimensions Pendant-mount camera Flush-mount camera UltraView IP PTZ 36X Camera User Manual... -
Page 9: Specifications
For proper operation, adhere to the following operational, cable, and power requirements for the dome camera. Cable requirements Table 1 on page 6 lists the requirements for the cables that connect to the dome camera. UltraView IP PTZ 36X Camera User Manual... -
Page 10: Installing The Camera
Figure 2 on page 5. For advanced operation, you can also connect any combination of alarm, relay, or audio cables to the dome. A qualified service person, complying with all applicable codes, should perform all required hardware installation. UltraView IP PTZ 36X Camera User Manual... - Page 11 Note: If using a SDHC card, insert it into the camera before inserting the PTZ module into the housing. 6. Re-attach the bubble by screwing it to the housing using three M3 screws. 7. Route the PTZ module cables through the bracket. UltraView IP PTZ 36X Camera User Manual...
- Page 12 Adjust the height of the two housing tabs by turning the screw on which they are attached. The distance (h) of the tabs from the housing ring must be greater than the thickness of the ceiling. Housing tab Screw UltraView IP PTZ 36X Camera User Manual...
- Page 13 7. Re-attach the bubble by screwing it to the housing using three M3 screws. 8. Install the trim ring. Align the trim ring to the housing, and insert the fix-pins to the holes. Then rotate the ring clockwise. UltraView IP PTZ 36X Camera User Manual...
-
Page 14: Accessing The Sdhc Card
Video and log files stored on the SDHC card can only be accessed via the Web browser. You cannot access the card using TruVision Navigator or a recording device. Figure 3: SDHC card location Card slot UltraView IP PTZ 36X Camera User Manual... -
Page 15: Connections
There are seven built-in alarm inputs to use as internal alarm triggers and two alarm built-in outputs in the camera housing. Note: The DIP switches are not used. Figure 4: Connections to the UltraView IP PTZ 36X camera circuit board 1. Power supply 3. Video output and audio input/output Connect +24 VAC power supply and GND. - Page 16 Chapter 2: Installation Alternating current: Dome camera relay output UltraView IP PTZ 36X Camera User Manual...
-
Page 17: Using The Web Browser
Settings, click the security level for the whole zone in the Reset To box, and select Low. Click Reset. Then click to the Internet Options Security tab screen. 5. Click Apply in the Internet Options Security tab screen. UltraView IP PTZ 36X Camera User Manual... -
Page 18: Accessing The Camera Over The Internet
192.168.222.89). Use the tool, IP Finder, enclosed on the CD to find the IP address of the camera. The Login dialog box appears. 2. Enter your user name and password as well as the port to be used. Default user name: admin UltraView IP PTZ 36X Camera User Manual... -
Page 19: Overview Of The Camera Web Browser
Note: Any changes made to the camera’s configuration only apply to this camera. The configuration of other devices that may be connected to the camera, such as cameras or DVRs, is not changed. UltraView IP PTZ 36X Camera User Manual... - Page 20 Iris Adjust the iris. Click an iris button to increase or decrease its apperture and move the scroll bar to adjust the iris value. UltraView IP PTZ 36X Camera User Manual...
-
Page 21: Configuring The Camera
The configuration pane is always visible. Each folder has a list of subfolders that display the different configuration screens. The camera is shipped with on-screen display (OSD) menus in English only. UltraView IP PTZ 36X Camera User Manual... -
Page 22: Local Configuration
Use the Local Configuration folder to manage the network type, display mode and local storage paths. See Figure 9 and Table 3 on page 19 below for descriptions of the different configuration parameters. UltraView IP PTZ 36X Camera User Manual... - Page 23 Defines the directory for saving playback files on your PC. The default directory is C:\ProgramData\Web\PlaybackPicFiles. Save downloaded file as Defines the directory for saving downloaded files on your PC. The default directory is C:\ProgramData\Web\DownloadFiles. UltraView IP PTZ 36X Camera User Manual...
-
Page 24: Remote Configuration
See Chapter 4 “Camera setup” on page 22 for more information. Network parameters Defines the network parameters required to access the camera over the internet. See Chapter 6 “Network setup” on page 50 for more information. UltraView IP PTZ 36X Camera User Manual... - Page 25 “Firmware upgrade” on page 63 for more information. Default Restores factory default settings. See “Restore default settings” on page 63. Reboot device Reboots the camera. See ““Restore default settings” on page 63 . UltraView IP PTZ 36X Camera User Manual...
-
Page 26: Chapter 4 Camera Setup
DST time Use this menu to enable or disable daylight savings time (DST). If the option is enabled, enter the month, day and time when DST starts and ends and then click Save. UltraView IP PTZ 36X Camera User Manual... -
Page 27: Camera Configuration
All changes made apply only to the camera being configured. Parameters cannot be copied to another camera. Note: When schedule parameters are modified, the camera will prompt you to reboot after the changes are saved. UltraView IP PTZ 36X Camera User Manual... -
Page 28: Display Information
Extra text can be displayed on screen. See “Adding extra text on screen” on page 22. To display the date and time: 1. In the Channel Parameters folder, click the Display Setting subfolder to open its screen. UltraView IP PTZ 36X Camera User Manual... -
Page 29: Video Recording Parameters
You can adjust the video recording parameters to obtain the image quality and file size best suited to your needs. Figure 11 on page 26 lists the recording options you can configure for the camera. UltraView IP PTZ 36X Camera User Manual... - Page 30 Select one of the options: Highest, Higher, High, Average, Low, or Lowest. Default is High. Bit rate type Specify whether variable or fixed bit rate is used. Variable produces higher quality results suitable for video downloads and streaming. Default is Variable. UltraView IP PTZ 36X Camera User Manual...
- Page 31 Camera Parameters. The recording is saved on the SDHC card in the camera. Although all recordings are saved on the DVR, the camera’s SDHC card provides a backup in case of network failure, for example. See Figure 12 on page 28. UltraView IP PTZ 36X Camera User Manual...
- Page 32 2. Click the Enable Recording box to enable recording. Note: Deselect the option to disable recording. 3. Select the pre and post event record times. 4. Select the recording period: All day recording Section recording. UltraView IP PTZ 36X Camera User Manual...
-
Page 33: Camera Tamper Alarm
Use the Video Tampering screen in the Channel Parameters folder to change the video tampering settings. Note: Deselect the “Enable Video Tampering” option to disable the video tampering alarm. UltraView IP PTZ 36X Camera User Manual... - Page 34 6. Define the alarm response method to a tamper alarm. Select the Linkage tab to select how you want to be notified when tamper is detected. Check one or more of the response methods: UltraView IP PTZ 36X Camera User Manual...
-
Page 35: Adding Extra Text On-Screen
The strings follow each other consecutively. To add text on screen: 1. In the Channel Parameters folder, click the Text Overlay subfolder to open its screen. UltraView IP PTZ 36X Camera User Manual... -
Page 36: Camera Image Settings
Click the Advanced configuration button to also adjust camera behavior parameters such as shutter speed, iris mode, day/night mode, IR mode, image flip, power mode and white balance. Figure 14: Camera settings screen UltraView IP PTZ 36X Camera User Manual... - Page 37 The iris opens and closes in response to changing lighting conditions. Set the response level of the iris to f1.4, f1.6, f2.0, f2.4, f3.4, f4.0, f4.8, f5.6, f6.8, f8.0, f9.6, f11, f14, f16, f19, or f22 UltraView IP PTZ 36X Camera User Manual...
- Page 38 Use this function to maintain lens focus accuracy over prolong periods of time. When enabled, the lens initialization occurs daily at midnight (00:00:00). Default is disabled. Use electronic image stabilization (IES) to remove blur from the image. Check to enable or disable. UltraView IP PTZ 36X Camera User Manual...
-
Page 39: Reset Camera Settings
To restore camera settings: 1. In the Channel Parameters folder, click the Restore Image subfolder to open its screen. 2. Click OK. You will receive a prompt asking you to reboot the camera. UltraView IP PTZ 36X Camera User Manual... -
Page 40: Motion Setup
Chapter 5 Motion setup This chapter describes how to configure camera movement. See Figure 15 below. Each folder is explained in detail in the following sections. Figure 15: Motion menu screens UltraView IP PTZ 36X Camera User Manual... -
Page 41: Ptz Channel
Power loss position When enabled, the camera can return to its previous postion after a predefined dwell time following a power loss. Select one of the options: Disable, 30s, 60s, 300s, 600s.Default is 30s. UltraView IP PTZ 36X Camera User Manual... -
Page 42: Park Action
Click Save to save this position as the home position. Click the button to delete the current home postion and the Call button tocall up the current home position. UltraView IP PTZ 36X Camera User Manual... -
Page 43: Preset Position
Calls up the selected preset. The camera moves to this preset position. Note: Predefined presets can be called up but cannot be changed. To set a preset position: 1. In the Motion folder, click the Preset subfolder to open its screen. UltraView IP PTZ 36X Camera User Manual... -
Page 44: Limit Ptz Movement
The focus can also be restricted so that the camera can’t focus in too closely on an object. Figure 18: PTZ limited screen UltraView IP PTZ 36X Camera User Manual... - Page 45 Using the buttons again, manually move the camera to the right until the desired limit is reached. Click to stop. The left and right limits are now set. 5. To clear the set movement limits, click Clear. UltraView IP PTZ 36X Camera User Manual...
-
Page 46: Preset Tour Settings
The speed is the rate at which the camera will move from one step to the next. It can range between levels 1 and 40 with 30 as default. See Table 8 for the list of speed level values. UltraView IP PTZ 36X Camera User Manual... - Page 47 4. Click Save. The preset step is added to the tour list. 5. Click to add another preset to the tour. The screen reappears. Repeat steps 2 and 3 and then click Save. The new preset is added to the tour list. UltraView IP PTZ 36X Camera User Manual...
-
Page 48: Shadow Tour Settings
Navigator or automatically using a configured function such as an alarm, park time, or power up. Up to four shadow tours can be set up. There is no priority between the four tours. UltraView IP PTZ 36X Camera User Manual... - Page 49 3. Click Record Start and use the PTZ control buttons to record the route for this shadow tour. When the memory reaches zero, no further recording can be done. UltraView IP PTZ 36X Camera User Manual...
-
Page 50: Privacy Masking
You can create up to 24 privacy masks (numbered 1 to 24) per camera. A maximum of eight privacy masks can be displayed at one time. Figure 21: Privacy mask screen UltraView IP PTZ 36X Camera User Manual... -
Page 51: Time Task
4. Click Save to save changes. Time task Use this menu to define the schedule of tasks such as auto scans, presets, preset tours, panorama scans and shadow tours. UltraView IP PTZ 36X Camera User Manual... - Page 52 Random scan. The camera randomly scans either horizontally or vertically. Patrol (preset tour) Pattern (shadow tour) Preset Panorama scan. The camera simultaneously scans horizontally and vertically. Dome reboot Dome adjust Aux output Tilt scan. The camera scans up and down. UltraView IP PTZ 36X Camera User Manual...
-
Page 53: Clearing Customized Settings
Save changes made Clear Clear entries. Clearing customized settings Use the Clear menu to delete all user-defined settings for presets, preset tours (patrols), shadow tours (patterns), privacy masks, PTZ limited settings, and time tasks. UltraView IP PTZ 36X Camera User Manual... -
Page 54: Chapter 6 Network Setup
The current network settings are displayed in each screen. See Figure 24 below. Change the parameters required and then click Save to save all changes made. Note: When a network parameter is modified, the camera will prompt you to save and reboot. UltraView IP PTZ 36X Camera User Manual... - Page 55 239.255.255.255. You do not need to specify this option if you are not using the multicast function. Some routers prohibit the use of multicast function in case of a network storm. PPPoE settings Retrieves a dynamic IP address. DDNS settings Specifies either DynDNS or IP server. UltraView IP PTZ 36X Camera User Manual...
- Page 56 If using the NTP server, enter the IP address of the NTP server and the port number. If using the manual system enter the current date and time. Select your time zone from the drop-down list. Click Save to save changes. UltraView IP PTZ 36X Camera User Manual...
- Page 57 Chapter 6: Network setup 5. Click the E-mail setting subfolder to open its screen. Enter the SMTP server, SMTP port, user name and password and the e-mail sender and receiver addresses. Click Save to save changes. UltraView IP PTZ 36X Camera User Manual...
-
Page 58: Chapter 7 Alarm Setup
For example, the motion recording is triggered by the movement of a person but not that of a cat. Note: Deselect the “Enable Motion Detection” option to disable the motion detection alarm. UltraView IP PTZ 36X Camera User Manual... - Page 59 5. Define the alarm response method to a motion alarm. Select the Linkage tab to select how you want to be notified when motion is detected. Check one or more of the response methods: UltraView IP PTZ 36X Camera User Manual...
-
Page 60: Event Schedule For Alarms
(see “Motion detection” on page 54) as well as the alarm input and output parameters (see “Alarm set up” on page 57). Figure 26: Deployment time screen To define an event schedule: 1. Open the Deployment Time folder to see its screen. UltraView IP PTZ 36X Camera User Manual... -
Page 61: Alarm Set Up
To set up an external alarm input: 1. In the Alarm Parameters folder, open the Alarm Input screen. 2. Select an alarm input from the drop-down list. Note: The camera can have up to seven alarm inputs. UltraView IP PTZ 36X Camera User Manual... - Page 62 3. Select the alarm output delay time. The alarm output delay is the length of time that an alarm output triggers before stopping. Select a Delay option: 5, 10, and 30 seconds, 1, 2, 5, and 10 UltraView IP PTZ 36X Camera User Manual...
- Page 63 5. If required, copy the settings of this alarm output to the other alarm output. 6. Click Save to save changes. Note: The camera will prompt you to reboot in order for the changes to take effect. UltraView IP PTZ 36X Camera User Manual...
-
Page 64: Chapter 8 Camera Management
All users can connect to a camera when IP and MAC addresses are set to zero. The user access rights must be set up for each camera individually. UltraView IP PTZ 36X Camera User Manual... - Page 65 You can create up to 15 users. Only the system administrator can create or delete users. To add a user: 1. In the Remote Configuration folder, click the User Management subfolder to open its screen. 2. Click the button. The following screen appears: UltraView IP PTZ 36X Camera User Manual...
- Page 66 The User Information screen appears. 4. Change the information required. Note: The user “Admin” can only be changed by entering the admin password. 5. Click to accept the change and return to the User Management screen. UltraView IP PTZ 36X Camera User Manual...
-
Page 67: Format The Sdhc Card
The option is located in the Remote Configuration folder. All parameters are restored to factory default settings; camera and network. Use this function cautiously. UltraView IP PTZ 36X Camera User Manual... -
Page 68: Reboot The Camera
The option is located in the Remote Configuration folder. Click the folder Reboot device to open its screen. Click to the question “Restart the device?” The camera reboots. UltraView IP PTZ 36X Camera User Manual... -
Page 69: Chapter 9 Camera Operation
(see Figure 6 on page 16). However, the live screen is initially blank. You must then click the Start Live View button on the bottom of the screen for the live view to appear on-screen. UltraView IP PTZ 36X Camera User Manual... -
Page 70: Searching Recorded Video For Playback
Select a play type and a file type in the appropriate boxes and specify a time range. Click the Search button to start the search. Note: There must be an SDHC card inserted in the camera to be able to use the playback functions. UltraView IP PTZ 36X Camera User Manual... - Page 71 They are arranged by start of time. Playback control bar Click to control how the selected file is played back: Play/pause, stop, reverse, fast forward, and play the next file in the search result. UltraView IP PTZ 36X Camera User Manual...
-
Page 72: Playing Back Recorded Files
While playing back a video, the timeline bar displays the type and time of the recording. The timeline can be manually scrolled using the mouse. When completed, click the Preview button on the menu toolbar to return to live mode. UltraView IP PTZ 36X Camera User Manual... -
Page 73: Viewing Logs
In the search results listed in the Log window, these four log types are shown under “Main information types” and each has its own sub information type listed which provides a description of the cause of the log. See Table 12 for more information. UltraView IP PTZ 36X Camera User Manual... -
Page 74: Archiving Recorded Files
66. 2. Select the file that you want to back up. 3. Click the Archive button to start archiving the file to your computer desktop. Click again to stop archiving. UltraView IP PTZ 36X Camera User Manual... -
Page 75: Using Predefined Presets
Pattern 2 (Shadow Tour 2) Patrol 5 (Tour 5) Pattern 3 (Shadow Tour 3) Patrol 6 (Tour 6) Pattern 4 (Shadow Tour 4) Patrol 7 (Tour 7) Enable limit stops setting Patrol 8 (Tour 8) UltraView IP PTZ 36X Camera User Manual... -
Page 76: Controlling A Ptz Camera
Supported PTZ protocols GE RS-485 ASCII Philips 3 DennardDome GE RS-485 (default) Philips 2 DeltaDome VideoTec Philips VCL SpeedDome Panasonic Tyco AD Techwin EVI-D30 Infinova Pelco D Samsung HIKVISION Pelco P Siemens DM DynaColor UltraView IP PTZ 36X Camera User Manual... -
Page 77: Appendix A Pin Definitions
White-Green Blue Blue White/Blue White/Blue Green Green White/Brown White/Brown Brown Brown Please make sure your connected cables have the same pin assignment and color as above before deploying the cables in your network. UltraView IP PTZ 36X Camera User Manual... - Page 78 Appendix A: Pin definitions UltraView IP PTZ 36X Camera User Manual...
-
Page 79: Index
Firmware upgrade, 63 image freeze, 37 Flush-mount camera keypad control speed, 37 installing, 8 park action, 38 Focus control power loss position, 37 set up, 33 preset speed, 37 Frame rate setup, 25 UltraView IP PTZ 36X Camera User Manual... - Page 80 In live mode, 66 Park action, 38 In playback, 68 Park time. See Dwell time Stream mode setup, 25 Passwords Subnet mask set up, 50 default admin password, 14 Sync camera time to PC time, 22 UltraView IP PTZ 36X Camera User Manual...
- Page 81 35 default admin user name, 14 Wide dynamic range (WDR) User settings set up, 34 add new users, 61 delete a user, 62 modify password, 62 Zoom limit set up, 34 UltraView IP PTZ 36X Camera User Manual...
Need help?
Do you have a question about the UltraView IP PTZ 36X and is the answer not in the manual?
Questions and answers