Table of Contents
Advertisement
Quick Links
Download this manual
See also:
Installation Manual
Advertisement
Table of Contents
Troubleshooting

Related Manuals for GE CyberDome II


Summary of Contents for GE CyberDome II
-
Page 1: User Manual
CyberDome II User Manual... - Page 2 GE Security and you. Read the following terms and conditions carefully before installing or using this software. This agreement provides a license from GE Security to use the software. It also contains warranty information, disclaimers, and liability limitations. Installing and/or using the software confirms your agreement to be bound by these terms and conditions.
- Page 3 Software to a human-perceivable form, nor create derivative works or programs based on the Software. 4. Limited warranty. GE Security warrants that for one (1) year from the date of delivery of the Licensed Product (Software Warranty Period), the functions contained in the Software will...
- Page 4 You further agree that this agreement is the complete and exclusive statement of the agreement between you and GE Security, and supersedes any proposal or prior agreement, oral or written, and any other communication relating to the subject matter of this agreement.
-
Page 5: Table Of Contents
Contents Preface ..................vii Conventions used in this document . - Page 6 CyberDome II User Manual...
-
Page 7: Preface
Preface This is the GE CyberDome II User Manual. This document includes an overview of the product and detailed instructions explaining: • how to access the menus; and • how to customize the settings. There is also information describing how to contact technical support if you have questions or concerns. - Page 8 CyberDome II User Manual...
-
Page 9: Programming
Programming This chapter provides an overview of your CyberDome II menu system, including steps you may want to perform before you begin using your CyberDome II. In this chapter: Introduction..........2 Accessing programming menus . -
Page 10: Introduction
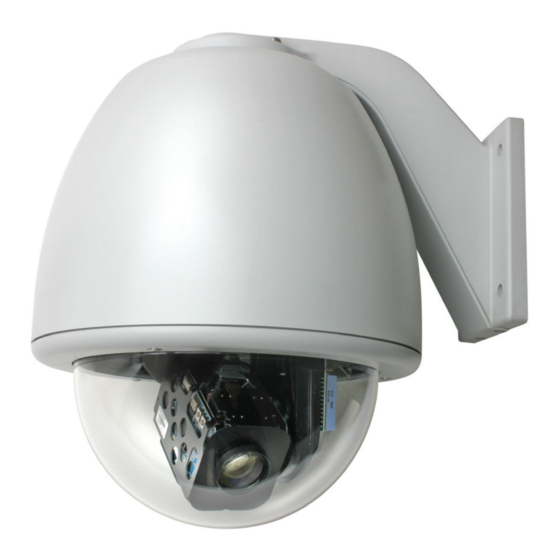
CyberDome II User Manual Introduction This manual contains programming instructions for the CyberDome II series cameras (Figure 1). The most common CyberDome II programming options and screen sequences are illustrated. Notations indicate where options may differ among camera models. Figure 1. CyberDome II series basic system... -
Page 11: Accessing Programming Menus
5. At the Enter camera site number screen, enter the site number of the camera you wish to program. Figure 2. KTD-405 keyboard At this point, you have access to the CyberDome II programming menus. For more information on the programming menus, see Accessing programming menus on page 3. - Page 12 CyberDome II User Manual Other functions have specific instructions that are displayed on screen while you are performing the function.
-
Page 13: Camera System Menu
There are DIP switch settings on the camera that you can set that will automatically pull the settings from the housing, or push the settings from the camera to the housing. See the CyberDome II Installation Manual for more information. -
Page 14: Product Information
CyberDome II User Manual Product information The first screen (Figure 4) after accessing the main menu provides information on: • Product name • Camera type • Site #/ID • Unit serial number • Installation date • Video format • Protocol Figure 4. - Page 15 If the type and version date are not populated either the camera circuit board is not working properly, or the camera is not in a CyberDome II housing. There are no customizable options on this screen. Proceed to the next screen by pressing the fast forward button on the keypad.
-
Page 16: Setup Menus
CyberDome II User Manual Program select Use the program select menu (Figure 7) to choose which submenus you wish to change. To access a particular submenu, either press the number associated with that submenu, or navigate to the desired submenu and press the fast forward button on the keypad. - Page 17 Chapter 1 Programming 2. To confirm the restoration of factory defaults (Figure 9) for the feature chosen on the previous menu, do one of the following: a. Select option 1 to keep the current settings. b. Select option 2 to delete the current settings and reload the factory default settings. Figure 9.
- Page 18 CyberDome II User Manual Autopan speed This feature selects the speed at which the camera autopans. Use the joystick to set the three speed settings: slow, med (default), or fast (Figure 11). Figure 11. Autopanspeed Autoreturn This feature sets the camera to automatically return after a period of inactivity to a home position, a specific preset, a preprogrammed tour, or autopan mode (Figure 12).
- Page 19 Chapter 1 Programming The minimum return time is 15 seconds. The maximum return time is 60 minutes. Use the joystick to increase or decrease the return time for items 2 through 5 in the following increments: • Increments of fifteen seconds to increase the return time from 15 to 60 seconds. •...
- Page 20 CyberDome II User Manual Azimuth indicator The azimuth indicator enables a direction indicator to be displayed on the monitor/screen (Figure 13). Figure 13. Azimuth indicator • To disable the azimuth indicator select option 1, the default setting. • To enable the azimuth indicator to show the heading (N, NE, E, SE, S, SW, W, or NW), select option 2.
- Page 21 Chapter 1 Programming Day/night switch Set the level at which the camera’s infrared filter automatically switches in and out at dawn and dusk (Figure 14). The light level switch point is adjustable, but should be set only during dawn/dusk conditions. Note: This menu will only be present if the camera supports day/night switching.
-
Page 22: Exposure Control
CyberDome II User Manual Electronic zoom Set the electronic zoom on the camera. The factory default setting is 4x (Figure 16). This will extend the camera module’s zoom ability to whatever the camera is capable of, multiplied by the choice you make here. If the camera is capable of 26x, and you leave the default here of 4x, the camera will be able to digitally zoom in up to 104x. - Page 23 Chapter 1 Programming Image freeze Image freeze (Figure 18) sets whether or not the cameras image will freeze on the screen while the camera is traveling to a preset. Enabling Image freeze causes the camera to freeze the last image while the camera is moving and display a static image on the monitor until the camera stops.
- Page 24 CyberDome II User Manual Lift/gain Lift is a camera feature that optimizes the video’s color over long runs of coaxial cable (Figure 20). To set the lift value, do the following: 1. Navigate to Lift (0-7). 2. Press iris +.
- Page 25 Use this feature to enable or disable the pressure warning (Figure 22). Note: This menu is only enabled when using a CyberDome II camera inside a CyberDome II PressurDome housing. Figure 22. Pressure warning If you enable the pressure warning, you will be asked to set the level at which the warning displays. Move the...
-
Page 26: Preset Speed
CyberDome II User Manual the screen when the pressure (temperature-compensated pressure, relative to sea-level atmospheric pressure) in the dome drops below the value selected on this menu. Preset speed Set the speed at which the camera travels between presets (Figure 23). This setting is used when calling up presets manually or in a tour. - Page 27 Chapter 1 Programming Proportional speed The proportional speed feature (Figure 24) decreases the pan/tilt speed of the camera to provide better tracking when the camera is zoomed in. This helps reduce pan/tilt overshoot when zooming in on objects far from the camera.
-
Page 28: Shutter Speed
CyberDome II User Manual Shutter speed Use this feature to select the shutter speed (Figure 26). Select the number that corresponds with the desired speed to set the shutter speed for either a NTSC or PAL. Figure 26. Shutter speed During pan/tilt operation, shutter speed is controlled automatically by the camera. - Page 29 Chapter 1 Programming Figure 27. Site number display Synchronization Set the video signal to be synchronized either to the AC input frequency (line lock) or to the camera’s internal clock. Figure 28. Synchronization Select option 1 to select line lock. If you want to enable this feature, press the set button. Press iris+ to adjust line lock.
- Page 30 CyberDome II User Manual Temperature display Enable or disable the temperature display feature, which will show the temperature on the screen (Figure 29). Figure 29. Temperature display • Select option 1 to disable temperature display. • Select option 2 to enable temperature display, showing Fahrenheit.
-
Page 31: White Balance
Chapter 1 Programming White balance Select the method by which the camera shifts its output colors to compensate for the color of a light source. Figure 30. White balance • Select option 1 for automatic white balance. • Select option 2 for ATW (white balance is adjusted while the image changes). •... - Page 32 CyberDome II User Manual Zoom speed control Select the speed at which the camera will zoom Figure 34). Figure 32. Zoom speed control • Select option 1 for variable speed. • Select option 2 for a slow fixed speed. •...
-
Page 33: Presets Menu
Chapter 1 Programming Presets menu CyberDome II cameras can store up to 128 preset positions (numbered 1 to 128). To enter preset positions, do the following: 1. Select the Program select menu (Figure 7 on page 8). 2. Navigate to option 2 and pan right. The Preset programming menu displays (Figure 33). -
Page 34: Titles/Areas Menu
Under the titles/areas menu, you can set titles for preset positions, areas, the camera, and tours. Figure 34 identifies the available character set. Figure 34. CyberDome II character set 0 1 2 3 4 5 6 7 8 9 a b c d e f g h I j k l m n o p q r s t u v w x y z A B C D E F G H I J K L M N O P Q R S T U V W X Y Z ) - : ;... -
Page 35: Area And Titles
8. Repeat steps 4 through 7 for any additional titles, or press iris - to return to the Edit Titles/Areas menu. Area and titles Some CyberDome II models can display a title over a selected area on their pan/tilt routines. To program a titled area, do the following: 1. - Page 36 CyberDome II User Manual 3. Use the keypad to enter the number (01 to 16) of the area to be programmed and titled. The Area 01 programming menu displays. Figure 39. Area 01 programming menu 4. To define the boundaries of an area, use the joystick to pan/tilt the camera to the upper left corner of the desired area and press the iris + button.
-
Page 37: Camera Title
Tour title Some CyberDome II models can show a title when on a tour. To set a title for a tour, do the following: 1. Navigate to the Edit titles/areas menu (Figure 35 on page 26). 2. Navigate to option 4 and pan right. The Tour titles menu displays (Figure 41). - Page 38 CyberDome II User Manual Figure 42. Tour title entry menu 4. Confirm that the cursor (arrow) is under the tour ###. 5. To move the display location for the title up or down on the screen, move the joystick up and down.
-
Page 39: Current Status
To review the current setup settings for your camera, select option 4 (Current status) from the Program select menu and pan right. Settings cannot be entered or changed from the Setup status menus. CyberDome II cameras with preset and area features have status menus that show programmed presets and programmed areas by putting an X next to them in the menu. - Page 40 CyberDome II User Manual • To page up and down through the menus, move the joystick left or right. • To return to the Program select menu, press iris -.
-
Page 41: Tours
Preset tours CyberDome II cameras have preset tour capability. A preset tour is composed of a group of preset positions that the operator can program to be linked together in a sequence. Each tour consists of a string of up to 64 steps, or presets, which are programmed by the user. - Page 42 CyberDome II User Manual Figure 46. Tour programming menus 3. Navigate to option 1 and pan right to edit the tour. 4. Navigate through and use iris + to set the preset, position, dwell time, speed, zoom, and TTL (Figure 47).
-
Page 43: Shadowtour
7. Navigate to option two to play the tour, to verify, and press the iris + to exit back to the previous menu. ShadowTour CyberDome II cameras have ShadowTour capability. A ShadowTour is a tour that the camera “learns” by recording up to five minutes of manual P, T, and Z operation. Use a keypad to manually direct your camera through the desired PTZ movements, and the camera stores in memory the movements you performed. - Page 44 CyberDome II User Manual 7. Repeat steps 2 through 6 to review other ShadowTours. To edit a previously programmed ShadowTour, do the following: 1. Select 5 from the Program select menu. The first menu to display is the PTZ tour programming menu.
-
Page 45: Additional Menus
Chapter 1 Programming Additional menus 1. The Privacy mask and System startup are submenus of Program select menu 2 (Figure 48). Figure 48. Program select additional menus Privacy masks To set a privacy mask, do the following: Note: Privacy masks do not display if they were not implemented in your installation. 1. -
Page 46: System Startup
CyberDome II User Manual Figure 50. Privacy mask select 6. Using the joystick, set the size of the mask by pushing up or down to increase or decrease the vertical size of the mask (Figure 51), or left or right to increase or decrease the horizontal size of the mask. - Page 47 Chapter 1 Programming Figure 52. Password protection 2. Select 3. The Change password menu displays (Figure 53). Figure 53. Change password menu 3. Using the number selecting line, enter four numbers for your password. 4. Enter those same numbers again when prompted. 5.
- Page 48 Once set the installation date cannot be erased. Power up actions You can set the CyberDome II to do a certain actions when it is first powered up. To set a power up action, do the following: 1. From the Program select menu 2 screen (Figure 48 on page 37), select 2. The Password protection screen displays (Figure 52 on page 39).
- Page 49 Select 5 for autopan. Position reporting You can enable or disable position reporting on your CyberDome II. To do so, do the following: 1. From the Program select menu 2 screen, select 2. The Password protection screen displays. 2. Using the joystick, pan right to proceed past the Password protection screen, the Installation date screen, and Power on action screen.
- Page 50 CyberDome II User Manual...
-
Page 51: Chapter 2 Troubleshooting And Support
Chapter 2 Troubleshooting and support This chapter provides information to help you troubleshoot problems and contact technical support in case you need assistance with your GE equipment. In this chapter: Troubleshooting ......... . . 44 Common issues. -
Page 52: Troubleshooting
Troubleshooting This section provides information to help you diagnose and solve various problems that may arise while configuring or using your GE product and offers technical support contacts in case you need assistance. Common issues The following are the most common troubleshooting issues and their solutions: •... -
Page 53: Contacting Technical Support
After you register and log on, you may search through our online library for the documentation you need. Many GE documents are provided as PDFs (portable document format). To read these documents, you will need Adobe Reader, which can be downloaded free from Adobe’s website at www.adobe.com. - Page 54 CyberDome II User Manual...
- Page 55 Appendix A Defaults This appendix provides a list of default settings. In this appendix: Defaults..........48...
-
Page 56: Defaults
CyberDome II User Manual Defaults The following table lists the defaults for each setting in the Setup menu on CyberDome II. Table 3. Setup menu Menu property Default setting Autoreturn Disable Autoslow shutter Disable Autopan speed Medium Azimuth indicator Enable... -
Page 57: Toxic And Hazardous Element Levels
Toxic and hazardous element levels The levels for toxic and hazardous elements listed in this table apply to the following SKUs: • CYH-4101, CYH-4201, CYH-4202, CYH-4301, CYH-4401, CYH-4402, CYH-4501, CYH-4502, CYH-4602, CYH-4701, CYH-5101, CYH-5201, CYH-5202, CYH-5301, CYH-5401, CYH-5402, CYH-5501, CYH-5502, CYH-5602, CYH-5701, CYP-1111, CYP-1121, CYP-1301, CYP-1302, CYP- 1311, CYP-1312, CYP-1411, CYP-1412. - Page 58 CyberDome II User Manual...
- Page 59 Index ATW .......................23 lens initialization..................15 autopan speed..................10 lift......................16 autoreturn ....................10 autoslow shutter ..................9 azimuth indicator ..................12 manual adjustments.................23 max tilt/pan speed ...................17 memory .....................5 camera processor..................7 clear memory ....................8 clear functions...................8 no memory ....................5 conventions .................... vii nonvolatile memory ..................8 day/night switch ..................13 pan processor ....................7 day/night switching.................15...
- Page 60 CyberDome II User Manual setup menus....................8 tilt processor....................7 shutter speed ...................20 site number display .................20 synchronization ..................21 white balance ..................23 system information ................5, 6 wide dynamic range ................23 technical support ..................45 zoom speed control .................24 temperature display.................22 zoom button ....................3...
Need help?
Do you have a question about the CyberDome II and is the answer not in the manual?
Questions and answers