
Related Manuals for US Water Systems Fusion


Summary of Contents for US Water Systems Fusion
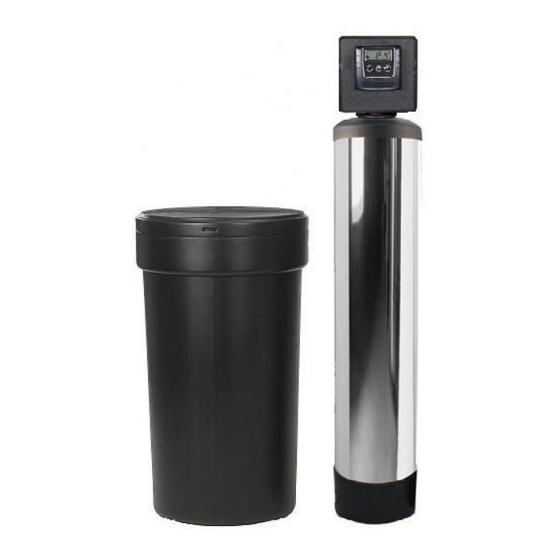
- Page 1 Fusion, Fusion Hybrid and Prelude Water Softener Service Manual IMPORTANT: Fill in Pertinent Information on Page 3 for Future Reference...
- Page 2 IMPORTANT PLEASE READ: The information, specifications and illustrations in this manual are based on the latest information available at the time of printing. The manufacturer reserves the right to make changes at any time without notice. This manual is intended as a guide for service of the valve only. System installation requires information from a number of suppliers not known at the time of manufacture.
-
Page 3: Job Specification Sheet
Job Specification Sheet Job Number: ________________ Model Number: ______________ Water Test: _________________ Capacity Per Unit: ____________ Mineral Tank Size: _________ Diameter: ___________ Height: Brine Tank Size & Salt Setting per Regeneration: _______ 9000/9100/9500 Control Valve Specifications: 1. Type of Timer: A. - Page 4 General and Commercial Installation Instructions 1. Place the softener tank where you want to install the unit. Be sure the tank is level and on a firm NOTE: base. The tank base (black plastic) is a floating base that can be adjusted to meet uneven floors. The softener should be located close to the incoming water supply.
- Page 5 4. Place the supplied funnel in the tank with the distributor tube in the middle. It is recommended that a helper hold the funnel during the fill process. A face shield or eye protection should be used during the fill procedure to prevent an injury.
- Page 6 8. The distributor tube must be flush with the top of the tank. Cut if necessary. Remove the duct tape. Lubricate the tube and nylon seal ring on the tank. Use only non-aerosol food grade silicone lubricant.
- Page 7 9. Lubricate the distributor o-ring seal and tank o-ring seal on the control valve. Install the upper basket by pushing in the slotted holes and turn it clockwise until it locks in place.
- Page 8 10. Place the control valve on the tank. Place the valve over the distributor tube through the bottom of the upper basket. Slide the valve down and thread the valve on the tank by turning it clockwise. Once the valve is hand tight turn it an additional ¼ turn to snug it to the tank. 11.
- Page 10 12. Solder joints near the drain must be done before connecting the Drain Line Flow Control fitting (DLFC). Leave at least 6” (152 mm) between the DLFC and solder joints when soldering pipes that are connected on the DLFC. Failure to do this could cause interior damage to DLFC. 13.
- Page 11 16. Connect the supplied 3/8” tubing to both brine connections. 17. At the control valve place the nut over the tube, install the brass sleeve in the tube. Install the cone screen in brass insert. Install the plastic flange over the tube. Install the tube in the control valve and tighten the nut by turning it clockwise.
- Page 12 18. Remove the white cap from the white tube in the brine tank. Place the other end of the tube through the hole in the side of the bine tank.
- Page 13 19. Remove the nut from the brine safety valve. BE CAREFUL, not to drop the nut and sleeves (2) in the brine tube. 20. Place the nut over the tube. Be sure the brass insert is in the tube.
- Page 14 21. Now place the black split ring on the tube with the coned side facing the nut. 22. Now place the white ring on the tube with the shoulder touching the black split ring.
- Page 15 23. Insert the tube in the brine safety valve elbow and tighten the nut by turning it clock wise. Tighten the nut hand tight and snug it an additional ¼ to ½ turn. Place the white cap back on the white tube.
- Page 16 24. There is a barb fitting on the side of the brine tank. This is used as an overflow and only is used if the brine tank overfills. This barb is for 5/8” tubing. If you elect to use tubing for this elbow, run it to a floor drain or sump pump.
- Page 17 27. Slowly place the bypass In Service position and let water flow into the mineral tank. Open the bypass in small increments until it is fully open. When water flow stops, slowly open a cold water tap nearby and let water run until air is purged from the unit. Preferably a garden spigot or bath tube. Then close tap once the water runs clear and there is no air in the system.
-
Page 18: Timer Features
TIMER FEATURES Parameter Data Display Display Indicator Error/ Information Icon Flow Indicator S e r v i c e I c o n x1000 Indicator Extra Cycle D o w n Button B u t t o n B u t t o n 1. - Page 19 9. If the error icon is illuminated there is a problem with the unit and a service technician should be contacted. 10. The x1000 icon will illuminate when values are multiplied by 1000 (capacity setting). 11. The system will hold the values for up to 48 hours after a power outage. Outages exceeding 48 hours should have the programming values revisited.
-
Page 20: General And Commercial Installation Checklist
General and Commercial Installation Checklist A minimum of 25 pounds of water pressure is required for regeneration valve to WATER PRESSURE: operate effectively. ELECTRICAL FACILITIES: A continuous 115 volt, 60 Hertz current supply is required. Make certain the current supply is always energized and cannot be turned off with another switch. Condition of existing plumbing should be free from lime and iron buildup. - Page 21 Programming Setting the Time of Day 1. Press and hold either the Up or Down buttons until the programming icon replaces the service icon and the parameter display reads DO. 2. Adjust the displayed time with the Up and Down buttons. 3.
- Page 22 2. Valve Type (Display Code VT) Press the Extra Cycle button. Use this display to set the Valve Type. The Valve Type setting specifies the type of cycle that the valve follows during regeneration. Note that some valve types require that the valve be built with specific subcomponents.
- Page 23 5. Tank in Service (Display Code TS) Press the Extra Cycle button. Use this display to set whether tank one or tank two is in service. This option setting is identified by “TS” in the upper left hand corner of the screen. This parameter is only available if the number of tanks has been set to 2. There are two possible settings: Tank One in Service: U1 Tank Two in Service: U2 NO CHANGES NECESSARY ON THIS PARAMATER...
- Page 24 7. Feed Water Hardness (Display Code H) Press the Extra Cycle button. Use this display to set the feed water hardness. Enter the feed water hardness in grains per unit volume for softener systems, or 1 for filter systems. This option setting is identified by “H” in the upper left hand corner of the screen.
- Page 25 10. Fixed Reserve Capacity (Display Code RC) Press the Extra Cycle button. Use this display to set the Reserve Capacity. This setting specifies a fixed volume that will be held as a reserve. The reserve capacity cannot be set to a value greater than one-half of the calculated system capacity. The reserve capacity is a fixed volume and does not change if the unit capacity or feed water hardness is changed.
- Page 26 13. Regeneration Cycle Step Times Press the Extra Cycle button. Use this display to set the Regeneration Cycle Step Times. The different regeneration cycles are listed in sequence based on the valve type selected for the system, and are identified by an abbreviation in the upper left-hand corner of the screen.
-
Page 27: User Programming Mode
14. Flow Meter Type (Display Code FM) Press the Extra Cycle button. Use this display to set the type of flow meter connected to the control. This option setting is identified by “FM” in the upper left-hand corner of the screen. Use the Up and Down buttons to select one of the 7 available settings. - Page 28 3. Press the Extra Cycle button. Use this display to adjust the Regeneration Time. This option setting is identified by “RT” in the upper left hand corner of the screen. 4. Press the Extra Cycle button. Use this display to adjust the Feed Water Hardness. This option setting is identified by “H” in the upper left hand corner of the screen.
-
Page 29: Diagnostic Programming Mode
DIAGNOSTIC PROGRAMMING MODE Diagnostic Programming Mode Options Abbreviation Parameter Description Flow Rate Displays the current outlet flow rate Peak Flow Displays the highest flow Rate rate measured since the last regeneration Hours in Displays the total hours that the Service unit has been in service Volume Used Displays the total volume of water... - Page 30 7. Press the Up button. Use this display to view the Software Version. This option setting is identified by “SV” in the upper left hand corner of the screen. Press the Extra Cycle button to end Diagnostic Programming Mode.
-
Page 31: Troubleshooting
Troubleshooting Problem Cause Correction 1. Water conditioner fails to A. Electrical service to unit A. Assure permanent electrical service regenerate. has been interrupted (check fuse, plug, pull chain, or switch) B. Control is defective. B. Replace Control. C. Power failure. C. - Page 32 Troubleshooting Problem Cause Correction 8. Softener fails to draw brine. A. Drain line flow control A. Clean drain line flow control. is plugged. B. Injector is plugged. B. Clean injector C. Injector screen plugged. C. Clean screen. D. Line pressure is too low. D.
-
Page 33: Control Dimensions
Control Dimensions... - Page 34 NOTES...
Need help?
Do you have a question about the Fusion and is the answer not in the manual?
Questions and answers