
Related Manuals for HighPoint RocketStor 6328


Summary of Contents for HighPoint RocketStor 6328
- Page 1 RocketStor 6328 Thunderbolt™ 2 RAID Host Adapters User’s Guide Revision: 1.00 Mar. 21, 2014 HighPoint Technologies, Inc. HighPoint Technologies Inc.
-
Page 2: Table Of Contents
11. Technical Support……………………………………………………………………………………………………………17 12. LIMITED WARRANTY…………………………………………………………………………………………………………17 APPENDIX A - Using the WebGUI (full guide) …………………………………………………………………………18 1. Running the HighPoint Web RAID Management software (WebGUI) ………………………… 18 2. Web RAID Management Software - Global View…………………………………………..19 3. Web RAID Management Software - Physical………………………………………………………………20 3.1 Physical - Controller………………..……………………………………………………………………………20... -
Page 3: Highpoint Rocketstor 6328
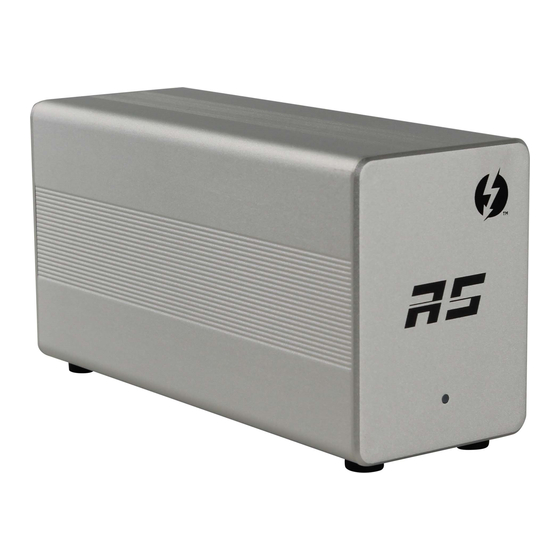
The RocketStor 6238 is set to revolutionize the compact desktop and portable workstation market; no other Thunderbolt™ connectivity Adapter packs so much power and versatility into such a tiny package! The RocketStor 6328 delivers true, 20Gb/s bi-directional transfer bandwidth for any Mac or Windows PC platform with Thunderbolt™ capability. -
Page 4: What's In The Box
Power Cord Quick Installation Guide Software CD (includes Driver and WebGUI) 4. RocketStor 6328(RS6328) Overview 4.1 RS6328 Specification Host Interface/Ports Dual Thunderbolt™ 2 ports Data Transfer Rate 20Gbps Bi-directional Device Ports Dual External Mini-SAS ports (SFF-8088) -
Page 5: Rs6328 Audible Alarm
If the RAID is in critical status, please follow “Chapter 8 RAID Disk Failure Recovery” to recover the RAID disk e. For other RAID status, please refer p.14 for RAID recovery 6. Setting up the RocketStor 6328 6.1 Storage Enclosure Preparation RS6328 support two types of storage enclosure: External Mini-SAS and External SATA (eSATA). -
Page 6: Connecting The Rocketstor 6328
The supported enclosure interface: (Mini-SAS) (eSATA) RocketStor 6328 connection diagram: 6.2 Connecting the RocketStor 6328 (RS6328) Steps: a. Connect the RS6328 to the storage enclosure using an industry standard Mini-SAS cable. Power on the storage enclosure. b. Connect the Power Adapter to the RS6328. -
Page 7: Driver And Webgui Software Installation
Open the Windows Device Manager. The RS6328 will be recognized as a RAID controller under “Other devices”. d. Insert the HighPoint software CD into a CD/DVD drive. The program should start automatically. Click the Setup.exe icon. The HighPoint Software Install window should be displayed. - Page 8 After rebooting the system, the RocketStor 6328 will be recognized by Device Manager, and listed under “Storage Controllers”. 2) RAID Management software installation. In order to configure and manage the HighPoint RAID array, you will need to install the Web RAID Management software (also known as the WebGUI). WebGUI Installation: Windows Insert the HighPoint software CD into a CD/DVD drive.
-
Page 9: Configuring Storage Raid Arrays
N, where N refers to the disk module number. Click the device icon; it will display detailed information about the selected device. If any of the disks are not detected, check the corresponding disk module and make sure the drive is securely installed (see page 6 for more information). HighPoint Technologies Inc. - Page 10 The initialization process will zero out all disks so a correct parity can be generated during disk writes. Correct, consistent parity information is essential for the integrity of data when rebuilding RAID 5 arrays. d. Select the Available Disks: Click the Select all button. HighPoint Technologies Inc.
- Page 11 Click the Create button to create the array. The following diagram displays RAID5 foreground initialization in progress. HighPoint Technologies Inc.
-
Page 12: Using The Raid Disk With Windows
After the array has been created, it will be displayed under the Logical tab. 7.2 Using the RAID disk with Windows. Any previously used single disk, preconfigured OS RAID drives or HighPoint RAID array attached to the RS6328 will be recognized automatically. -
Page 13: Deleting Raid Storage
Switch to the Logical tab. Locate the RAID array that you wish to delete. d. Click the Maintenance link to the right of the RAID array. e. Click the Delete button from the Array Maintenance pop up window. HighPoint Technologies Inc. -
Page 14: Raid Disk Failure Recovery
“Status” of the array is Critical. The lower portion of the GUI indicates which drive in which disk unit has failed. Note: In this example drive 4 of the RAID 5 Array of has failed. HighPoint Technologies Inc. -
Page 15: Expanding Raid Storage Capacity
To use OCE/ORLM: Step 1: Install the new disks and/or storage enclosure and attach it to the RocketStor 6328 using the appropriate eSATA or Mini-SAS cable (see page 6 for more information). Step 2: Boot Windows and start the WebGUI. - Page 16 Step 4: Once the OCE/ORLM procedure is complete, Disk Management will recognize the new storage capacity. There are several ways to configure this storage: Create a new Volume (new partition or disk). b. Extend the existing partition using the Extend Volume option. HighPoint Technologies Inc.
-
Page 17: Technical Support
11. Technical Support If you encounter any problems while utilizing the HighPoint RocketStor Thunderbolt Series product, or have any questions about this or any other HighPoint Technologies, Inc. product, feel free to contact our Customer Support Department. Web Support: http://www.highpoint-tech.com/websupport/ Thunderbolt™... -
Page 18: Appendix A - Using The Webgui (Full Guide)
APPENDIX A - Using the WebGUI (full guide) HighPoint’s web-based RAID Management Software (also known as the WebGUI) is used to monitor and configure hard disks and RAID arrays attached to the HighPoint RocketStor adapter. 1. Running the HighPoint Web RAID Management software (WebGUI) -
Page 19: Web Raid Management Software - Global View
Drop-down menu that displays the controller that is currently being managed. Host Adapter Model: Name of the RAID controller Enclosure Count: Total number of HighPoint Rocket EJ (Port Multiplier) devices connected. It should be always “0” Physical Drive: Total physical drives detected by this RAID controller Legacy Disk:... -
Page 20: Web Raid Management Software - Physical
It lists other controller information such as processor type, temperatures, voltage, SDRAM, Battery, Firmware version, and SAS address. C. Update Firmware Controller BIOS/Firmware can be update from Physical page. Browse for BIOS image and click the Submit button. HighPoint Technologies Inc. -
Page 21: Physical - Devices
Native Command Queuing, I/O commands that are in a queue are re-ordered for better efficiency Identify LED: A blinking cursor to identify the location of a HDD 3.3 Physical - Rescan The item will rescan the controller to detect devices. HighPoint Technologies Inc. -
Page 22: Web Raid Management Software - Logical
It is the logical disk that is connected to the RAID controller and has already been reported to the operating system. Example: Check the Windows Disk Management utility. Physical Device Information: The physical disk attached to the RAID controller. HighPoint Technologies Inc. -
Page 23: Logical - Create Array
4.1 Logical - Create Array To create an array, users will need to provide information to the Web GUI utility which in turn, instructs the RocketStor 6328 how to configure the array. The following diagram illustrates the Create Array page: A. Array Type Choose the RAID type to create. - Page 24 4. Background: The RAID array is accessible while disk initialization is being performed. a. This option will delete all content on the disks. b. This method will slow the initialization process, but allows the array to be utilized immediately HighPoint Technologies Inc.
- Page 25 User can select how many disks to construct the array or click “select all” to use all HDDs for the array creation. H. Capacity This allows users to define how much disk capacity will be used. If “maximum” is chosen, the array will use all available disk space. HighPoint Technologies Inc.
- Page 26 Status of RAID array. Other option include (Normal, Critical, Disable, Rebuilding, Verifying) Array Maintenance: Maintenance provides a selection of general maintenance features and options for the selected array: 1. Diagram 1: Array is in “Normal” Status 2. Diagram 2: Array is in “Critical” status HighPoint Technologies Inc.
- Page 27 : This option is only available when RAID is in “Critical” status. Click the “add disk” button to add a new disk in. The following diagram shows how to add a free disk to join the critical array rebuilding. HighPoint Technologies Inc.
-
Page 28: Logical - Spare Pool
When creating redundant RAID arrays (1, 5, 6, 10 or 50) a Spare HDD can be configured to automatically help rebuild a degraded redundant RAID. Users can assign any free storage into spare pool. And any disk is in spare pool can be removed as well. The following diagrams show how to operate “spare pool”. HighPoint Technologies Inc. -
Page 29: Logical - Logical Device
4.4 Logical - Rescan When hot-plugging a single device or RAID array, the Rescan button prompts the RAID controller to scan for device changes. 4.5 Logical - Beeper Mute This will temporarily disable the internal speaker on the RAID controller. HighPoint Technologies Inc. -
Page 30: Web Raid Management Software - Setting
You are free to specify the interval – from 10 to 240 minutes. E. Restrict to localhost This option is used to restrict WebGUI access to the local system and not allow access: remote access. HighPoint Technologies Inc. - Page 31 The default password “hpt” can be changed. Note: If the current password is lost or forgotten, you can uninstall and reinstall the Web RAID Management software to restore the default settings. When changing the password, the maximum number of characters allowed is eight. HighPoint Technologies Inc.
-
Page 32: Setting - Email
5.2 Setting - Email The HighPoint RAID controller can be configured to send Event Log entries to one or more E-Mail addresses. The email setting has SMTP setting and recipient which users need to configure it. A. Enable Event Check this item to enable Event Notification Notification: B. -
Page 33: Web Raid Management Software - Event
Click “Clear” to remove all current entries from the Event View log. Next: The Event View log can span several pages. Click “Next” to view past entries. Download: The Event View log can be saved as a text file for reference. HighPoint Technologies Inc. -
Page 34: Web Raid Management Software - Shi (Storage Health Inspector)
SMART attributes for each HDD will be displayed. The following diagram display detail SMART information read out from HDD Schedule This allows user to schedule a task to run When “schedule” button is checked, it displays the following configuration page to schedule a task to run. HighPoint Technologies Inc. - Page 35 10 and 50 arrays. User can name each task and specify the frequency, date, hour, minute and second for each session. Regular maintenance is highly recommended for any redundant RAID array, and is essential for maintaining healthy, reliable storage configurations. HighPoint Technologies Inc.
-
Page 36: Web Raid Management Software - Recover
Recover can help repair RAID arrays that have been assigned the disabled status. This feature helps protect RAID configurations by storing multiple copies of RAID configuration data, which administrators can use to restore a disabled RAID array. Note: Please refer the How-To guide that explains this Recover feature: http://www.highpoint-tech.com/PDF/support/WebGUI_Recover_Feature.pdf HighPoint Technologies Inc. -
Page 37: Appendix B - Web Raid Management Icon Definition List
), it indicates that the disk is not initialized and will need to be initialized for the 1 time before it can be used with HighPoint RAID card. The device status "Legacy". An existing file system has been created on the HDD. - Page 38 The array is not available. Two scenarios can cause this to happen. First - a lost RAID disk member exceed the minimum required to maintain a RAID level. Second - a disk failed before the initialization or rebuilding process complete. The status is in “Disabled”. Array disk member diagram is like this: HighPoint Technologies Inc.
-
Page 39: Appendix C - Raid Technology Explanation
Data archives and RAID 6 with dual performance, and for applications that ideal for application rotating medium write require that requires data parity performance with frequent/heavy write protection data protection in sessions. case of up to two drives failure HighPoint Technologies Inc. -
Page 40: Appendix D - Thunderbolt Daisy Chain Configuration
Thunderbolt’s Daisy Chain feature can connect the host system with 6 Thunderbolt devices (or 5 devices and 1 display). Configuration 1: Connect the host with 6 Thunderbolt Devices. Configuration 2: Connect the host with 5 Thunderbolt devices and one display. Mar. 18, 2014 © Copyright 2014 HighPoint Technologies, Inc. All right reserved. HighPoint Technologies Inc.
Need help?
Do you have a question about the RocketStor 6328 and is the answer not in the manual?
Questions and answers