
Related Manuals for Direct Color Systems Direct Jet 1024UVHS


Summary of Contents for Direct Color Systems Direct Jet 1024UVHS
-
Page 1: Troubleshooting
Go to table of contents Maintenance Troubleshooting DCS_Direct_Jet_1024UVHS_Maintenance_Troubleshooting_Guide_1.2.docx... - Page 2 You will be prompted to put in a user name and password. (If you are not prompted then double click on a file) Passwords are as follows and are case sensitive: Login: dcs Password: dcsftp Corporate Direct Color Systems® 99 Hammer Mill Rd Rocky Hill, CT 06067 T: 860-829-2244 F: 860-829-2255 Email: info@directcolorsystems.com...
- Page 3 Equipment Certificate of Compliance Printing Edition 1.2 – February 2013 History Addition to FAQs Printed in the USA © Copyright 2013, Direct Color, LLC. All rights reserved. DCS_Direct_Jet_1024UVHS_Maintenance_Troubleshooting_Guide_1.2.docx...
-
Page 4: Table Of Contents
Go to table of contents Table of Contents SAFETY AND PRECAUTIONS………………………………………………………………………………………6 MAINTENANCE and CLEANING……………………………………………………………………………………8 Daily Maintenance and Cleaning…………………………………………………………………………9 Weekly Maintenance and Cleaning……………………………………………………………………9 Monthly or Periodic Maintenance………………………………………………………………………13 Correcting a Bad Nozzle Check Condition……………………………………………………………15 The Capping Station……………………………………………………………………………………16 Replacing a Direct Jet Print Head………………………………………………………………………27 TROUBLE SHOOTING………………………………………………………………………………………………28 PRINTING - INFO SHEET AND FAQs……………………………………………………………………………37 P a g e... -
Page 5: Troubleshooting Guide
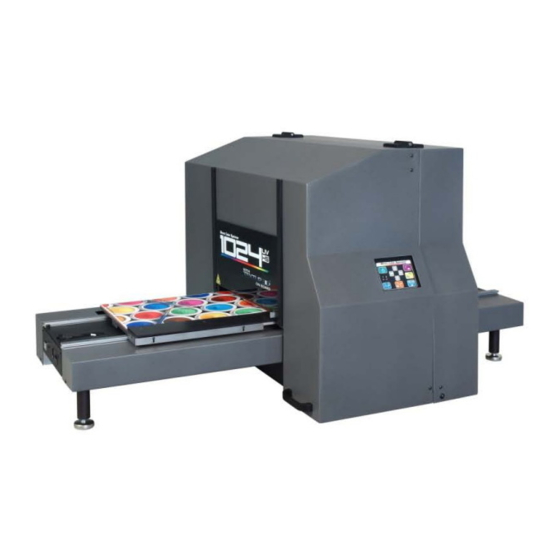
The Direct Jet 1024UVHS accepts material up to 6" (152 mm) thick. • The Direct Jet 1024UVHS model accepts substrates up to 13" (330 mm) x 24" (610 mm) in size and has a printable area of 10" (254mm) x 24" (610 mm). -
Page 6: Safety And Precautions
Go to table of contents SAFETY AND PRECAUTIONS Please read these guidelines before operating your Direct Jet printer. • Keep all inks, solvents and lubricants out of the reach of children. • Use only approved cleaning agents and solvents and then only for the purposes specified in this •... - Page 7 Go to table of contents Below you will find diagrams of the printer and its parts. Be sure to familiarize yourself with all the individual parts and descriptions of printer as they will be referred to later in this guide. P a g e DCS_Direct_Jet_1024UVHS_Maintenance_Troubleshooting_Guide_1.2.docx...
-
Page 8: Maintenance And Cleaning
Go to table of contents MAINTENANCE and CLEANING wait 5 seconds When powering the printer back on, remember to turn on the main power then before powering up the print engine. This is to allow time for the LED light to calibrate its distance from the print head. -
Page 9: Daily Maintenance And Cleaning
Empty the waste ink bottle. The ink in the bottle should be emptied at the end of each day (or more often if necessary). Direct Color Systems recommends filling an empty coffee can or similar with cat litter or an oil absorbing product (found in most automotive parts stores). - Page 10 Go to table of contents 10. Remove build up ink from the spit tray. Wearing gloves, wipe the inside of the spit tray with a paper towel. Dried ink that is elevated above the edges should be removed as well. It should break off in your gloved hand, but can also be scraped off with a tool if necessary.
- Page 11 Go to table of contents Do not over-lubricate. Apply a drop or two of oil to the areas indicated. The outside of the print head bushings on both sides. Apply the 3-in-1 oil and It is critical that the then, using a gloved area between the finger, apply lithium...
- Page 12 Go to table of contents 11. Clean the UV lamp. Use the up arrow to raise the print engine to its maximum height. Clean the UV lamp after you've cleaned and lubricated the rails. The print head carriage is already in place.
-
Page 13: Monthly Or Periodic Maintenance
Go to table of contents 13. Clean the print head encoder strip for the X-axis. Using an IPA wipe, clean the encoder strip. Both sides of the encoder strip used by the print head should be wiped gently with an IPA wipe (included in the cleaning kit) in order to remove any debris that may have fallen on to it during the lubrication process or from ink residue. - Page 14 Go to table of contents Discard the old filter. Clean the retainer and fan guard with a dry cloth if needed. Fan guard Retainer Place the new filter over the fan guard and secure with the retainer and 4 screws. 16.
-
Page 15: Correcting A Bad Nozzle Check Condition
Go to table of contents Correcting a Bad Nozzle Check Condition If you are unsatisfied with a nozzle check, first run a head clean. Perform a head clean from the device properties dialog box in the Queue or to perform the head clean from the printer, hold for 5 seconds. -
Page 16: The Capping Station
Go to table of contents The Capping Station Clean the wiper blade Press . Manually move the capping station away from the print head. Pull back on the tab as shown below and Do not remove then flip up the wiper. the capping station. - Page 17 Go to table of contents Replace the Capping Station Replace a Capping Station if: a. The gaskets no longer form a tight seal around the print heads, and the cleaning cycle does not perform properly. b. Some type of physical damage has occurred to the unit. c.
- Page 18 Go to table of contents Remove the locking bracket holding the unit to the side plate. Use pliers to remove the bracket from the side of the print engine. Disconnect orange ground wire. Disconnect the electrical cable that goes to the motor. Do not leave the gender changer connected to the capping station.
- Page 19 Go to table of contents X & Y "0" Calibration Adjustment This procedure is used for adjusting the X and Y "0" point of the printer to be equal to the Color Byte software "0" point. Tools Required 1/16" hex head wrench 3/32"...
- Page 20 Paper may not have been aligned properly, go back to step 2 and reprint the picture. If you are sure the paper was aligned properly and the black line does not appear parallel, the print engine is not aligned with the front edge of the slide table. Contact Direct Color Systems tech support.
- Page 21 Note If the new value that is calculated from these steps exceeds -60 or +60, then the left edge of the Print Head Engine Assembly must be readjusted. Contact Direct Color Systems Tech support. 21 | P a g e...
- Page 22 Go to table of contents Print Head and Lamp Height Check Read all of the instructions prior to execution wait 5 When powering the printer back on, remember to turn on the main power then seconds before powering up the print engine. This is to allow time for the LED light to calibrate its distance from the print head.
- Page 23 Go to table of contents If this is the first time the printer is going to print, make sure all of the ink cartridges are filled with ink. On the Device Properties dialogue box, click on Head Clean, and wait for the printer to finish (The green LED will go from blinking to solid).
- Page 24 Go to table of contents Check head height Remove the tool. Press the down arrow button and hold it until the elevator stops, then release it. This sets the print head height. Using and the arrow buttons once again, move the table until it is under the print head.
-
Page 25: Adjusting The Head Height
Go to table of contents Adjusting the head height If the LED sensors aren't level, use these instructions but only adjust one of the blocks Manually move the print head carriage toward the capping station. Move the media table to the far right. - Page 26 Go to table of contents UV Lamp Height Adjustment Always check the head height before the UV lamp height! If you have performed and are satisfied with the head height adjustment, place two shims on the media table in front of the UV lamp. use the arrow keys to move the media table Press and hold then...
-
Page 27: Replacing A Direct Jet Print Head
There is a clog in the head that prevents the correct nozzle check pattern to be printed, and after all attempts at clearing the head, the head will not properly print the correct nozzle check. Contact Direct Color Systems for the print head replacement instructions and special tools needed for replacing the print head. 27 | P a g e DCS_Direct_Jet_1024UVHS_Maintenance_Troubleshooting_Guide_1.2.docx... -
Page 28: Trouble Shooting
Go to table of contents TROUBLE SHOOTING If you have difficulty operating the printer, the troubleshooting procedures in this section should, in most cases, solve the problem. Turning the printer off and back on and rebooting the P.C. (cold booting the system) may also clear the error. If you still have difficulty after trying the following procedures, the Direct Jet printer often uses the lights on the Control Panel buttons to indicate various error conditions. - Page 29 5 seconds and then power on the print engine normally to clear this error. If after 3 times of powering on and off the fatal error continues, the fault may be one of the items below. Contact Direct Color Systems Technical Support to help diagnose the problem.
- Page 30 Go to table of contents Hardware Troubleshooting Guide Use the following table to indentify and fix Mechanical and Electrical faults Symptoms Check Replace The UV light is not lit. The light will automatically shut off when the temperature exceeds 104°F (40°C). It will turn back on automatically when the operating temperature has returned to an acceptable value.
- Page 31 Go to table of contents Symptoms Check Replace Check and verify print home (table control lock) has not been pressed (See Print Home Replace 42 VDC 2 Amp Description). Press Fuse. Check and reseat cable connected to CN3 on the Replace 5 VDC 1 Amp.
- Page 32 Go to table of contents Symptoms Check Replace If you have shut the printer down abnormally, you will need to press the green button again to clear the fatal error. The amber light should light on the green button. Make sure the table is all the way to the right and then press the green button.
- Page 33 Go to table of contents Capping Station Pump motor. Note: Loud grinding noise will occur in addition to flashing lights. Replace capping station. Check Pump motor connector. When pressing the green button with the amber Check gear train position in capping light lit, after a short time station.
- Page 34 Go to table of contents Symptoms Check Replace Check Print Head Height (See Head Height Adjustment) Check that all items on the table are of a similar height. Check for Static on Substrate (Use Novus Cleaner) Replace Small Waste Pad. Over Spray on the print Check Nozzle Check Pattern for Correct spray Replace Print Head.
-
Page 35: Capping Station
Go to table of contents During Normal Operation the capping station should last 3 months on average. Normal operation is running the printer 8 hours a day, 5 days a week. Why does the capping station fail? The reason the capping station fails is because the solvents in the ink and cleaning solutions dry out the rubber gasket that is used to seal against the print head. -
Page 36: The Printed Image Is Faint Or Has Gaps
Go to table of contents Print quality and Ink Supply Problems The printed image is faint or has gaps Possible Cause Solution 1. The gap between the head and 1. Press the down button until the Z axis sensor touches the substrate; release the substrate is too large button when you hear a clicking noise and the stepper motor stops. -
Page 37: Printing - Info Sheet And Faqs
What is the necessary table space for the printer? The Direct Jet 1024UV and Direct Jet 1024UVHS measure approximately 33" wide x 50" long (838mm x 1270mm). The table should be at least this large so that all of the leveling feet make full contact with the table. - Page 38 Do the inks have a "use by" date? Inks are viable for 12 months from DOM and 6 months after opening. How do I refill the inks? See section Filling Ink Cartridges, in the Getting Started Guide. How often do I refill the inks? Inks will need to be refilled depending on the amount of printing you do and the print modes that you use.
- Page 39 Can the UV inks cure without being exposed to the LED light? They can over a long period of time. This is why it is important to swap out your syringes every 28 days and cartridges every 84 days. Continued exposure to overhead and natural light during the filling process will eventually create contaminants in the form of dried ink.
- Page 40 Direct Jet UV Printer Maintenance Log DCS_Direct_Jet_UV_Printer_Maintenance_Log_REVB021413...
- Page 41 Introduction to the Log: This maintenance log has been provided to you by Direct Color Systems to ensure proper operational function of your UV printer. It will also provide DCS technical support with a history to refer to when assessing any issues.
- Page 42 Week 1 Start Date:_____________ Day 2 Day 3 Day 4 Day 5 Day 6 Day 7 Pre Production: Day 1 Shake White Ink Shake White Ink Shake White Ink Shake White Ink Shake White Ink Shake White Ink Shake White Ink Power up Print Engine Power up Print Engine Power up Print Engine...
- Page 43 Week 2 Start Date:_____________ Day 9 Day 10 Day 11 Day 12 Day 13 Day 14 Pre Production: Day 8 Shake White Ink Shake White Ink Shake White Ink Shake White Ink Shake White Ink Shake White Ink Shake White Ink Power up Print Engine Power up Print Engine Power up Print Engine...
- Page 44 Week 3 Start Date:_____________ Day 16 Day 17 Day 18 Day 19 Day 20 Day 21 Pre Production: Day 15 Shake White Ink Shake White Ink Shake White Ink Shake White Ink Shake White Ink Shake White Ink Shake White Ink Power up Print Engine Power up Print Engine Power up Print Engine...
- Page 45 Week 4 Start Date:_____________ Day 23 Day 24 Day 25 Day 26 Day 27 Day 28 Pre Production: Day 22 Shake White Ink Shake White Ink Shake White Ink Shake White Ink Shake White Ink Shake White Ink Shake White Ink Power up Print Engine Power up Print Engine Power up Print Engine...
- Page 46 Week 5 Start Date:_____________ Pre Production: Day 29 Day 30 Day 31 Day 32 Day 33 Day 34 Day 35 Shake White Ink Shake White Ink Shake White Ink Shake White Ink Shake White Ink Shake White Ink Shake White Ink Power up Print Engine Power up Print Engine Power up Print Engine...
- Page 47 Week 6 Start Date:_____________ Pre Production: Day 36 Day 37 Day 38 Day 39 Day 40 Day 41 Day 42 Shake White Ink Shake White Ink Shake White Ink Shake White Ink Shake White Ink Shake White Ink Shake White Ink Power up Print Engine Power up Print Engine Power up Print Engine...
- Page 48 Week 7 Start Date:_____________ Pre Production: Day 43 Day 44 Day 45 Day 46 Day 47 Day 48 Day 49 Shake White Ink Shake White Ink Shake White Ink Shake White Ink Shake White Ink Shake White Ink Shake White Ink Power up Print Engine Power up Print Engine Power up Print Engine...
- Page 49 Week 8 Start Date:_____________ Day 51 Day 52 Day 53 Day 54 Day 55 Day 56 Pre Production: Day 50 Shake White Ink Shake White Ink Shake White Ink Shake White Ink Shake White Ink Shake White Ink Shake White Ink Power up Print Engine Power up Print Engine Power up Print Engine...
- Page 50 Week 9 Start Date:_____________ Pre Production: Day 57 Day 58 Day 59 Day 60 Day 61 Day 62 Day 63 Shake White Ink Shake White Ink Shake White Ink Shake White Ink Shake White Ink Shake White Ink Shake White Ink Power up Print Engine Power up Print Engine Power up Print Engine...
- Page 51 Week 10 Start Date:_____________ Pre Production: Day 64 Day 65 Day 66 Day 67 Day 68 Day 69 Day 70 Shake White Ink Shake White Ink Shake White Ink Shake White Ink Shake White Ink Shake White Ink Shake White Ink Power up Print Engine Power up Print Engine Power up Print Engine...
- Page 52 Week 11 Start Date:_____________ Day 72 Day 73 Day 74 Day 75 Day 76 Day 77 Pre Production: Day 71 Shake White Ink Shake White Ink Shake White Ink Shake White Ink Shake White Ink Shake White Ink Shake White Ink Power up Print Engine Power up Print Engine Power up Print Engine...
- Page 53 Week 12 Start Date:_____________ Pre Production: Day 78 Day 79 Day 80 Day 81 Day 82 Day 83 Day 84 Shake White Ink Shake White Ink Shake White Ink Shake White Ink Shake White Ink Shake White Ink Shake White Ink Power up Print Engine Power up Print Engine Power up Print Engine...
Need help?
Do you have a question about the Direct Jet 1024UVHS and is the answer not in the manual?
Questions and answers