
Related Manuals for Direct Color Systems Directjet 1024UV


Summary of Contents for Direct Color Systems Directjet 1024UV
- Page 1 Go to table of contents Getting Started Guide DCS_Direct_Jet_1024UV_1014UV_Getting_Started_Guide_2.1.docx...
- Page 2 You will be prompted to put in a user name and password. (If you are not prompted then double click on a file) Passwords are as follows and are case sensitive: Login: dcs Password: dcsftp Corporate Direct Color Systems® 99 Hammer Mill Rd Rocky Hill, CT 06067 T: 860-829-2244 F: 860-829-2255 Email: info@directcolorsystems.com...
- Page 3 Equipment Certificate of Compliance This Equipment has been tested and found to be within compliance with CE Compliance: • Directive 2006/95/EC Printing Edition 2.1 – February 2013 History Driver installation instructions updated Printed in the USA © Copyright 2013, Direct Color, LLC. All rights reserved. DCS_Direct_Jet_1024UV_1014UV_Getting_Started_Guide_2.1.docx...
-
Page 4: Table Of Contents
Table of Contents SAFETY AND PRECAUTIONS……………………………………………….………………………………….…….…….…..…6 GETTING STARTED WITH THE HARDWARE…………………………………..……………….….….….……………7 Control Panel Button Descriptions………………………………………….…………………………..…..………..8 Choosing a Location……………………………………………………….………………………………...….…..…...9 Applying Power………………………………………………………………………………………….….….………...10 Turning the Printer On For the First Time…………………………………….…………….……...…………...10 Filling Ink Cartridges………………………………………………………………………………….………………….11 Resetting Cartridge Chips…………………………………………………….……………………….……………..13 Installing Cartridges……………………………………………………………………………………….…………..13 Checking Ink Levels…………………………………………………….……………………………………………..13 DRIVER INSTALLATION…………………………………………………………………………………………….……………..15 USING THE DIRECT JET PRINTER……………………………………………………………………………………….…….16 Connect the USB Cable and Verify Communication…………………………………………………………..16 Initial setup after install or moving the printer…………………………………………………………………..16... -
Page 5: Thank You
Windows 7 or 8, 32- and 64- bit versions using Direct Color Systems' exclusive Color Byte RIP (Raster Image Processing) software. ll substrates should be tested for image receptivity, adhesion and durability with final acceptance and suitability determined by the customer. -
Page 6: Safety And Precautions
Go to table of contents SAFETY AND PRECAUTIONS Please read these guidelines before operating your Direct Jet printer. • • Keep all inks, solvents and lubricants out of the reach of children. • Use only approved cleaning agents and solvents and then only for the purposes specified in this guide. -
Page 7: Getting Started With The Hardware
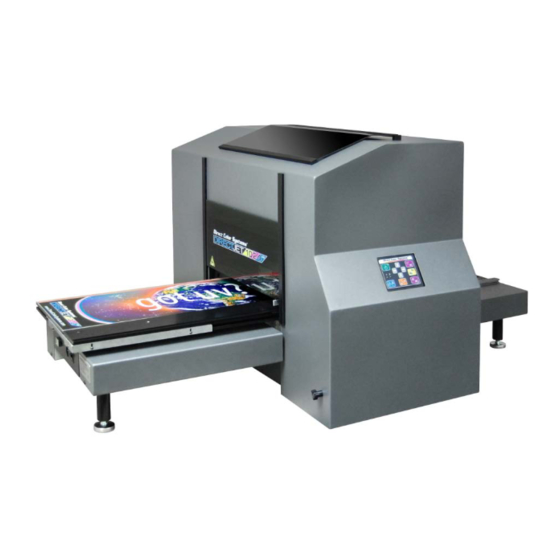
Go to table of contents GETTING STARTED WITH THE HARDWARE Below you will find diagrams of the printer and its parts. Be sure to familiarize yourself with all the individual parts and descriptions of printer as they will be referred to later in this guide. Control Panel for Direct Jet with Optional Direct Drive P a g e DCS_Direct_Jet_1024UV_1014UV_Getting_Started_Guide_2.1.docx... -
Page 8: Control Panel Button Descriptions
Go to table of contents Control Panel Button Descriptions Print Engine On/Off & Print Status/Data Status. When the amber light (Standby Power) is on, there is power to the printer but not the print engine. You will not be able to print in this state but you can move the print engine up and down and the media table back and forth. -
Page 9: Choosing A Location
Go to table of contents Found with optional direct drive module only. Slow/Unlock. Press and hold this key before using the left and right arrow keys in order to use the slow movement feature of the table. To unlock after the table has been sent to the Print Home position, press this key. Media Home. -
Page 10: Applying Power
DO NOT attempt to use the unit. Contact your dealer/representative or Direct Color Systems directly. At this time, do not plug in the USB cable. You will be directed to plug in the cable later in this manual. -
Page 11: Ink Cartridge
Im portant Note on refilling and resetting Although you may be alerted to only one cartridge needing to be refilled, Direct Color Systems recommends that you refill all cartridges at once, in order to minimize downtime on your printer. Follow the same steps regardless of how many cartridges you are refilling. - Page 12 Go to table of contents Remove the yellow breathing strip from the side/top of the cartridge. Make sure all the tape has been removed and the breather hole is exposed and clear of any residue. Never fill the ink cartridges while they are installed in the printer. Remove the filler plug from the top (towards the center) of the cartridge.
-
Page 13: Resetting Cartridge Chips
Go to table of contents Resetting Cartridge Chips Each ink cartridge has a chip on it that relays information to the Color Byte software regarding ink level. When you receive a new cartridge, its setting is full. As ink is used, the setting changes and so the chip must be reset when you refill the cartridge. - Page 14 Go to table of contents Select Printers and Manage Printers. Click on the DCS Direct Jet printer to select it. Click on the printer icon in the tool bar. This will bring up the Device properties screen that shows the ink status. 14 | P a g e DCS_Direct_Jet_1024UV_1014UV_Getting_Started_Guide_2.1.docx...
-
Page 15: Driver Installation
Go to table of contents DRIVER INSTALLATION Insert the orange USB security device (dongle). You should connect it directly to your computer and not to a hub. The dongle is required to run Color Byte. It must remain in the computer at all times. It also contains documentation, software and driver files necessary to use your printer. -
Page 16: Using The Direct Jet Printer
Go to table of contents USING THE DIRECT JET PRINTER Connect the USB Cable and Verify Communication. Your Direct Jet printer ships with a USB cable for connection between your printer and computer. Connect one end of the USB cable to the USB Port connector on the back of the printer. Connect the other end of the cable to any available USB port on the computer. -
Page 17: Loading Substrates Onto The Table
Go to table of contents Loading Substrates onto the Table When loading substrates onto the table, you can ensure consistent and predictable output by following these steps: Bring the media table all the way to the left, if it isn't already in that position. Press and hold until there is sufficient space between the table and the print head to accommodate the thickness of the substrate being loaded. -
Page 18: Printing Onto Reflective, Shiny And/Or Mirrored Surfaces
Go to table of contents After pressing , all buttons that control table movement are locked. & can still be used to adjust the print head height. To escape the locked state, press then move the table all the To unlock a standard drive printer, simultaneously press way to the right. - Page 19 Go to table of contents Angle your RSM substrate slightly so that it slopes downhill away from the capping station. Printing onto thin or low melt-point plastics (e.g. PVC) If you are using a thin material, the UV Lamp intensity may need to be adjusted so that the material does not warp and scrape against the print head.
-
Page 20: Nozzle Check
Go to table of contents Nozzle Check The last step of the printer setup is to perform a nozzle check. Printing a nozzle check file is very important to verifying the health of the print head's nozzles. This file will be the indicator of whether or not the printed output will be acceptable. -
Page 21: Cleaning The Print Head
Go to table of contents If the output indicates that another head cleaning is required, perform the head cleaning procedure from the Device Properties screen where you selected the nozzle check option. If the nozzle continues to be bad, use the Device Properties screen and scroll down, select Initial Charge.
Need help?
Do you have a question about the Directjet 1024UV and is the answer not in the manual?
Questions and answers