Table of Contents
Advertisement
Quick Links
Advertisement
Table of Contents

Related Manuals for Toshiba SD-M1401


Summary of Contents for Toshiba SD-M1401
- Page 1 TOSHIBA DVD-ROM DRIVE SD-M1401 HARDWARE INSTRUCTION MANUAL VERSION 6.0 JULY 2002...
- Page 2 TOSHIBA AMERICA INFORMATION SYSTEMS, INC. STORAGE DEVICE DIVISION 9740 Irvine Blvd. Irvine, CA 92618 Contents of this manual are subject to change without prior notice. © 2002 TOSHIBA AMERICA INFORMATION SYSTEMS, INC. All rights reserved Printed in USA TOSHIBA SD-M1401 DVD-ROM Drive P/N 470085-F0...
- Page 3 Therefore, please handle this equipment properly in compliance with the warnings provided below. In the event that you do not comply with the warnings, Toshiba cannot guarantee the safety, reliability and performance of the equipment expressly provided in the specification.
- Page 4 Revised Contents April 2000 Initial release June 2000 Misc spec changes November 2000 Jumper changes December 2000 Added Warning/Notice. Corrected pg 1 & 12 December 2001 Change TAEC to TAIS. E-mail changes. July 2002 Phone Number Change TOSHIBA SD-M1401 DVD-ROM Drive...
-
Page 5: Table Of Contents
Operating the DVD Loading Tray ........14 Emergency Eject ..............15 Specifications ................16 Performance ................. 16 Environmental Conditions ............ 18 Reliability ................18 Physical Characteristics ............19 Technical Support ..............20 Repair Center ................. 21 Warranty ................22 TOSHIBA SD-M1401 DVD-ROM Drive... -
Page 6: Introduction
SD-M1401 DVD-ROM drive. This manual will provide you with the information you will need to install and operate your new DVD-ROM. The SD-M1401 combines high storage capacity with unprecedented performance in sound and clarity. Features include: ➬ 4.38GB Capacity single layer/single side 15.9GB Capacity dual layer/double side... -
Page 7: Disc Formats
DISC FORMATS he SD-M1401 is capable of reading data from a variety of disc formats, some of which are: CD-ROM, CD-audio, CD-RW†, CD-R†, Photo-CD, DVD-ROM*, and DVD-R*†. * You must have a DVD/MPEG-2 Playback Card installed in your sys- tem or use a “DVD software solution” to utilize DVD options. -
Page 8: Installing Dvd-Rom
Connect computer power cable to internal DVD-ROM drive. ☛ Connect a sound cable to your DVD-ROM (optional). Additional audio connections may be available when using a DVD/MPEG card (see MPEG card installation instructions). ☛ Load SCSI Host Adapter driver software. TOSHIBA SD-M1401 DVD-ROM Drive... -
Page 9: Dvd-Rom Jumper Settings
DVD-ROM’s jumper settings. Locate the block of jumper pins on the back left side of the DVD- ROM. (Note: additional jumpers are provided with your drive.) Jumper Location SCSI-ID 0 no jumper TOSHIBA SD-M1401 DVD-ROM Drive... - Page 10 OFF mode. In the OFF mode, the parity bit check function on the SCSI data bus is activated which enhances data bus reliability. Note: If your interface card does not provide “parity generation” function, this jumper will have no effect. TOSHIBA SD-M1401 DVD-ROM Drive...
- Page 11 This jumper turns termination power ON or OFF. The default setting is termination disabled (no jumper). If you are connecting more than one SCSI device to your system, and the SD-M1401 DVD-ROM is not at the end of the chain, then terminator jumper is not required.
-
Page 12: Placing Dvd-Rom Inside Your Computer
(make sure to allow yourself enough workspace for the DVD- ROM installation). The SD-M1401 DVD-ROM drive can be placed in any free half-height drive slot at the front of your computer. (It can be mounted horizon- tally or vertically.) You most likely will have to remove the cover plate which conceals the front of the open slot (see your computer book on how to remove panel). -
Page 13: Cabling
If there is no power cable in your system, contact your computer dealer. You may need a “power splitter lead” (a Y shaped cable which taps two power outputs from one input). TOSHIBA SD-M1401 DVD-ROM Drive... - Page 14 (optional) like to play audio CDs on your computer, you will need to install a CD/DVD-ROM audio cable. Toshiba's DVD-ROMs use a standard 4-pin CD/DVD-ROM audio cable that can be purchased from most local computer suppliers. The sound cable connects to your sound...
- Page 15 Host Computer Interface I/F Card Connector SCSI Cable DVD-ROM DRIVE (see note 1) Terminator SD-M1401 CONNECTION (ONE DRIVE) SD-M1401 INTERNAL DRIVE(S) Host Computer SCSI Cable Interface Connector I/F Card DVD-ROM DRIVE (see note 2)
-
Page 16: Completing Installation
After you have connected all the necessary cables, you can push the DVD-ROM completely into the slot. There are eight screw holes on the SD-M1401 that are used to mount the DVD-ROM into your com- puter, four on the bottom and two on each side. Use either the four bottom screw holes or the four side screw holes, depending on your computer’s installation requirements. -
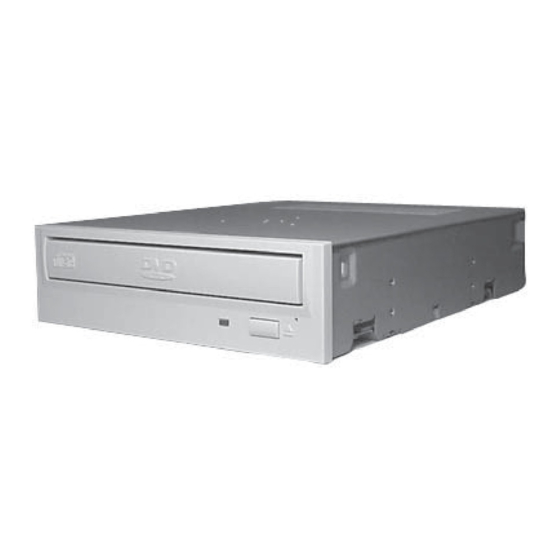
Page 17: Using Your Dvd-Rom
Using your DVD-ROM THE CONTROLS The SD-M1401 DVD-ROM drive has the following controls and fea- tures: ➬ DVD Loading Tray ➬ Busy Light ➬ Eject Button ➬ Emergency Eject Hole THE FRONT PANEL SD-M1401 Front Panel (1) Loading Tray - Load disc using tray. -
Page 18: Back Panel
See page 15 for additional information. THE BACK PANEL SD-M1401 Back Panel (1) Audio Out Connector - Outputs CD audio on the SD-M1401. (2) Mode Select Headers (jumpers) - Selects SCSI ID, Parity, Termi- nation, 512/2K Block Size, Test, and Power Supply. -
Page 19: Operating The Dvd Loading Tray
To open the DVD loading tray, just press the Eject button. After in- serting or removing a disc, press the Eject button again. Vertical Installations If you are loading a disc in a SD-M1401 drive that has been mounted vertically, perform the following procedures: 1. The four disc holders are located at the top and bottom of the vertical tray. -
Page 20: Emergency Eject
After the media is removed and the loading tray is closed, the tray will not reopen without first turning the power ON/OFF. * Use a bar that is less than 1.5mm in diameter. Do not insert more than 50mm in depth as this may damage the drive. TOSHIBA SD-M1401 DVD-ROM Drive... -
Page 21: Specifications
Specifications he following describes the specifications of the SD-M1401 DVD-ROM. (Specifications are subject to change without notice.) PERFORMANCE ■ Disk Formats DVD-ROM, DVD-R CD-DA, CD+(E)G, CD-MIDI, CD-TEXT, CD-ROM, CD- ROM XA, CD-I, CD-I Bridge (Photo-CD, Video-CD), Multisession CD (Photo-CD, CD-EXTRA, CD-R, CD-... - Page 22 Measured by performing maximum accesses which refer to reads of each data block of 00 min. 02 sec. 00 frame and 60 min. 01 sec. 74 frames alternately more than 100 times. Includes positioning, setting, latency time, and ECC implementation time (if required). TOSHIBA SD-M1401 DVD-ROM Drive...
-
Page 23: Environmental Conditions
100,000 hours ■ MTTR 0.5 hours ■ Drive Life 15,000/hours or 5 years ■ Load/Eject 10,000 times or more ■ Interface Connector Attach/Detach 20 times or more ■ DC Power Connector Attach/Detach 20 times or more TOSHIBA SD-M1401 DVD-ROM Drive... -
Page 24: Physical Characteristics
■ Operating position ±20° Horizontal and ±10° Vertical 5.88" (149.5mm) 5.2" (132.2mm) 1.18" (30mm) 1.69 " (43mm) 5.5 " (139.7mm) 5.75" (146±0.3mm) 1.6" (41.5mm) 5.75" (146±0.3mm) MODE SELECT POWER HEADERS CONNECTOR ANALOG SCSI AUDIO CONNECTOR External Dimensions TOSHIBA SD-M1401 DVD-ROM Drive... -
Page 25: Technical Support
Remember, many problems are caused by the interaction of two or more products in your system. The problem could be related to your latest addition. You can obtain technical information and software driver information from our web site at http://www.sdd.toshiba.com or email technical support at: toshibadpd@teleplan-ventura.com. TOSHIBA SD-M1401 DVD-ROM Drive... -
Page 26: Repair Center
DVD-ROM require maintenance, contact Toshiba SDD's Repair Center. In order to return your DVD-ROM, a Return Authorization Number (RA#) must be obtained from Toshiba's SDD Repair Center (do not send drives without an autho- rized RA number). Toshiba Repair Center... -
Page 27: Warranty
Product to the attention of TAIS within the twelve (12) month period and no later than thirty (30) days after such malfunction, whichever occurs first. Failure to bring the malfunction to the attention of TAIS, within the prescribed time, will result in the Purchaser being not entitled to warranty service. TOSHIBA SD-M1401 DVD-ROM Drive... - Page 28 It may not be released, discharged, changed or modified, except by an instrument in writing signed by duly authorized representative of Toshiba America Information Systems, Inc. No person other than an officer of TAIS may extend or modify this warranty. No such modification or extensions are effective, unless it is in writing and signed by the Vice President, General Manager, Storage Device Division.
- Page 29 4700850F0 P/N 470085-F0...
Need help?
Do you have a question about the SD-M1401 and is the answer not in the manual?
Questions and answers