
Subscribe to Our Youtube Channel
Related Manuals for Toshiba SD-M1712


Summary of Contents for Toshiba SD-M1712
- Page 1 TOSHIBA AMERICA INFORMATION SYSTEMS STORAGE DEVICE DIVISION IRVINE, CALIFORNIA SD-M1712 DVD-ROM DRIVE USER MANUAL...
-
Page 2: Table Of Contents
CONTENTS Introduction................1 Setup ..................3 Using the DVD-ROM Drive ............6 Troubleshooting...............8 Specifications ................9 Drive Connectors..............13... -
Page 3: Introduction
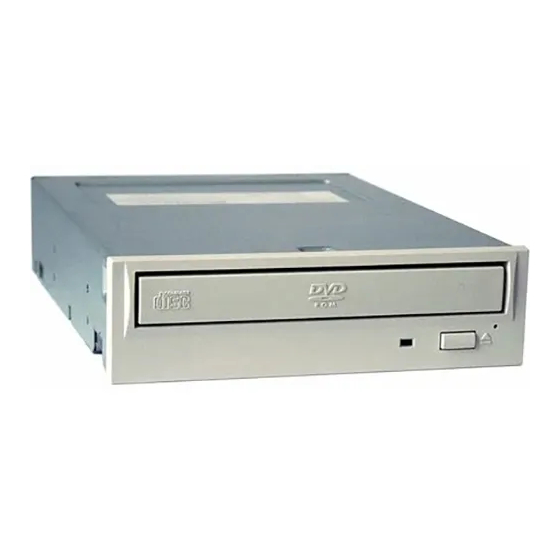
INTRODUCTION – SD-M1712 DVD-ROM Drive General Features Tray Loading Mechanism 3-way Disc Eject (eject button, software, emergency eject hole) Average Random Access Time CD-ROM 85ms 95ms DVD-RAM 170ms DAE (Digital Audio Extraction) Audio Capability MPC3 Compatibility Multi-Read Capability Regionalization (RPC2 compliance) (DVD) ATAPI BUS Interface Drive Speed 16X Single Layer... - Page 4 • CD-DA • CD+(E)G • CD-MIDI • CD-TEXT • CD-ROM • CD-ROM-XA • CD-I Bridge (Photo-CD, Video CD) • CD-I • Multi-session (Photo-CD, CD Extra, CD-RW, CD-R) • CD-R (Read) • CD-RW (Read) Front Panel Figure 1.SD-M1712 DVD-ROM Drive Front Panel Load disc using tray.
-
Page 5: Setup
SETUP – SD-M1712 DVD-ROM The following steps must be performed to properly install your drive: • Set Drive Jumper Settings • Connect Audio Cable (optional) • Attach IDE BUS Cable • Attach Power Cable • Mount Drive Jumper Settings The mode select jumpers are 6 straight angle pins located on the rear of the DVD-ROM drive. By placing a jumper on the pins, you can select the following functions: Drive is configured using host interface signal CSEL Configures drive as Slave... - Page 6 If the DVD-ROM drive is replacing a CD-ROM or DVD-ROM, remove drive presently installed in your system. Your Toshiba DVD-ROM drive can be placed in any free half-height drive slot at the front of your computer. (It can be mounted horizontally or vertically.) Carefully start sliding the DVD-ROM drive into the opening with the disc tray facing the front of the computer.
- Page 7 Figure 6.Mounting Illustration Software Driver - Toshiba's optical drives do not require any unique device drivers for Windows '95/'98/2000/Me/XP/NT. After installing your drive and re-booting, your system should recognize your drive. Windows '95/'98/2000/Me/XP/NT Operating Systems support all Toshiba optical drives natively If...
-
Page 8: Using The Dvd-Rom Drive
USING THE DVD DVD-ROM Drive – SD-M1712 Drive Operation Inserting a Disc - Horizontally To insert a disc into a drive that is mounted horizontally, perform the following steps: Figure 1.Inserting Disc 1. Open the drive's Loading tray by pressing the Eject Button. 2. - Page 9 Usage Guidelines • Keep the disc tray closed when not using the DVD-ROM Drive. • Do not press down on the disc tray when opening or closing it. • Do not place objects on the disc tray. • Never use a damaged, broken, or deformed disc. •...
-
Page 10: Troubleshooting
TROUBLESHOOTING – SD-M1712 Solution Problem • Disc tray cannot be opened Check that there is power to drive. • Use Emergency Eject instructions to open tray. • Drive is not recognized by system Is the drive connected properly? Are all cables plugged in properly (e.g. Power Cable, Interface Cable and Audio Cables). -
Page 11: Specifications
SPECIFICATIONS –SD-M1712 General Interface ATAPI Compatible DVD-ROM Standards DVD-ROM (DVD-5, DVD-9, DVD-10, DVD-18) DVD-R, DVD-RW, DVD-RAM CD-DA CD-ROM CD-I Bridge (Photo-CD, Video CD) Multi-session (Photo-CD, CD Extra, CD-RW, CD-R) CD-MINI CD-TEXT CD+(E)G CD-ROM-XA CD-I CD-R (Read) CD-RW (Read) Storage Capacities 4.377GB (DVD-5) 7.959GB (DVD-9) 8.754GB (DVD-10) - Page 12 Performance Rotational Speed DVD-ROM (6.0X - 16X) single layer 9,200rpm (4.1X - 10X) dual layer 6,300rpm DVD-R (Ver 2.0), DVD-RW (2 - 4.8X) 2,780rpm DVD-R (Ver 1.0) (2 - 4.8X) 3,200rpm DVD-RAM (Ver 1.0) (2X) 2,160 - 4,800rpm DVD-RAM (Ver 2.1) (1X) 1,380 - 3,300rpm DVD-Video CSS-disc (2 - 4.8X) 2,780rpm...
- Page 13 Spin-up Time 1.5s Typ DVD-RAM (Ver 2.1) 1.5s Typ DVD-RAM (Ver 1.0) 1.9s Typ 1.4s Typ Data Buffer 192Kbytes Reliability MTBF 100,000 hours Power ON Hours 5,436 hours/year ON/OFF Cycles 313 cycles/yea Number of Access 600,000 accesses/year Operating Duty Cycle 20% of Power ON time (Reading/Seeking) MTTR 0.5 hours...
- Page 14 Power DC Voltage and Current Requirements 5V 5%, 12V 5% +12V Sleep 200mA Standby 240mA Idle 410mA (DVD) 50mA (DVD) 430mA (CD) 50mA (CD) Random Access (average) 660mA (DVD) 730mA (DVD) 600mA (CD) 830mA (CD) Physical Height 5.75" (146mm) Width 1.6"...
-
Page 15: Drive Connectors
DRIVE CONNECTORS –SD-M1712 Figure 1.SD-M1712 DVD-ROM Drive Rear Panel - Connectors Power is supplied to your DVD-ROM drive by the connection with your computer's Power +5V/+12V power cable to the power socket at the back of drive. One side of the plug has Connector chamfered edges, so the power connector fits only one way CAUTION: Severe damage to the Drive circuits may occur if power cable is plugged in... - Page 16 Table 1.Interface Pin Assignments INTERFACE PIN ASSIGNMENT SIGNAL HOST SIGNAL NAME SIGNAL HOST SIGNAL NAME NAME NAME Reset Host Reset HDRQ DMA Request Host Data Bus BIT 7 HWR-,STOP Host I/O Write Host Data Bus BIT 8 Host Data Bus BIT 6 HRD-, Host I/O Read HDMARDY, -...
Need help?
Do you have a question about the SD-M1712 and is the answer not in the manual?
Questions and answers