Table of Contents
Advertisement
Advertisement
Table of Contents
Troubleshooting

Related Manuals for Matrix U5X-04 BIKE


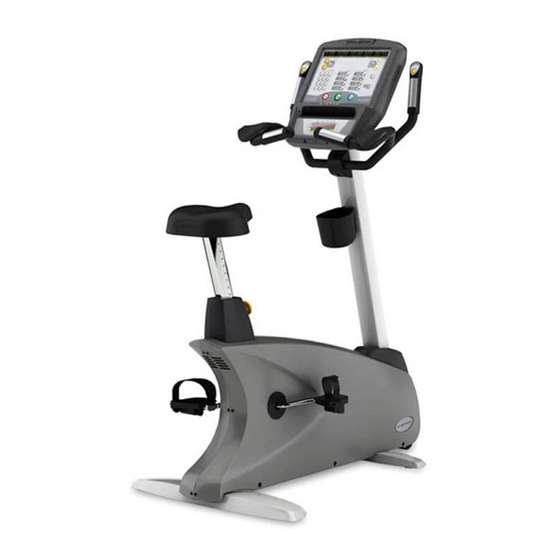
Summary of Contents for Matrix U5X-04 BIKE
- Page 1 U 5 x - 0 4 B i k e S e R V i C e M A N U A l...
-
Page 2: Table Of Contents
TABle of CoNTeNTS CHAPTeR 1: SeRiAl NUMBeR loCATioN ..............CHAPTeR 2: iMPoRTANT SAfeTy iNSTRUCTioNS Read and Save These Instructions ................3 Electrical Requirements .................... 4 CHAPTeR 3: PReVeNTATiVe MAiNTeNANCe Recommended Cleaning Tips ................... 5 Check for Damaged Parts ..................5 Care and Maintenance Instructions ................ - Page 3 9.20 Front Stabilizer Replacement ..................52 9.21 Testing the Bike ....................... 53 CHAPTeR 10: Bike SPeCifiCATioNS AND ASSeMBly gUiDe 10.1 U5x-04 Bike Specifications ..................54 10.2 Fasteners and Assembly Tools .................. 55 10.3 Assembly Instructions ....................56 10.4 Adjusting the Pedal Straps and Seat ................. 60 10.5...
-
Page 4: Chapter 1: Serial Number Location
CHAPTeR 1: SeRiAl NUMBeR loCATioN 1.1 SeRiAl NUMBeR loCATioN A serial number plate is located below the bottom of the console mast beneath a rubber boot. There is also a serial number tag on the middle of the main frame pointed towards the floor. - Page 5 CHAPTeR 1: SeRiAl NUMBeR loCATioN 1.1 SeRiAl NUMBeR loCATioN SN # PlACeMeNT...
-
Page 6: Chapter 2: Important Safety Instructions
To ensure proper use of the Matrix U5x-04 Bike, make sure that all users read this manual. Remind the users that before undertaking CAUTioN! Any changes or modifications to this equipment any fitness program, they should obtain complete physical could void the product warranty. -
Page 7: Electrical Requirements
2.2 eleCTRiCAl ReqUiReMeNTS The Matrix 5x Series Upright Bike is designed to be self powered. NOTE: If an add on TV (using a bracket) is added to the unit, it must be plugged in, or the TV will not operate correctly. If the Bike will be plugged in, follow the requirements below. -
Page 8: Chapter 3: Preventative Maintenance
3.2 CHeCk foR DAMAgeD PARTS Do NoT use any equipment that is damaged or has worn or broken parts. Use only replacement parts supplied by Matrix Fitness Systems. MAiNTAiN lABelS AND NAMePlATeS. Do not remove labels for any reason. They contain important information. If unreadable or missing, contact Matrix Fitness Systems for a replacement. -
Page 9: Care And Maintenance Instructions
3.3 CARe AND MAiNTeNANCe iNSTRUCTioNS In order to maximize life span, and minimize down time, all MATRIX equipment requires regular cleaning, and maintenance items performed on a scheduled basis. This section contains detailed instructions on how to perform these items and the frequency of which they should be done. -
Page 10: Chapter 4: Console Overlay And Workout Description
CHAPTeR 4: CoNSole oVeRlAy AND WoRkoUT DeSCRiPTioN 4.1 CoNSole DeSCRiPTioN WORKOUT KEYS: Simple program view and selection buttons. GO: One touch Start. UP / DOWN LEVEL: Easy information and level selection. UP / DOWN TIME: Easy information and time adjustment. STOP: Ends workout and shows workout summary data. -
Page 11: Workout Setup Steps - Manual
CHAPTeR 4: CoNSole oVeRlAy AND WoRkoUT DeSCRiPTioN 4.2 WoRkoUT SeTUP STePS - MANUAl 4.4 WoRkoUT SeTUP STePS - leVel BASeD ROLLING HILLS - Press to immediately begin a workout. Workout, resistance - The Rolling Hills program is a level based program that automatically adjusts the resistance level to simulate level, and time will automatically go to default settings. -
Page 12: Workout Setup Steps - Fitness Test
CHAPTeR 4: CoNSole oVeRlAy AND WoRkoUT DeSCRiPTioN 4.5 WoRkoUT SeTUP STePS - fiTNeSS TeST FITNESS TEST -The Cooper Fitness Test measures cardiovascular fitness and proves an estimated sub-maximal VO2 result. It is based on power output according to ACSM standards and was developed by the Cooper Institute© (www.cooperinstitute.org). User RPMs must remain between 60-80 RPM during the test. -
Page 13: Workout Setup Steps - Target Heart Rate
4.7 WoRkoUT SeTUP STePS - CoNSTANT WATTS TARGET HEART RATE CONSTANT WATTS - The Matrix U5x-04 Bike comes with - Constant Watts is a unique program standard digital contact heart rate sensors and are POLAR telemetry that allows you to vary your cadence or RPM and the bike's compatible. -
Page 14: Chapter 5: Manager Mode
CHAPTeR 5: MANAgeR MoDe 5.1 USiNg MANAgeR MoDe The Manager's Custom Mode allows the club owner to customize the bike for the club. 1) To enter Manager Mode, press and hold down the UP and DOWN LEVEL keys. Continue to hold down these two keys until the display reads Manager Mode and hit ENTER (Figure A). -
Page 15: Chapter 6: Engineering Mode
CHAPTeR 6: eNgiNeeRiNg MoDe 6.1 USiNg eNgiNeeRiNg MoDe To enter Engineering Mode, hold the LEVEL UP and DOWN keys for 3-5 seconds until Manager Mode appears on the middle LED display. Press the LEVEL UP or DOWN key to scroll to Engineering Mode. Press ENTER to go into Engineering Mode. CoDe DefAUlT oPTioNS... -
Page 16: Chapter 7: Service Mode
CHAPTeR 7: SeRViCe MoDe 7.1 USiNg SeRViCe MoDe To enter Service Mode, hold the LEVEL UP and DOWN keys for 3-5 seconds until Manager Mode appears on the middle LED display. Press the LEVEL UP or DOWN key to scroll to Service Mode. Press ENTER to go into Service Mode. CoDe DefAUlT oPTioNS... -
Page 17: Chapter 8: Troubleshooting
CHAPTeR 8: TRoUBleSHooTiNg 8.1 eleCTRiCAl DiAgRAM HUReS5x-C eleCTRiCAl BloCk DiAgRAM... - Page 18 CHAPTeR 8: TRoUBleSHooTiNg 8.1 eleCTRiCAl DiAgRAM - CoNTiNUeD U5x-f eleCTRiCAl BloCk DiAgRAM...
- Page 19 CHAPTeR 8: TRoUBleSHooTiNg 8.1 eleCTRiCAl DiAgRAMS - CoNTiNUeD PUlSe SeNSoR WiRe PoWeR ReSiSTANCe WiRe...
- Page 20 CHAPTeR 8: TRoUBleSHooTiNg 8.1 eleCTRiCAl DiAgRAMS - CoNTiNUeD DigiTAl CoMMUNiCATioN WiRe CHAPTeR 8: TRoUBleSHooTiNg eCB WiRe...
-
Page 21: Error Codes On The Console
CHAPTeR 8: TRoUBleSHooTiNg 8.2 eRRoR CoDeS oN THe CoNSole CoDe ClASS DeSCRiPTioN SolUTioN 0x02AB Machine type error. Set the correct machine type in Engineering Mode. 0x02B3 Resistance type error. Set the correct machine type in Engineering Mode. 0x0201 Low voltage on the battery Charge by running or by plugging (voltage under 11.2V). -
Page 22: Lcb Led Indicators
CHAPTeR 8: TRoUBleSHooTiNg 8.3 lCB leD iNDiCAToRS ====================== fiRMWARe DefiNiTioN ======================== leD6: lCB STATUS (BliNkiNg: ok) leD7: ReSiSTANCe RegUlATe STATUS (BRigHT : NoRMAl ) leD8: UCB/lCB CoMMUNiCATioN STATUS (BliNkiNg : ok ) ====================== HARDWARe DefiNiTioN ======================= leD1: AC PlUg-iN STATUS (BRigHT : AC ) leD2: DC 5V STATUS (BRigHT : ok) leD3: AC PlUg-iN STATUS (BRigHT : AC ) leD4: DC 12V STATUS (BRigHT : ok ) -
Page 23: Lcb Wiring Connections
CHAPTeR 8: TRoUBleSHooTiNg 8.4 lCB WiRiNg CoNNeCTioNS... -
Page 24: Troubleshooting - Error 04A0
CHAPTeR 8: TRoUBleSHooTiNg 8.5 TRoUBleSHooTiNg - eRRoR 04A0 eRRoR CoDe 04A0 1) SyMPToM: 04A0 – PCB communication disconnected. 2) SolUTioN: 1) The console cable is damaged or not properly plugged in. Check the connection of the console cable at the UCB and LCB. Also check the console cable for damage. -
Page 25: Troubleshooting - Error 04B0
CHAPTeR 8: TRoUBleSHooTiNg 8.6 TRoUBleSHooTiNg - eRRoR 04B0 eRRoR CoDe 04B0 1) SyMPToM: 04B0 – LCB communication disconnected. 2) SolUTioN: 1) The console cable is damaged or not properly plugged in. Check the connection of the console cable at the UCB and LCB. Also check the console cable for damage. -
Page 26: Troubleshooting - Error 0248
CHAPTeR 8: TRoUBleSHooTiNg 8.7 TRoUBleSHooTiNg - eRRoR 0248 eRRoR CoDe 0248 1) SyMPToM: 0248 –Battery disconnection or fail. (When power is on, LCB battery voltage is less than 6 VAC). 2) SolUTioN: 1) Check the battery wire connection between the battery and LCB (Figure A). 2) Check the battery voltage (Figure B), if it is less than 6 VAC, replace the battery. -
Page 27: Troubleshooting - Error 02B4
CHAPTeR 8: TRoUBleSHooTiNg 8.8 TRoUBleSHooTiNg - eRRoR 02B4 eRRoR CoDe 02B4 1) SyMPToM: 02B4 – Resistance type error. 2) SolUTioN: 1) Check if the machine has the correct resistance system (resistor or ECB) (Figures A & B). 2) Check if the console is matched with the correct frame, and that the Machine Type is set correctly in Engineering Mode. 3) Replace the LCB. -
Page 28: Troubleshooting - Error 02Ab
CHAPTeR 8: TRoUBleSHooTiNg 8.9 TRoUBleSHooTiNg - eRRoR 02AB eRRoR CoDe 02AB 1) SyMPToM: 02AB –Machine type error. 2) SolUTioN: 1) Enter into Engineering Mode and verify that the Machine Type setting is correct (should be U5x - Figure A). figURe A... -
Page 29: Troubleshooting - Error 01Ac
CHAPTeR 8: TRoUBleSHooTiNg 8.10 TRoUBleSHooTiNg - eRRoR 01AC eRRoR CoDe 01AC 1) SyMPToM: 01AC - Resistance over current 2) SolUTioN: 1) Check if the resistance is short circuited by measuring amperage through the generator cable (Figure A). - If the resistance value is under 10 ohms, replace the generator. - If the resistance value is over 10 ohms, replace the LCB. -
Page 30: Troubleshooting - No Resistance
CHAPTeR 8: TRoUBleSHooTiNg 8.11 TRoUBleSHooTiNg - No ReSiSTANCe iSSUe No ReSiSTANCe TRoUBleSHooTiNg 1) SyMPToM: No resistance 2) SolUTioN: 1) Check the power resistor wire connection between the power resistor and the LCB (Figure A). 2) Check if there is a resistance value by measuring amperage through the generator cable (Figure A). - If there is not a resistance value, replace the resistor. -
Page 31: Troubleshooting - Heart Rate Issues
An ohm reading of less than 1 should be received. If it is higher, replace the HR grip wiring. 3) Perform a continuity check on the console (See Service Bulletin - Continuity Test on Matrix Bikes). a. Once the console continuity is confirmed, perform a continuity check on the HR board ground wire. With a multi meter set for ohms, place one prong on the HR board ground wire (Figure D), and the other on the console ground wire. -
Page 32: Troubleshooting - No Power To The Console
CHAPTeR 8: TRoUBleSHooTiNg 8.13 TRoUBleSHooTiNg - No PoWeR To THe CoNSole PoWeR SWiTCH iS oN, BUT THe CoNSole HAS No DiSPlAy PoSSiBle CAUSeS: 1) The unit is not getting power from the outlet. 2) The LCB is not getting power from the power receptacle. 3 &... -
Page 33: Troubleshooting - Keypad Issues
CHAPTeR 8: TRoUBleSHooTiNg 8.14 TRoUBleSHooTiNg - keyPAD iSSUeS All oR SoMe of THe fUNCTioN keyS Do NoT ReSPoND PoSSiBle CAUSeS: 1) The keypad connection ribbon cable has not been plugged in correctly. 2) The keypad is damaged. 3) The UCB is damaged. SolUTioN: 1) Perform a keypad test in Service Mode: a. -
Page 34: Chapter 9: Part Replacement Guide
CHAPTeR 9: PART RePlACeMeNT gUiDe 9.1 CoNSole RePlACeMeNT 1) Remove the 5 screws holding the console to the frame (Figure A). figURe A 2) Disconnect the console cable and HR connections from the defective console and remove the console (Figure B). figURe B 3) Reinstall the wire connections to the new console. -
Page 35: Heart Rate Handlebar Replacement
CHAPTeR 9: PART RePlACeMeNT gUiDe 9.2 HeART RATe HANDleBAR RePlACeMeNT 1) Remove the 2 screws holding on the handlebar cover (Figures A & B). figURe B figURe A 2) Remove the 4 screws holding the heart rate handlebar to the console mast being careful to support the handlebar (Figure C). 3) Carefully pull the wires from the console mast until the connectors are showing, and then disconnect the 3 wires from the handlebar and remove the defective handlebar (Figure D). -
Page 36: Heart Rate Grip Replacement
CHAPTeR 9: PART RePlACeMeNT gUiDe 9.3 HeART RATe gRiPS RePlACeMeNT 1) Remove the 3 screws holding the 2 halves of the HR grip together (Figure A). 2) Split the HR grip in half (Figure B). figURe A figURe B 3) Disconnect the level key and HR plate wiring (Figure C) and remove the HR grip. 4) Reverse Steps 1-3 to install a new HR grip. -
Page 37: Cup Holder Replacement
CHAPTeR 9: PART RePlACeMeNT gUiDe 9.4 CUP HolDeR RePlACeMeNT 1) Remove the 2 screws holding the cup holder to the console mast (Figure A). figURe A 2) Remove the cup holder (Figure B). figURe B 3) Reverse Steps 1-2 to install a new cup holder. -
Page 38: Console Keypad / Overlay Replacement
CHAPTeR 9: PART RePlACeMeNT gUiDe 9.5 CoNSole keyPAD / oVeRlAy RePlACeMeNT NOTE: The instructions below are for console overlays / keypads replacement, but the procedure is the same regardless of where the overlay / keypad is. 1) Turn off power and disconnect the cord from the machine. 2) Remove the console as outlined in Section 9.1. - Page 39 CHAPTeR 9: PART RePlACeMeNT gUiDe 9.5 CoNSole keyPAD / oVeRlAy RePlACeMeNT - CoNTiNUeD 7) Peel part of the protective film from the back of the overlay (Figure E). 8) Push the overlay ribbon cable through the hole in the console and plug it in (Figure F). figURe e figURe f 9) Match the overlay to the cutout on the console (Figure G).
-
Page 40: Console Mast Removal
CHAPTeR 9: PART RePlACeMeNT gUiDe 9.6 CoNSole MAST ReMoVAl 1) Remove the console as outlined in Section 9.1. 2) Remove the HR handlebars as outlined in Section 9.2. 3) Lift up the rubber boot at the bottom of the console mast (Figure A), and remove the 4 screws holding the console mast to the frame (Figure figURe B figURe A 4) Pull the wires out the bottom of the console mast and remove the mast (Figure C). -
Page 41: Seat Pad Replacement
CHAPTeR 9: PART RePlACeMeNT gUiDe 9.7 SeAT PAD RePlACeMeNT 1) Remove the 4 screws holding the seat pad to the seat post (Figure A). figURe A 2) Lift the seat pad away from the seat post (Figure B). figURe B 3) Reverse Steps 1-2 to install a new seat pad. -
Page 42: Seat Post Replacement
CHAPTeR 9: PART RePlACeMeNT gUiDe 9.8 SeAT PoST RePlACeMeNT 1) Remove the seat adjustment pin (Figure A). 2) Pull the seat post upward until the stem comes away from the frame (Figure B). figURe A figURe B 3) Remove the 4 nuts holding the seat pad to the seat post and remove the seat pad (Figure C). figURe C 4) Reverse Steps 1-3 to install a new seat post. -
Page 43: Seat Post Insert Replacement
CHAPTeR 9: PART RePlACeMeNT gUiDe 9.9 SeAT PoST iNSeRT RePlACeMeNT 1) Remove the seat adjustment pin (Figure A). 2) Pull the seat post upward until the stem comes away from the frame and set it aside (Figure B). figURe A figURe B 3) Remove the rubber boot that rests at the bottom of the seat post (Figure C). -
Page 44: Pedal Replacement
9.10 PeDAl RePlACeMeNT 1) Use a 15 mm wrench commercial pedal wrench (available from Matrix - part # ZMS4001254) to remove the pedal from the crank (Figure A). NOTE: For the right side pedal, the threads are normal. For the left side pedal, the threads are reversed (the pedal turns off counterclockwise). -
Page 45: Shrouds Removal
CHAPTeR 9: PART RePlACeMeNT gUiDe 9.11 SHRoUDS ReMoVAl 1) Remove the pedals as outlined in Section 9.10. 2) Remove the seat adjustment pin (Figure A). 3) Remove the seat post and seat post boot (Figures B & C). figURe B figURe A figURe C 4) Remove the 13 screws holding the left shroud in place (Figure D). -
Page 46: Lower Control Board Replacement
CHAPTeR 9: PART RePlACeMeNT gUiDe 9.12 loWeR CoNTRol BoARD RePlACeMeNT 1) Remove the shrouds as outlined in Section 9.11. 2) Remove the 3 screws holding the cover onto the lower board and remove the cover. 3) Disconnect the 5 wire connections to the lower board (Figure A). 4) Remove the 2 screws holding the lower board to the frame (Figure B), and remove the lower board. -
Page 47: Battery Replacement
CHAPTeR 9: PART RePlACeMeNT gUiDe 9.13 BATTeRy RePlACeMeNT 1) Remove the right side shroud as outlined in Section 9.11. 2) Disconnect the 2 wires from the battery (Figure A). figURe A 3) Remove the 2 wing nuts on the battery bracket (Figure B). 4) Swivel the battery bracket out of the way and remove the battery (Figure C). -
Page 48: Drive Belt Replacement
CHAPTeR 9: PART RePlACeMeNT gUiDe 9.14 DRiVe BelT RePlACeMeNT 1) Remove the right side shroud as outlined in Section 9.11. 2) Pull up on the tension assembly and walk the belt off of the pulley (Figure A). 3) Remove the belt (Figure B). figURe A figURe B 4) Reverse Steps 1-3 to install a new drive belt. -
Page 49: Generator Belt Replacement
CHAPTeR 9: PART RePlACeMeNT gUiDe 9.15 geNeRAToR BelT RePlACeMeNT 1) Remove the shrouds as outlined in Section 9.11. 2) Loosen the nuts holding the generator to the frame (Figure A), and remove the nuts putting tension on the generator belt (Figure B). figURe A figURe B 3) Once the tension has been removed, the generator belt can be walked off of the pulley (Figure C). -
Page 50: Generator Replacement
CHAPTeR 9: PART RePlACeMeNT gUiDe 9.16 geNeRAToR RePlACeMeNT 1) Remove the shrouds as outlined in Section 9.11. 2) Remove the nuts holding the generator to the frame (Figure A), and remove the nuts putting tension on the generator belt (Figure B). figURe A figURe B 3) Once the tension has been removed, the generator belt can be walked off of the pulley (Figure C). -
Page 51: Pulley Axle Set Replacement
CHAPTeR 9: PART RePlACeMeNT gUiDe 9.17 PUlley Axle SeT RePlACeMeNT 1) Remove the shrouds as outlined in Section 9.11. 2) Remove the drive belt as outlined in Section 9.14. 3) Loosen the nuts holding the generator to the frame (Figure A), and remove the nuts putting tension on the generator belt (Figure B). figURe A figURe B 4) Once the tension has been removed, walk the generator belt off of the pulley (Figure C). - Page 52 CHAPTeR 9: PART RePlACeMeNT gUiDe 9.17 PUlley Axle SeT RePlACeMeNT - CoNTiNUeD 5) Remove the C-clip holding the bearing in place on the right side of the frame (Figure D). 6) Remove the bearing (Figure E). figURe D figURe e 7) Remove the 60 mm nut holding in the pulley axle assembly with a large channel lock pliers or a pipe wrench (Figure F).
-
Page 53: Crank Axle Set Replacement
CHAPTeR 9: PART RePlACeMeNT gUiDe 9.18 CRANk Axle SeT RePlACeMeNT 1) Remove the shrouds as outlined in Section 9.11. 2) Pull up on the tension assembly and walk the drive belt off of the pulley (Figure A). 3) Remove the drive belt (Figure B). 4) Remove the 3 screws holding the crank axle bearings in place on both sides (Figure C). -
Page 54: Rear Stabilizer Replacement
CHAPTeR 9: PART RePlACeMeNT gUiDe 9.19 ReAR STABilizeR RePlACeMeNT 1) Lean the bike to one side and remove the 4 screws holding the rear stabilizer to the frame (Figure A). figURe A 2) Remove the rear stabilizer (Figure B). figURe B 3) Reverse Steps 1-2 to install a rear stabilizer. -
Page 55: Front Stabilizer Replacement
CHAPTeR 9: PART RePlACeMeNT gUiDe 9.20 fRoNT STABilizeR RePlACeMeNT 1) Lean the bike to one side and remove the 4 screws holding the front stabilizer to the frame (Figure A). figURe A 2) Remove the front stabilizer (Figure B). figURe B 3) Reverse Steps 1-2 to install a new front stabilizer. -
Page 56: Testing The Bike
CHAPTeR 9: PART RePlACeMeNT gUiDe 9.21 TeSTiNg THe Bike oNCe THe UNiT oR RePlACeMeNT PART iS fUlly iNSTAlleD AND ASSeMBleD AND PRoPeRly PlACeD oN THe flooR, USe THe folloWiNg iNSTRUCTioNS To SeTUP AND TeST THe MACHiNe: 1) Check that the console is set for upright bike. a. -
Page 57: Chapter 10: Bike Specifications And Assembly Guide
CHAPTeR 10: Bike SPeCifiCATioNS AND ASSeMBly gUiDe 10.1 U5x-04 Bike SPeCifiCATioNS MODEL NAME CYCLE TYPE U5x UPRIGHT FRAME PART # U-3X/5X/7X-03-F CONSOLE PART # HURE-5X-04-C FEATURES CONTACT & TELEMETRIC HR SENSORS HANDLEBAR DESIGN FULL RACING STYLE WITH ELBOW SUPPORT INTEGRATED ARM RESTS... -
Page 58: Fasteners And Assembly Tools
CHAPTeR 10: Bike SPeCifiCATioN AND ASSeMBly gUiDe 10.2 fASTeNeRS AND ASSeMBly ToolS QUANTITY PART SKETCH DESCRIPTION NOTES 4 MM ALLEN WRENCH PURPLE See sketch of part Z04 5MM ALLEN WRENCH PURPLE See sketch of part Z04 6 MM ALLEN WRENCH PURPLE OPEN END WRENCH (15 &... -
Page 59: Assembly Instructions
CHAPTeR 10: Bike SPeCifiCATioNS AND ASSeMBly gUiDe 10.3 ASSeMBly iNSTRUCTioNS AfTeR THeSe ASSeMBly STePS ARe CoMPleTe, Be SURe To SeTUP AND TeST THe UNiT AS oUTliNeD iN SeCTioN 9.21. STEP 1 STEP 2... - Page 60 CHAPTeR 10: Bike SPeCifiCATioN AND ASSeMBly gUiDe 10.3 ASSeMBly iNSTRUCTioNS - CoNTiNUeD STEP 3 STEP 4...
- Page 61 CHAPTeR 10: Bike SPeCifiCATioNS AND ASSeMBly gUiDe 10.3 ASSeMBly iNSTRUCTioNS - CoNTiNUeD STEP 5...
- Page 62 CHAPTeR 10: Bike SPeCifiCATioN AND ASSeMBly gUiDe 10.3 ASSeMBly iNSTRUCTioNS - CoNTiNUeD FINAL ASSEMBLY...
-
Page 63: Adjusting The Pedal Straps And Seat
It should be possible to pedal without locking the knees or shifting in the seat. The Matrix U5x-04-F Bike features a vertical ratchet seat adjustment system, which makes it easy and safe to change the height of the seat quickly. -
Page 64: Leveling The Bike
CHAPTeR 10: Bike SPeCifiCATioN AND ASSeMBly gUiDe 10.5 leVeliNg THe Bike STABILIZING THE MATRIX U5X-04 BIKE After positioning the bike in its intended location, check its stability by attempting to shake it side to side. Shaking or wobbling indicates that your bike needs to be leveled. -
Page 65: Tv Bracket Installation Instructions
10.6 TV BRACkeT iNSTAllATioN iNSTRUCTioNS The Matrix Upright bike is capable of having a MYE Entertainment or Web Ready (PCTV) television installed using an integrated bracket. Follow the instructions below to install the TV and TV bracket, and the instructions located in the TV owner's manual to program the television. - Page 66 CHAPTeR 10: Bike SPeCifiCATioNS AND ASSeMBly gUiDe 10.6 TV BRACkeT iNSTAllATioN iNSTRUCTioNS - CoNTiNUeD 6) Run the white end from the Y cable through the headphone jack hole in the console plastic, and plug it into the headphone jack sent with the TV bracket set (Figure G).
- Page 67 CHAPTeR 10: Bike SPeCifiCATioNS AND ASSeMBly gUiDe 10.6 TV BRACkeT iNSTAllATioN iNSTRUCTioNS - CoNTiNUeD 12) Press the entertainment keypad / overlay into the cut out in the console plastic (Figure M). 13) Plug the ribbon cable into the pins on the UCB (Figure N). Make sure that the pins and ribbon cable are correctly aligned with no pins open on the UCB.
- Page 68 19) Re-attach the console back to the front using the bottom 6 screws removed in Step 2. NOTE: Be sure to route the wiring so that it is not pinched by the bracket or plastic when installing the top 2 screws (Figure U). The small cover with the Matrix logo that makes up the top of the rear console cover is no longer used with a TV bracket.
- Page 69 CHAPTeR 10: Bike SPeCifiCATioNS AND ASSeMBly gUiDe 10.6 TV BRACkeT iNSTAllATioN iNSTRUCTioNS - CoNTiNUeD 25) If installing a PCTV, plug the net wire into the back of the TV (Figure Z). NOTE: The net wire is not used if installing a MYE TV, and should be hidden by the plastic covers.
-
Page 70: Chapter 11: Software Upgrade Guide
1. Create a file on the USB flash drive which will be used. The folders should be MATRIX\FW\UCB (create a folder called MATRIX, then a folder in MATRIX called FW, then a folder in FW called UCB). Or you can put USB flash drive into the console and press ENTER, 9, 0, 0, 1, ENTER on the keypad and the USB will create the folders (Figure A) 2. - Page 71 NoTeS...
- Page 72 MATR ix fiTN e SS Sy S Te M S C oR P. 1610 LANDMARK D R IV E C OTTAG E G R OV E WI 535 27 U S A TOLL FREE 866.693.4863 w w w.matri x fi tn es s .c om FA X 608 .8 39. 17 17 ReV.
Need help?
Do you have a question about the U5X-04 BIKE and is the answer not in the manual?
Questions and answers