Matrix U7xe Owner's Manual
Hide thumbs
Also See for U7xe:
- Owner's manual (39 pages) ,
- User instruction (29 pages) ,
- User manual (12 pages)

Related Manuals for Matrix U7xe


Summary of Contents for Matrix U7xe
- Page 1 U7xe R7xe H7xe CYCLES OWNER’S MANUAL MX_12_HUR3x_5x_7xe_OM_Rev1_3.indd 1 10/25/12 8:36 AM...
-
Page 2: Important Precautions
IMPORTANT PRECAUTIONS SAVE THESE INSTRUCTIONS Read this GUIDE before using the OWNER’S MANUAL. When using an electrical product, basic precautions should always be followed, including the following: Read all instructions before using this product. It is the responsibility of the owner to ensure that all users of this product are adequately informed of all warnings and precautions. - Page 3 DANGER WARNING TO REDUCE THE RISK OF ELECTRICAL SHOCK: TO REDUCE THE RISK OF BURNS, FIRE, ELECTRICAL SHOCK OR INJURY TO PERSONS: Always unplug the unit from the electrical outlet immediately after using, before cleaning, performing maintenance and putting on or •...
-
Page 4: Electrical Requirements
If the user does not follow these grounding instructions, the user could void the Matrix limited All Matrix 3x, 5x and 7xe 110 V bikes require the use of a 100-125 V, 60 Hz and a 15 A “Dedicated Circuit”, with a non-looped warranty. -
Page 5: Basic Operation
DANGER BASIC OPERATION Improper connection of the equipment-grounding conductor can result in a risk of electric shock. Check with a qualified electrician or serviceman if you are in doubt as to whether the product is properly grounded. Do not modify the plug provided with the product. - Page 6 Your exercise bike may be powered by a power supply. The power must be plugged into the power jack, which is located in the front MOVING THE UNIT of the machine near the stabilizer tube. Unplug cord when not in use. Two hand holds are located just above the MATRIX logo on the rear legs of the unit. To WARNING WARNING avoid injury to the user or the unit, be sure to have proper assistance to move the unit.
-
Page 7: Troubleshooting And Maintenance
PULSE GRIPS TROUBLESHOOTING Place the palm of your hands directly on the grip pulse handlebars. Both hands must grip the bars for your heart rate to register. It takes 5 consecutive heart beats (15-20 seconds) for your heart rate to register. When gripping the pulse handlebars, do not grip tightly. -
Page 8: Recommended Cleaning Tips
• Make sure the power cord is not underneath the unit or in any other area where it can must be disconnected DO NOT use any equipment that is damaged or has worn or broken parts. Use only replacement parts supplied by Matrix Fitness. become pinched or cut during storage or use. - Page 9 CONSOLE SERIAL NUMBER: FRAME SERIAL NUMBER: SERIAL # PLACEMENT MATRIX MODEL NAME: » Refer to the SERIAL NUMBER and MODEL NAME when calling for service. *The console serial number can be found in the Manager Mode or Engineering Mode. MX_12_HUR3x_5x_7xe_OM_Rev1_3.indd 16-17...
-
Page 10: Required Tools
BUTTON HEAD BOLT(M8x25L) BLUE BUTTON HEAD BOLT(M8x50L) ARC WASHER INCLUDED FASTENERS SPRING WASHER FASTENERS BUTTON HEAD BOLT(M8x15L) GREEN REFERENCE SKETCH DESCRIPTION QUANTITY PACKAGE COLOR FLAT WASHER GREEN BUTTON HEAD BOLT(M8x25L) WHITE SPRING WASHER GREEN SPRING WASHER WHITE ADJUSTMENT FOOT BUTTON HEAD BOLT(M5x10L) WHITE BUTTON HEAD BOLT(M8x20L) BLACK... -
Page 11: Assembly Step
ASSEMBLY STEP 1 ASSEMBLY STEP 2 BLACK HARDWARE BAG CONTENTS : YELLOW HARDWARE BAG CONTENTS BUTTON HEAD BOLT(M8x20L) BUTTON HEAD BOLT(M8x15L) FLAT WASHER FLAT WASHER SPRING WASHER SPRING WASHER Open BLACK HARDWARE BAG. Attach the STABILIZER TUBE to the MAIN Open YELLOW HARDWARE BAG. - Page 12 ASSEMBLY STEP 3 ASSEMBLY STEP 4 RED HARDWARE BAG : GREEN HARDWARE BAG : WHITE HARDWARE BAG CONTENTS : Open RED AND GREEN HARDWARE BAGS. BUTTON HEAD BOLT(M8x50L) BUTTON HEAD BOLT(M8x15L) BUTTON HEAD BOLT(M8x25L) ARC WASHER FLAT WASHER Attach the GUIDE RAIL SET to the SPRING WASHER MAIN FRAME using 4 BOLTS (F), 4 SPRING WASHER...
- Page 13 ASSEMBLY STEP 6 ASSEMBLY STEP 5 BLUE HARDWARE BAG CONTENTS : 7XE / 5X CONSOLE ASSEMBLY Slide 1 FLAT WASHER (N), 1 7XE SHOWN 7XE SHOWN WAVY WASHER (O) and another BUTTON HEAD BOLT(M8x25L) FLAT WASHER (N) onto the CONSOLE SCREW LOWER LINK ARM.
- Page 14 SERIAL NUMBER LOCATION RECUMBENT BIKE R8000 CONSOLE SERIAL NUMBER: FRAME SERIAL NUMBER: MATRIX MODEL NAME: » Refer to the SERIAL NUMBER and MODEL NAME when calling for service. *The console serial number can be found in the Manager Mode and Engineering Mode.
- Page 15 SPRING WASHER YELLOW FLAT WASHER YELLOW HEX SOCKET HEAD CAP SCREW(M8x25L) BLUE INCLUDED FASTENERS FASTENERS BUTTON HEAD HEX SOCKET CAP SCREW-CHROME PLATED(M8x20L) PACKAGE REFERENCE SKETCH DESCRIPTION AMOUNT FLAT WASHER-CHROME PLATED COLOR BUTTON HEAD HEX SOCKET CAP SCREW(M8x25L) WHITE SPRING WASHER-CHROME PLATED SPRING WASHER WHITE BUTTON HEAD HEX SOCKET CAP SCREW WITH NYLOC(M5x12L)
- Page 16 ASSEMBLY STEP 1 ASSEMBLY STEP 2 BLACK HARDWARE BAG CONTENTS : RED HARDWARE BAG CONTENTS HEX SOCKET HEAD CAP SCREW(M8x20L) BUTTON HEAD HEX SOCKET CAP SCREW-CHROME PLATED(M8x20L) FLAT WASHER-CHROME PLATED FLAT WASHER SPRING WASHER-CHROME PLATED SPRING WASHER Open BLACK HARDWARE BAG. Attach the STABILIZER TUBE to the MAIN Open RED HARDWARE BAG.
- Page 17 ASSEMBLY STEP 3 ASSEMBLY STEP 4 YELLOW HARDWARE BAG CONTENTS : WHITE HARDWARE BAG : GREEN HARDWARE BAG : BUTTON HEAD HEX SOCKET CAP SCREW W/NYLOC(M8x20L) BUTTON HEAD HEX SOCKET BUTTON HEAD HEX CAP SCREW (M8x25L) SOCKET CAP SCREW WITH NYLOC (M5x12L) SPRING WASHER SPRING WASHER FLAT WASHER...
-
Page 18: Console Assembly
ASSEMBLY STEP 5 CONSOLE SCREW BLUE HARDWARE BAG CONTENTS : 7XE / 5X CONSOLE ASSEMBLY 3X CONSOLE ASSEMBLY 7XE SHOWN HEX SOCKET HEAD CAP SCREW(M8x25L) CONSOLE SCREW Open BLUE HARDWARE BAG. CONSOLE SCREW Attach the STABILIZER TUBE to the MAIN FRAME using 2 BOLTS (A), 2 SPRING WASHERS (B) and 2 ARC WASHERS (C) on each side. - Page 19 SERIAL NUMBER LOCATION UPRIGHT BIKE C8000 CONSOLE SERIAL NUMBER: FRAME SERIAL NUMBER: MATRIX MODEL NAME: RECUMBENT BIKE R8000 » Refer to the SERIAL NUMBER and MODEL NAME when calling for service. *The console serial number can be found in the Manager Mode and Engineering Mode.
- Page 20 BUTTON HEAD BOLT(M8x25L) BLUE BUTTON HEAD BOLT(M8x15L) INCLUDED FASTENERS BUTTON HEAD BOLT(M8x50L) ARC WASHER REFERENCE SKETCH DESCRIPTION QUANTITY PACKAGE COLOR SPRING WASHER BUTTON HEAD BOLT(M8x25L) WHITE BUTTON HEAD BOLT(M8x15L) SPRING WASHER WHITE ADJUSTMENT FOOT BUTTON HEAD BOLT(M5x10L) WHITE BUTTON HEAD SCREW(M5x10L) BUTTON HEAD BOLT(M8x20L) BLACK FLAT WASHER...
- Page 21 ASSEMBLY STEP 1 ASSEMBLY STEP 2 BLACK HARDWARE BAG CONTENTS : YELLOW HARDWARE BAG CONTENTS BUTTON HEAD BOLT(M8x20L) BUTTON HEAD BOLT(M8x15L) FLAT WASHER FLAT WASHER SPRING WASHER SPRING WASHER Open BLACK HARDWARE BAG. Open YELLOW HARDWARE BAG. Attach the STABILIZER TUBE to the MAIN Attach MANUAL INCLINE LIFT LEVER to GUIDE FRAME using 2 BOLTS (A), 2 SPRING RAIL SET using 4 BOLTS (D), 4 FLAT WASHERS...
- Page 22 ASSEMBLY STEP 3 ASSEMBLY STEP 4 Open RED HARDWARE BAG. RED HARDWARE BAG CONTENTS : WHITE HARDWARE BAG : BLUE HARDWARE BAG : Attach the STABILIZER TUBE to the MAIN FRAME using BUTTON HEAD BOLT(M8x15L) BUTTON HEAD BOLT BUTTON HEAD BOLT 2 BOLTS (A), 2 SPRING WASHERS (B) and 2 ARC (M8x25L) (M8x25L)
- Page 23 ASSEMBLY STEP 5 7XE / 5X CONSOLE ASSEMBLY 3X CONSOLE ASSEMBLY 7XE SHOWN Attach the CONSOLE to the CONSOLE MAST using 2 PRE-INSTALLED SCREWS. CONSOLE SCREW CONSOLE SCREW CONSOLE SCREW 7XE SHOWN ASSEMBLY COMPLETE! MX_12_HUR3x_5x_7xe_OM_Rev1_3.indd 44-45 10/25/12 8:37 AM...
-
Page 24: Cycle Operation
CYCLE OPERATION MX_12_HUR3x_5x_7xe_OM_Rev1_3.indd 46-47 10/25/12 8:37 AM... -
Page 25: Console Description
These sections allow users to manipulate default settings for the machines. Manager Mode may be accessed by pressing ENTER, 1, The Matrix machine is inspected before it is packaged. It is shipped in two pieces: the base 0, 0, 1, Enter on the keypad. Engineering Mode may be accessed by pressing ENTER, 2, 0, 0, 1, Enter on the keypad. The screen and the console. - Page 26 H3X/ U3X / R3X CONSOLE DESCRIPTION Note: There is a thin protective sheet of clear plastic on the overlay of the console that should be removed before use. A) WORKOUT KEYS: Simple program view and selection buttons. B) GO: One Touch Start. C) ENTER: To confirm each program setting.
- Page 27 H5X / U5X / R5X CONSOLE DESCRIPTION Note: There is a thin protective sheet of clear plastic on the overlay of the console that should be removed before use. A) WORKOUT KEYS: Simple program view and selection buttons. B) GO: One Touch Start. C) ENTER: To confirm each program setting.
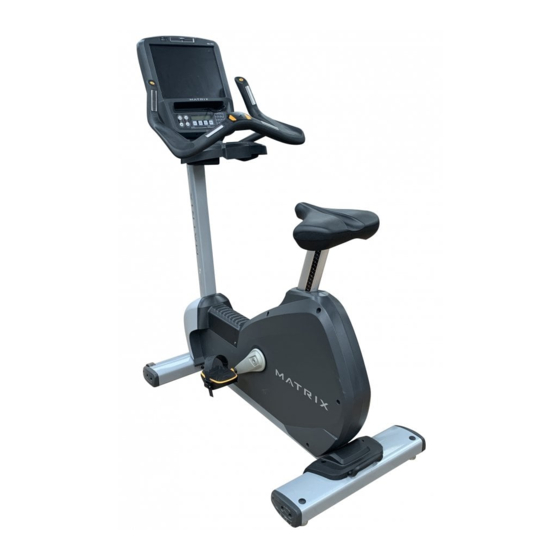
- Page 28 H7XE / U7XE / R7XE CONSOLE DESCRIPTION The 7xe has a fully integrated touch screen display. All information required for workouts is explained on screen. Exploration of the interface is highly encouraged. The information explaining how to program for various workouts will give an explanation about the contents of each screen on the 7xe.
-
Page 29: Workout Descriptions
Press the GO button and the machine will enter into a manual mode of operation. All energy expenditure values will be Your Matrix machine offers a variety of level-based workouts to challenge users of all fitness levels. The following information will calculated using the default weight measurement. -
Page 30: User Defined Programs (Random)
FITNESS TEST USER DEFINED PROGRAMS (RANDOM) FAT BURN WORKOUT OPERATION Your Matrix machine offers a heart rate control workout This test measures cardiovascular fitness and proves an There are 20 workout profiles in random mode. Profile will Fat burn is a level-based workout that is designed to help users mode. - Page 31 WORKOUT DESCRIPTIONS AVAILABLE ON 7XE CONSOLES NIKE + OPERATION CONSTANT WATTS This program allows you to vary your cadence or RPM and the machine’s resistance will adjust accordingly to your selected goal. The REQUIREMENTS READY quicker your stride the less resistance for the goal selected. Connect your Nike Plus-compatible device to the built-in Nike Plus –...
-
Page 32: Product Specifications
PRODUCT SPECIFICATIONS ALL BIKE WATTS TABLE @ 60 RPM CONSOLE MODEL HURESAC-7XE-04-C HURE-5X-04-C HURE-3X-C MX_12_HUR3x_5x_7xe_OM_Rev1_3.indd 62-63 10/25/12 8:37 AM... - Page 33 10 POWERED / 25 SELF-POWERED CONSOLE CONSOLE DISPLAY TYPE 15” / 38.1 CM TOUCH SCREEN LCD DOT-MATRIX LED 14-SEG ALPHANUMERIC, 8X16 LED GRAPHIC DISPLAY DISPLAY TYPE 15” / 38.1 CM TOUCH SCREEN LCD DOT-MATRIX LED 14-SEG ALPHANUMERIC, 8X16 LED GRAPHIC DISPLAY...
- Page 34 MODEL NAME U-3x/5x/7x CYCLE TYPE U7xe UPRIGHT U5x UPRIGHT U3x UPRIGHT FRAME PART # U-3X/5X/7X-03-F CONSOLE PART # HURESAC-7XE-04-C HURE-5X-04-C HURE-3X-C FEATURES CONTACT & TELEMETRIC HR SENSORS HANDLEBAR DESIGN FULL RACING STYLE WITH ELBOW SUPPORT FULL RACING STYLE WITH ELBOW SUPPORT...
- Page 35 Matrix Fitness 1-866-693-4863 1600 Landmark Drive, www.matrixfitness.com Cottage Grove, WI 53527 Matrix Bikes 1.3 | © 2012 Matrix Fitness MX_12_HUR3x_5x_7xe_OM_Rev1_3.indd 68 10/25/12 8:37 AM...
Need help?
Do you have a question about the U7xe and is the answer not in the manual?
Questions and answers