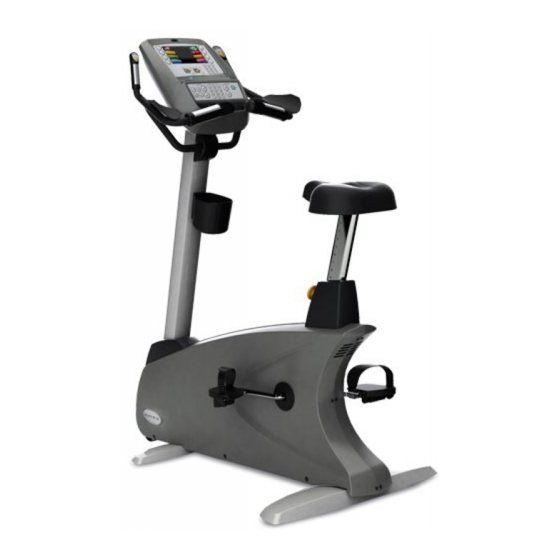
Hide thumbs Also See for U7xe:

Advertisement

bikes_om_r1.5.indd 1
U7xe
R7xe
U7x
R7x
U5x
R5x
U3xe
R3xe
U3x
R3x
CYCLES OWNER'S MANUAL
H7xe
H7x
H5x
H3xe
H3x
9/9/11 8:19 AM

Advertisement

Table of Contents
loading
Need help?

Need help?

Do you have a question about the U7xe and is the answer not in the manual?

Questions and answers

Summary of Contents for Matrix U7xe

  • Page 1 U7xe R7xe H7xe U3xe R3xe H3xe CYCLES OWNER’S MANUAL bikes_om_r1.5.indd 1 9/9/11 8:19 AM...
  • Page 2: Important Precautions

    IMPORTANT PRECAUTIONS SAVE THESE INSTRUCTIONS Read this GUIDE before using the OWNER’S MANUAL. When using an electrical product, basic precautions should always be followed, including the following: Read all instructions before using this product. It is the responsibility of the owner to ensure that all users of this product are adequately informed of all warnings and precautions.
  • Page 3 DANGER WARNING TO REDUCE THE RISK OF ELECTRICAL SHOCK: TO REDUCE THE RISK OF BURNS, FIRE, ELECTRICAL SHOCK OR INJURY TO PERSONS: Always unplug the unit from the electrical outlet immediately after using, before cleaning, performing maintenance and putting on or •...
  • Page 4: Electrical Requirements

    Improper connection of the equipment-grounding conductor can result in a risk of electric shock. Check with a qualified All Matrix units require the use of a 15 amp or 20 amp “dedicated circuit, ” with a non-looped (isolated) neutral/ground, for the power electrician or serviceman if you are in doubt as to whether the product is properly grounded.
  • Page 5: Basic Operation

    BASIC OPERATION bikes_om_r1.5.indd 8-9 9/9/11 8:19 AM...
  • Page 6 To adjust the seat height on the Hybrid Cycle, pull the orange Two hand holds are located just above the MATRIX logo on the behind the exercise bike, 3 feet on each side and one foot in front for the power cord.
  • Page 7: Troubleshooting And Maintenance

    WIRELESS HEART RATE RECEIVER TROUBLESHOOTING When used in conjunction with a wireless chest transmitter, your heart rate can be transmitted wirelessly to the unit and displayed on the console. & MAINTENANCE Prior to wearing the wireless chest transmitter on your chest, moisten the two rubber electrodes with water. Center the chest strap just below the breast or pectoral muscles, directly over your sternum, with the logo facing out.
  • Page 8: Recommended Cleaning Tips

    Ensure that any person(s) making adjustments or performing maintenance or repair of any kind is qualified to do so. Matrix Fitness Systems will provide service and maintenance training at our corporate facility upon request or in the field if proper arrangements are made.
  • Page 9: Maintenance

    PLACEMENT • Wipe or vacuum any dust particles or other objects that may have accumulated underneath the bike. • Return the bike to its previous position. MATRIX MODEL NAME: EVERY MONTH • Inspect all assembly bolts and pedals on the machine for proper tightness.
  • Page 10 BUTTON HEAD BOLT(M8x25L) BLUE BUTTON HEAD BOLT(M8x50L) ARC WASHER REQUIRED FASTENERS FASTENERS SPRING WASHER BUTTON HEAD BOLT(M8x15L) GREEN REFERENCE SKETCH DESCRIPTION QUANTITY PACKAGE COLOR BUTTON HEAD BOLT(M8x25L) WHITE FLAT WASHER GREEN SPRING WASHER WHITE SPRING WASHER GREEN ADJUSTMENT FOOT BUTTON HEAD BOLT(M5x10L) WHITE REQUIRED TOOLS BUTTON HEAD BOLT(M8x20L)
  • Page 11 ASSEMBLY STEP 1 ASSEMBLY STEP 2 BLACK HARDWARE BAG CONTENTS : YELLOW HARDWARE BAG CONTENTS BUTTON HEAD BOLT(M8x20L) BUTTON HEAD BOLT(M8x15L) FLAT WASHER FLAT WASHER SPRING WASHER SPRING WASHER Open BLACK HARDWARE BAG. Attach the STABILIZER TUBE to the MAIN Open YELLOW HARDWARE BAG.
  • Page 12 ASSEMBLY STEP 3 ASSEMBLY STEP 4 RED HARDWARE BAG CONTENTS WHITE HARDWARE BAG CONTENTS : Open RED HARDWARE BAG. BUTTON HEAD BOLT(M8x50L) BUTTON HEAD BOLT(M8x25L) Attach the GUIDE RAIL SET to the ARC WASHER MAIN FRAME using 4 BOLTS (F), 4 SPRING WASHER SPRING WASHERS (E) and 4 FLAT SPRING WASHER...
  • Page 13 ASSEMBLY STEP 6 ASSEMBLY STEP 5 BLUE HARDWARE BAG CONTENTS : Open HARDWARE BAG. 7XE / 7X / 5X CONSOLE ASSEMBLY Slide 1 FLAT WASHER (N), 1 BUTTON HEAD BOLT(M8x25L) CONSOLE SCREW WAVY WASHER (O) and another FLAT WASHER (N) onto the Open HARDWARE BAG.
  • Page 14 SERIAL NUMBER LOCATION RECUMBENT BIKE R8000 CONSOLE SERIAL NUMBER: FRAME SERIAL NUMBER: MATRIX MODEL NAME: » Refer to the SERIAL NUMBER and MODEL NAME when calling for service. *The console serial number can be found in the Manager Mode. bikes_om_r1.5.indd 26-27...
  • Page 15 BUTTON HEAD HEX SOCKET CAP SCREW W/NYLOC(M8x20L) YELLOW SPRING WASHER YELLOW YELLOW FLAT WASHER REQUIRED FASTENERS FASTENERS HEX SOCKET HEAD CAP SCREW(M8x25L) BLUE BUTTON HEAD HEX SOCKET CAP SCREW-CHROME PLATED(M8x20L) REFERENCE SKETCH DESCRIPTION AMOUNT PACKAGE COLOR BUTTON HEAD HEX SOCKET CAP SCREW(M8x25L) WHITE FLAT WASHER-CHROME PLATED WHITE...
  • Page 16 ASSEMBLY STEP 1 ASSEMBLY STEP 2 BLACK HARDWARE BAG CONTENTS : RED HARDWARE BAG CONTENTS HEX SOCKET HEAD CAP SCREW(M8x20L) BUTTON HEAD HEX SOCKET CAP SCREW-CHROME PLATED(M8x20L) FLAT WASHER-CHROME PLATED FLAT WASHER SPRING WASHER-CHROME PLATED SPRING WASHER Open BLACK HARDWARE BAG. Attach the STABILIZER TUBE to the MAIN Open RED HARDWARE BAG.
  • Page 17 ASSEMBLY STEP 3 ASSEMBLY STEP 4 YELLOW HARDWARE BAG CONTENTS : WHITE HARDWARE BAG CONTENTS BUTTON HEAD HEX SOCKET CAP SCREW W/NYLOC(M8x20L) BUTTON HEAD HEX SOCKET CAP SCREW(M8x25L) SPRING WASHER SPRING WASHER FLAT WASHER BUTTON HEAD SCREW(M5x10L) Open YELLOW HARDWARE BAG. BUTTON HEAD HEX SOCKET CAP SCREW WITH NYLOC(M5x12L) Attach the STABILIZER TUBE to the MAIN...
  • Page 18 ASSEMBLY STEP 5 CONSOLE SCREW BLUE HARDWARE BAG CONTENTS : 7XE / 7X / 5X CONSOLE ASSEMBLY 3X / 3XE CONSOLE ASSEMBLY HEX SOCKET HEAD CAP SCREW(M8x25L) CONSOLE SCREW Open BLUE HARDWARE BAG. CONSOLE SCREW Attach the STABILIZER TUBE to the MAIN FRAME using 2 BOLTS (A), 2 SPRING WASHERS (B) and 2 ARC WASHERS (C) on each side.
  • Page 19 SERIAL NUMBER LOCATION UPRIGHT BIKE C8000 CONSOLE SERIAL NUMBER: FRAME SERIAL NUMBER: MATRIX MODEL NAME: RECUMBENT BIKE R8000 » Refer to the SERIAL NUMBER and MODEL NAME when calling for service. *The console serial number can be found in the Manager Mode.
  • Page 20 FLAT WASHER YELLOW SPRING WASHER YELLOW BUTTON HEAD BOLT(M8x25L) BLUE REQUIRED FASTENERS FASTENERS BUTTON HEAD BOLT(M8x15L) BUTTON HEAD BOLT(M8x50L) REFERENCE SKETCH DESCRIPTION QUANTITY PACKAGE COLOR ARC WASHER BUTTON HEAD BOLT(M8x25L) WHITE SPRING WASHER SPRING WASHER WHITE BUTTON HEAD BOLT(M8x15L) BUTTON HEAD BOLT(M5x10L) ADJUSTMENT FOOT WHITE BUTTON HEAD BOLT(M8x20L)
  • Page 21 ASSEMBLY STEP 1 ASSEMBLY STEP 2 BLACK HARDWARE BAG CONTENTS : RED HARDWARE BAG CONTENTS BUTTON HEAD BOLT(M8x20L) BUTTON HEAD BOLT(M8x15L) FLAT WASHER FLAT WASHER SPRING WASHER SPRING WASHER Open BLACK HARDWARE BAG. Open RED HARDWARE BAG. Attach the STABILIZER TUBE to the MAIN Attach MANUAL INCLINE LIFT LEVER to GUIDE FRAME using 2 BOLTS (A), 2 SPRING RAIL SET using 4 BOLTS (D), 4 FLAT WASHERS...
  • Page 22 ASSEMBLY STEP 3 ASSEMBLY STEP 4 Open BLACK HARDWARE BAG. BLACK HARDWARE BAG CONTENTS : RED HARDWARE BAG CONTENTS Attach the STABILIZER TUBE to the MAIN FRAME using BUTTON HEAD BOLT(M8x15L) BUTTON HEAD BOLT(M8x25L) 2 BOLTS (A), 2 SPRING WASHERS (B) and 2 ARC BUTTON HEAD BOLT(M8x50L) SPRING WASHER WASHERS (C) on each side.
  • Page 23 ASSEMBLY STEP 5 BLACK HARDWARE BAG CONTENTS : 7XE / 7X / 5X CONSOLE ASSEMBLY 3X / 3XE CONSOLE ASSEMBLY Open BLACK HARDWARE BAG. CONSOLE SCREW Attach the STABILIZER TUBE to the MAIN FRAME using 2 BOLTS (A), 2 SPRING WASHERS (B) and 2 ARC WASHERS (C) on each side.
  • Page 24: Cycle Operation

    CYCLE OPERATION bikes_om_r1.5.indd 46-47 9/9/11 8:20 AM...
  • Page 25: Console Description

    Pressing “Enter” again will save the change. Pressing “Back” will bring you to the previous menu. To exit manager’s mode, press the “Home” key. Below is a list of the settings. CONSOLE DESCRIPTION: The Matrix machine is inspected before it is packaged. It is shipped in two pieces: the base Maximum Time Default Incline and the console.
  • Page 26 H3X/ U3X / R3X CONSOLE DESCRIPTION Note: There is a thin protective sheet of clear plastic on the overlay of the console that should be removed before use. A) WORKOUT KEYS: Simple program view and selection buttons. B) GO: One Touch Start. C) ENTER: To confirm each program setting.
  • Page 27 H3XE / U3XE / R3XE CONSOLE DESCRIPTION Note: There is a thin protective sheet of clear plastic on the overlay of the console that should be removed before use. A) MULTI-PURPOSE KEYS: Keys have different functions depending on each screen. B) GO: One Touch Start.
  • Page 28 H5X / U5X / R5X CONSOLE DESCRIPTION Note: There is a thin protective sheet of clear plastic on the overlay of the console that should be removed before use. A) WORKOUT KEYS: Simple program view and selection buttons. B) GO: One Touch Start. C) ENTER: To confirm each program setting.
  • Page 29 H7X / U7X / R7X CONSOLE DESCRIPTION Note: There is a thin protective sheet of clear plastic on the overlay of the console that should be removed before use. A) MULTI-PURPOSE KEYS: Keys have different functions depending on each screen. B) GO: One Touch Start.
  • Page 30 H7XE / U7XE / R7XE CONSOLE DESCRIPTION Note: There is a thin protective sheet of clear plastic on the overlay of the console that should be removed before use. A) MULTI-PURPOSE KEYS: Keys have different functions depending on each screen.
  • Page 31: Workout Descriptions

    All energy expenditure values will be steps to select Intervals, Rolling, Fat Burn and Random This test measures cardiovascular fitness and proves an Your Matrix cycle offers a heart rate control workout mode. The calculated using the default weight measurement. workouts.
  • Page 32 12) Selecting START will start program. capabilities as standard equipment. Your Matrix bike offers a heart rate control workout mode. The A unique program that allows you to vary your cadence or RPM 13) Select WEIGHT by using the UP or DOWN ARROW heart rate control workout mode allows the user to program and the machine’s resistance will adjust accordingly to your...
  • Page 33 HEART RATE CONTROL WORKOUT OPERATION Press the GO button and the machine will enter into a manual Your Matrix machine offers a variety of level-based workouts to Fat burn is a level-based workout that is designed to help users Your Matrix machine offers a heart rate control workout mode.
  • Page 34 WORKOUT DESCRIPTIONS FIT TEST This test measures cardiovascular fitness and proves an estimated sub-maximal VO2 result. It is based on power output according to ACSM standards and was developed by the Cooper Institute (© www.cooperinstitute.org) User RPMs must remain between 60-80 RPM during the test. The test will end when the user can no longer maintain this speed.
  • Page 35: Usb Features

    USB FEATURES AVAILABLE ON ALL 7X AND 7XE CONSOLES • Software Updates NIKE + OPERATION • USB Charging • Record Workout Statistics to USB REQUIREMENTS READY • Upload Workout Statistics to www.livestrong.com Connect your Nike Plus-compatible device to the built-in Nike Plus –...
  • Page 36: Product Specifications

    PRODUCT SPECIFICATIONS ALL BIKE WATTS TABLE @ 60 RPM CONSOLE MODEL HURESAC-7xe-C HURESC-7x-C HURE-5x-C HURES-3xe-C HURE-3x-C bikes_om_r1.5.indd 70-71 9/9/11 8:20 AM...
  • Page 37 10 POWERED / 25 SELF-POWERED CONSOLE CONSOLE 14-SEG ALPHANUMERIC, 8X16 LED 14-SEG ALPHANUMERIC, 8X16 LED DISPLAY TYPE 15" TOUCH SCREEN LCD 7" LCD DOT-MATRIX LED 7" LCD DISPLAY TYPE 15" TOUCH SCREEN LCD 7" LCD DOT-MATRIX LED 7" LCD GRAPHIC DISPLAY...
  • Page 38 MODEL NAME U-3x/5x/7x CYCLE TYPE U7xe Upright U7x Upright U5x Upright U3XE UPRIGHT U3x Upright FRAME PART # U-3x/5x/7x-F CONSOLE PART # HURESAC-7xe-C HURESC-7x-C HURE-5x-C HURES-3xe-C HURE-3x-C FEATURES CONTACT & TELEMETRIC HR SENSORS FULL RACING STYLE WITH ELBOW FULL RACING STYLE WITH ELBOW...
  • Page 39 Matrix Fitness 1-866-693-4863 1600 Landmark Drive, www.matrixfitness.com Cottage Grove, WI 53527 Matrix Bikes 1.5 | © 2011 Matrix Fitness bikes_om_r1.5.indd 76 9/9/11 8:20 AM...

This manual is also suitable for:

U3xR7xeU7xU5xU3xeR7x ... Show all

Table of Contents