
Related Manuals for FLIR DPB34TLX


Summary of Contents for FLIR DPB34TLX
-
Page 1: Instruction Manual
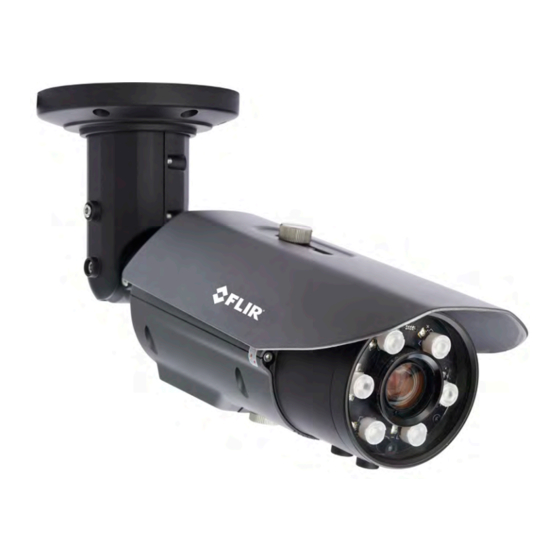
DPB34TLX TDN Long Range IR Bullet Camera Instruction Manual English Version 1.0 www.digimerge.com Copyright © 2013 Digimerge Technologies Inc., a FLIR Company... - Page 2 Thank you for purchasing this product. FLIR/Digimerge is committed to providing our customers with a high quality, reliable security solution. This manual refers to the following models: • DPB34TLX For more information on this product and accessory products, please visit us at: www.digimerge.com...
-
Page 3: Important Safeguards
Important Safeguards In addition to the careful attention devoted to quality standards in the manufacturing process of your video product, safety is a major factor in the design of every instrument. However, safety is your responsibility too. This sheet lists important information that will help to assure your enjoyment and proper use of the video product and accessory equipment. -
Page 4: General Precautions
Service 13. Servicing - Do not attempt to service this video 19. Cleaning - Unplug the video product from the wall equipment yourself as opening or removing covers outlet before cleaning. Do not use liquid cleaners or may expose you to dangerous voltage or other aerosol cleaners. - Page 5 General Precautions 1. All warnings and instructions in this manual should be followed. 2. Remove the plug from the outlet before cleaning. Do not use liquid aerosol detergents. Use a water dampened cloth for cleaning. 3. Keep enough space around the unit for ventilation. Slots and openings in the storage cabinet should not be blocked.
- Page 6 Features • 700+ TVL • Ultra Resolution 1/3" Sony EXview™ II 960H CCD • 330ft (100m) Smart-IR Night Vision + Polaris Vision3 Low Light Viewing • 6-50mm Varifocal Auto Iris Day/Night Lens • External Zoom/Focus/OSD Adjustment • True Day/Night Function with ICR •...
-
Page 7: Table Of Contents
TABLE OF CONTENTS 1. Getting Started ........1 1.1 Mounting Accessories . -
Page 9: Getting Started
Getting Started 1. GETTING STARTED The system comes with the following components: • 1 x Camera • 1 x Mounting Screw Kit • 1 x Mounting Plate • 1 x Allen Key • 1 x RCA-to-BNC Test Cable Mounting Screw Kit: •... -
Page 10: Camera Installation
Camera Installation 2. CAMERA INSTALLATION Make sure to follow the correct polarity if connecting the camera to DC power. Polarity is marked on the power connector. 1. Use the mounting plate or template to drill holes for the mounting screws and cables. Align the mounting plate with the TOP mark facing you. - Page 11 Camera Installation 3. Run the cables through the mounting plate. Align the TOP mark on the camera base with the TOP mark on the mounting plate, rotate the camera approximately 10° clockwise, and then rotate the camera counterclockwise to slide the hinge screw into the notch on the mounting plate.
- Page 12 Camera Installation 5. (Optional) Loosen the service compartment screw and open the service compartment. The service compartment allows you to: • Insert the included RCA-to-BNC test cable into the RCA output port and connect the camera to a test monitor. •...
- Page 13 Camera Installation 6. Loosen the three allen screws on the camera stand to adjust the camera viewing angle as necessary. Tighten the allen screws when finished. • Screw A allows you to rotate the camera 360°, independent from the camera stand. •...
-
Page 14: Configuring Osd Menus
Configuring OSD Menus 3. CONFIGURING OSD MENUS Use the OSD controls, located inside the service compartment, to configure the camera’s OSD menus. Press the middle button to open the OSD menu. LEFT OSD Controls: • Middle: Open Menu; Enter button DOWN •... -
Page 15: Menu Tree Overview
Configuring OSD Menus 3.1 Menu Tree Overview 3.2 Exposure Select AUTO or MANUAL exposure. -
Page 16: Auto
Configuring OSD Menus 3.2.1 Auto High Luminance: • Mode: Select AE+AUTO IRIS or ME+AUTO IRIS. • Brightness: Brightness level of operating mode set above. Default setting is 32. Low Luminance • Mode: Select AGC, DSS, AGC>DSS, AGC>DSS>AGC, or OFF. NOTE: Settings available only when AUTO is selected in OTHERS>LENS. •... -
Page 17: Pict Adjust
Configuring OSD Menus • Shut: When Mode is set to SHUT, select the shutter speed in x / second: 1/60, 1/100, 1/250, 1/500, 1/1000, 1/2000, 1/4000, 1/10000. Default setting is 1/60. When Mode is set to DSS, select the shutter speed: 2, 4, 8, 16, 32, 64, 128, 256. -
Page 18: E-Zoom
Configuring OSD Menus 3.3.1 E-Zoom • Zoom: Adjust digital zoom level from 0~255. • Pan: Pan camera image left and right. • Tilt: Tilt camera image up and down. NOTE: Zoom level selected must be greater than 0 to enable digital Pan and Tilt controls. -
Page 19: Atw (Auto Trace White Balance)
Configuring OSD Menus 3.4.1 ATW (Auto Trace White Balance) • Speed: Specifies the AE control for ATW between 0~255. • Delay Cnt: Sets the delay time for ATW changes between 0~255. • ATW Frame: Sets pull-in frame for magnification. Select x0.5, x1.0, x1.5, or x2.0. -
Page 20: Anti-Cr
Configuring OSD Menus 3.4.4 Anti-CR Activates color rolling suppression. 3.4.5 Push Lock Press down on joystick to set current scene as the white balance level. Place a 18% gray card in front of the lens and select PUSH LOCK for a natural white level. -
Page 21: Dnr
Configuring OSD Menus 3.6 DNR Configure Digital Noise Reduction settings. DNR function reduces the background noise in a low luminance environment. • DNR Mode: Select the filter mode for DNR: 2D+3D, 3D, 2D, or OFF. • Level: Select the filter strength for DNR: OFF, LOW, MIDLOW, MID, MIDHIGH, or HIGH. -
Page 22: Auto
Configuring OSD Menus 3.7.1 Auto • Burst: Select ON to enable the burst signal when Night mode has been identified or OFF. • Delay Control: Select Day/Night delay time between 0~255. • Day-Night: Select threshold for Night status from Day status between 0~255. -
Page 23: Privacy
Configuring OSD Menus • Mode: Select AUTO or select CENTER and press the middle button to define a rectangular area for Front Light Compensation by adjusting TOP, BOTTOM, LEFT, and RIGHT. • Level: Select the Level for Smart IR from 0~31. •... -
Page 24: Motion Detect
Configuring OSD Menus • Position: Press the middle button to configure the position of the selected privacy area. Press the directional buttons to move the corners (you can create any 4-sided shape). The selected side is highlighted by a small box. To select the next corner, press the middle button. -
Page 25: Monitor Area
Configuring OSD Menus TIP: Motion detection settings are usually set independently on the DVR, which allows for more advanced customization options. • Motion Det: Select ON to enable motion detection or OFF to disable. • Detect Sense: Select the motion detection sensitivity level between 0~127. •... -
Page 26: Others
Configuring OSD Menus • Area Sel: Select the monitor area to adjust. • Mode: Select ON to enable the selected monitor area or OFF. • Top: Select the top position of the area. • Bottom: Select the bottom position of the area. •... -
Page 27: Sync
Configuring OSD Menus • Speed: Select the iris convergence speed between 0~255. 3.10.2 Sync Camera uses internal sync (INT) when camera is connected to DC power. Line Lock (LL) is used when camera is connected to AC power. If you notice color rolling when the camera is connected to AC power: 1. -
Page 28: Wpc (Advanced Function; Not For Normal Use)
Configuring OSD Menus 3. When finished, select RETURN and press the middle button to save the camera title. 3.10.4 WPC (Advanced Function; Not for Normal Use) The WPC (White Pixel Compensation) features is used to correct the CCD if dead pixels are visible. To use White Pixel Compensation: NOTE: For WPC to work, you must cover the lens completely so no light can enter the camera sensor. -
Page 29: Camera Reset (Factory Default)
Configuring OSD Menus 3.10.6 Camera Reset (Factory Default) Select CAMERA RESET and press the middle button to reset the camera to factory default settings. 3.11 Exit / Save All • Exit: Select EXIT and press the middle button to exit the OSD menu. Exit will keep any changes only until camera is powered off. -
Page 30: Dimensions
Dimensions 4. DIMENSIONS... -
Page 31: Technical Specifications
Within 90%RH Operating Temperature -40~122°F / -40~50°C IP Rating IP66 Because our products are subject to continuous improvement, Digimerge Technologies Inc, a FLIR Company, reserves the right to modify product design and specifications without notice and without incurring any obligation. E&O.E. -
Page 32: Troubleshooting
Troubleshooting 6. TROUBLESHOOTING Follow the steps below if you are experiencing trouble with your camera. Contact Digimerge Technical Support if the issue persists. Nothing appears on the screen: • Check that the power cable is connected properly and that the voltage is correct. - Page 33 Need Help? Please make sure to visit our website www.digimerge.com to receive product updates and information. 3 Easy Ways To Contact Us Online: P ro d u c t s upp or t i s a v a i l a b l e 2 4 / 7 i n c l ud i n g p r od u c t in fo r m a ti on , u se r m a nu a l s , qu i c k s t a rt up g u i d e s an d FA Q’s w w w.d ig i m e rg e .c om By Email:...
- Page 36 DPB34TLX English Version 1.0 www.digimerge.com Copyright © 2013 Digimerge Technologies Inc., a FLIR Company...
Need help?
Do you have a question about the DPB34TLX and is the answer not in the manual?
Questions and answers