Table of Contents
Advertisement
Quick Links
Specifications
Wingspan. . .................................60.7.in.(1540.5mm)
Wing.Area................................667.sq.in.(43.sq.dm)
Pulse
™
Plug-N-Play
Assembly mAnuAl
XT 40
Length. . ............................................50.in.(1270mm)
Weight. . ......................... 5.5–6.25.lb.(2.5.kg–2.8.kg)
™
Advertisement
Table of Contents

Related Manuals for Hangar 9 Pulse XT 40 Plug-N-Play


Summary of Contents for Hangar 9 Pulse XT 40 Plug-N-Play
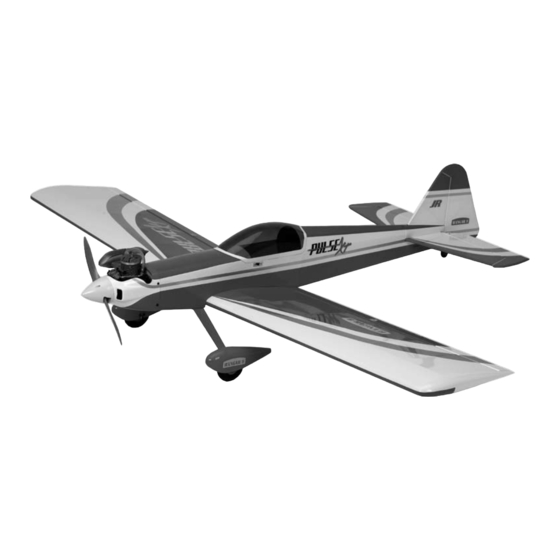
- Page 1 Pulse XT 40 ™ Plug-N-Play ™ Assembly mAnuAl Specifications Wingspan........60.7.in.(1540.5mm) Length..........50.in.(1270mm) Wing.Area........667.sq.in.(43.sq.dm) Weight......5.5–6.25.lb.(2.5.kg–2.8.kg)
-
Page 2: Table Of Contents
Table of Contents Contents.of.Kit..............3 Radio.and.Power.Systems.Requirements.. -
Page 3: Contents.of.kit
Contents of Kit Replacement Parts A.. Fuselage.w/o.Engine. HAN4101 B.. Wing.w/o.Aluminum.Tube. HAN4102 C.. Tail.Set. HAN4104 D.. Canopy. HAN4108 E.. Landing.Gear. HAN4107 F.. Painted.Cowl. HAN4105 G.. Painted.Wheel.Pants. HAN4106 Items not shown Pushrod.Set. HAN4109 Decal.Set. HAN4112 Aluminum.Wing.Tube. HAN4103 Wing.Bolt.Set. HAN4110 EP.Motor.Mount. HAN4111 Radio and Power Systems Requirements •.4-channel.radio.system.(minimum).with.receiver Recommended JR ®... -
Page 4: Optional.field.equipment
Optional Field Equipment •.Fieldmate™.Pre-built.Flight.Box.(HAN117). •.Cleaner.&.towels •.Blue.Block.After.Run.Oil.(EVOX1000). •.Power.Panel.(HAN106) •.12V.7Ah.Sealed.Battery.(HAN102). •.PowerPro™.12V.Starter.(HAN161) Required Tools and Adhesives Tools •.Adustable.wrench. •.Hobby.knife •.Phillips.screwdriver.(large). •.Phillips.screwdriver.(small) •.Ruler Adhesives •.Pacer.Z-42.Threadlock Using the Manual This.manual.is.divided.into.sections.to.help.make.assembly.easier.to.understand,.and.to.provide.breaks.between.each. major.section..In.addition,.check.boxes.have.been.placed.next.to.each.step.to.keep.track.of.each.step.completed..Steps. with.a.single.box.( ).are.performed.once,.while.steps.with.two.boxes.( ).indicate.that.the.step.will.require. repeating,.such.as.for.a.right.or.left.wing.panel,.two.servos,.etc..Remember.to.take.your.time.and.follow.the.directions. Before Starting Assembly ™ Before.beginning.the.assembly.of.the.Pulse .XT,.remove.each.part.from.its.bag.for.inspection..Closely.inspect.the. fuselage,.wing.panels,.rudder,.and.stabilizer.for.damage..If.you.find.any.damaged.or.missing.parts,.contact.the.place. of.purchase.If.you.find.any.wrinkles.in.the.covering,.use.a.heat.gun.or.sealing.iron.to.remove.them..Use.caution.while. -
Page 5: Limited.warranty.period
Limited Warranty Period Horizon.Hobby,.Inc..guarantees.this.product.to.be.free.from.defects.in.both.material.and.workmanship.at.the.. date.of.purchase. Limited Warranty & Limits of Liability Pursuant.to.this.Limited.Warranty,.Horizon.Hobby,.Inc..will,.at.its.option,.(i).repair.or.(ii).replace,.any.product.determined. by.Horizon.Hobby,.Inc..to.be.defective..In.the.event.of.a.defect,.these.are.your.exclusive.remedies. This.warranty.does.not.cover.cosmetic.damage.or.damage.due.to.acts.of.God,.accident,.misuse,.abuse,.negligence,. commercial.use,.or.modification.of.or.to.any.part.of.the.product..This.warranty.does.not.cover.damage.due.to.improper. installation,.operation,.maintenance,.or.attempted.repair.by.anyone.other.than.an.authorized.Horizon.Hobby,.Inc..service. center..This.warranty.is.limited.to.the.original.purchaser.and.is.not.transferable..In.no.case.shall.Horizon.Hobby’s. liability.exceed.the.original.cost.of.the.purchased.product.and.will.not.cover.consequential,.incidental.or.collateral. damage..Horizon.Hobby,.Inc..reserves.the.right.to.inspect.any.and.all.equipment.involved.in.a.warranty.claim..Repair. or.replacement.decisions.are.at.the.sole.discretion.of.Horizon.Hobby,.Inc..Further,.Horizon.Hobby.reserves.the.right.to. change.or.modify.this.warranty.without.notice. REPAIR.OR.REPLACEMENT.AS.PROVIDED.UNDER.THIS.WARRANTY.IS.THE.EXCLUSIVE.REMEDY.OF.THE.CONSUMER.. HORIZON.HOBBY,.INC..SHALL.NOT.BE.LIABLE.FOR.ANY.INCIDENTAL.OR.CONSEQUENTIAL.DAMAGES. As.Horizon.Hobby,.Inc..has.no.control.over.use,.setup,.final.assembly,.modification.or.misuse,.no.liability.shall.be. assumed.nor.accepted.for.any.resulting.damage.or.injury..By.the.act.of.use,.setup.or.assembly,.the.user.accepts.all. resulting.liability.. If.you.as.the.purchaser.or.user.are.not.prepared.to.accept.the.liability.associated.with.the.use.of.this.product,.you.are. advised.to.return.this.product.immediately.in.new.and.unused.condition.to.the.place.of.purchase. Safety Precautions This.is.a.sophisticated.hobby.product.and.not.a.toy..It.must.be.operated.with.caution.and.common.sense.and.requires. some.basic.mechanical.ability..Failure.to.operate.this.product.in.a.safe.and.responsible.manner.could.result.in.injury.or. damage.to.the.product.or.other.property..This.product.is.not.intended.for.use.by.children.without.direct.adult.supervision. The.product.manual.contains.instructions.for.safety,.operation.and.maintenance..It.is.essential.to.read.and.follow.all.. the.instructions.and.warnings.in.the.manual,.prior.to.assembly,.setup.or.use,.in.order.to.operate.correctly.and.avoid. damage.or.injury. -
Page 6: Questions,.Assistance,.And.repairs
Questions, Assistance, and Repairs Your.local.hobby.store.and/or.place.of.purchase.cannot.provide.warranty.support.or.repair..Once.assembly,.setup.or.use. of.the.product.has.been.started,.you.must.contact.Horizon.Hobby,.Inc..directly..This.will.enable.Horizon.to.better.answer. your.questions.and.service.you.in.the.event.that.you.may.need.any.assistance. Questions or Assistance For.questions.or.assistance,.please.direct.your.email.to.productsupport@horizonhobby.com,.or.call.877.504.0233.toll. free.to.speak.to.a.service.technician. Inspection or Repairs If.your.product.needs.to.be.inspected.or.repaired,.please.call.for.a.Return.Merchandise.Authorization.(RMA)..Pack.the. product.securely.using.a.shipping.carton..Please.note.that.original.boxes.may.be.included,.but.are.not.designed.to. withstand.the.rigors.of.shipping.without.additional.protection..Ship.via.a.carrier.that.provides.tracking.and.insurance.for. lost.or.damaged.parcels,.as.Horizon.Hobby,.Inc..is.not.responsible.for.merchandise.until.it.arrives.and.is.accepted.at. our.facility..Include.your.complete.name,.address,.phone.number.where.you.can.be.reached.during.business.days,.RMA. number,.and.a.brief.summary.of.the.problem..Be.sure.your.name,.address,.and.RMA.number.are.clearly.written.on.the. shipping.carton. Warranty Inspection and Repairs To.receive.warranty.service,.you.must.include.your.original.sales.receipt.verifying.the.proof-of-purchase.date..Providing. warranty.conditions.have.been.met,.your.product.will.be.repaired.or.replaced.free.of.charge..Repair.or.replacement. decisions.are.at.the.sole.discretion.of.Horizon.Hobby..Horizon.Hobby,.Inc..guarantees.this.product.to.be.free.from.defects. in.both.material.and.workmanship.at.the.date.of.purchase. -
Page 7: Non-Warranty.repairs
Non-Warranty Repairs Should.your.repair.not.be.covered.by.warranty.and.the.expense.exceeds.50%.of.the.retail.purchase.cost,.you.will.be. provided.with.an.estimate.advising.you.of.your.options..You.will.be.billed.for.any.return.freight.for.non-warranty.repairs.. Please.advise.us.of.your.preferred.method.of.payment..Horizon.Hobby.accepts.money.orders.and.cashiers.checks,.as. well.as.Visa,.MasterCard,.American.Express,.and.Discover.cards..If.you.choose.to.pay.by.credit.card,.please.include.your. credit.card.number.and.expiration.date..Any.repair.left.unpaid.or.unclaimed.after.90.days.will.be.considered.abandoned. and.will.be.disposed.of.accordingly. Electronics.and.engines.requiring.inspection.or.repair.should.be.shipped.to.the.following.address.(freight.prepaid): Horizon.Service.Center. 4105.Fieldstone.Road. Champaign,.Illinois.61822 All.other.products.requiring.inspection.or.repair.should.be.shipped.to.the.following.address.(freight.prepaid): Horizon.Product.Support. 4105.Fieldstone.Road. Champaign,.Illinois.61822 Safety, Precautions, and Warnings As.the.user.of.this.product,.you.are.solely.responsible.for.operating.it.in.a.manner.that.does.not.endanger.yourself.and. others.or.result.in.damage.to.the.product.or.the.property.of.others. Carefully.follow.the.directions.and.warnings.for.this.and.any.optional.support.equipment.(chargers,.rechargeable.battery. packs,.etc.).that.you.use. This.model.is.controlled.by.a.radio.signal.that.is.subject.to.interference.from.many.sources.outside.your.control..This. interference.can.cause.momentary.loss.of.control.so.it.is.necessary.to.always.keep.a.safe.distance.in.all.directions.around. your.model,.as.this.margin.will.help.to.avoid.collisions.or.injury. •.Always.operate.your.model.in.an.open.area.away.from.cars,.traffic,.or.people. •.Avoid.operating.your.model.in.the.street.where.injury.or.damage.can.occur. •.Never.operate.the.model.out.into.the.street.or.populated.areas.for.any.reason. •.Never.operate.your.model.with.low.transmitter.batteries. •.. C arefully.follow.the.directions.and.warnings.for.this.and.any.optional.support.equipment.(chargers,.rechargeable. battery.packs,.etc.).that.you.use. •.Keep.all.chemicals,.small.parts.and.anything.electrical.out.of.the.reach.of.children. •.. M oisture.causes.damage.to.electronics..Avoid.water.exposure.to.all.equipment.not.specifically.designed.and.protected. for.this.purpose. -
Page 8: Section.1:.Landing.gear.installation
Section 1: Landing Gear Installation Required Parts .Step 2 •.Fuselage. •.Landing.gear Secure.the.wheel.pant.to.the.landing.gear.using.two.. •.6-32.x.1/2".socket.head.screw.(3) 4-40.x.3/8".socket.head.screws..Make.sure.to.use. threadlock.to.prevent.the.screws.from.loosening.. •.#6.washer.(3) during.flight. •.Wheel.pant.(right.and.left) •.4-40.x.3/8".socket.head.bolt.(4) Required Tools and Adhesives •.Hex.wrench:.3/32",.7/64". •.Threadlock .Step 1 Attach.the.landing.gear.to.the.bottom.of.the.fuselage.using. three.6-32.x.1/2".socket.head.bolts.and.three.#6.washers.. Put.a.little.threadlock.on.the.bolts.to.prevent.them.from. vibrating.loose.during.flight. .Step 3 Check.that.the.wheel.can.spin.freely.without.rubbing.on. the.wheel.pant..If.it.does,.loosen.the.4mm.nut.and.4mm. locknut.and.reposition.the.wheel.so.it.can.spin.freely. -
Page 9: Section.2:.Receiver.and.battery.installation
Section 2: Receiver and Battery Installation Required Parts .Step 3 •.Fuselage Route.the.receiver.antenna.to.the.rear.of.the.fuselage. •.Receiver.battery. •.Receiver using.the.pre-installed.antenna.tube. .Step 1 Wrap.the.receiver.and.receiver.battery.in.1/4".(6mm).. foam.to.protect.them.from.engine.vibrations. Note:.Do.not.cut.the.excess.antenna.wire.as. it.will.reduce.the.range.of.your.radio.system. .Step 2 Plug.the.servos,.extensions.and.switch.harness.into.the. receiver..Plug.the.receiver.battery.and.switch.harness. together..Place.the.receiver.and.receiver.battery.into.the. fuselage. -
Page 10: Section.3:.Tail.installation
Section 3: Tail Installation Required Parts .Step 3 •.Fuselage. •.Rudder.assembly Secure.the.tail.assembly.to.the.fuselage.using.two.4-40. •.Stabilizer.assembly. •.4-40.locknut.(2) locknuts.and.two.#4.washers. •.#4.washer Required Tools and Adhesives •.Adjustable.wrench .Step 1 Carefully.slide.the.threaded.rods.from.the.rudder. assembly.into.the.stabilizer.assembly. Note:.Do.not.over-tighten.the. nuts.and.crush.the.fuselage. .Step 4 Connect.the.rudder.clevis.to.the.rudder.control.horn..With. the.radio.system.on,.check.that.the.rudder.is.centered..If. not,.either.thread.the.clevis.on.or.off.the.pushrod.until.the. rudder.is.centered. .Step 2 Slide.the.tail.assembly.into.position.on.the.fuselage. - Page 11 Section 3: Tail Installation .Step 5 Repeat.Step.4.for.the.elevator.
-
Page 12: Section.4:.Spinner.installation
Section 4: Spinner Installation Required Parts .Step 3 •.Fuselage Slide.the.propeller.onto.the.engine.crankshaft..Install. the.washer.and.nut.onto.the.engine.crankshaft..Align.the. Required Tools and Adhesives propeller.so.it.is.slightly.away.from.the.dimples.of.the. •.Phillips.screwdriver. •.Propeller spinner.backplate. •.Adjustable.wrench .Step 1 Remove.the.plastic.packaging.cap.from.the.crankshaft.of. the.engine. .Step 4 Test.fit.the.spinner.cone.onto.the.backplate..Make.sure. the.gap.in.the.spinner.cone.is.evenly.positioned.around. the.propeller..Reposition.the.propeller.in.relation.to.to.the. spinner.backplate.if.necessary. .Step 2 Remove.the.propeller.nut.and.washer.from.the.crankshaft.. Slide.the.spinner.backplate.onto.the.crankshaft. -
Page 13: Section.5:.Wing.installation
Section 4: Spinner Installation .Step 5 .Step 6 Use.a.crescent.wrench.to.tighten.the.propeller.nut. Secure.the.spinner.cone.to.the.spinner.backplate.using. two.3mm.x.12mm.sheet.metal.screws. Section 5: Wing Installation Required Parts .Step 2 •.Fuselage. •.Wing Slide.the.remaining.wing.panel.onto.the.wing.tube. •.Wing.bolt.plate. •.Wing.tube aligning.the.dowel.into.the.panel. •.1/4-20.x.1 ".nylon.bolt.(2) •.1 ".(33mm).wing.dowel Required Tools and Adhesives •.Thin.CA. •.Phillips.screwdriver .Step 1 Slide.the.wing.tube.and.the.1 ".(33mm).wing.dowel. -
Page 14: Control.throws
Control Throws The.amount.of.control.throw.should.be.adjusted.as.closely. Rudder as.possible.using.mechanical.means,.rather.than.making. 3/4".(19mm).Left large.changes.electronically.at.the.radio..By.moving. 3/4".(19mm).Right the.position.of.the.clevis.at.the.control.horn.toward.the. outermost.hole,.you.will.decrease.the.amount.of.control. The rudder throw is measured at the counter- throw.of.the.control.surface..Moving.it.toward.the.control. balance using the top of the fin as a reference. surface.will.increase.the.amount.of.throw..Moving.the. pushrod.wire.at.the.servo.arm.will.have.the.opposite. effect:.Moving.it.closer.to.center.will.decrease.throw,. and.away.from.center.will.increase.throw..Work.with.a. combination.of.the.two.to.achieve.the.closest.or.exact. control.throws.listed. Aileron Low.Rate. Down 11/32".(9mm). 11/32".(9mm) High.Rate 1/2".(13mm). -
Page 15: Recommended.center.of.gravity.(Cg)
Recommended Center of Gravity (CG) An.important.part.of.preparing.the.aircraft.for.flight.is. properly.balancing.the.model. Caution: Do not inadvertently skip this step! The.recommended.Center.of.Gravity.(CG).location.for.. ™ the.Pulse .XT.is.2 ".(70mm).behind.the.leading.edge.. of.the.wing.against.the.fuselage..Make.sure.the.aircraft.. is.inverted.when.measuring.the.CG..If.necessary,.move.. the.battery.pack.or.add.weight.to.either.the.nose.or.the.. tail.until.the.correct.balance.is.achieved..Stick-on.. weights.are.available.at.your.local.hobby.store.and.. work.well.for.this.purpose.. Note:.The.range.for.the.center.of.gravity. is.2 ".(63mm).to.3".(76mm). Pre-Flight Charge.both.the.transmitter.and.receiver.pack.for.your. Check.all.the.control.horns,.servo.horns.and.clevises.to. airplane..Use.the.recommended.charger.supplied.with. make.sure.they.are.secure.and.in.good.condition..Replace. your.particular.radio.system,.following.the.instructions. any.items.that.would.be.considered.questionable..Failure. provided.with.the.radio..In.. of.any.of.these.components.in.flight.would.mean.the.loss. most.cases,.the.radio.should.be.charged.the.night.before. of.your.aircraft. going.out.flying. Test.run.the.engine.and.make.sure.it.transitions.smoothly. -
Page 16: Adjusting.the.engine
Adjusting the Engine .Step 1 .Step 3 Completely.read.the.instructions.included.with.your. Before.you.fly,.be.sure.that.your.engine.idles.reliably,. engine.and.follow.the.recommended.break-in.procedure. transitions.and.runs.at.all.throttle.settings..Only.when. this.is.achieved.should.any.plane.be.considered.ready.for. .Step 2 flight. At.the.field,.adjust.the.engine.to.a.slightly.rich.setting.at. full.throttle.and.adjust.the.idle.and.low-speed.needle.so. that.a.consistent.idle.is.achieved. Maintaining Your Pulse XT PNP The.following.is.a.check.list.that.you.should.follow.. Checking the Control Horns every.time.you.have.completed.a.flying.session.with.. Inspect.the.control.horns.to.make.sure.they.have.not. your.Pulse ™ .XT..Doing.so.will.keep.your.aircraft.. crushed.the.wood.of.the.control.surface..If.so,.remove.the. in.the.best.flying.condition. control.horn.screws.to.remove.the.control.horn..Place.2–3. drops.of.thin.CA.into.each.of.the.screw.holes..In.addition,. Clean Up use.a.T-pin.to.poke.small.holes.in.the.covering.in.the.area. -
Page 17: Glossary.of.terms
Glossary of Terms •.. A ilerons:..Each.side.of.this.airplane.has.a.hinged. •.. P itch Axis:.The.horizontal.plane.on.which.the. control.surface.(aileron),.located.on.the.trailing.edge.of. airplane’s.nose.is.raised.or.lowered..By.moving.the. the.wing..Move.the.aileron.stick.on.the.transmitter.left,. elevator,.you.can.raise.the.airplane’s.nose.above.the. the.left.aileron.moves.up.and.the.right.aileron.moves. pitch.axis.(climb).or.lower.it.below.the.pitch.axis.(dive). down..Moving.the.left.aileron.up.causes.more.drag.and. •.. P ushrod:.The.rigid.mechanism.that.transfers. less.lift,.causing.the.left.wing.to.drop.down..When.the. movement.from.the.servo.to.the.control.surface. right.aileron.moves.down,.more.lift.is.created,.causing. •.. R oll Axis:.The.horizontal.plane.on.which.the.airplane’s. the.right.wing.to.rise..This.interaction.causes.the. wings.are.raised.or.lowered..By.adjusting.the.ailerons,. airplane.to.turn.or.roll.to.the.left..Perform.the.opposite. you.can.drop.a.wing.tip.below.the.roll.axis.and.cause. actions,.and.the.airplane.will.roll.to.the.right.. the.airplane.to.bank.or.roll. •.. C levis:.The.clevis.is.a.small.clip.that.connects.the.wire. •.. R udder:.The.hinged.control.surface.on.the.vertical. end.of.the.pushrod.to.the.control.horn.which.is.secured. stabilizer.that.controls.the.airplane’s.yaw..Moving.the. -
Page 18: 2006.Official.ama.national.model.aircraft.safety.code
2006 Official AMA National Model Aircraft Safety Code GENERAL 7).I.will.not.operate.models.with.pyrotechnics.(any. device.that.explodes,.burns,.or.propels.a.projectile. 1).I.will.not.fly.my.model.aircraft.in.sanctioned. of.any.kind).including,.but.not.limited.to,.rockets,. events,.air.shows.or.model.flying.demonstrations.until. explosive.bombs.dropped.from.models,.smoke. it.has.been.proven.to.be.airworthy.by.having.been. bombs,.all.explosive.gases.(such.as.hydrogen-filled. previously,.successfully.flight.tested. balloons),.or.ground.mounted.devices.launching.a. 2).I.will.not.fly.my.model.higher.than.approximately. projectile..The.only.exceptions.permitted.are.rockets. 400.feet.within.3.miles.of.an.airport.without.notifying. flown.in.accordance.with.the.National.Model.Rocketry. the.airport.operator..I.will.give.right-of-way.and.avoid. Safety.Code.or.those.permanently.attached.(as.per. flying.in.the.proximity.of.full-scale.aircraft..Where. JATO.use);.also.those.items.authorized.for.Air.Show. necessary,.an.observer.shall.be.utilized.to.supervise. Team.use.as.defined.by.AST.Advisory.Committee. flying.to.avoid.having.models.fly.in.the.proximity.of. (document.available.from.AMA.HQ)..In.any.case,. full-scale.aircraft. models.using.rocket.motors.as.a.primary.means.of. 3).Where.established,.I.will.abide.by.the.safety.rules. propulsion.are.limited.to.a.maximum.weight.of.3.3. for.the.flying.site.I.use,.and.I.will.not.willfully.and. pounds.and.a.G.series.motor..(A.model.aircraft.is. deliberately.fly.my.models.in.a.careless,.reckless.and/ defined.as.an.aircraft.with.or.without.engine,.not.able. or.dangerous.manner. to.carry.a.human.being.) 4).The.maximum.takeoff.weight.of.a.model.is.55. - Page 19 2006 Official AMA National Model Aircraft Safety Code 5).Flying.sites.separated.by.three.miles.or.more. Organized RC Racing Event are.considered.safe.from.site-to.site.interference,. 10).An.RC.racing.event,.whether.or.not.an.AMA.Rule. even.when.both.sites.use.the.same.frequencies..Any. Book.event,.is.one.in.which.model.aircraft.compete. circumstances.under.three.miles.separation.require. in.flight.over.a.prescribed.course.with.the.objective.of. a.frequency.management.arrangement,.which.may. finishing.the.course.faster.to.determine.the.winner. be.either.an.allocation.of.specific.frequencies.for. A..In.every.organized.racing.event.in.which. each.site.or.testing.to.determine.that.freedom.from. contestants,.callers.and.officials.are.on.the.course: interference.exists..Allocation.plans.or.interference. 1..All.officials,.callers.and.contestants.must.properly. test.reports.shall.be.signed.by.the.parties.involved. wear.helmets,.which.are.OSHA,.DOT,.ANSI,.SNELL.or. and.provided.to.AMA.Headquarters..Documents.of. NOCSAE.approved.or.comparable.standard.while.on. agreement.and.reports.may.exist.between.(1).two. the.racecourse. or.more.AMA.Chartered.Clubs,.(2).AMA.clubs.and. 2..All.officials.will.be.off.the.course.except.for.the. individual.AMA.members.not.associated.with.AMA. starter.and.their.assistant. Clubs,.or.(3).two.or.more.individual.AMA.members. 3.”On.the.course”.is.defined.to.mean.any.area.beyond. 6).For.Combat,.distance.between.combat.engagement. the.pilot/staging.area.where.actual.flying.takes.place.
- Page 20 ©.2006.Horizon.Hobby,.Inc.. 4105.Fieldstone.Road. Champaign,.Illinois.61822. (877).504-0233. horizonhobby.com 9282...
Need help?
Do you have a question about the Pulse XT 40 Plug-N-Play and is the answer not in the manual?
Questions and answers