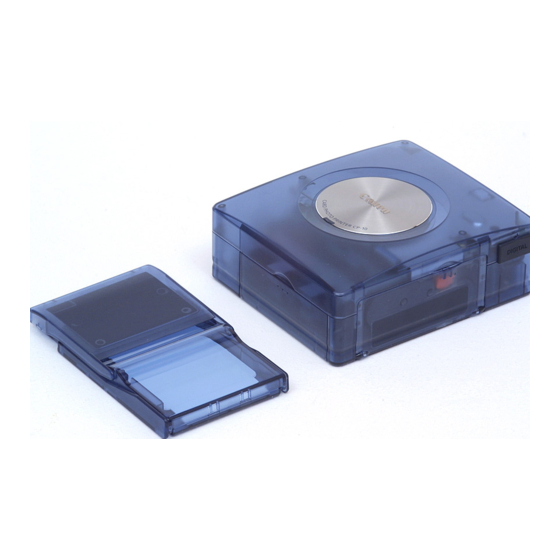
Canon CP-10 User Manual
Card photo printer
printer driver
Hide thumbs
Also See for CP-10:
- User manual (60 pages) ,
- Specifications (2 pages) ,
- Connection manual (76 pages)
Table of Contents
Advertisement
Quick Links
Download this manual
See also:
User Manual
Advertisement
Table of Contents
Troubleshooting

Related Manuals for Canon CP-10


Summary of Contents for Canon CP-10
-
Page 1: User Guide
Card Photo Printer CP-10 Printer Driver User Guide Windows... -
Page 2: Table Of Contents
About the Connection Cable ............. 6 Installing/Uninstalling the Software on the Solution Disk ....7 Installing the Software............... 7 Uninstalling the Software ..............9 Connecting the CP-10 to Your Computer ..........10 Installing/Uninstalling the Printer Driver ..........12 For Windows 98 ................13 Installing..................13 For Windows Me ................ -
Page 3: Safety Precautions
• While every effort has been made to ensure that the information contained in this guide is accurate and complete, no liability can be accepted for any errors or omissions. Canon reserves the right to change the specifications of the hardware and software described herein at any time without prior notice. -
Page 4: Read This First
Meaning of Illustrations Indicates a printed manual. Indicates a manual in the form of a PDF file stored on the Canon Digital Camera Solution Disk. Detailed explanations of operating procedures are given in the [Help] accompanying each software application. - Page 5 Refer to the ZoomBrowser EX Software Guide If a Problem Occurs • Problems related to the CP-10 • Error messages related to the CP-10 Refer to the CP-10 User Guide that appear on the display of a (included with the CP-10 Printer Kit)
-
Page 6: About The Connection Cable
About the Connection Cable To connect the CP-10 to your computer, you must use a USB cable. A USB cable is provided with the Computer Connection Kit CCK-CP100, but you can also purchase a USB cable separately as indicated below. -
Page 7: Installing/Uninstalling The Software On The Solution Disk
Software on the Solution Disk The Canon Digital Camera Solution Disk contains software necessary for printing to the CP-10 from your computer. This section describes how to install and uninstall the software. With Windows 2000, be sure to log on with Administrator privileges when installing the software. - Page 8 Click [Software Installation]. You can click the [Using the Software] and then click [ZoomBrowser EX] to open the guide (PDF), which gives details about using ZoomBrowser EX and PhotoRecord. Read the product license agreement. If you agree to all of its conditions, click the [Yes] button.
-
Page 9: Uninstalling The Software
Uninstalling the Software This section describes how to uninstall applications, using ZoomBrowser EX as an example. Click the [Start] button and select [Programs], [Canon Utilities], [ZoomBrowser EX], and [ZoomBrowser EX Uninstall]. Uninstallation begins and ZoomBrowser EX is removed. • If you uninstall ZoomBrowser EX for any reason, such as because of a problem with the database, please delete the [Database] folder from the [C:\Program Files\ZoomBrowser EX] folder on the hard disk. -
Page 10: Connecting The Cp-10 To Your Computer
Computer Notes about connection • Using the USB cable, be sure to connect the CP-10 directly to your computer. If you connect it via a USB hub, the printer may not function properly. • Do not use the CP-10 together with other USB devices (except a USB mouse or keyboard);... - Page 11 CP-10, and the other end to a USB port on your computer. • There is no need to turn off the CP-10 when connecting it to your computer. • When connecting the CP-10 to your computer, make sure the connectors on the ends of the USB cable match the terminals on the CP-10 and your computer.
-
Page 12: Installing/Uninstalling The Printer Driver
(2) Right-click the [Canon CP-10] icon and then select [Delete]. 3. Restart your computer and reconnect the CP-10. (You can connect it to any USB port.) • When you use the following procedure, the USB driver for the CP-10 is also installed automatically. Uninstalling •... -
Page 13: For Windows 98
For Windows 98 Installing Close any programs that are running. Connect the AC adapter to the CP-10. Then plug the power cable into the AC adapter and the wall outlet and make sure power is supplied to the CP-10. Connect the CP-10 and your computer, using the USB cable. - Page 14 Place the Canon Digital Camera Solution Disk in the CD-ROM drive. Select the “Specify a location”. Click the [Browse] button to select the [\CP_DRV\ENGLISH\WIN9X] folder on the CD-ROM and click the [OK] button. Then click the [Next] button. Do not select the “CD-ROM drive”.
- Page 15 When the following message appears, click the [Finish] button. Now you can continue and install the printer driver. When the following message appears, click the [Next] button. Select the “Search for the best driver for your device (Recommended).” and then click the [Next] button.
- Page 16 Because the folder specified in step 7 already appears here, there is nothing to do but click the [Next] button. Do not select the “CD-ROM drive”. Click the [Next] button. Adjust any necessary settings, and then click the [Finish] button. The printer driver is installed.
-
Page 17: For Windows Me
Place the Canon Digital Camera Solution Disk in the CD-ROM drive. Connect the AC adapter to the CP-10. Then plug the power cable into the AC adapter and the wall outlet and make sure power is supplied to the CP-10. - Page 18 Select the “Automatic search for a better driver (Recommended)” and then click the [Next] button. In the list of printer drivers, select [Canon CP-10] so that [\CP_DRV\ENGLISH\WIN9X\CP10USB.INF] appears in [Location], then click the [OK] button. The USB driver for the CP-10 is installed.
- Page 19 When the following message appears, click the [Finish] button. Now you can continue and install the printer driver. Select the “Automatic search for a better driver (Recommended)” and then click the [Next] button.
- Page 20 In the list of printer drivers, select [Canon CP-10] so that [\CP_DRV\ENGLISH\WIN9X\CP10.INF] appears in [Location], then click the [OK] button. Adjust any necessary settings, and then click the [Finish] button. The printer driver is installed. When the following message appears, click the [Finish] button.
-
Page 21: Troubleshooting The Printer Driver Installation
Make sure power is supplied to the CP-10 (its indicator light is green), and that the CP-10 is connected to your computer with the USB cable. If the CP-10 and your computer are not yet connected, be sure to connect them. Click the [Start] button and select [Settings], and [Control Panel]. - Page 22 Click the [Device Manager] tab. Following the examples shown below, select the [Canon CP-10] under [Universal Serial Bus controllers] or [Other devices], and then click the [Remove] button. Use the following screen examples as a reference and make sure you select the correct device for deletion.
- Page 23 Example 2: Example 3: When the confirmation message appears, click the [OK] button.
-
Page 24: For Windows 2000
Close any programs that are running. Connect the AC adapter to the CP-10. Then plug the power cable into the AC adapter and a wall outlet and make sure that power is supplied to the CP-10. - Page 25 Click the [Next] button. Select the “Search for a suitable driver for my device (recommended)” and then click the [Next] button. Place the Canon Digital Camera Solution Disk in the CD-ROM drive.
- Page 26 Select the “Specify a location” and then click the [Next] button. Do not select the “CD-ROM drive”. Click the [Browse] button, select the [W2KCP10.inf] file in the [\CP_DRV\ENGLISH\WIN2K] folder, click the [OPEN] button, then click the [OK] button. The “Locate File” dialog appears.
- Page 27 Click the [Next] button. The printer driver is installed. When the following message appears, click the [Yes] button.
-
Page 28: Uninstalling
When the following message appears, click the [Finish] button. Uninstalling Before uninstalling the printer driver, be sure to disconnect the CP-10 from your computer. Important Be sure to follow the procedures described in this section to uninstall the printer driver. Do not uninstall: by clicking the [Start] button and selecting [Settings], [Control Panel], and [Add/Remove Programs]. - Page 29 From the list of printers available for deletion, select the [Canon CP-10] and then click the [Delete] button. If [Canon CP-10] does not appear, it was probably not installed correctly. In this case, perform the procedure described in Troubleshooting the Printer Driver Installation...
- Page 30 When the confirmation message appears, check the printer name and then click the [Yes] button. When the printer driver is deleted and “CP Printer Driver Uninstall” dialog returns, click the [Exit] button. Restart your computer.
-
Page 31: Printing
This is not a printer problem. • Use the following procedure to set up spooling: click the [Start] button and select [Settings], and [Printers]. Right-click the [Canon CP-10] icon and select [Properties]. Then, select the [Details] tab and [Spool Settings]. -
Page 32: Starting Zoombrowser Ex
Starting ZoomBrowser EX Double-click the [Canon ZoomBrowser EX] icon on the desktop. Or, click the [Start] button and select [Programs], [Canon Utilities], [ZoomBrowser EX], and [ZoomBrowser EX] to start the program. Selecting an Image for Printing Select an image you want to print. Click the (PRINT) button to display a menu. -
Page 33: Selecting A Print Mode
For information on how to print on an 8-label sheet, see Printing Duplicate Images on an 8-Label Sheet Printing Different Images on an 8-Label Sheet p.37) or p.39). From the [Printer] drop-down list, select “Canon CP-10”. The CP-10 setup dialog appears. -
Page 34: Setting The Printer Driver For Printing
For [Print Mode], select “Photo printer standard printing” and then click the [Next] button. Select “Bordered” or “Borderless”, and then click the [Finish] button. If you select “Bordered”, the image is automatically resized to fit within the print. Close the “PhotoRecord Print Modes” dialog. The print mode settings are now reflected in the album page window. - Page 35 Click the [Properties] button. At this point, do not change the printer. Click the [Print Settings] tab, and then set the print orientation and the number of copies. For details, click the [?] button or [Help] button to see the online help.
- Page 36 Click the [Image Adjustment] tab, and then adjust the brightness and color of prints. For details, click the [?] button or [Help] button to see the online help. Adjust the brightness and contrast of prints. Adjust the color of prints. When you finish adjusting the settings, click the [OK] button to close the Properties dialog.
-
Page 37: Printing Duplicate Images On An 8-Label Sheet
• While printing is in progress, do not use [Cancel All Documents] or [Cancel] from the “Canon CP-10” window to stop printing. If you do so, paper is ejected to the paper delivery area and printing may end in an error. This is not a malfunction, but a mechanism for protecting the print head. - Page 38 Right-click the image you want to print, and then select [Make Copies]. For [Number of copies], specify 7. Then click the [OK] button. The images are printed in replicate, with their positions adjusted accordingly, in the eight labels on the 8-label sheet. Click the (PRINT) button to start printing.
-
Page 39: Printing Different Images On An 8-Label Sheet
Printing Different Images on an 8-Label Sheet You can also print a combination of different images on an 8-label sheet. In the “PhotoRecord Print Modes” dialog, select “Photo printer multiple printing”, and then click the [Finish] button. Close the “PhotoRecord Print Modes” dialog. The print mode settings are now reflected in the album page window. -
Page 40: Printing Part Of An Image (Trimming)
Printing Part of an Image (Trimming) You can select and then print a portion of an image (trimming). This is useful when you only want to print part of an image, or if the part you are most interested in is not at the center of the image. •... - Page 41 Select the area you want to print, and then click the (CLOSE) button. This determines the area to print. The area inside the frame is printed. You can drag the edge of the frame to change its size, or drag inside the frame to move it.
-
Page 42: Other Printing Functions
Other Printing Functions By selecting “Artwork/Layout album” at [Print Mode], you can add text or decorative embellishments to an image when printing it. Also, you can combine the different functions and create your own original name card. Adding text Adding decorative embellishments... - Page 43 Creating original name cards...
-
Page 44: Appendices
Appendices About the Print Area and the Number of Pixels Print Area The shaded area ( ) in the following diagrams indicates the print area on standard sheet, full-sheet label sheet, and 8-label sheets. (Unit = mm) Note that because the print area is larger than the actual paper size, a border is trimmed from the image when it is printed. -
Page 45: Number Of Pixels
8-label sheets 15.4 20.3 17.3 22.0 112.0 Number of Pixels 1040 × 662 dots * Total number of pixels 1016 × 638 dots Effective number of pixels * Number of pixels of print area. This also includes the border that is trimmed from around an image during printing. -
Page 46: Troubleshooting
Check the USB cable to make sure it is connected correctly. A USB hub is being used for the connection. Be sure to use the USB cable to connect the CP-10 directly to your computer. If you connect via a USB hub, the printer may not function properly. - Page 47 The color of an image seen on the screen is different from that seen in prints. Printers and computer displays use different color reproduction methods, and lighting conditions and display settings affect the appearance of colors on your computer’s display. However, you can adjust color using [Image Adjustment] p.36).
-
Page 48: Error Messages
Remove the paper, and then insert it back into the paper cassette correctly. There is no paper in the paper cassette. Add more paper to the paper cassette. Refer also to Loading the Paper in the CP-10 User Guide . - Page 49 There is no more ink in the ink cassette. Replace the ink cassette with a new one. Refer also to Loading the Ink Cassette in the CP-10 User Guide . Ink cassette not installed. You must insert an ink cassette before printing.
- Page 50 If the problem still continues, replace the ink cassette with a new one. Refer also to Loading the Ink Cassette in the CP-10 User Guide . Error occurred during communication. Check the printer power and printer connections.
-
Page 51: Other Messages
This is not a malfunction. Wait until the print head cools down and printing will automatically resume again. For messages caused by errors related to the operating environment of your computer, follow the messages on the screen. CDP-E005 ©2001 CANON INC.
Need help?
Do you have a question about the CP-10 and is the answer not in the manual?
Questions and answers