
Related Manuals for Sanofi-aventis BG STAR


Summary of Contents for Sanofi-aventis BG STAR
-
Page 1: Blood Glucose Monitoring System
Blood Glucose Monitoring System OWNER’S GUIDE Application number: 184338 Page 1 of 48 Date of revision: August 18, 2011 s-a Version 2.1 dated August 26, 2011... - Page 2 In case of emergency, contact your health professional or emergency medical response. Manufactured by AgaMatrix Inc., 7C Raymond Avenue, Salem NH 03079 USA For sanofi-aventis Canada Inc., 2150 St. Elzear Blvd. West, Laval (Quebec) Canada H7L 4A8 www.bgstar.ca ©2011 sanofi-aventis Meter Firmware ©2011AgaMatrix, Inc.
-
Page 3: Table Of Contents
Contents Chapter Page Getting Started Important Health-related Information Important Information about Your BGStar System About the BGStar System Meter Basics Preparing For a Test With Your BGStar Meter Performing a Control Solution Test How To Test Your Blood Glucose Level Testing on Your Palm or Forearm Data Management Features 10.1... -
Page 4: Getting Started
1 Getting Started CHAPTER Unpack your BGStar System Kit. Dispose of the packing material properly. IMPORTANT: To ensure accurate use of meter, verify the time, date and units of measure. For step-by-step instructions on changing the time and date settings, please refer to chapters 13 and 14. - Page 5 [1] For quantitative measuring of blood glucose levels from fresh capillary whole blood samples taken from the fingertip, palms (at the base of the thumb), or forearms. [2] For in vitro diagnostic (i.e. outside of the body) use only. [3] With BGStar Test Strips and BGStar Control Solution only. Do not use other brands of test strips and control solution with this meter.
-
Page 6: About The Bgstar System
[2] you are testing your blood glucose within 2 hours of eating, taking insulin or medication, exercising; or [3] your blood glucose results obtained from the palm (at the base of the thumb) or forearm are not consistent with the way you feel. CAUTION: Please read all the instructions provided in this Owner’s Guide and practice the testing procedures before using the BGStar Blood Glucose Monitoring System. - Page 7 CAUTION: Dispose used test strips properly. IMPORTANT: Use a BGStar Test Strip only once. IMPORTANT: Only use BGStar Test Strips with the BGStar or iBGStar System. Important Test Strip Information: [1] Store the BGStar Test Strip vial in a cool, dry place at 8°C to 30°C. [2] Use BGStar Test Strips only within the system operating temperature range of 10°C to 40°C.
-
Page 8: Meter
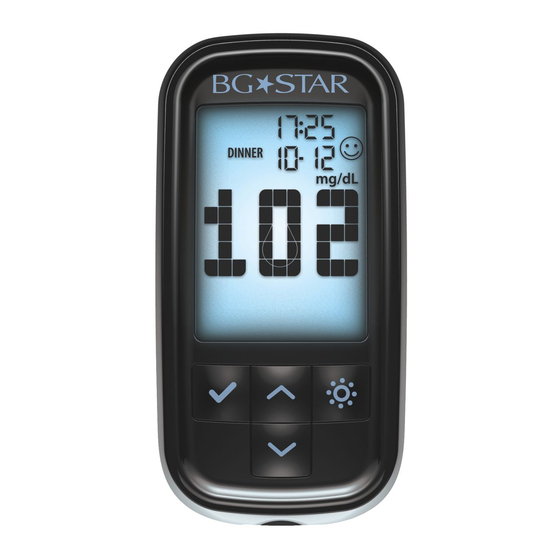
About the BGStar Meter (1) Display: Glucose test results, symbols, messages, and graphs appear here. (2) CHECK ( ) Button: Use the CHECK button to confirm an option or make a selection in a menu. (3) UP Arrow ( ) Button: Use the UP arrow button to scroll backward through options. (4) DOWN Arrow ( ) Button: Use the DOWN arrow button to scroll forward through options. - Page 9 (3) Low Battery Message: Appears when battery #2 in your meter is running low. (4) Dead Battery Message: Appears when battery #2 in your meter is dead. (5) Temperature Symbol: Appears when the meter is outside its operating temperature range of 10°C to 40°C.
-
Page 10: Lancing System
(12) 1,2,3 Countdown: The 1, 2 and 3 symbols will appear during a glucose test. (13) Graphing Area: Areas of the dot matrix will appear during a test and when displaying graphs. (14) Happy Face Symbol: The happy face is displayed with glucose test results that fall within specific pre and post meal target ranges. -
Page 11: Meter Basics
ON. IMPORTANT: If all the display segments DO NOT flash ON (each time your meter is activated), do not use the meter. Call sanofi-aventis toll free immediately at 1-888-852-6887. HOW TO ACTIVATE THE METER AND ENTER MENU MODE [1] When your meter is deactivated, press the CHECK ( ) button to enter the menu mode. -
Page 12: Preparing For A Test With Your Bgstar Meter
[1] When your meter is deactivated, press the CHECK ( ) button once to enter Menu mode. The word “MEM” is displayed. Press the DOWN ( ) or UP ( ) arrow buttons until the word “MEAL” appears in the lower part of the display. Press the CHECK ( ) button again to see your most recent test result. - Page 13 [2] Suspect that your meter or test strips are not working properly. [3] Think your test results are not accurate. [4] Have dropped or damaged your meter or exposed your meter to liquids. [5] Are advised by your health professional to do so. Control solution should only be used for 90 days after first opening the bottle or until the expiration date printed on the label, whichever comes first.
- Page 14 Bring the tip of the test strip to the control solution sample. The BGStar System will automatically detect if a test is performed with BGStar Control Solution. This is the visual fill window. DO NOT PUT CONTROL SOLUTION HERE. Apply control solution here. When control solution is applied, the visual fill window on the BGStar Test Strip turns blue.
- Page 15 BGStar System to test your blood glucose. Call sanofi-aventis toll free at 1-888-852-6887. IMPORTANT: Out-of-range test results may be due to one or more of the following factors: [1] Expired or defective control solution.
-
Page 16: How To Test Your Blood Glucose Level
8 How to Test Your Blood Glucose Level CHAPTER CAUTION: To ensure accurate results, wash your hands with warm, soapy water and dry before every test. Make sure there is no grease, oil or lotion on the test site. Use lancets only once. - Page 17 the Handle: Pull the arming handle out until it clicks. You may have already armed the handle accidentally while inserting the lancet; this is OK. The lancing device is now ready for use. [2] Insert a BGStar Test Strip: Insert a new BGStar Test Strip into the strip port of the meter. Make sure you insert the test strip, with the contact bars facing up, into the test strip port.
- Page 18 Do not squeeze directly around the lanced area. If necessary, set the lancing device to a deeper setting or use a larger lancet to produce enough blood. [4] Applying Blood Sample Bring Test Strip to Blood Sample: The meter now displays the droplet symbol and the word “Fill”.
- Page 19 IMPORTANT: [1] Remove the test strip from the blood sample as soon as you hear the beep. [2] Do not press the BGStar Test Strip against the test site. [3] Do not scrape blood onto the BGStar Test Strip. [4] Do not apply blood to the top side of the BGStar Test Strip. [5] Do not apply blood to the BGStar Test Strip when the test strip is out of the meter.
- Page 20 [5] Test Result Mealtime Tagging and Feedback If the Mealtime Tag Feature is Enabled: The BGStar Meter allows you to add a tag to your test result. Tagging results allows you to view averages before and after meals to see what effect food has on your blood glucose levels.
- Page 21 If you don’t want to tag a reading, scroll through the options by pressing the DOWN ( ) or UP ) arrow buttons. One of the options will leave the tag field blank. If you do not want to tag meals, this feature can be turned OFF in the menu mode.
-
Page 22: Testing On Your Palm Or Forearm
Remove the Lancet: When you have finished testing, snap off the cap from the lancing device. While the lancet is still in the lancing device, replace the lancet cover onto the lancet. You can then safely handle the used lancet. Extract the lancet from the lancet holder cup by pulling on the plastic collar of the lancet (near the middle of the lancet). - Page 23 IMPORTANT: When testing on the palm (at the base of the thumb) or forearm, you may need to set the lancing device to a deeper setting or use a larger lancet to obtain enough whole blood to perform a test. Consult your health professional for a recommendation. CAUTION: To ensure accurate results, wash your hands and test site with warm, soapy water and dry before every test.
-
Page 24: Data Management Features
[4] Obtain Blood Drop: After lancing, hold the lancing device against your skin until a blood droplet forms. Make sure the blood drop is large enough to completely fill the visual fill window of the test strip. Pull the lancing device directly off your palm or forearm to ensure that you do not smear the blood drop. -
Page 25: Viewing Individual Results
You can transfer your stored results to a computer to track, identify patterns and print. For information on how to order the BGStar Diabetes Management Software please call toll free sanofi-aventis 24 hour support Tel.: 1-888-852-6887 or visit us at www.bgstar.ca 10.1 Viewing Individual Results... -
Page 26: Viewing 14, 30 And 90 Day Averages
[1] When your meter is deactivated, press the CHECK ( ) button once to enter menu mode. The word “MEM” is displayed. [2] Press the DOWN ( ) or UP ( ) arrow buttons until the word “STATS” appears on the display. -
Page 27: Viewing Pre/Post Mealtime Averages & Glucose Variability Tracking
Average Number of Tests Per Day 30 Day Average Test Result [5] Press the DOWN ( ) arrow button. The display now shows your 90 day average and average number of tests per day. Average Number of Tests Per Day 90 Day Average Test Result... - Page 28 Number of results tagged Standard Deviation Average Test Result [4] Press the DOWN ( ) arrow button. The display now shows your post breakfast average [5] Press the DOWN ( ) arrow button. The display now shows your lunch average. [6] Press the DOWN ( ) arrow button.
-
Page 29: Viewing 1 Month, 2 Week, And 3 Day Trend Graphs
[8] Press the DOWN ( ) arrow button. The display now shows your post dinner average. [9] Press the DOWN ( ) arrow button. The display now shows your bedtime average. Note: Press the UP ( ) arrow button to scroll backwards. When scrolling, you will cycle through the Pre/Post Mealtime Averages. - Page 30 [5] Press the DOWN ( ) arrow button. The display now shows your 3 day trend graph. Note: Press the UP ( ) arrow button to scroll backwards. When scrolling, you will cycle through the Trend Graphs. To return to the menu, press the CHECK ( ) button.
-
Page 31: Setting The Mealtime Tag
3 Day Trend Graph: Days Each bar represents a test result average from 1 day. Each vertical unit represents about 2.8 mmol/L. The most recent result is on the right side of the screen. IMPORTANT: Averages above 16.7 mmol/L will not be represented in the trend graphs. Any bars represented at 16.7 mmol/L may represent a value higher than 16.7 mmol/L. -
Page 32: Setting Meter Volume
[4] Turn the tagging feature ON or OFF with the DOWN ( ) or UP ( ) arrow buttons. Your selection will be highlighted by the blinking of the symbol. Press the CHECK ( ) button to confirm your selection and return to the menu. 12 Setting Meter Volume CHAPTER [1] When your meter is deactivated, press the CHECK (... -
Page 33: Setting The Date
[2] Press the DOWN ( ) or UP ( ) arrow buttons until the word “TIME” is displayed. Press the CHECK ( ) button to enter and edit the time settings. [3] You should see a display with the message blinking “12hr” or “24hr”, this means you are ready to set the meter’s time. - Page 34 [3] You should see a display with the message blinking “M-d” or “d-M”, this means you are ready to set the meter’s date. Select the M-d (Month-Day) or d-M (Day-Month) date format with the DOWN ( ) or UP ( ) arrow buttons.
-
Page 35: Setting Hypoglycemic Warning Alarms
15 Setting Hypoglycemic Warning Alarms CHAPTER The Hypoglycemic Warning Alarm alerts you when your glucose test results are below the hypoglycemic threshold you have set. The meter is pre-set to a hypoglycemic threshold of 3.9 mmol/L. Always consult your health professional for your recommended target ranges. When your glucose test results are below your set hypoglycemic threshold, the meter display will flash your test results, the abbreviation “HYPO,”... -
Page 36: Setting The Glucose Target Range
WARNING: Your health professional should recommend what your hyperglycemic limit is. [1] When your meter is deactivated, press the CHECK ( ) button once to enter menu mode. The word “MEM” is displayed. [2] Press the DOWN ( ) or UP ( ) arrow buttons until the abbreviation “HYPER”... - Page 37 or less; or if you want the postmeal target range to end at 10.0 mmol/L, then the hyperglycemic alarm needs to be set at 10.0 mmol/L or higher. [1] When your meter is deactivated, press the CHECK ( ) button once to enter menu mode. The word “MEM”...
-
Page 38: Setting Alarms
[7] Set the upper limit of the postmeal glucose target range (flashing) with the DOWN ( ) or UP ) arrow buttons. Press the CHECK ( ) button to confirm your selection and return to the menu. 18 Setting Alarms CHAPTER There are 7 alarms you can set to remind you when to test your glucose levels. - Page 39 [3] Select An Alarm to Set: Choose the alarm you want to set with the DOWN ( ) or UP ( arrow buttons. If this is your first time setting an alarm, use AL1. Press the CHECK ( ) button to confirm your selection and advance to the alarm ON or OFF section.
-
Page 40: Errors And Troubleshooting
[6] Setting Multiple Alarms: To set other alarms, press the DOWN ( ) or UP ( ) arrow buttons until the alarm you want to set (AL1 to AL7) is displayed. Follow the previous steps in this section. 19 Errors and Troubleshooting CHAPTER The BGStar Blood Glucose Monitoring System has been designed to work accurately under normal conditions. - Page 41 [2] If this error code persists on retesting, consult your health professional. Error 7: Meter problems have occurred that are beyond your control. Call sanofi-aventis toll free at: 1-888-852-6887 for assistance. Temp Icon: Test was performed outside the system operating temperature range of 10°C to 40°C.
-
Page 42: Display Messages
[5] CAUSE: Blood or foreign objects introduced into the BGStar Meter strip port. ACTION: Please refer to chapter 22. If problem persists, call sanofi-aventis toll free at: 1-888-852-6887 and have the meter serial number available (located on back of the meter). - Page 43 MEANING: Glucose test result is lower than 1.1 mmol/L. This Lo result may indicate hypoglycemia (low blood glucose). The Lo result is stored in the memory with time and date. It will be included in averages as a value of 1.1 mmol/L. ACTIONS: If you feel symptoms such as weakness, sweating, nervousness, headache or confusion, follow your health professional’s recommendations.
-
Page 44: Batteries
MEANING: The test has been performed outside the operating temperature range. ACTIONS: Move to an area with an ambient temperature of 10°C to 40°C. Wait for the meter and test strips to reach the new temperature (usually 10-20 minutes) and retest. LOW BATTERY MESSAGE: Flashing message MEANING: Battery #2 in your meter is low. - Page 45 Replacing the Batteries [1] Open Battery Door: Make sure the meter is deactivated. Turn the meter so you are looking at the battery door. Press the battery door clip to open. Remove the battery door. Be careful not to misplace the battery door. [2] Remove and Install the meter battery: To remove the used battery, pull the appropriate tab to pop out the battery.
-
Page 46: Caring For Your Meter And Lancing Device
[1] Set the year (flashing) with the DOWN ( ) or UP ( ) arrow buttons. Press the CHECK ) button to confirm your selection and continue on to the month setting. [2] Set the month (flashing) with the DOWN ( ) or UP ( ) arrow buttons. -
Page 47: Meter Specifications
using a cloth dampened with mild detergent or mild soap. If you wish to clean the lancing device cap only, remove the cap, wash it in warm water, rinse well, and dry. CAUTION: Never immerse the meter or the body of the lancing device in water or any other liquid solution. - Page 48 Batch Code: Consult Instructions For Use: Do Not Reuse: Temperature Limitation: Use By: Reference Number: Application number: 184338 Page 48 of 48 Date of revision: August 18, 2011 s-a Version 2.1 dated August 26, 2011...
Need help?
Do you have a question about the BG STAR and is the answer not in the manual?
Questions and answers