
Subscribe to Our Youtube Channel
Related Manuals for Sanofi-aventis BG-STAR


Summary of Contents for Sanofi-aventis BG-STAR
- Page 1 ® Blood Glucose Monitoring System Blood Glucose Monitoring System OWNER’S GUIDE OWNER’S GUIDE WNER’S GUID...
- Page 2 Meter Firmware ©2011 AgaMatrix, Inc. U.S. and International Patents Pending. All rights reserved. All trademarks and/or copyrights are the property of their respective owners. Distributor: sanofi-aventis australia pty ltd sanofi-aventis new zealand limited 12-24 Talavera Road Level 8, James and Wells Tower...
-
Page 3: Table Of Contents
Contents CHAPTER TITLE PAGE CHAPTER TITLE PAGE Getting Started Setting the Mealtime Tag Important Health-related Information Setting Meter Volume Important Information about Your Setting the Time BGStar System Setting the Date About the BGStar System Setting Hypoglycemic Warning Alarms Meter Basics Setting Hyperglycemic Warning Alarms Preparing For a Test With Your BGStar Meter Setting the Glucose Target Range... -
Page 4: Getting Started
[5] Results over 13.3 mmol/L may mean high blood glucose Getting Started levels (hyperglycemia). Checking ketones may be advisable. [6] If you get results below 3.9 mmol/L or above 13.3 mmol/L Unpack your BGStar System Kit. Dispose of the packing and do not have symptoms of hypoglycemia or hyperglycemia, material properly. - Page 5 [2] For in vitro diagnostic (i.e. outside of the body) use only. Physiological differences in circulation between the [3] With BGStar Test Strips and BGStar Control Solution only. fingertip, palm (at the base Do not use other brands of test strips and control solution of the thumb), and forearm with this meter.
-
Page 6: About The Bgstar System
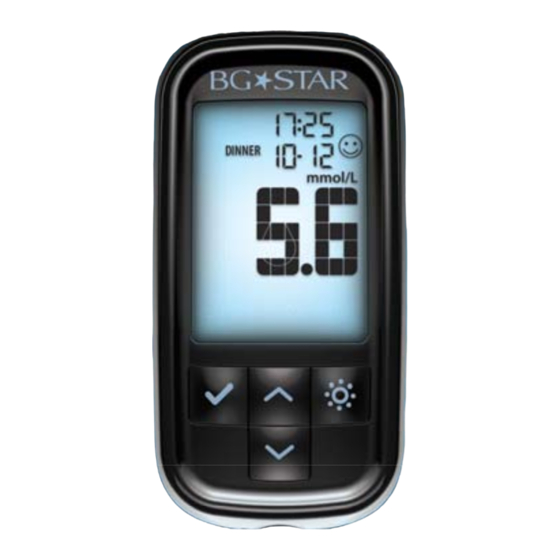
CAUTION: Dispose of used test strips properly. About the BGStar System IMPORTANT: Use BGStar Test Strips only once. Your BGStar System includes: IMPORTANT: Only use BGStar Test Strips with the BGStar • BGStar Blood Glucose Meter • 10 Sterile Lancets System. - Page 7 [9] Apply only fresh capillary blood or control solution to the About the BGStar Meter Display Symbols/Messages sample area of the BGStar Test Strip. (1) Date and Time: Appears here, including About the BGStar Meter when the meter is deactivated. (1) Display: Glucose test results, symbols, messages, and graphs appear here.
- Page 8 (10) Volume Message: Can be set to ON or OFF. About the BGStar Lancing System (11) 1 Month, 2 Week, 3 Day Indicators: The appropriate number of days will appear when (1) Cocking Handle: Cocks the device so it viewing graphical averages. is ready to lance.
-
Page 9: Meter Basics
Press the CHECK ( ) button again to see your most recent test result. Meter Basics [2] Press the DOWN ( ) or UP ( ) arrow buttons repeatedly METER SYSTEM CHECK to scroll through every test result, starting from the most recent and ending with the oldest. -
Page 10: Preparing For A Test With Your Bgstar Meter
Preparing For a Test With Your Performing a Control Solution Test BGStar Meter [1] Insert a BGStar Test Strip: The control solution is used to: Insert a new BGStar Test Strip into [1] Ensure that your BGStar Meter and Test Strips are working the meter. - Page 11 Dispense a second drop onto a clean surface, such as an Important BGStar Control Solution information: unused resealable plastic bag. [1] Use only BGStar Control Solution with your BGStar Bring the tip of the test strip to the control solution sample. System.
- Page 12 [4] Viewing Control Solution Test Result: [4] Watered-down control solution. The result will appear on the display and, if the volume is enabled, your meter will beep. [5] Meter malfunction. The date and the abbreviation “Ctrl” will also appear on the display. [6] Control solution test done outside the system operating temperature of 10°C to 40°C.
-
Page 13: How To Test Your Blood Glucose Level
Replace Lancing Device Cap: How to Test Your Replace the lancing device Blood Glucose Level cap until it snaps into place. Be careful not to touch the CAUTION: To ensure accurate results, wash your hands with exposed needle on the lancet. warm, soapy water and dry before every test. - Page 14 Meter Ready for Test: The meter now displays the droplet [4] Applying Blood Sample symbol and the word “Fill”. The BGStar System is now ready for you to apply blood. You do not need to set a calibration Bring Test Strip to Blood Sample: The meter now displays code for this meter.
- Page 15 IMPORTANT: [1] Remove the test strip from the blood sample as soon as you hear the beep. Your test is completed when your blood glucose test result with time and date is [2] Do not press the BGStar Test Strip against the test site. shown on the display.
- Page 16 You can still change this Example of Example of IMPORTANT: If you do not remove the used test strip after Mealtime Tag: Mealtime Tag: setting by pressing the 3 minutes of testing, the meter will deactivate. To activate POST BREAKFAST NO TAG (BLANK) DOWN ( ) or UP your meter with a used test strip still in the meter, press the...
-
Page 17: Testing On Your Palm Or Forearm
will be testing. Ensure that your palm or forearm is facing up and held level. Testing on Your Palm or Forearm [3] Lance Test Site: Press the tip of the clear cap against your Testing glucose levels with blood obtained from the palm (at skin on the palm of your hand (at the base of the thumb) or the base of the thumb) or forearm may reduce the pain of testing. -
Page 18: Data Management Features
About averages and standard deviations: Data Management Features Control solution, out-of-temperature-range results, and results without a valid time or date are not included in averages, standard deviations and trend graphs. Hi and Lo test results IMPORTANT: Results, averages and graphs stored in will be included in averages as values of 33.3 mmol/L and memory should only be used as a reference. -
Page 19: Viewing 14 Day Statistics
[4] Press the DOWN ( ) arrow 10.2 Average Viewing 14 Day Statistics Number of button. The display now shows Tests Per Day your 30 day average and average 14 Day The stats feature allows you to compare your average test number of tests per day. -
Page 20: Viewing 1 Month, 2 Week, And 3 Day Trend Graphs
[1] When your meter is deactivated, press the CHECK ( ) button Note: Press the UP ( ) arrow button to scroll backwards. When once to enter menu mode. The word “MEM” is displayed. scrolling, you will cycle through the Pre/Post Mealtime Averages. To return to the menu, press the CHECK ( ) button. - Page 21 1 Month Trend Graph: 3 Day Trend Graph: Each bar represents a test result average from 3 days. Each Each bar represents a test result average from 1 day. Each vertical unit represents about 2.8 mmol/L. The most recent vertical unit represents about 2.8 mmol/L. The most recent result is on the right side of the screen.
-
Page 22: Setting The Mealtime Tag
[3] Press the CHECK ( ) button to enter and edit the alarm volume setting. Setting the Mealtime Tag [4] Turn the volume ON or OFF with the DOWN The BGStar Meter allows you to turn ON or OFF the feature ( ) or UP ( ) arrow buttons. -
Page 23: Setting The Date
Select the 12 or 24 hour clock format with the [3] You should see a display with the message DOWN ( ) or UP ( ) arrow buttons. The 12 hour blinking “M-d” or “d-M”, this means you are ready clock display option is indicated by a 12hr. -
Page 24: Setting Hypoglycemic Warning Alarms
[5] Set the hypoglycemic threshold Setting (flashing) with the DOWN ( ) or UP ( ) Hypoglycemic Warning Alarms arrow buttons. Press the CHECK ( ) button to confirm your selection and return to the menu. The hypoglycemic Warning Alarm alerts you when your glucose test results are below the hypoglycemic threshold you have set. -
Page 25: Setting The Glucose Target Range
[4] Set the Hyperglycemic Alarm ON or OFF For example: If you want the pre meal target range to begin at with the DOWN ( ) or UP ( ) arrow buttons. 5.0 mmol/L, then the hypoglycemic alarm needs to be set at Your selection will be highlighted by the 5.0 mmol/L or less;... -
Page 26: Setting Alarms
[6] Set the lower limit of the post meal CAUTION: Follow your healthcare professional’s glucose target range (flashing) with the recommendations on when and how often to test your glucose. DOWN ( ) or UP ( ) arrow buttons. Press the CHECK ( ) button to confirm your How to set alarms: selection and continue on to the upper... -
Page 27: Errors And Troubleshooting
Set the minute (flashing numbers) with the CAUTION: In certain cases, the meter may return an error DOWN ( ) or UP ( ) arrow buttons. Press the code or provide an inaccurate result if it is being used near CHECK ( ) button to confirm the minutes and electrical equipment, like a power generator or a computer return to the MENU Mode. - Page 28 [3] Parts of the test strip may have become covered in grease, oil, or lotion. Error 7: [4] The strip port connector may be dirty. Meter problems have occurred that are beyond your control. Error 4: Contact Customer Care for assistance. Unusual test strip problems have occurred that may be related to extreme conditions.
-
Page 29: Display Messages
ACTION: Insert the BGStar Test Strip with the black side up and the contact bars of the test strip in the meter. Ensure that Display Messages the test strip is fully inserted. [4] CAUSE: Defective meter or defective BGStar Test Strips. ACTION: Call Customer Care. - Page 30 excessive urination, or blurry vision, follow your healthcare MEANING: The test has been performed outside the professional’s recommendations. If you get a Hi glucose operating temperature range. test result but have no symptoms of high blood glucose, ACTIONS: Move to an area with an ambient temperature of then retest with a new BGStar Test Strip.
-
Page 31: Batteries
[2] Remove and Install the meter battery: To remove the used battery, pull the appropriate Batteries tab to pop out the battery. Install the new battery with the positive (+) sign facing up towards you. CR2032 CR2032 CAUTION: When the battery symbol appears, you should replace the batteries immediately. -
Page 32: Caring For Your Meter And Lancing Device
Time and Date Setting After Battery Replacement [5] Set the minute (flashing) with the DOWN ( ) or UP ( ) arrow buttons. Press the CHECK ( ) If the date and time need to be set, the word “SET” will be button to confirm your selection. -
Page 33: Symbols
Alarms: 7 programmable alarms Result Range: 1.1 to 33.3 mmol/L Symbols Hematocrit: 20% to 60% Operating Relative Humidity: Up to 90% Operating Temperature: 10°C to 40°C The following symbols may appear on the equipment Control Solution Storage Temperature: 2°C to 30°C packages or in the documents. - Page 35 <MAT>508740...
Need help?
Do you have a question about the BG-STAR and is the answer not in the manual?
Questions and answers