Table of Contents
Advertisement
Advertisement
Table of Contents

Related Manuals for Tynetec SayPhone V2


Summary of Contents for Tynetec SayPhone V2
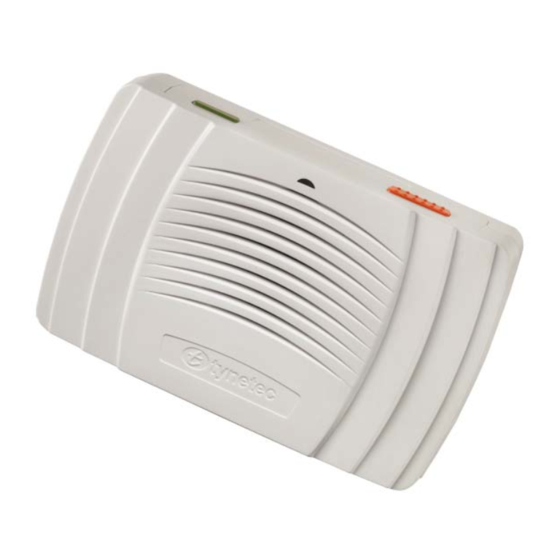
- Page 1 Trusted Technology. Caring for People SayPhone V2 AT‐HOME ALARM UNIT USER GUIDE Tynetec operate a policy of continual product improvement. If any variation to the details contained in this manual are suspected please contact your service provider. www.tynetec.co.uk ...
- Page 2 10 13 Battery Failure Alert 11 14 Replacing the Batteries 11 15 Quick Guide 12 1. UNPACKING YOUR SAYPHONE V2 The SayPhone V2 is supplied with a Power Lead, a Telecom Lead, a Personal Pendant and a Pendant Wearing Kit including a neck cord, belt clip and wrist strap. tynetec Personal Pendant Pendant Wearing Kit ...
-
Page 3: Connecting Your Sayphone V2
2. CONNECTING YOUR SAYPHONE V2 It is important that the SayPhone V2 is connected and programmed by a trained installer. Do not locate the SayPhone V2 within 1 metre of DECT cordless telephone equipment and always pay particular attention on installations with extension telephones or Broadband. Refer to the Installation & Programming Manual (Tynetec Doc No. FM0546) for full details. Basic Connections USERS TELEPHONE SAYPHONE V2 AT-HOME ALARM UNIT MAINS MASTER ELECTRICITY TELEPHONE SUPPLY SOCKET AERIAL SUPPLY POWER LEAD TELECOM LEAD SAYPHONE V2 FROM BELOW ... -
Page 4: Your Personal Pendant
Neck Clip Cord Additional Pendants are available separately if more than one is required. The neck cord must never be shortened or knotted without the safety break device in place. Replacement black or white cord assembly’s tynetec tynetec tynetec are available as spares. The wrist strap fittings use standard 15mm watch strap pins if an alternative strap is preferred. Wrist ... -
Page 5: Switching Your Sayphone V2 On
4. SWITCHING YOUR SAYPHONE V2 ON Connect the power lead and switch the mains supply on… On power‐up the front lamp will flash RED/AMBER/GREEN for about 12 seconds. When the front lamp goes steady GREEN ... -
Page 6: Making An Emergency Call
6. MAKING AN EMERGENCY CALL An emergency call can be made at any time of the day or night… 1. Press the RED button on the SayPhone V2 unit or press the RED button on your Personal Pendant... The lamp on the Pendant OR will flash RED for several seconds after the button ... -
Page 7: What Happens If I Make An Accidental Call
7. WHAT HAPPENS IF I MAKE AN ACCIDENTAL CALL ? If an emergency call is made by accident it can be cancelled by pressing the GREEN button once, the unit will announce “Alarm Cancelled” and the front lamp will return to GREEN. “Alarm cancelled” However, once the SayPhone V2 starts to dial the Control Centre the call cannot be cancelled. Don’t worry if you do not manage to cancel an accidental call – when the Control Centre answers simply tell them what you have done. The staff will be pleased that they have talked to you and they will cancel the call in the normal way. 8. ANSWERING AN INCOMING TELEPHONE CALL The SayPhone V2 can also be used to answer a normal incoming telephone call… The front lamp will FLASH RED ... -
Page 8: Activity Monitoring And The Away Mode
9. ACTIVITY MONITORING AND THE AWAY MODE If you have optional movement detectors installed with your SayPhone V2 the Control Centre will know you are “up and about” each day. If you go away from home for more than one day you must select “Away Mode” to prevent in‐activity calls being sent to the Control Centre. 1. Press and HOLD the GREEN button until the unit announces… “Away Mode” 2. RELEASE the GREEN button… The front lamp will FLASH GREEN and the unit will announce… “Enabled” ... -
Page 9: Using The Intruder Mode
10. USING THE INTRUDER MODE If you have the optional movement detectors fitted for activity monitoring you can use these devices as a basic intruder alarm when you go out. 1. Press and HOLD the GREEN button until the unit announces… “Away Mode” 2. Keep HOLDING GREEN until the unit announces… “Intruder Mode” 3. RELEASE the GREEN button and the unit will announce… “Enabled” ‐ “Beep‐Beep” “Beep‐Beep”….. ... -
Page 10: Mains Power Failure Alert
11. MAINS POWER FAILURE ALERT The SayPhone V2 will make you aware if your mains electricity is off or if the Power Lead has been accidently unplugged... The front lamp will FLASH AMBER and the unit will announce… “Your mains power is disconnected” ... -
Page 11: Replacing The Batteries
The message will repeat 3 times every 4 hours until the batteries are replaced. To silence the message and prevent it repeating again, press the GREEN button once. Take no further action, the low battery condition is automatically reported to the Control Centre and they will arrange to visit and replace the batteries for you. 14. REPLACING THE BATTERIES In normal use the batteries should not need replacing for about 5 years. Replacement batteries must be identical to those originally fitted and should only be changed by a competent person. 1. Turn the unit off (as described in section 5). 2. Remove the screw from the battery compartment cover. 3. Pay special attention to the polarity when refitting new batteries. Replacement batteries must be: 5 off Rechargeable Duracell 1.2V 1700mAh NiMH AA/HR6/DC1500 Order 5 off Tynetec Part No. F00146 ‐ 11 ‐ ... -
Page 12: Quick Guide
Trusted Technology. Caring for People Cowley Road, Blyth Riverside Business Park, Blyth, Northumberland, NE24 5TF Tel: 01670 352371 Fax: 01670 362807 Email: sales@tynetec.co.uk Website: www.tynetec.co.uk Doc No. FM0545 issue A ‐ 12 ‐ ...
Need help?
Do you have a question about the SayPhone V2 and is the answer not in the manual?
Questions and answers