
Related Manuals for Krell Industries Home Theater Standard 7.1


Summary of Contents for Krell Industries Home Theater Standard 7.1
-
Page 1: Home Theater
Home Theater Standard 7.1 THE LEADER IN AUDIO ENGINEERING Surround Preamp/Processor Instructions for Use Owner’s Reference... -
Page 2: Contact Information
This product complies with the EMC directive (89/336/EEC) and the low-voltage directive (73/23/EEC). The Home Theater Standard 7.1 must be placed on a firm level surface where it is not exposed to dripping or splashing. The ventilation grids on the top and bottom of the Home Theater Standard 7.1 must be unobstructed at all times during operation. -
Page 3: Table Of Contents
RESTORING THE FACTORY DEFAULT SYSTEM SETTINGS OPERATING THE HOME THEATER STANDARD 7.1 On/Off/Stand-by, Tape Input and Output Main Zone and Zone 2 Operation Simulcast APPENDIX: HOME THEATER STANDARD 7.1 OPERATING MODES Automatically Detected Modes User Selectable Modes WARRANTY RETURN AUTHORIZATION PROCEDURE... - Page 4 FIGURE 3 The Home Theater Standard 7.1 Remote Control FIGURE 4 Source Selection Buttons, Factory Default Video Signals, and Video Formats for the Home Theater Standard 7.1, North American Operation FIGURE 5 Source Selection Buttons, Factory Default Video Signals, and Video Formats for the Home Theater Standard 7.1,...
-
Page 5: Introduction
Introduction Krell Home Theater Standard 7.1 Thank you for your purchase of the Krell Home Theater Standard 7.1 Surround Preamp/Processor. The Home Theater Standard 7.1 surround preamp/processor serves as the centerpiece in a Krell HEAT™—High End Audio Theater— system, which applies the fundamental principles of Krell engineering to the creation of a fully integrated high-performance multichannel sound system. -
Page 6: Definition Of Terms
When the component is in the stand-by mode, and you press the power button on the front panel or the power key on the remote con- trol, the blue power LED illuminates. The component is in the opera- tional mode and is ready to play music. Krell Home Theater Standard 7.1... - Page 7 Definition of Terms, continued TECHNOLOGY VIDEO Krell Home Theater Standard 7.1 Krell Current Mode A proprietary Krell circuit topology in which the audio gain stages of a component operate in the current rather than the voltage domain. This unique technology provides the component with exceptional speed and a wide bandwidth.
-
Page 8: Unpacking
Open the box and remove the top layer of foam. You see these items: 1 Home Theater Standard 7.1 1 IEC connector (AC power) cord 1 Home Theater Standard 7.1 handheld remote control 1 CR2025 lithium battery 1 T-15 Torx wrench (small L type) 1 T-10 Torx wrench (small L type) 1 12 VDC output (12 V trigger) cable 1 packet containing the owner’s reference manual, the “read this... -
Page 9: Placement
This will facilitate a clean, trouble-free installation. The Home Theater Standard 7.1 does not require any type of special rack or cabinet for installation. For the dimensions of your Home Theater Standard 7.1 see Specifications, on pages 80-81. -
Page 10: Getting Started
Front Panel Description, on page 8, Rear Panel Description, on page 14, and Remote Control Description, on page 18. 2. Connect the Home Theater Standard 7.1 to your analog and digi- tal audio sources. See Connecting the Home Theater Standard 7.1 to Your System, on page 22. -
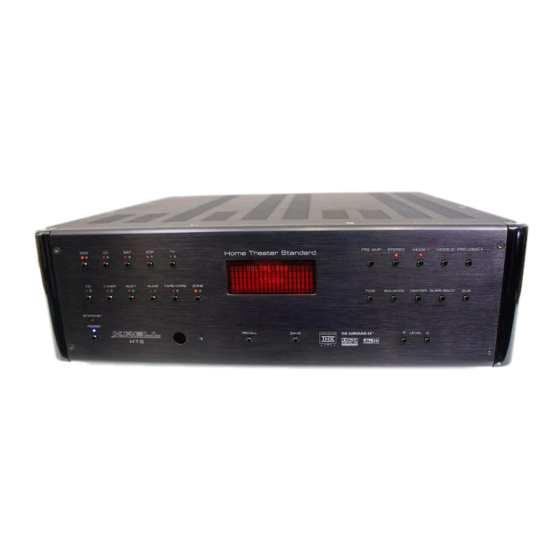
Page 12: Front Panel Description
Stand-by LED The red stand-by LED illuminates when the back panel power switch (55) is on, indicating that the Home Theater Standard 7.1 is in the stand-by mode. Krell recommends that the back panel power switch remain on at all times. - Page 13 The green LED illuminates when the input is engaged and the source is playing in zone 2. 17 Infrared Emitter Emits the Home Theater Standard 7.1 remote operation code to a learning remote. See Program Remote, on page 64.
- Page 14 Mode 2 button to scroll through these other modes. The last mode displayed in Mode 2 is the one selected. Based on the source signal, the Home Theater Standard 7.1 automatically selects the correct modes available for the signal. 21 Pro Logic II Button and LED...
- Page 15 24 Front Panel Display The front panel window provides status messages for Home Theater Standard 7.1 operations, including volume and balance level, decod- ing mode and zone information. In addition, when a new device is selected, the physical inputs are displayed. The display turns off after 60 seconds of inactivity.
- Page 16 Use this button to recall previously stored system configuration set- tings. Also use this button to return configuration settings to factory default: With the Home Theater Standard 7.1 in the operational mode, hold the recall button and press the power button. See Saving and Recalling Customized Settings and Restoring the Factory Default System Settings, on page 70.
- Page 17 INPUTS VIDEO OUTPUTS VIDEO INPUTS AUDIO ANALOG OUTPUTS AUDIO ANALOG...
-
Page 18: Back Panel Description
FEATURES Analog Audio Outputs and Inputs The back panel of the Home Theater Standard 7.1 provides all audio and video input and output connections, remote control inputs and outputs, power on and off, and power connection. The back panel functions are described below. - Page 19 RCA connectors. 50 Component Video Outputs The Home Theater Standard 7.1 is equipped with one set of compo- nent video outputs with RCA connectors. Component video uses three wires, labeled Y, Cr, and Cb on the back panel, to convey the video signal.
- Page 20 When the Home Theater Standard 7.1 is in the operational mode and a trig- ger is configured, the 12 VDC Out provides 12 V of DC output. When the Home Theater Standard 7.1 is in the stand-by mode or off, or if a trigger is not configured, the DC output is 0 V.
-
Page 21: Remote Control Description
Figure 3 The Home Theater Standard 7.1 Remote Control Power Keys 57 Amp Key 58 Pre Key (Power Pre Key) Zone Selection Keys 59 Main Key 60 Z2 Key Device Selection Keys 61 DVD Key 62 LD Key 63 SAT Key... -
Page 22: Battery Installation And Removal
Use this key to power on/off a Krell remote control amplifier. 58 Pre Key (Power Pre Key) Use this key to switch the Home Theater Standard 7.1 between the stand-by mode and the operational mode. When you power off while zone 2 is selected, only zone 2 turns off. Press the power button or the power pre key a second time to power off the main zone. - Page 23 Zone Selection Keys Note Device Selection Keys Note Krell Home Theater Standard 7.1 59 Main Key Use this key to select the main zone for a device. 60 Z2 Key Use this key to select zone 2 for a device.
- Page 24 Dolby Surround encoded material, including laser discs, videotapes, television broadcasts, and compact discs. The red LED illuminates when the Home Theater Standard 7.1 is in the Dolby Pro Logic II decoding mode. This mode is selected automatically if Dolby Digital source material is encoded for Pro Logic.
-
Page 25: Volume Mute
82 Menu Key Use this key to access the system configuration on-screen menus. 83 Mute Key Use this key to mute the output of the Home Theater Standard 7.1. appears in the front panel display (24). VOLUME MUTE 84 Enter Key Use this key to accept configuration menu selections, accept an input device selection, or to display current system conditions. -
Page 26: Connecting The Home Theater Standard 7.1
For stereo analog input sources, connect the right and left outputs of your source components to the inputs on the Home Theater Standard 7.1. The Home Theater Standard 7.1 is equipped with nine sets of single-ended analog audio inputs (41) (S-1 through S-7, tape, and VCR) via RCA connectors and one set of balanced analog audio inputs (35) via XLR connectors. -
Page 27: Step 3: Connect Digital Sources
When your monitor is set to NTSC Progressive or PAL Progressive, the OSD will not be visible. 6. The video device LED must be illuminated on the front panel of the Home Theater Standard 7.1 in order for the OSD to be visible. -
Page 28: Step 4: Match Video Formats And Signals
Connecting the Home Theater Standard 7.1 to Your System, continued Step 4: Match Video Formats and Signals To match the video formats and signals in your system, we recom- mend that you follow these steps: 1. Determine your monitor format. The factory default video format in North America is NTSC Interlaced. -
Page 29: And Video Formats For The Home Theater Standard 7.1 North American Operation
Krell Home Theater Standard 7.1 Figure 4 Device Selection Buttons, Factory Default Video Signals, and Video Formats for the Home Theater Standard 7.1, North American Operation TUNER STAND-BY POWER... -
Page 30: And Video Formats For The Home Theater Standard 7.1 International Operation
AUX 2, the factory video defaults are disabled and therefore a video format is not available. Figure 5 Device Selection Buttons, Factory Default Video Signals, and Video Formats for the Home Theater Standard 7.1, International Operation TUNER STAND-BY POWER H T S... -
Page 31: Step 5: Connect Video Sources And The Video Monitor
See the user manuals included with these sources for more information. Video inputs for the Home Theater Standard 7.1 include 2 compo- nent inputs (51), 4 s-video inputs (47), and 4 composite inputs (49). Video outputs include 1 component video output (50), 2 s-video out- puts (46), and 2 composite video outputs (48). -
Page 32: Step 6: Activating The On Screen Display (Osd)
Step 6: Activating the On Screen Display (OSD) Follow these steps to connect the Home Theater Standard 7.1 to the video sources and monitor in your system: 1. Connect the video outputs on each video source in your system to video inputs on the Home Theater Standard 7.1. -
Page 33: Configure Video
EXAMPLE 1: You want to use a component signal with a DVD device and you reside in North America. Connect the DVD device to the Home Theater Standard 7.1 and con- nect the Home Theater Standard 7.1 to the NTSC Interlaced video monitor using component connections. - Page 34 EXAMPLE 3: You want to use an s-video connection with a VCR device and you reside in Europe. Connect the VCR device to the Home Theater Standard 7.1 and con- nect the Home Theater Standard 7.1 to the PAL Interlaced video monitor using s-video (OSD) connections.
-
Page 35: Step 7: Connect Amplifiers And Loudspeakers
The DB-25 cable simultaneously transmits audio outputs and Trigger 1 signals from the DB-25 output of the Home Theater Standard 7.1 to all inputs and to a 5 VDC (5 Volt trigger) via the DB-25 input device. If you are connecting the Home Theater Standard 7.1 to an amplifier via a DB-25 connector, you need to configure Trigger 1 on the Home Theater Standard 7.1 to send a 5 Volt trigger signal before operating the amplifier. -
Page 36: Overview: System Configuration And Navigation
1. CONFIGURE SPEAKERS The configure speaker menu lets you tell the Home Theater Standard 7.1 how many and what type of loudspeakers are in your system and allows you to select the bass range for each loudspeak- er. It also allows you to control the subwoofer output and set the crossover frequency. -
Page 37: Navigation Conventions
Krell Home Theater Standard 7.1 continued The remote control is the main input device for configuring the Home Theater Standard 7.1. For all system options, use the following keys to navigate through the configuration menu screens: 82 Menu Key Press once to enter the configuration menu. The front panel display reads MENU MODE. -
Page 38: System Configuration
5. Use the direction keys to scroll to the next line. The Home Theater Standard 7.1 is shipped with factory default selec- tions in the configuration menus. For maximum performance, the Home Theater Standard needs to be configured for each system device, its capabilities, and loudspeaker positions in the listening room. -
Page 39: Step 1: Configure Loudspeakers
Krell Home Theater Standard 7.1 The first option on the main menu screen, you tell the Home Theater Standard 7.1 how many and what type of loudspeakers are in your system and select the bass range for each loudspeaker. It also allows you to control the subwoofer output and set the crossover frequency. -
Page 40: Full Range
5.1 SURR Select SURROUND, BACK, BOTH 6.1 or 7.1 system receive surround information when playing a Dolby Digital 5.1 or DTS 5.1 encoded software. channel information to your surround loudspeakers only. surround channel information to your back loudspeakers only. sends surround channel information to your surround and back loud- speakers simultaneously. -
Page 41: Step 2: Listening Room Setup
SETUP Room Setup Screen Note Krell Home Theater Standard 7.1 The second option on the main menu screen, to tell the Home Theater Standard 7.1 the exact location of each loudspeaker in your system. Select on the LISTENING ROOM SETUP... -
Page 42: Step 3: Calibrate Volume
The third option on the main menu screen, you to calibrate each channel using the internal noise generator of the Home Theater Standard 7.1, either automatically, manually, or by listening to external program material. A sound pressure level (SPL) meter is required for this procedure. -
Page 43: Manual Noise Sequence
Note Manual Noise Sequence Note Program Material Option Krell Home Theater Standard 7.1 Set the SPL meter to C weighting and slow response. After initializ- ing, the channel dB setting on the screen blinks, and you hear LEFT band limited white noise through the left loudspeaker. This noise con- tinues for two seconds and then moves clockwise to the next loud- speaker in the system. -
Page 44: Step 4: Configure Devices
To help you understand the numerous configuration options available through the Home Theater Standard 7.1, Step 4 illustrates configur- ing a specific source device: a DVD player. To configure other source devices, Krell recommends that you config- ure one device at a time, using the menu’s step-by-step format. -
Page 45: Table
Aux 1 Disabled Disabled Aux 2 Tape Composite 3 Video factory defaults for the Home Theater Standard 7.1 do not need to be configured if your system matches the factory defaults. Video Standard NTSC Interlaced NTSC Interlaced NTSC Interlaced NTSC Interlaced... - Page 46 Use the direction and enter keys to navigate through the menu and set selections. When all selections are entered, press the previous key once to return to the CONFIGURE DEVICES menu. The CONFIGURE DEVICES DVD. DEVICE INTERLACED PREVIOUS DISABLED NTSC INTERLACED menu. Krell Home Theater Standard 7.1 ASSIGN PAL,...
-
Page 47: And International Operation
System Configuration, continued Please read before configuring audio and digital inputs Table 3 Factory Default Digital and Analog Audio Inputs for the Home Theater Standard 7.1, North American and International Operation Analog Digital Coax 1 Coax 2 Opt 1 Disabled... -
Page 48: Table 4 Home Theater Standard 7.1 Factory Default Audio Operating Modes
PCM, Dolby Digital 2.0, and Dolby Digital 5.1 signals; the input will playback only DTS 5.1 material. When the Home Theater Standard 7.1 detects a DTS 5.1 signal and engages the default mode selected for a DTS 5.1 signal, DTS-ES MATRIX 6.1... - Page 49 System Configuration, continued Assign Analog Audio Inputs Assign Audio Inputs Screen Assign Analog Audio Input Screen Krell Home Theater Standard 7.1 Select from the CONFIGURE AUDIO screen appears, with the cursor blinking at AUDIO INPUTS KRELL HTS -ASSIGN AUDIO INPUTS- Select ANALOG.
- Page 50 DIGITAL 2.0, DOLBY DIGITAL 5.1, DTS 5.1, options under If a THX Surround EX or DTS ES encod- DEFAULT MODE. ed disc is played, the Home Theater Standard 7.1 will automatically select one of these modes. The digital input must be set to DISABLED main zone.
- Page 51 Configure Trigger Configure Trigger Screen Trigger Modes Krell Home Theater Standard 7.1 The final option on the CONFIGURE DEVICES This option allows you to customize the operation of the four remote output 12 VDC (12 Volt trigger) connectors (54) on the back panel.
- Page 52 When you have configured all the devices you want, press the previ- ous button twice to return to the main menu. (LD, SAT, VCR1, TV, CD, TUNER, AUX1, Krell Home Theater Standard 7.1...
-
Page 53: Step 5: Configure Level Adjustment
After adjusting the volume trim, you can easi- ly switch between these inputs without changes in volume levels.The Home Theater Standard 7.1 uses two types of trims: master volume trims and taste trims. Master volume trims (device, analog, and music mode sub trim) change the volume of all speakers at once. - Page 54 When you have made your selections, press the previous key once to return to the screen. URE LEVELS menu. The DEVICE TRIM DVD. 0 DB CONFIG- Krell Home Theater Standard 7.1...
- Page 55 System Configuration, continued Please read before configuring analog input trim Krell Home Theater Standard 7.1 An analog device must be selected before the analog input trim option functions. The following screen appears if an analog device is not selected: KRELL HTS...
-
Page 56: Clip Indicator
5. Use the direction keys to scroll to the next line. Use the menu to measure the level of an analog ANALOG INPUT TRIM input source to the Home Theater Standard 7.1. Select from the ANALOG INPUT TRIM screen appears:... - Page 57 System Configuration, continued Music Mode Sub Trim Music Mode Sub Trim Screen Krell Home Theater Standard 7.1 Use the menu to adjust the trim for the subwoofer, MUSIC MODE SUB TRIM during music mode playback. The adjustment range is -10 to +10 dB.
- Page 58 DTS NEO:6 CONTROL screen appears, with the cursor blinking at CONTROL KRELL HTS -DTS CONTROL- CENTER GAIN After setting the selection, press the previous key once to return to screen. CONFIGURE LEVELS menu. The CONFIGURE LEVELS Krell Home Theater Standard 7.1...
- Page 59 System Configuration, continued PLII Control PLII Control Screen Krell Home Theater Standard 7.1 Use the menu to adjust the signal for Dolby Prologic II PLII CONTROL music mode, which derives a 6.0 signal from two-channel material. Select from the PLII CONTROL CONFIGURE LEVELS screen appears, with the cursor blinking at the center width value.
-
Page 60: Volume Limit
MAXIMUM VOLUME LIMIT screen appears: MUM VOLUME LIMIT KRELL HTS -MAXIMUM VOLUME LIMIT- VOLUME LIMIT After setting your selection, press the previous key (80) once to return to the screen. CONFIGURE LEVELS menu. The CONFIGURE LEVELS MAXI- Krell Home Theater Standard 7.1... - Page 61 System Configuration, continued Zone 2 Level Zone 2 Level Screen Krell Home Theater Standard 7.1 Use the menu to select a ZONE 2 LEVEL from zone 2. Select from the ZONE 2 LEVEL CONFIGURE LEVELS screen appears, with the cursor blinking at...
-
Page 62: Step 6: Operation
BK GND COLOR OSD ON TIME LINE NUMBER VIDEO OUTPUT MENU BKGND , lets you select OPERATION . The MAIN MENU OPERATION MENU OSD OPERATION. screen. The cursor is blink- BLUE 3 SEC ACTIVE ONLY TRANSPARENT Krell Home Theater Standard 7.1... - Page 63 System Configuration, continued OSD Operation, continued Krell Home Theater Standard 7.1 The on-screen display feature allows you to customize on-screen dis- play options. BACKGROUND COLOR Choose the background color of the video display screen. This color choice is only applicable to composite and S-video inputs. The back- ground color is always black for component signals.
- Page 64 20 dB and may still be audible. DOLBY MODE HOLD Dolby mode hold sets the time your Home Theater Standard 7.1 remains in Dolby Digital mode when the incoming bitstream is inter- rupted. Bitstreams are interrupted in some devices when you press and release fast forward, track back/forward, or change channels for a compact disc, video disc, or satellite receiver.
-
Page 65: Dynamic Range
Krell Home Theater Standard 7.1 EX AUTO SWITCHING When the Home Theater Standard 7.1 will automatically ENABLED, engage THX Surround EX decoding if it receives a bitstream that is encoded in this format. When this feature is ually select THX Surround EX decoding. - Page 66 Then select that level, or slightly below. After setting your selections, press the previous key once to return to screen. OPERATION you can then set the maxi- from the menu. The OPERATION reverts to 0. Use the up Krell Home Theater Standard 7.1 BASS OFF.
- Page 67 7.1 inputs that are 7.1 INPUT SETUP connected. Select from the 7.1 INPUT SETUP screen appears, with the cursor blinking on an active 7.1 input selection. KRELL HTS -7.1 INPUT SETUP- ACTIVE INPUTS L C R Sl Sr Sbl Sbr ACTIVE SW SELECT THE 7.1 INPUTS THAT...
- Page 68 Press the recall button (31) on the front panel to return to Program Remote Screen A. Then press the previous key on the Home Theater Standard 7.1 remote control to return to the operation screen The final item on the OPERATION program a learning remote control to operate the Home Theater Standard 7.1.
-
Page 69: The System Information
6. Press the recall button (31) on the front panel to return to Program Remote Screen A. Then press the previous key on the Home Theater Standard 7.1 remote control to return to the oper- ation screen. menu displays AC line frequency, the version... -
Page 70: Adjustable Parameters
You can adjust the filters for the Home Theater Standard 7.1 chan- nels globally or individually. Up to three filters can be configured to act equally on all seven channels of audio. Alternatively, each filter can be configured separately for each individual channel. -
Page 71: Channel Selection
Exit the main configuration menu by pressing the menu key (82) on the remote. The Home Theater Standard 7.1 is now in operational mode. Press the right arrow directional key followed by the up and down directional keys... - Page 72 TYPE FREQ SHAPE LEVEL Use the direction and enter keys on the Home Theater Standard 7.1 remote control to scroll through and select the following step-by-step options for audio operation: MEMORY Navigate to one of the four memory locations and enter your selec- tion.
- Page 73 After selecting the appropriate loudspeaker configurationfor your sys- tem, press the previous key twice to return to the main configuration menu. Exit the main configuration menu by pressing the menu key on the remote. The Home Theater Standard 7.1 is now in the operational mode.
-
Page 74: Saving And Recalling Customized Settings And Restoring The Factory Default System Settings
The front panel displays: PLEASE WAIT INITIALIZING Your customized settings for the Home Theater Standard 7.1 revert to the factory default settings. If you save your settings, they are still in memory after you restore the factory default system settings. Follow Recalling Customized Settings above to retrieve your customized settings. -
Page 75: Operating The Home Theater Standard 7.1
7.1 is ready for operation. 1. Insert the AC power cord into the IEC connector (56) on the Home Theater Standard 7.1. Insert the other end into the AC wall receptacle. 2. Move the back panel power switch (55) into the up (on) position. -
Page 76: Main Zone And Zone 2 Operation
With the Home Theater Standard 7.1 in operational or stand-by mode, you can activate the main zone only. Or, while the Home Theater Standard 7.1 is still in stand-by mode, you can set up zone 2 listening so that when you switch to operational mode, only zone 2 plays. - Page 77 ZONE 2 Krell Home Theater Standard 7.1 continued With the Home Theater Standard 7.1 in the stand-by mode: 1. Press and release the power pre key (58) until the blue power LED illuminates. 2. Press the input device selection button or key for the source you wish to play.
-
Page 78: Simulcast
(80) key. For example, you have configured your Home Theater Standard 7.1 to turn on your TV monitor when trigger 4 is on and your CD player is set for . -
Page 79: Appendix: Home Theater Standard 7.1 Operating Modes
MATRIX 6.1, DTS-ES MATRIX 6.1 + THX, DTS 5.1 MOVIE, DTS 5.1 MOVIE + THX, DTS 5.1 MUSIC. DTS-ES MATRIX 6.1 The Home Theater Standard 7.1 engages DTS ES Matrix 6.1 decod- ing. All of the following modes plus using the M2 button or key: DTS-ES MATRIX 6.1 + THX, DTS 5.1 MOVIE, DTS 5.1... -
Page 80: For The Home Theater Standard 7.1
THX and THX Surround EX Modes continued User selectable modes available on the Home Theater Standard 7.1 are listed below: DOLBY PRO LOGIC II Dolby Pro Logic II is the next generation in Dolby Surround decoding. The Pro Logic II decoder takes 2 channels in and 5 channels out. It is designed specifically to decode all existing Dolby Surround pro- grams with improved spatiality and directionality. -
Page 81: Table 5 Krell Music Surround Modes
THX Surround EX to operate. If the DVD has the proper encoding, the Home Theater Standard 7.1 will recognize THX Surround EX and automatically engage the signal. Many DVD discs include THX Surround EX information but do not encode it in a way that a surround processor can recognize. -
Page 82: Warranty
All operational features, functions, and specifications and policies are subject to change without notification. Krell Home Theater Standard 7.1... -
Page 83: Return Authorization Procedure
To purchase additional packaging, please contact your authorized Krell dealer, distributor, or the Krell Service Department for assis- tance. Your Home Theater Standard 7.1 product serial number is: to 5:00... -
Page 84: Krell Home Theater Standard
94 dB 20 Hz-20 kHz, -88 dB 1 pair balanced via XLR connectors 7 pairs single-ended via RCA connectors one 7.1 via RCA connectors 6 coaxial via RCA connectors 2 EIAJ optical via TosLink connectors 4 S-video via DIN connectors... - Page 85 Specifications, continued SURROUND ENHANCEMENT MODES DIMENSIONS WEIGHT Krell Home Theater Standard 7.1 KRELL MUSIC SURROUND INCHES CENTIMETERS SHIPPING UNIT ONLY All operational features, functions, specifications, and policies are subject to change without notification. General Admission Front Row On Stage Enhanced Stereo...
- Page 86 Krell Industries, Inc. Home Theater 45 Connair Road Standard 7.1 Orange, CT 06477-3650 USA Surround TEL 203-799-9954 Preamp/Processor FAX 203-891-2028 E-MAIL krell@krellonline.com v 02.3 WEBSITE http://www.krellonline.com...
Need help?
Do you have a question about the Home Theater Standard 7.1 and is the answer not in the manual?
Questions and answers