
Related Manuals for Honda CG150 Titan ES


Summary of Contents for Honda CG150 Titan ES
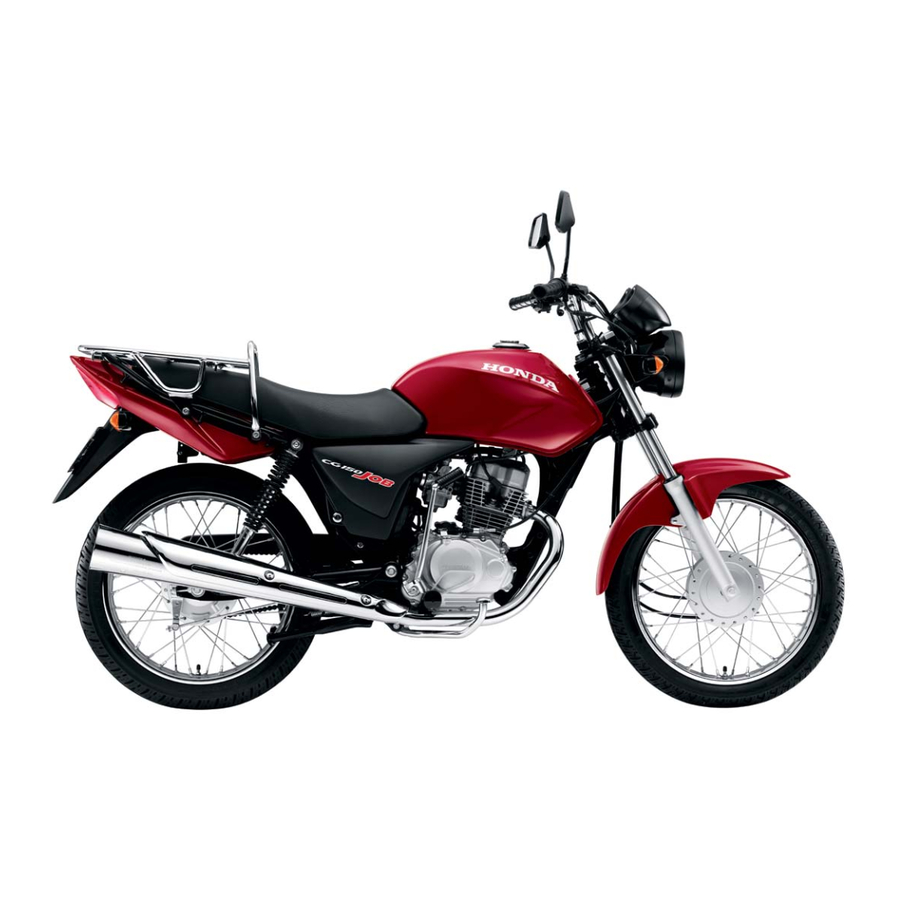
- Page 1 Manual del Propietario Owner´s Manual CG150 Titan KS • ES • ESD CG150 Sport • CG150 Job...
- Page 2 Algunas Palabras sobre la Motocicleta Felicitaciones por haber elegido una motocicleta Honda. Cuando usted adquiere una Honda, automáticamente pasa a formar parte de la familia de clientes satisfechos, o sea, de personas que aprecian la responsabilidad Honda en producir productos de alta calidad.
- Page 3 Siempre que haya alguna duda o necesidad de efectuar reparos especiales, diríjase a un distribuidor Honda que dispone de técnicos calificados y entrenados por la fábrica, los cuales conocen su motocicleta y están siempre dispuestos a ayudarle.
- Page 4 Manual del Propietario Conservación y Activación de Motocicletas Oxidación Inactivas Una de las principales consecuencias de la conservación inadecuada o ineficiente de la motocicleta es el proceso En caso de que haya necesidad de mantener la de oxidación. La motocicleta difiere de otros vehículos, motocicleta inactiva durante un largo período, se pues posee chasis y piezas aparentes desprotegidos.
- Page 5 No quite ningún elemento de fijación y utilice Las vibraciones no se caracterizan como anomalías. solamente piezas originales Honda en su motocicleta Ellas son una característica de cualquier vehículo para evitar ruidos desagradables.
- Page 6 Manual del Propietario CG150 Titan KS/ES CG150 Titan ESD CG150 Sport CG150 Job...
- Page 7 COMO PRINCIPIO LAS INFORMACIONES MÁS RECIENTES DISPONIBLES SOBRE EL PRODUCTO EN EL MOMENTO DE LA AUTORIZACIÓN DE LA IMPRESIÓN. MOTO HONDA DA AMAZÔNIA LTDA. SE RESERVA EL DERECHO DE CAMBIAR LAS CARACTERÍSTICAS DE LA MOTOCICLETA EN CUALQUIER MOMENTO Y SIN NOTIFICACIÓN PREVIA, SIN QUE POR ESTO INCURRA EN OBLIGACIONES DE CUALQUIER NATURALEZA.
-
Page 8: Table Of Contents
Frenos ................ 25 Identificación de la Motocicleta ......56 Embrague ..............29 Prevención de Robos ..........57 Válvula de Combustible ........... 30 Tanque de Combustible ........... 31 Aceite del Motor ............32 Neumáticos ..............33 Cámara de Aire Honda TUFFUP ......38... - Page 9 Manual del Propietario MANTENIMIENTO COMO TRANSPORTAR LA MOTOCICLETA ....89 TABLA DE MANTENIMIENTO ........58 ECONOMÍA DE COMBUSTIBLE ........91 Aceite del Motor ............62 Acelerador ..............66 LIMPIEZA Y CONSERVACIÓN ........92 Batería ............... 80 Bombillas ..............84 CONSERVACIÓN DE MOTOCICLETAS INACTIVAS .
-
Page 10: Asistencia Al Propietario
– los distribuidores Honda. Por lo tanto, diríjase a un de nuestros distribuidores siempre que haya alguna duda o necesidad de efectuar algún reparo. Proceda de la siguiente manera: 1. -
Page 11: Pilotaje Con Seguridad
Manual del Propietario 4. Obedezca a todas las leyes de tránsito. PILOTAJE CON SEGURIDAD • La velocidad excesiva es un factor común en muchos accidentes. Obedezca a los límites de velocidad y ADVERTENCIA NUNCA exceda las condiciones permitidas. Pilotar una motocicleta requiere ciertos cuidados para •... -
Page 12: Aparatos De Protección
Honda, a fin de cerciorarse de permanece, durante algún tiempo, aun después de la eliminación del agua del motor, bien como para apagado el motor. -
Page 13: Accesorios Y Carga
• el ángulo de inclinación de la motocicleta; Honda cancelará la garantía, en caso de que se • la carrera de las suspensiones delantera y trasera; constate la utilización de algún tipo de alarma. - Page 14 Manual del Propietario Carga Capacidad (CG150 Titan KS/ES/ESD/CG150 Sport o CG150 Job sin portaequipaje trasero) El peso y el acondicionamiento de la carga son mucho importantes para su seguridad. Observe las siguientes Esta motocicleta ha sido diseñada para el transporte precauciones, siempre que conduzca la motocicleta de dos personas: el piloto (1) y el pasajero (2).
- Page 15 • • • • • Daños causados por carga excesiva NO SERÁN CUBIERTOS por la Garantía Honda. En caso de que usted tenga dudas con respecto al cálculo del peso (figura solamente para referencia) de la carga que se puede acondicionar en la motocicleta, sin causar sobrecarga o daños...
-
Page 16: Instrumentos Y Controles
Luces indicadoras Velocímetro Obturador Palanca del embrague Palanca del freno delantero Empuñadura del acelerador CG150 Titan ES/ESD Interruptor de los señalizadores Interruptor de la bocina Tapa del tanque de combustible Interruptor de arranque Depósito de fluido del freno delantero (CG150 Titan ESD) - Page 17 Manual del Propietario CG150 Sport Depósito de fluido Interruptor de encendido Velocímetro del freno delantero Tacómetro Conmutador del faro Espejo retrovisor Obturador Espejo retrovisor Luces indicadoras Palanca del estrangulador Palanca del embrague Palanca del freno delantero Empuñadura del acelerador Interruptor de arranque Interruptor de los señalizadores Interruptor de la bocina Tapa del tanque de combustible...
- Page 18 Manual del Propietario CG150 Titan KS/ES/CG150 Job Pedal de arranque (CG150 Titan KS/CG150 Job) Compartimiento CG150 Job para objetos Filtro de aire Portaequipaje trasero Agarradero trasero (excepto CG150 Job) Gancho soporte (excepto CG150 Job) Ajustador de tensión del resorte trasero Descansapie del piloto Tapa de suministro/Varilla...
- Page 19 Manual del Propietario CG150 Titan KS/ES/CG150 Job Palanca del estrangulador Válvula de combustible CG150 Job Batería/Fusible Portaequipaje trasero Agarradero trasero (excepto CG150 Job) Portacasco Gancho soporte (excepto CG150 Job) Ajustador de tensión del resorte trasero Soporte lateral Descansapie Pedal de cambio Descansapie del pasajero del piloto Soporte central...
- Page 20 Manual del Propietario CG150 Titan ESD Compartimiento para objetos Filtro de aire Agarradero trasero Gancho soporte Ajustador de tensión del resorte trasero Descansapie del piloto Descansapie del pasajero Tapa de suministro/Varilla Pedal del freno trasero medidora del nivel de aceite...
- Page 21 Manual del Propietario CG150 Titan ESD Palanca del estrangulador Válvula de combustible Batería/Fusible Agarradero trasero Portacasco Gancho soporte Ajustador de tensión del resorte trasero Soporte lateral Descansapie del piloto Pedal de cambio Descansapie del pasajero Soporte central...
- Page 22 Manual del Propietario CG150 Sport Filtro de aire Compartimiento para objetos Agarradero trasero Gancho para equipaje Ajustador de tensión del resorte trasero Descansapie del piloto Tapa de suministro/Varilla Descansapie del pasajero Pedal del freno trasero medidora del nivel de aceite...
- Page 23 Manual del Propietario CG150 Sport Válvula de combustible Batería/Fusible Portacasco Agarradero trasero Gancho para equipaje Ajustador de tensión del resorte trasero Soporte lateral Descansapie del piloto Descansapie del pasajero Pedal de cambio...
-
Page 24: Instrumentos E Indicadores
Manual del Propietario Instrumentos e Indicadores (CG150 Titan KS/ES/ESD/CG150 Job) Los instrumentos y las luces indicadoras y de advertencia están ubicados en el tablero de instrumentos. Sus funciones se describen en la tabla siguiente. (1) Velocímetro (2) Odómetro (3) Indicador de marcha (4) Luz indicadora de los señalizadores (5) Luz indicadora del punto muerto (6) Luz indicadora del faro alto... - Page 25 Manual del Propietario Ref. Descripción Función Velocímetro Indica la velocidad de la motocicleta (km/h). Odómetro Registra el total de kilómetros recorridos por la motocicleta. Indicador de marcha Indica la velocidad ideal para cada marcha. Luz indicadora de los señalizadores (verde) Se enciende intermitentemente cuando se acciona los señalizadores.
- Page 26 Manual del Propietario (CG150 Sport) Los instrumentos y las luces indicadoras y de advertencia están ubicados en el tablero de instrumentos. Sus funciones se describen en la tabla siguiente. (1) Velocímetro (2) Odómetro (3) Luz indicadora de los señalizadores (4) Tacómetro (5) Faja roja del tacómetro (6) Luz indicadora del faro alto (7) Luz indicadora del punto muerto...
- Page 27 Manual del Propietario Ref. Descripción Función Velocímetro Indica la velocidad de la motocicleta (km/h). Odómetro Registra el total de kilómetros recorridos por la motocicleta. Luz indicadora de los señalizadores (verde) Se enciende intermitentemente cuando se acciona los señalizadores. Tacómetro Indica el régimen de rotaciones del motor (rpm). Faja roja del tacómetro No permita que la aguja del tacómetro alcance la faja roja, aún después del ablande del motor.
-
Page 28: Indicador De Combustible
Manual del Propietario Indicador de Combustible (CG150 Titan KS/ES/ESD/CG150 Job) Si la aguja del indicador de combustible (1) alcanza la (1) Indicador de combustible marca roja (2), esto indica que el tanque de combustible está casi vacío. Abastezca lo más rápido (2) Marca roja posible. -
Page 29: Componentes Principales
Manual del Propietario (1) Amortiguador COMPONENTES PRINCIPALES 1 2 3 4 trasero (2) Llave para tuerca cilíndrica (Informaciones necesarias a la utilización de la (3) Extensión motocicleta) ADVERTENCIA La no realización de la Inspección Antes del Uso (página 46) podrá resultar en serios riesgos al funcionamiento de la motocicleta y a la seguridad del piloto y del pasajero. -
Page 30: Frenos
Diríjase a un • • • • • Utilice solamente fluido de freno con las distribuidor Honda para efectuar este servicio. especificaciones DOT 3 o DOT 4. Verifique si el embalaje no ha sido violado. - Page 31 Manual del Propietario Con la motocicleta en la posición vertical, verifique si Freno Delantero el nivel del fluido de freno se encuentra arriba de la (CG150 Titan KS/ES/CG150 Job) marca de nivel inferior (1). El sistema de freno afecta su seguridad personal. Se Complete el depósito con el fluido de freno debe efectuar siempre el ajuste adecuado.
- Page 32 • En caso de que no obtenga el juego correcto a contratuerca (2) y gire el tornillo limitador. Apriete la través de los procedimientos descritos, diríjase a un contratuerca. distribuidor Honda para efectuar una inspección en el (1) Tornillo limitador sistema de freno. (2) Contratuerca...
- Page 33 (6). • En caso de que no sea posible obtener el ajuste a través de este procedimiento, diríjase a un distribuidor Honda. (6) Articulación del brazo del freno 2. Para ajustar el juego del pedal del freno, gire la...
-
Page 34: Embrague
Manual del Propietario Embrague (2) Guardapolvo (3) Contratuerca Ajuste (4) Ajustador del cable El ajuste del embrague se hace necesario en caso de del embrague que la motocicleta presente pérdida de rendimiento (A) Aumenta el juego durante el cambio de marchas o patine, causando (B) Disminuye el juego incompatibilidad entre la velocidad de la motocicleta y la rotación del motor. -
Page 35: Válvula De Combustible
En caso de que no sea posible obtener el ajuste del embrague a través de los procedimientos descritos, o de que el embrague no funcione correctamente, diríjase a un distribuidor Honda y solicite una inspección del sistema de embrague. Otras Comprobaciones... -
Page 36: Tanque De Combustible
Reabastezca lo más rápido posible. La provisión de distribuidor Honda. Al contrario, el motor podrá sufrir daños que no están cubiertos por la garantía. reserva es de aproximadamente 2,0 litros (valor de referencia). -
Page 37: Aceite Del Motor
Manual del Propietario Ocasionalmente puede ocurrir un leve “cascabeleo” durante Aceite del Motor la conducción bajo carga elevada. No se preocupe, eso Verificación del Nivel de Aceite del Motor significa que el motor está funcionando de forma eficiente. Inspeccione el nivel de aceite diariamente, antes de conducir la motocicleta, y complételo si necesario. -
Page 38: Neumáticos
Manual del Propietario 4. En caso de que sea necesario, adicione el aceite Neumáticos recomendado (página 62) hasta alcanzar la marca La presión correcta de los neumáticos otorga mayor de nivel superior. Nunca sobrepase este límite. estabilidad, confort y seguridad en la conducción de la 5. - Page 39 Medida de los neumáticos 18M/C 47P 17M/C 57P llantas presentan rayas o deformaciones. PIRELLI MT75 PIRELLI MT75 Diríjase a un distribuidor Honda para el reemplazo de Solamente neumáticos dañados y cámaras perforadas. Presión de los piloto (2,00; 29) (2,00; 29) neumáticos...
- Page 40 En caso de daños, diríjase a un distribuidor Honda Los indicadores se tornan visibles tan luego el desgaste para efectuar los reparos necesarios, el reemplazo de sobrepase el límite recomendado de 1,5 mm para el...
- Page 41 él no presentará la Para reparar o reemplazar los neumáticos, diríjase a misma resistencia de un neumático nuevo. Por lo un distribuidor Honda, que dispone de materiales y tanto, es mejor reemplazar un neumático perforado o métodos correctos para efectuar el reparo.
- Page 42 No quite o modifique los contrapesos de las ruedas. En caso de que haya necesidad de equilibrar las ruedas, diríjase a un distribuidor Honda. Es necesario equilibrar las ruedas después de reparar o reemplazar los neumáticos.
-
Page 43: Cámara De Aire Honda Tuffup
• • • • • Los daños en la cámara • • • • • La cámara de aire Honda Tuffup no ha sido de aire que se pueden proyectada para evitar todos los tipos de perforación repararse son aquellos a que un neumático está... -
Page 44: Componentes Individuales Esenciales
Manual del Propietario (1) Interruptor de COMPONENTES INDIVIDUALES encendido ESENCIALES Interruptor de Encendido LOCK El interruptor de encendido (1) está ubicado debajo del tablero de instrumentos. Posición de la llave Función Condición de la llave LOCK (Traba de la columna Bloqueo del manillar. -
Page 45: Obturador
Manual del Propietario Obturador CERRAR (4) Botón El interruptor de encendido de esta motocicleta posee un obturador. Al dejar la motocicleta estacionada, cierre el obturador para evitar robos. Para cerrar el obturador, quite la llave de encendido, alinee el resalte (1) de la llave del obturador (2) con la ranura (3) del obturador y gire la llave del obturador en el sentido contra horario o mueva el botón (4) para la posición SHUT. -
Page 46: Interruptores Del Manillar Derecho
Manual del Propietario Interruptores del Manillar Derecho Interruptores del Manillar Izquierdo Interruptor de Arranque (CG150 Titan ES/ESD/ Conmutador del Faro CG150 Sport) Posicione el conmutador del faro (1) en para obtener luz alta, o en para obtener luz baja. El motor de arranque se acciona al presionarse el interruptor de arranque (1). -
Page 47: Equipamientos
Manual del Propietario Portacasco EQUIPAMIENTOS El portacasco (1) está ubicado del lado izquierdo, debajo del asiento. Traba de la Columna de Dirección Inserte la llave de encendido (2) en el portacasco y Para trabar la columna de dirección, gire el manillar gírela en el sentido contra horario para destrabar. -
Page 48: Tapa Lateral Derecha
Manual del Propietario Tapa Lateral Derecha (CG150 Titan KS/ES/ESD/CG150 Job) (1) Llave de encendido Quite la tapa lateral derecha para efectuar el (2) Tapa lateral mantenimiento del filtro de aire. derecha Desmontaje (3) Gomas 1. Inserte la llave de encendido (1) y gírela en el sentido horario. -
Page 49: Tapa Lateral Izquierda
Manual del Propietario Tapa Lateral Izquierda (CG150 Titan KS/ES/ESD/CG150 Job) (1) Tornillo Se debe quitar la tapa lateral izquierda al efectuarse el (2) Tapa lateral mantenimiento de la batería y del fusible. izquierda (3) Gomas Desmontaje 1. Quite el tornillo (1). 2. -
Page 50: Compartimiento Para Objetos
Manual del Propietario Compartimiento para Objetos Ganchos para Equipaje El compartimiento para objetos (1) está ubicado detrás (CG150 Sport) de la tapa lateral derecha. Este compartimiento ha sido Esta motocicleta está equipada con ganchos para proyectado para transportar objetos livianos. equipaje (1) retráctiles, debajo del asiento, a ambos El manual del propietario, bien como otros lados. -
Page 51: Funcionamiento
Corrija cualquier anormalidad, antes de conducir la motocicleta. Diríjase a un distribuidor Honda siempre 1. NIVEL DE ACEITE DEL MOTOR – Verifique el nivel que no sea posible solucionar algún problema. -
Page 52: Arranque Del Motor
Manual del Propietario Arranque del Motor Procedimientos de Arranque (CG150 Titan KS/ES/ESD/CG150 Job) Siga siempre los procedimientos de arranque descritos Motor Frío abajo. 1. Coloque la palanca del estrangulador (1) en la posición ON (A) (totalmente accionado). ADVERTENCIA (1) Palanca del Nunca accione el motor en áreas cerradas, o sin estrangulador ventilación. - Page 53 • • • • • Debido a la proximidad y su formato geométrico, la curva del tubo de escape es sometida a altas (CG150 Titan ES/ESD) temperaturas, lo que normalmente altera la 2. Con el acelerador ligeramente abierto, presione el coloración de la camada de cromo, cambiando...
- Page 54 Manual del Propietario NOTA (CG150 Sport) No abra el acelerador durante el arranque del motor Para accionar un motor caliente siga los con el estrangulador en la posición ON (A) (totalmente procedimientos indicados para “Temperatura Alta”. accionado). Esto hará que la mezcla de combustible Temperatura Normal: 10°C –...
- Page 55 OFF ligeramente el acelerador. Accione el motor a través (B) (totalmente desaccionado). del pedal de arranque. (CG150 Titan ES/ESD) ADVERTENCIA En caso de que el motor no funcione después de La utilización continua del estrangulador podrá...
-
Page 56: Cuidados Para El Ablande Del Motor
Manual del Propietario (CG150 Sport) Cuidados para el Ablande del Motor En caso de que el motor no funcione después de Los cuidados para el ablande del motor durante los varios intentos, puede ser que esté anegado con primeros kilómetros de uso prolongarán exceso de combustible. -
Page 57: Conducción De La Motocicleta
Manual del Propietario Conducción de la Motocicleta ATENCIÓN No efectúe el cambio de marchas sin accionar el ADVERTENCIA embrague y reducir la aceleración. Al contrario, • • • • • Lea con atención las informaciones referentes a la transmisión y el motor podrán sufrir daños. “Pilotaje con Seguridad”... - Page 58 Manual del Propietario Velocidades máximas recomendadas para el cambio de marchas (excepto CG150 Sport): Marcha más alta Velocidad Reducción 1ª – 2ª 35 km/h 2ª – 1ª 2ª – 3ª 57 km/h 3ª – 2ª 3ª – 4ª 80 km/h 4ª...
-
Page 59: Frenado
Manual del Propietario • • • • • Si se conduce la motocicleta en pistas mojadas, Frenado bajo lluvia, o en pistas de arena o tierra, la 1. Para frenar normalmente accione los frenos seguridad para maniobrar o parar se reduce. En delantero y trasero de manera progresiva y, al tales condiciones, todos los movimientos de la mismo tiempo, reduzca las marchas. -
Page 60: Estacionamiento
Manual del Propietario • • • • • Antes de hacer funcionar el motor, quite la capa o Estacionamiento protección de la motocicleta. 1. Después de detener la motocicleta coloque la • • • • • El accionamiento del motor se debe efectuar transmisión en punto muerto, cierre la válvula de solamente por personas que tengan práctica y combustible (posición OFF), gire el manillar... -
Page 61: Identificación De La Motocicleta
Manual del Propietario Identificación de la Motocicleta Placa de Identificación del Año de Fabricación Esta placa identifica el año de fabricación de su La identificación oficial de su motocicleta se hace motocicleta y va pegada en el lado derecho del mediante los números de serie del chasis y del motor. -
Page 62: Prevención De Robos
Fecha de compra: ___/___/___ 3. Estacione su motocicleta en locales cerrados, siempre que sea posible. 4. Moto Honda da Amazônia Ltda. no autoriza: DATOS DEL 2º PROPIETARIO a) El uso de dispositivos antirrobo, tales como alarmas, dispositivos de bloqueo del encendido, rastreador Nombre: _____________________________________________ vía satélite, etc. -
Page 63: Mantenimiento Tabla De Mantenimiento
MANTENIMIENTO Tabla de Mantenimiento • Cuando necesite servicios de mantenimiento acuérdese de que su distribuidor Honda es el que mejor conoce su motocicleta y está totalmente preparado para ofrecerle todos los servicios de mantenimiento y de reparos. Diríjase a su distribuidor Honda siempre que necesite de servicios de mantenimiento. - Page 64 4. Cambie cada año o a cada intervalo de kilometraje indicado en la Tabla de Mantenimiento, lo que ocurra primero. 5. Cambie cada 2 años. El cambio requiere habilidad mecánica. Por razones de seguridad, recomendamos que todos los servicios presentados en esta tabla sean efectuados por un distribuidor Honda.
-
Page 65: Cuidados Con El Mantenimiento
• Llave estrella, 22 mm plana y firme. • Extensión • • • • • Utilice solamente piezas nuevas y genuinas Honda. • Llave de bujías Piezas que no tengan una calidad equivalente • Llave para tuerca cilíndrica pueden comprometer la seguridad de su •... -
Page 66: Filtro De Aire
4. Instale un nuevo elemento del filtro de aire. Use solamente un elemento de filtro de aire original Honda especificado para esta motocicleta. El uso de elementos de filtro de aire no originales Honda puede causar el desgaste prematuro del motor o... -
Page 67: Aceite Del Motor
ADVERTENCIA En caso de que no se utilice una llave dinamométrica en la instalación, diríjase a un distribuidor Honda, tan luego sea posible, para verificar el armado. ATENCIÓN • • • • • El aceite es el factor que más afecta el desempeño y la vida útil del motor. - Page 68 Manual del Propietario 1. Coloque un recipiente debajo del motor para recoger 5. Instale la tapa de suministro/varilla medidora del el aceite y quite la tapa de suministro/varilla nivel de aceite. medidora del nivel de aceite, el tapón de drenaje (1) 6.
-
Page 69: Bujía De Encendido
Manual del Propietario Bujía de Encendido 4. Mida la separación de los electrodos (3), utilizando un calibrador de espesores del tipo alambre. Si necesario, (Observe “Cuidados con el Mantenimiento” en la ajuste la separación doblando el electrodo lateral (4). página 60.) Separación correcta: 0,8 –... -
Page 70: Holgura De Las Válvulas
Manual del Propietario Holgura de las Válvulas Esta condición se puede determinar moviéndose los balancines con la mano. Caso estén libres, eso indica (Observe “Cuidados con el Mantenimiento” en la que las válvulas están cerradas y el pistón está en el página 60.) tiempo de compresión. -
Page 71: Acelerador
Para ajustar el juego de la empuñadura, afloje la • Diríjase a un distribuidor Honda para efectuar ajustes contratuerca (1) y gire el ajustador (2) en el sentido deseado a fin de aumentar o disminuir el juego. -
Page 72: Cadena De Transmisión
Manual del Propietario (CG150 Titan KS/ES/ESD/CG150 Job) Cadena de Transmisión (1) Tornillo de (Observe “Cuidados con el Mantenimiento” en la aceleración página 60.) (A) Aumenta la rotación La durabilidad de la cadena de transmisión depende de (B) Disminuye la rotación la lubricación y de ajustes correctos. - Page 73 Manual del Propietario 3. Gire la rueda trasera (CG150 Titan KS/ES/ESD/ Cadena de Transmisión • Rolletes dañados CG150 Job) o mueva la motocicleta hacia delante Dientes Dientes gastos dañados (CG150 Sport). Pare y verifique la holgura de la • Pasadores flojos cadena.
- Page 74 En caso de que no se utilice una llave dinamométrica en la instalación, diríjase a un NOTA distribuidor Honda, tan luego sea posible, para En caso de que la holgura de la cadena de transmisión verificar el armado de la rueda. El armado sea excesiva y el eje trasero esté...
- Page 75 Si la cadena está excesivamente sucia, se debe quitarla y limpiarla, antes que sea lubricada. Para su seguridad, recomendamos que este servicio se efectúe en su distribuidor Honda. 2. Limpie la cadena de transmisión con un disolvente no inflamable y deje que se seque totalmente.
-
Page 76: Guía De La Cadena De Transmisión
Reemplácela en caso de que el 4. Lubrique la cadena de transmisión (página 70). desgaste alcance la línea indicadora de desgaste (2). Diríjase a su distribuidor Honda para efectuar el 5. Pase la cadena de transmisión a través de la reemplazo. -
Page 77: Soporte Lateral
(2). Verifique si el conjunto del soporte lateral se mueve libremente. En caso de que sea necesario reemplazar algún componente, diríjase a un distribuidor Honda. (1) Resorte del soporte lateral... -
Page 78: Suspensión
Fuerce la rueda lateralmente para verificar si los componente presenta desgaste o está dañado, diríjase rodamientos y bujes del brazo oscilante presentan a su distribuidor Honda. Los distribuidores Honda holguras, o si el eje de pivote está flojo. están calificados para efectuar los servicios de 2. -
Page 79: Desgaste De Las Pastillas Del Freno
Verifique la ranura (1) en cada pastilla. En caso de que (3) Marca de alguna de las pastillas esté desgastada hasta la ranura referencia reemplace las dos pastillas en conjunto. Diríjase a un (4) Brida del freno distribuidor Honda para efectuar este servicio. FRENO DELANTERO (1) Ranuras indicadoras de desgaste... - Page 80 Siempre que haya necesidad de efectuar ajustes o (3) Tuerca de ajuste reparos en el sistema de freno diríjase a un (4) Cable del freno distribuidor Honda, lo cual dispone de piezas delantero originales, fundamentales para la seguridad de la (5) Brazo del freno motocicleta.
- Page 81 1. Posicione la rueda delantera en la horquilla e diríjase a un distribuidor Honda así que posible para introduzca el eje por el amortiguador derecho, a una verificación del armado de la rueda. El armado través del cubo de la rueda y del amortiguador...
-
Page 82: Rueda Delantera (Cg150 Titan Esd/Cg150 Sport)
Los pistones de la pinza del freno serán forzados hacia fuera de los cilindros, provocando fuga de fluido de freno. En caso de que esto ocurra, será necesario efectuar el mantenimiento del sistema de freno. Diríjase a un distribuidor Honda y solicite el servicio. -
Page 83: Rueda Trasera
En caso de que no se utilice una llave dinamométrica en la instalación de la rueda, diríjase a un distribuidor Honda así que posible para una verificación del armado de la rueda. El armado incorrecto puede reducir la eficiencia del freno. - Page 84 En caso de que no se utilice una llave dinamométrica en la instalación de la rueda, diríjase a un distribuidor Honda así que posible para una verificación del armado de la rueda. El armado incorrecto puede reducir la eficiencia del freno.
-
Page 85: Batería
15 minutos y busque auxilio arranque o causando otros problemas eléctricos) médico inmediatamente. diríjase a su distribuidor Honda. • • • • • En caso de ingestión, beba una gran cantidad de agua o leche. Enseguida se debe ingerir leche de ATENCIÓN... -
Page 86: Interruptor De La Luz Del Freno
Para ajustar el interruptor de la luz del freno gire (3) Tornillo solamente la tuerca de ajuste, nunca el cuerpo del (4) Terminal interruptor. negativo (–) (5) Terminal (1) Interruptor de la luz positivo (+) del freno (2) Tuerca de ajuste (CG150 Titan ES/ESD/CG150 Sport) -
Page 87: Fusibles
Siempre mantenga fusibles de reserva en la motocicleta, pues estos serán útiles en caso de que ocurra algún problema en el sistema eléctrico. (CG150 Titan ES/ESD/CG150 Sport) ADVERTENCIA No utilice fusibles con capacidad diferente a la especificada, ni reemplace fusibles por otros mate- riales conductores. - Page 88 4. Quite el fusible quemado e instale uno nuevo. El fusible de reserva (3) está ubicado próximo a la caja del fusible principal. (CG150 Titan ES/ESD/CG150 Sport) 5. Cierre la tapa de la caja del fusible principal e instale la tapa lateral izquierda.
-
Page 89: Bombillas
Manual del Propietario Bombillas Bombilla del Faro 1. Quite los tornillos de fijación (1) de la carcasa del (Observe “Cuidados con el Mantenimiento” en la faro. página 60.) 2. Empuje suavemente el extremo inferior del faro (2) hacia fuera y quite el faro. ADVERTENCIA 3. - Page 90 Manual del Propietario 4. Quite la capa de goma (4). Bombilla de la Luz Trasera/Luz del Freno 5. Quite la bombilla del faro (5) mientras presiona el 1. Retire la lente de la luz trasera (1) quitando los dos prendedor (6) hacia abajo. tornillos de fijación (2).
- Page 91 Manual del Propietario Bombillas de los Señalizadores Delanteros y (3) Soquete Traseros (4) Bombilla del señalizador 1. Retire la lente del señalizador (1) quitando el tornillo de fijación (2). 2. Presione suavemente el soquete (3) de la bombilla del señalizador y gírelo en el sentido contra horario. Quite la bombilla del señalizador (4) del soquete.
-
Page 92: Espejo Retrovisor
Manual del Propietario Espejo Retrovisor Faro (Observe “Cuidados con el Mantenimiento” en la (Observe “Cuidados con el Mantenimiento” en la página 60.) página 60.) El espejo retrovisor permite el ajuste del ángulo de Ajuste Vertical visión. Coloque la motocicleta en un local plano y El ajuste vertical se puede obtener moviendo la siéntese en ella. - Page 93 Manual del Propietario NOTA Ajuste del Haz Ajuste el faro utilizando luz “baja”. El faro es esencial para su seguridad. Cuando mal regulado, reduce la visibilidad y ofusca la visión de los 1. Coloque la motocicleta en la posición vertical (sin conductores que trafican en el sentido contrario.
-
Page 94: Como Transportar La Motocicleta
Manual del Propietario COMO TRANSPORTAR LA MOTOCICLETA En caso de que utilice un camión o camioneta para trans- portar su motocicleta Honda, siga las instrucciones abajo. • Utilice una rampa para colocar la motocicleta en el vehículo de transporte. • Cerciórese de que la válvula de combustible esté... - Page 95 (Figura solamente vibraciones. para referencia) ATENCIÓN Daños causados a la motocicleta por la utilización de tales dispositivos, u otros equipamientos no recomendados por Honda para el transporte de la motocicleta, no serán cubiertos por la Garantía Honda.
-
Page 96: Economía De Combustible
Utilice solamente piezas originales Honda y efectúe estructura, al nivel del mar, sin pasajero o carga, todos los servicios de mantenimiento necesarios en... -
Page 97: Limpieza Y Conservación
Manual del Propietario NOTA LIMPIEZA Y CONSERVACIÓN Aplique spray antioxidante solamente con el motor frío. Se puede eliminar el exceso después de 24 horas. Limpie la motocicleta regularmente para mantenerla con buena apariencia y para proteger la pintura, los ADVERTENCIA componentes plásticos, gomas y cromados. - Page 98 Manual del Propietario Evite pulverizar agua o aire a alta presión (común en los Equipamientos para el Lavado túneles de lavado) en los siguientes componentes o locales: Nunca utilice equipamiento de agua a alta presión para • Cubos de las ruedas •...
- Page 99 Manual del Propietario – No utilice lana de acero o abrasivos para limpiar las Como Lavar la Motocicleta llantas o ruedas, pues estos eliminan su camada Nunca lave la motocicleta expuesta al sol ATENCIÓN protectora empezando un proceso de oxidación severa. o con el motor caliente.
- Page 100 Manual del Propietario 4. Si necesario, aplique cera protectora en las superficies ADVERTENCIA pintadas o cromadas. La cera protectora se debe – No aplique spray antioxidante en el área próxima al sistema aplicar con un algodón especial o con una franela, de freno.
-
Page 101: Conservación De Motocicletas Inactivas
Manual del Propietario Antes de colocar la motocicleta en inactividad efectúe CONSERVACIÓN DE MOTOCICLETAS todos los reparos que sean necesarios. Al contrario, INACTIVAS esos reparos pueden ser olvidados cuando se vuelva a utilizar la motocicleta. En caso de que haya necesidad de mantener la ATENCIÓN motocicleta inactiva durante un largo período, se •... - Page 102 Manual del Propietario NOTA 4. Para impedir la oxidación en el interior del cilindro del motor, efectúe los siguientes procedimientos: En caso de que la motocicleta vaya a permanecer • Quite los cables de las bujías de encendido. inactiva por más de un mes, cerciórese de drenar el Utilice un cordón para amarrar los cables a algún carburador (si aplicable).
- Page 103 Manual del Propietario 6. Lave y seque la motocicleta. Aplique una camada de Activación de la Motocicleta cera a base de silicona en todas las superficies Cuando la motocicleta vuelva a ser utilizada, se deben pintadas. Aplique spray antioxidante en las llantas, observar los siguientes cuidados: rayos, amortiguadores, escape (inclusive parte 1.
-
Page 104: Preservación Del Medio Ambiental
ácida que ésta contiene, se debe llevar la clientes. pieza reemplazada a un distribuidor Honda, que le dará Con el objeto de una mejor relación de su motocicleta una destinación adecuada. -
Page 105: Especificaciones Técnicas
792 mm (CG150 Titan KS/ES/ESD/CG150 Job) 797 mm (CG150 Sport) Peso Peso en seco 118 kg (CG150 Titan KS) 119 kg (CG150 Titan ES/ESD/CG150 Job) 116 kg (CG150 Sport) Capacidades Aceite del motor 1,0 litro (después del drenaje) 1,2 litro (después del desarmado del motor) - Page 106 Manual del Propietario MOTOR Ítem Tipo 4 tiempos, enfriado por aire, OHC, accionado por cadena, 2 válvulas, monocilíndrico Disposición del cilindro Inclinado a 15° en relación a la vertical Diámetro y carrera 57,3 x 57,8 mm Cilindrada 149,2 cm Relación de compresión 9,5:1 Potencia máxima 14,2 cv a 8.000 rpm (CG150 Titan KS/ES/ESD/CG150 Job)
- Page 107 Manual del Propietario CHASIS/SUSPENSIÓN Ítem Ángulo de avance/trail 27°24’/93 mm (CG150 Titan KS/ES/ESD/CG150 Job) 27°23’/93 mm (CG150 Sport) Neumático delantero (tamaño) 80/100 – 18M/C 47P (CG150 Titan KS/ES/ESD/CG150 Job) (marca/modelo) PIRELLI CITY DEMON (tamaño) 80/100 – 18M/C 47P (CG150 Sport) (marca/modelo) PIRELLI MT75 Neumático trasero...
- Page 108 Manual del Propietario TRANSMISIÓN Ítem Tipo 5 velocidades constantemente engranadas Embrague Multidisco en baño de aceite Reducción primaria 3,350 Reducción final 2,687 (CG150 Titan KS/ES/ESD/CG150 Job) 2,800 (CG150 Sport) Relación de transmisión 2,785 1,789 1,350 1,090 0,937 Sistema de cambio de marchas Pedal operado por el pie izquierdo...
- Page 109 Manual del Propietario SISTEMA ELÉCTRICO Ítem Batería 12 V – 4 Ah (CG150 Titan KS/CG150 Job) 12 V – 6 Ah (CG150 Titan ES/ESD/CG150 Sport) Sistema de encendido C.D.I. (encendido por descarga capacitiva) Alternador 0,068 kW/5.000 rpm Fusible principal 15 A...
-
Page 110: Control De Inspecciones
Las dos primeras inspecciones son gratuitas, desde que se efectúen en Distribuidores o Centros de Servicio Autorizados Honda, dentro del territorio nacional, siendo los lubricantes, los materiales de limpieza y piezas de mantenimiento normal de responsabilidad del propietario. - Page 111 Manual del Propietario 36.000 km 40.000 km 44.000 km 48.000 km 52.000 km INSPECCIÓN INSPECCIÓN INSPECCIÓN INSPECCIÓN INSPECCIÓN SO nº SO nº SO nº SO nº SO nº FECHA: FECHA: FECHA: FECHA: FECHA: 56.000 km 60.000 km 64.000 km 68.000 km 72.000 km INSPECCIÓN INSPECCIÓN...
- Page 112 INTRODUCTION This manual is a practical guide on how to take care of the Honda motorcycle you have just acquired. It contains all basic instructions for your Honda to be well taken care of, daily inspection and maintenance procedures, and also explanations of how to drive it correctly in traffic.
- Page 113 • • • • • Do not dry the motorcycle with the same cloth used services performed by your authorized Honda dealer. You can clean and maintain your motorcycle by yourself.
- Page 114 Remember that natural wearing and corrosion are not covered by Honda Limited Warranty. We also provided important information at the end of the manual that will help you prevent oxidation. ATTENTION •...
- Page 115 They are a normal characteristic of an automotive vehicle Do not remove any attaching device and use only and therefore are not covered by Honda Limited Warranty. Honda genuine parts for replacement to avoid During motorcycle operation, these vibrations may lead to unpleasant noises.
- Page 116 Owner’s Manual CG150 Titan KS/ES CG150 Titan ESD CG150 Sport CG150 Job...
- Page 117 ALL INFORMATION IN THIS MANUAL IS BASED ON THE LATEST PRODUCTION INFORMATION AVAILABLE AT THE TIME OF APPROVAL FOR PRINTING. MOTO HONDA DA AMAZÔNIA LTDA. RESERVES THE RIGHT TO MAKE CHANGES AT ANY TIME WITHOUT NOTICE AND WITHOUT INCURRING ANY OBLIGATION.
- Page 118 Suspension ..............24 Parking ............... 55 Brakes ................ 25 Motorcycle Identification ........56 Clutch ................. 29 How to Prevent Theft ..........57 Fuel Cock ..............30 Fuel Tank ..............31 Engine Oil ..............32 Tires ................33 TUFFUP Honda Tube ..........38...
- Page 119 Owner’s Manual MAINTENANCE TRANSPORTATION ............89 MAINTENANCE SCHEDULE ........58 FUEL ECONOMY ............91 Air Cleaner ..............61 Battery ............... 80 CLEANING AND MAINTENANCE ......... 92 Brake Pad Wear ............74 Brake Shoe Wear ............. 74 STORAGE GUIDE ............96 Bulbs ................
-
Page 120: Owner's Assistance
For this, you can rely on our technical assistance network – Honda Dealers. Always go to a Honda dealer if you have questions or your motorcycle needs to be repaired. If your motorcycle presents any abnormality, proceed as follows: 1. -
Page 121: Motorcycle Safety
Owner’s Manual 4. Obey all national and local laws and regulations. MOTORCYCLE SAFETY • Excessive speed is a factor in many accidents. Obey the speed limits, and NEVER ride faster than WARNING conditions warrant. • Signal before you make a turn or lane change. Motorcycle riding requires special efforts on your part to ensure your safety. -
Page 122: Protective Apparel
The passenger needs the same lubricating oil. If this occurs, turn the engine off protection. immediately. Change the oil at an authorized Honda dealer to make sure the water in the engine is 2. The exhaust system becomes hot during operation, eliminated and proper maintenance is performed. -
Page 123: Accessories And Load
1. Carefully inspect the accessory to make sure it alarm system. The installation of any kind of alarm does not: may impair the electrical system. Honda shall cancel • obscure any lights (headlight, taillight, turn signal and warranty if the use of such device is determined. - Page 124 Owner’s Manual Load Load Limit (CG150 Titan KS/ES/ESD/CG150 Sport or CG150 Job without rear carrier) How much weight you put on your motorcycle, and how you load it, are important to your safety. Anytime you This motorcycle is designed to carry the pilot (1) and ride with a passenger or cargo, you should be aware of one passenger (2).
- Page 125 Maximum load capacity (pilot + cargo): Motorcycle stability and drivability will be adversely CG150 Job with rear carrier affected if excessive weight is put on Honda genuine 110 kg (242 lbs) rear carrier. Furthermore, it may damage the frame and also lead to a serious accident.
-
Page 126: Instruments And Controls Component Location
CG150 Titan KS/ES/ESD/CG150 Job Ignition switch Headlight dimmer switch Rearview mirror Rearview mirror Indicators Speedometer Shutter Clutch lever Front brake lever Throttle grip CG150 Titan ES/ESD Turn signal switch Horn button Fuel filler cap Starter button Front brake fluid reservoir (CG150 Titan ESD) - Page 127 Owner’s Manual CG150 Sport Ignition switch Speedometer Front brake fluid reservoir Tachometer Headlight dimmer switch Rearview mirror Shutter Rearview mirror Indicators Choke lever Clutch lever Front brake lever Throttle grip Starter button Turn signal switch Horn button Fuel filler cap...
- Page 128 Owner’s Manual CG150 Titan KS/ES/CG150 Job Kickstarter pedal (CG150 Titan KS/CG150 Job) CG150 Job Storage compartment Air cleaner Rear carrier Grab rail (except CG150 Job) Hook (except CG150 Job) Rear spring preload adjuster Footpeg Oil filler cap/dipstick Passenger footpeg Rear brake pedal...
- Page 129 Owner’s Manual CG150 Titan KS/ES/CG150 Job Fuel cock Choke lever CG150 Job Battery/Fuse Rear carrier Grab rail (except CG150 Job) Helmet holder Hook (except CG150 Job) Rear spring preload adjuster Side stand Footpeg Gearshift pedal Passenger footpeg Main stand...
- Page 130 Owner’s Manual CG150 Titan ESD Air cleaner Storage compartment Grab rail Hook Rear spring preload adjuster Footpeg Passenger footpeg Oil filler cap/dipstick Rear brake pedal...
- Page 131 Owner’s Manual CG150 Titan ESD Fuel cock Choke lever Battery/Fuse Grab rail Helmet holder Hook Rear spring preload adjuster Side stand Footpeg Gearshift pedal Passenger footpeg Main stand...
- Page 132 Owner’s Manual CG150 Sport Air cleaner Storage compartment Grab rail Hook Rear spring preload adjuster Footpeg Oil filler cap/dipstick Passenger footpeg Rear brake pedal...
- Page 133 Owner’s Manual CG150 Sport Fuel cock Battery/Fuse Helmet holder Grab rail Hook Rear spring preload adjuster Side stand Passenger footpeg Gearshift pedal Footpeg...
-
Page 134: Instruments And Indicators
Owner’s Manual Instruments and Indicators (CG150 Titan KS/ / / / / ES/ / / / / ESD/CG150 Job) The instruments and indicators are contained in the instrument panel. Their functions are described in the table in the next page. (1) Speedometer (2) Odometer (3) Gear range indicator... - Page 135 Owner’s Manual Ref. No. Description Function Speedometer Shows riding speed (km/h). Odometer Shows accumulated mileage. Gear range indicator Shows the proper speed range for each gear. Turn signal indicator light (green) Flashes when the turn signal operates. Neutral indicator light (green) Lights when the transmission is in neutral.
- Page 136 Owner’s Manual (CG150 Sport) The instruments and indicators are contained in the instrument panel. Their functions are described in the next table. (1) Speedometer (2) Odometer (3) Turn signal indicator light (4) Tachometer (5) Tachometer red zone (6) High beam indicator light (7) Neutral indicator light (10) (8) Fuel gauge...
- Page 137 Owner’s Manual Ref. No. Description Function Speedometer Shows riding speed (km/h). Odometer Shows accumulated mileage. Turn signal indicator light (green) Flashes when the turn signal operates. Tachometer Shows engine rpm. Tachometer red zone Do not allow the needle to reach the red zone, even after engine break in.
-
Page 138: Fuel Gauge
Owner’s Manual Fuel Gauge (CG150 Titan KS/ES/ESD/CG150 Job) When the fuel gauge (1) needle enters the red (1) Fuel gauge range (2), fuel level is low. Refill the tank as soon as (2) Red range possible. The amount of fuel left in the tank, when the needle enters the red range with the motorcycle set upright, is approximately: 2.0 liters (2.1 US qt, 1.8 Imp. -
Page 139: Main Components
Owner’s Manual (1) Shock absorber MAIN COMPONENTS 1 2 3 4 (2) Pin spanner (3) Extension bar (Necessary information to operate the motorcycle) WARNING If the Pre-riding Inspection (page 46) is not performed, severe personal injury or motorcycle damage may result. Suspension Each rear shock absorber (1) has 5 adjustment positions for different load and riding conditions. -
Page 140: Brakes
(page 74), there is probably air in • • • • • When adding brake fluid, be sure the reservoir the system. See your authorized Honda dealer for is leveled before the cap is removed or brake brake system air bleeding. - Page 141 Owner’s Manual Check the fluid level with the motorcycle in the upright Front Brake position. If the level is near the lower level mark (1), (CG150 Titan KS/ES/CG150 Job) add the recommended fluid. Brakes are items of personal safety and they should If the level is at or below the lower level mark, check always be maintained properly adjusted.
- Page 142 2. The stopper bolt (1) allows the adjustment of the • If proper adjustment cannot be obtained by this pedal height. To adjust, loosen the lock nut (2) and method, see your authorized Honda dealer. turn the stopper bolt. Tighten the lock nut. (1) Stopper bolt...
- Page 143 (6) after making the final adjustment. • If proper adjustment cannot be obtained by this method, see your authorized Honda dealer. (6) Brake arm pin 2. To adjust, turn the rear brake adjusting nut (5). Turning the nut clockwise will decrease free play and turning it counterclockwise will increase free play.
-
Page 144: Clutch
Owner’s Manual Clutch (2) Dust cover (3) Lock nut Adjustment (4) Adjuster Clutch adjustment may be required if the motorcycle (A) Increase free play stalls when shifting into gear or tends to creep; or if (B) Decrease free play the clutch slips, causing acceleration to lag behind engine speed. -
Page 145: Fuel Cock
(1) Fuel cock accelerate gradually. NOTE If proper adjustment cannot be obtained or the clutch does not operate correctly, see your authorized Honda dealer. Other Checks Check the clutch cable for kinks or signs of wear that could cause sticking or failure. Lubricate the clutch cable with a commercially available cable lubricant to prevent premature wear and corrosion. -
Page 146: Fuel Tank
• • • • • If spark knock or pinging persists, see your The reserve fuel supply is approximately: 2.0 l authorized Honda dealer. Failure to do so is (0.52 US gal, 0.44 Imp. gal) (reference amount). considered misuse. Honda Limited Warranty will not cover damages caused by misuse. -
Page 147: Engine Oil
Owner’s Manual Occasionally a light spark knock may occur when Engine Oil operating under heavy load. This is a normal condition; Engine Oil Level Check it indicates the engine is operating efficiently. Check the engine oil level each day before riding the motorcycle. -
Page 148: Tires
Owner’s Manual 4. If necessary, add the recommended oil (page 62) up Tires to the upper level mark. Do not overfill. Proper air pressure will provide maximum stability, 5. Reinstall the oil filler cap/dipstick. Start the engine safety, riding comfort and tire life. and check for oil leaks. - Page 149 80/100 – 110/80 – sharp objects. Also check for scored or deformed rims. Tire size 18M/C 47P 17M/C 57P See your authorized Honda dealer for tire and inner PIRELLI MT75 PIRELLI MT75 tube replacement. Cold tire Pilot only (2.00; 29) (2.00;...
- Page 150 Also check for scored or deformed rims. wear indicators that show when the tires must be replaced. See your authorized Honda dealer for tire and inner tube replacement, and wheel balancing. The indicators become visible when the tread depth exceeds the recommended limit: 1.5 mm (0.06 in) for...
- Page 151 To repair or replace the tires, go to your authorized a new tire. Therefore, we strongly recommend that you Honda dealer that has the necessary equipment and replace a damaged tire, instead of repairing it. trained technicians to perform proper services.
- Page 152 • • • • • Proper wheel balance is necessary for safe, stable handling of the motorcycle. Do not remove or change any wheel balance weights. When wheel balancing is required, see your authorized Honda dealer. Wheel balancing is required after tire repair or replacement.
-
Page 153: Tuffup Honda Tube
Owner’s Manual • • • • • Tuffup Honda tube is designed to withstand air TUFFUP Honda Tube leaks caused by punctures made by sharp objects. (CG150 Titan KS/ES/ESD/CG150 Job) Sometimes the object remains stuck in the tire. Tuffup Honda tube is a genuine Honda part specially •... -
Page 154: Essential Individual Components
Owner’s Manual (1) Ignition switch ESSENTIAL INDIVIDUAL COMPONENTS Ignition Switch The ignition switch (1) is located below the instrument LOCK panel. Key position Function Key removal LOCK The handlebar is locked. Engine and lights cannot be operated. Key can be removed. (Steering is locked) Engine and lights cannot be operated. -
Page 155: Shutter
Owner’s Manual Shutter CLOSE (4) knob This motorcycle is equipped with a shutter in the ignition switch. Close the shutter when leaving the motorcycle unattended for theft prevention. To close the shutter, remove the ignition key, align the projection (1) of the shutter key (2) with the shutter slot (3) and turn the shutter key counterclockwise, or move the knob (4) to SHUT. -
Page 156: Right Handlebar Controls
Owner’s Manual Right Handlebar Controls Left Handlebar Controls Starter Button (CG150 Titan ES/ESD/CG150 Sport) Headlight Dimmer Switch When the starter button (1) is pressed, the starter Push the headlight dimmer switch (1) to to select motor cranks the engine. high beam or to to select low beam. -
Page 157: Features
Owner’s Manual Helmet Holder FEATURES The helmet holder (1) is located on the left side below the seat. Steering Lock Insert the ignition key (2) and turn it counterclockwise To lock, turn the handlebars all the way to the left. Turn to unlock. -
Page 158: Right Side Cover
Owner’s Manual Right Side Cover (CG150 Titan KS/ES/ESD/CG150 Job) (1) Ignition key The right side cover must be removed for air cleaner (2) Right side cover maintenance. (3) Grommets Removal 1. Insert the ignition key (1) and turn it clockwise. 2. -
Page 159: Left Side Cover
Owner’s Manual Left Side Cover (CG150 Titan KS/ES/ESD/CG150 Job) (1) Bolt The left side cover must be removed for battery and (2) Left side cover fuse maintenance. (3) Grommets Removal 1. Remove the bolt (1). 2. Pull the left side cover (2) out from the grommets (3). Installation Installation can be done in the reserve order of removal. -
Page 160: Storage Compartment
Owner’s Manual Storage Compartment Baggage Hooks The storage compartment (1) is located behind the (CG150 Sport) right side cover. This compartment is for light weight This motorcycle is equipped with retractable baggage items. hooks (1) located under the seat on both sides of the The Owner´s Manual and other documents should be motorcycle. -
Page 161: Operation
Correct any abnormality before you ride. Contact your expense and possibly your life. If any adjustment or authorized Honda dealer for assistance if you cannot maintenance service is necessary, refer to the correct the problem. -
Page 162: Starting The Engine
Owner’s Manual Starting the Engine Starting Procedure (CG150 Titan KS/ES/ESD/CG150 Job) Always follow the proper starting procedure described Cold Engine below. 1. Pull the choke lever (1) all the way to ON (A). WARNING (1) Choke lever Never run the engine in an enclosed area. The (A) Fully ON exhaust contains poisonous carbon monoxide gas (B) Detent position... - Page 163 ATTENTION • • • • • Because of its closeness and shape, the exhaust (CG150 Titan ES/ESD) pipe curved section is subjected to high 2. Start the engine by pressing the starter button and temperatures. This may change the chromed layer leaving the throttle slightly open.
- Page 164 Owner’s Manual NOTE (CG150 Sport) Do not open the throttle when starting the engine with To start a warm engine, follow the procedures under the choke on. This will lean the mixture causing hard “High Temperature”. starting. Normal Temperature: 10°C – 35°C 1.
- Page 165 ON and open the throttle slightly. fully OFF (B). Start the engine by operating the kickstarter. (CG150 Titan ES/ESD) WARNING If the engine fails to start after repeated attempts, it Extended use of the choke may impair piston and may be flooded with excess fuel.
-
Page 166: Breaking In
Owner’s Manual (CG150 Sport) Breaking In If the engine fails to start after repeated attempts, it The proper care of your motorcycle during the first may be flooded with excess fuel. To clear the engine, kilometers of usage will considerably increase its turn the ignition switch on and move the choke lever to service life and improve its performance. -
Page 167: Riding
Owner’s Manual Riding ATTENTION Do not shift gears without pulling the clutch in and WARNING closing the throttle. The engine and transmission • • • • • Review “Motorcycle Safety” (pages 6 to 10) before could be damaged. you ride. •... - Page 168 Owner’s Manual Recommended maximum speed for gearshifting (except CG150 Sport): Upshifting Speed Downshifting 35 km/h 57 km/h 80 km/h 102 km/h WARNING 7. To decelerate smoothly and progressively, apply the Do not downshift while running at high engine speed. brakes and close the throttle in coordination with Besides subjecting the engine to excessive strain, the gear shifting.
-
Page 169: Braking
Owner’s Manual • • • • • When riding in wet or rainy conditions, or on loose Braking surface, the ability to maneuver and stop will be 1. For normal braking, gradually apply both the front reduced. All of your actions should be smooth and rear brakes while downshifting to suit your road under these conditions. -
Page 170: Parking
Owner’s Manual • • • • • Before starting the engine, remove the motorcycle Parking cover or protection. 1. After stopping the motorcycle, shift the • • • • • Only someone who knows and has had experience transmission into neutral, turn the fuel cock off, turn with the product should operate the engine. -
Page 171: Motorcycle Identification
Owner’s Manual Motorcycle Identification Manufacturing Year Identification Plate This plate identifies the manufacturing year of your The frame and engine numbers are required for the motorcycle. It is attached to the right side of the official identification of your motorcycle. These frame, close to the steering head, under the fuel tank. -
Page 172: How To Prevent Theft
3. Park your motorcycle in a locked garage whenever possible. Purchase date: ___/___/___ 4. Moto Honda da Amazônia Ltda. does not authorize: a) The use of electronic anti-theft devices, such as alarms, ignition cut-off devices, satellite tracking DATA OF THE 2 OWNER systems, etc. -
Page 173: Maintenance Maintenance Schedule
MAINTENANCE Maintenance Schedule • When maintenance is necessary, remember that your authorized Honda dealer knows your motorcycle better than anyone do and is fully equipped and properly trained to provide high quality maintenance and repair services. See your authorized Honda dealer whenever maintenance is required. - Page 174 3. Check the oil level daily before riding the motorcycle and add the recommended oil, if necessary. 4. Change every year or at each odometer interval, whichever comes first. 5. Change every 2 years. This service requires mechanical skills. For safety reasons, we recommend that all items be serviced only by your authorized Honda dealer.
-
Page 175: Maintenance Precautions
• No. 2 Phillips screwdriver performing any maintenance service. • 22 mm box end wrench • • • • • Use new, genuine Honda parts. Parts that are not • Extension bar of equivalent quality may impair motorcycle safety • Spark plug wrench and reduce the effectiveness of the emission •... -
Page 176: Air Cleaner
3. Remove the air cleaner element (3) and clean or discard it as specified in the Maintenance Schedule. 4. Install a new element. Use only a genuine Honda element specified for this motorcycle. The use of a different element may lead to engine premature wear... -
Page 177: Engine Oil
(CG150 Sport) to assure a complete and rapid draining. WARNING If a torque wrench is not used for installation, see your authorized Honda dealer as soon as possible to check for proper assembly. ATTENTION • • • • • The engine oil is the element that most affects engine performance and service life. - Page 178 Owner’s Manual 1. Place a suitable container under the engine to 5. Install the oil filler cap/dipstick. collect the oil and remove the oil filler cap/dipstick, 6. Start the engine and let it idle for 2 or 3 minutes. drain plug (1) and seal washer (3). 7.
-
Page 179: Spark Plug
Owner’s Manual Spark Plug 4. Check the spark plug gap (3) using a wire type feeler gauge. If adjustment is necessary, bend the (Refer to “Maintenance Precautions” on page 60.) side electrode (4) carefully. Specified gap: 0.8 – 0.9 mm (0.03 – 0.04 in) Recommended spark plug: (3) Spark plug gap (NGK) CPR8EA-9... -
Page 180: Valve Clearance
Owner’s Manual Valve Clearance This condition can be determined by moving the rocker arms by hand. If they are free, it indicates (Refer to “Maintenance Precautions” on page 60.) that the valves are closed and the piston is on the compression stroke. -
Page 181: Idle Speed
3 – 5 mm (0.118 – 0.196 in). by adjusting the idle speed. To adjust, loosen the lock nut (1) and turn the • See your authorized Honda dealer for regularly adjuster (2) to the desired direction to increase or decrease the play. -
Page 182: Drive Chain
Owner’s Manual (CG150 Titan KS/ES/ESD/CG150 Job) Drive Chain (1) Throttle stop screw (Refer to “Maintenance Precautions” on page 60.) (A) Increase idle speed Drive chain service life depends upon proper (B) Decrease idle lubrication and adjustment. Poor maintenance can speed cause premature wear or damage to the drive chain and sprockets. - Page 183 Owner’s Manual 3. Rotate the rear wheel (CG150 Titan KS/ES/ESD/ Drive chain • Damaged rollers CG150 Job) or roll the motorcycle forward Worn Damaged teeth teeth (CG150 Sport). Stop. Check the drive chain slack. • Loose pins Drive chain slack should remain constant. If the •...
- Page 184 If a torque wrench is not used for installation, see replaced with the sprockets as a set. your authorized Honda dealer as soon as possible to check for proper assembly. Otherwise brake effectiveness may be reduced.
- Page 185 For your own safety, we recommend that this service be performed by an authorized Honda dealer. 2. Clean the drive chain in non-flammable solvent and allow it to dry. Inspect the drive chain for wear or damage.
-
Page 186: Drive Chain Slider
(2). For 4. Lubricate the drive chain (page 70). replacement, see your Honda dealer. 5. Set the chain over the sprockets and join its ends (1) Drive chain slider with the master link. -
Page 187: Side Stand
Replace if it is worn to any point of the Replace wear exceeds the reference line (2). reference line. Check the side stand assembly for free movement and bending. For replacement of any component, see your Honda dealer. (1) Side stand spring... -
Page 188: Suspension
If any component shows wear or if it is check the bearings and bushing for play, or if the damaged, see your authorized Honda dealer that is shock link is loose. qualified to perform all maintenance and repair services. -
Page 189: Brake Pad Wear
Check the wear indicator mark (1) on each pad. If (1) Arrow either pad is worn to the indicator mark, replace both (2) Brake arm pads as a set. See your authorized Honda dealer for (3) Reference mark this service. (4) Brake panel... -
Page 190: Front Wheel (Cg150 Titan Ks/Es/Cg150 Job)
(1) Speedometer cable NOTE (2) Tab (3) Adjusting nut See your authorized Honda dealer for brake servicing. For safety reason, use only genuine Honda parts or (4) Front brake cable their equivalents. (5) Brake arm (6) Front axle nut (7) Front axle... - Page 191 If a torque wrench is not used for installation, see 1. Position the front wheel between the fork legs and your authorized Honda dealer as soon as possible to insert the front axle from the right side, through the check for proper assembly. Improper assembly may left fork leg and wheel hub.
-
Page 192: Front Wheel (Cg150 Titan Esd/Cg150 Sport)
Do not apply the brake lever while the wheel is off the motorcycle. The caliper pistons will be forced out of the cylinders with subsequent loss of brake fluid. If this occurs, servicing of the brake system will be necessary. See your authorized Honda dealer for this service. -
Page 193: Rear Wheel
WARNING If a torque wrench is not used for installation, see your authorized Honda dealer as soon as possible to check for proper assembly. Improper assembly may lead to loss of braking effectiveness. - Page 194 Recheck the wheel if the brake drags or the wheel does not rotate freely. WARNING If a torque wrench is not used for installation, see your authorized Honda dealer as soon as possible to check for proper assembly. Improper assembly may lead to loss of braking effectiveness. (8) Groove...
-
Page 195: Battery
15 minutes and call a physician starting or other electrical failures), contact your immediately. authorized Honda dealer. • • • • • Electrolyte is poisonous. If swallowed, drink large quantities of water or milk and follow with milk of ATTENTION magnesia or vegetable oil. -
Page 196: Stoplight Switch
To adjust the switch, turn only the adjusting nut. Do (2) Battery holder not turn the switch body. (3) Bolt (4) Negative (–) (1) Stoplight switch terminal lead (2) Adjusting nut (5) Positive (+) terminal lead (CG150 Titan ES/ESD/CG150 Sport) -
Page 197: Fuses
NOTE Always keep spare fuses in the motorcycle. They may be useful in case of electrical system failure. (CG150 Titan ES/ESD/CG150 Sport) WARNING Never use a fuse with a different rating from the specified or any other conductive material. Serious damage to the electrical system and subsequent loss of lights or engine power, or a fire may result. - Page 198 4. Remove the blown fuse and install a new one. The spare fuse (3) is near the main fuse box. 5. Close the fuse box cover and install the side left (CG150 Titan ES/ESD/CG150 Sport) cover. (CG150 Titan ES/ESD/CG150 Sport) 3.
-
Page 199: Bulbs
Owner’s Manual Bulbs Headlight Bulb 1. Remove the two screws (1) from the headlight case. (Refer to “Maintenance Precautions” on page 60.) 2. Gently pull the lower end of the headlight (2) forward. WARNING 3. Disconnect the connector (3). The light bulb becomes very hot while the light is on, and remains hot for a while after it is turned off. - Page 200 Owner’s Manual 4. Remove the seal rubber (4). Stop/Taillight Bulb 5. Remove the headlight bulb (5) while pressing down 1. Remove the taillight lens (1) by removing the two on the clip (6). screws (2). 6. Install a new bulb in the reverse order of removal. 2.
- Page 201 Owner’s Manual Front and Rear Turn Signal Bulb (3) Socket (4) Bulb 1. Remove the turn signal lens (1) by removing the screw (2). 2. Slightly press on the socket (3) and turn it counterclockwise. Pull out the bulb (4). 3.
-
Page 202: Headlight
Owner’s Manual Rearview Mirror Headlight (Refer to “Maintenance Precautions” on page 60.) (Refer to “Maintenance Precautions” on page 60.) The rearview mirror allows the adjustment of the vision Vertical Adjustment angle. Park the motorcycle on a flat surface and sit on The vertical adjustment can be performed by moving it. - Page 203 Owner’s Manual NOTE Headlight Aim Adjustment Adjust the headlight aim with the headlight in the low The headlight is of utmost importance for your safety. position. If badly adjusted, it reduces the visibility and blinds the vehicles coming from the opposite direction. 1.
-
Page 204: Transportation
NOTE The attaching straps should be tightened until the front suspension becomes partially compressed (at least Moto Honda da Amazônia Ltda. does not take any half of its stroke). Avoid excessive pressure to responsibility for freight, pilot or motorcycle prevent damage to the fork retainers. - Page 205 (Illustration only for reference) ATTENTION Damages to the motorcycle caused by the use of such devices or other equipment not recommended by Honda for towing the motorcycle are not be covered by Honda Limited Warranty.
-
Page 206: Fuel Economy
Use only Honda genuine parts for replacement and and load, with a moderate temperature, and when perform all maintenance services according to the... -
Page 207: Cleaning And Maintenance
Owner’s Manual NOTE CLEANING AND MAINTENANCE Apply rust-inhibiting spray only with the engine cold. The excess can be removed after 24 hours. Clean your motorcycle regularly to protect its painting, plastic, rubber and chromed components. Washing the WARNING motorcycle frequently also increases its service life. Do not apply rust-inhibiting spray near the brake When riding near the ocean, where the contact with system. - Page 208 “fan shaped” strokes at 1.2 m (4 ft) minimum from the Keep the engine running while the headlight is on. motorcycle. HONDA – The lower end of the exhaust pipe has holes to drain condensed liquids resulting from the engine ATTENTION combustion process.
- Page 209 Owner’s Manual How to Wash Your Motorcycle – Do not use wire wool or abrasive products to clean the wheels and/or rims as they will remove the protective Never wash the motorcycle in direct ATTENTION coating and start a severe oxidation process. sunlight or with the engine warm.
- Page 210 Owner’s Manual 4. If necessary, apply protective wax to painted or WARNING chromed surfaces. Apply it with a special cotton or – Do not apply rust-inhibiting spray near the brake system. flannel cloth, through circular and uniform strokes. – Braking efficiency may be temporarily impaired immediately after washing the motorcycle.
-
Page 211: Storage Guide
Owner’s Manual Necessary repairs should be performed before storing STORAGE GUIDE the motorcycle. Otherwise these repairs may be forgotten by the time the motorcycle is removed from ATTENTION storage. • • • • • The battery is charged during motorcycle use Extended storage requires that you take certain steps while the charging system is operating under to reduce the effects of deterioration from motorcycle... - Page 212 Owner’s Manual NOTE 4. To prevent cylinder oxidation, perform the following: • Remove the spark plug cap. Use a string to tie the If the motorcycle is to be stored for more than a plug cap to an appropriate plastic frame month, be sure to drain the carburetor to assure component, away from the spark plug.
-
Page 213: Removal From Storage
Owner’s Manual 6. Wash and dry the motorcycle. Protect all painted Removal from Storage surfaces by applying silicon-based wax. Apply rust- When the motorcycle is to be used again, follow the inhibiting spray to the wheel rims, forks and shock procedures below: absorbers, exhaust pipe (including inner surface) 1. -
Page 214: Environment Protection
The battery environment. should be sent to an authorized Honda dealer for proper destination. All replaced metal and plastic The engine oil must be changed according to the components should also be handed to an authorized intervals determined in this manual. -
Page 215: Specifications
797 mm (31.3 in) (CG150 Sport) Weight Dry weight 118 kg (260 lbs) (CG150 Titan KS) 119 kg (262 lbs) (CG150 Titan ES/ESD/CG150 Job) 116 kg (256 lbs) (CG150 Sport) Capacities Engine oil 1.0 liter (1.1 US qt, 0.9 Imp. qt) (after draining) 1.2 liter (1.3 US qt, 1.1 Imp. - Page 216 Owner’s Manual ENGINE Item Type 4 stroke, air cooled, OHC, chain driven, two-valve, single cylinder Cylinder arrangement Inclined 15° regarding the vertical position Bore and stroke 57.3 x 57.8 mm (2.25 x 2.27 in) Displacement 149.2 cc (9.1 cu-in) Compression ratio 9.5:1 Maximum horsepower 14.2 HP (10.6 kW) @ 8,000 min...
- Page 217 Owner’s Manual FRAME AND SUSPENSION Item Caster/trail 27°24'/93 mm (3.7 in) (CG150 Titan KS/ES/ESD/CG150 Job) 27°23/93 mm (3.7 in) (CG150 Sport) Front tire (size) 80/100 – 18M/C 47P (CG150 Titan KS/ES/ESD/CG150 Job) (brand/model) PIRELLI CITY DEMON (size) 80/100 – 18M/C 47P (CG150 Sport) (brand/model) PIRELLI MT75 Rear tire...
- Page 218 Owner’s Manual TRANSMISSION Item Type Constant mesh, 5-speed Clutch Multi-plate, wet-type Primary reduction 3.350 Final reduction 2.687 (CG150 Titan KS/ES/ESD/CG150 Job) 2.800 (CG150 Sport) Gear ratio 2.785 1.789 1.350 1.090 0.937 Gearshift system Left foot operated return system...
- Page 219 Owner’s Manual ELECTRICAL SYSTEM Item Battery 12 V – 4 Ah (CG150 Titan KS/CG150 Job) 12 V – 6 Ah (CG150 Titan ES/ESD/CG150 Sport) Ignition system Generator 0.068 kW/5,000 min (rpm) Main fuse Other fuses 5A, 10A LIGHTS Item Headlight (high/low beam) 12 V –...
-
Page 220: Maintenance Record
Periodic maintenance must be performed to keep your motorcycle always in optimum operating conditions, providing a safe and problem-free riding. The two first inspections are free of charge if performed by Honda dealers or authorized service centers. However lubricants, cleaning material and normal maintenance parts are at the owner expense. - Page 221 Owner’s Manual 36,000 km 40,000 km 44,000 km 48,000 km 52,000 km INSPECTION INSPECTION INSPECTION INSPECTION INSPECTION RO No.: RO No.: RO No.: RO No.: RO No.: DATE: DATE: DATE: DATE: DATE: 56,000 km 60,000 km 64,000 km 68,000 km 72,000 km INSPECTION INSPECTION...
- Page 222 CG150 Titan KS • ES • ESD CG150 Sport • CG150 Job Printed in Brazil D2203-MAN-0429 A0200-0502...