Table of Contents
Advertisement
Quick Links
Download this manual
See also:
User Manual
Advertisement
Table of Contents

Related Manuals for Harvia CS60


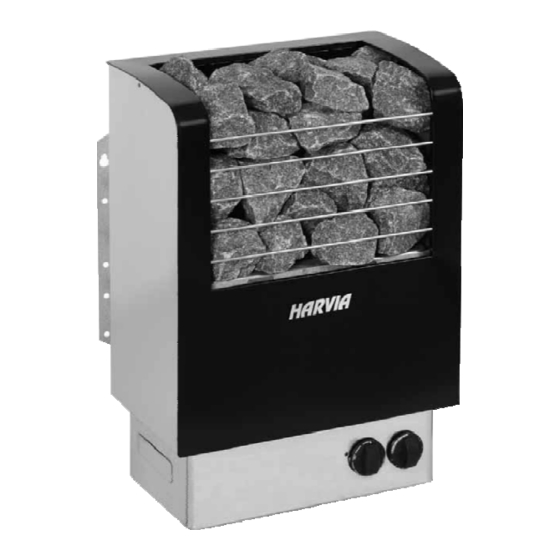
Summary of Contents for Harvia CS60
- Page 1 CS60, CS80 Instructions for Installation and Use of Electric Sauna Heater Instalace pro instalaci a použití saunových kamen. 22122011...
-
Page 2: Table Of Contents
Záruka pro komerční sauny 1 rok. Záruka se nevstahuje na vady způsobené nesprávnou instalací, používáním a údržbou. Dále se záruka nevztahuje na vady spirál při použití neoriginálních kamenů od výrobce Harvia. Obsah 1. Instrukce pro použití ...........3 1.1. Skládání kamenů ..........3 1.1.1. Hlavní ............4 1.2. -
Page 3: Instrukce Pro Použití
1. Instrukce pro instalaci 1. InSTRUCTIOnS FOR USE 1. Instrukce pro použití 1.1 Skládání kamenů do kamen 1.1. Piling of the Sauna Stones The piling of the sauna stones has a great effect Správné naskládání kamenů má velký efekt na správnou funkčnost kamen. -
Page 4: Hlavní
Před zapnutím kamen si vždy zkontrolujte, že na or inside the given safety distance. 1.6. kamnech není nic co mi mohlo hořet a I v těsné Heater models CS60 and CS80 are equipped with blízkosti. a timer and a thermostat. The timer is for setting the on-time for the heater and the thermostat is for setting a suitable temperature. -
Page 5: Vypnutí Kamen
starts heating. Because it takes about one hour for the sauna to be heated, it will be ready for bathing after about three hours, that is, when you come back from your walk. 1.3.3. Vypnutí kamen 1.3.3. Heater Off Kamna vypnete otočením časovače na nulu. The heater switches off, when the timer turns the switch back to zero. -
Page 6: Polevání Kamenů V Kamnech Vodou
sauna water may be used. Follow the instructions given on the package. 1.5. Instrukce pro saunování 1.5. Instructions for Bathing Před saunováním se osprchujte Begin by washing yourself. • Stay in the sauna for as long as you feel • com- fortable. - Page 7 ( 1.3.4.). Check that the overheat protector has not • Zkontrolujte ochranu proti přehřátí. Časovač funguje gone off. The timer works but the heater does ale Kamna netopí. not heat. ( 3.4.) Sauna se vyhřívá pomaleji. Voda steaká po The sauna room heats slowly. The water thrown kamenech.
-
Page 8: Sauna
. Sauna 2. Sauna ROOM 2.1. Sauna Room Structure 2.1. Struktura sauny Figure 4. Obrázek 4. A. Insulation wool, thickness 50–100 mm. The sauna room must be insulated carefully so that Izolační vata, tloušťka 50 – 100 mm. Sauna musí být the heater output can be kept moderately low. -
Page 9: Ventilace V Sauně
2.2. Sauna Room Ventilation 2.2. Ventilace v sauně The air in the sauna room should change six times Vzduch v sauně by se měl vyměnit 6x za hodinu. per hour. Figure 5 illustrates different sauna room ventilation options. Viz. obr. 5 zobrazuje různé způsoby ventilace. Figure 5. -
Page 10: Instrukce Pro Použití
The measurements apply to the connecting cable only! Height/Höhe 600 mm Weight/Gewicht 16 kg Stones/Kameny min. max. min. max. 27 kg CS60 1900 5 x 1,5 3 x 10 3 x 4 1 x 35 CS80 1900 5 x 2,5... -
Page 11: Změna Umístění Termostatu A Časovače
3.1.1. Repositioning of Thermostat and Timer 3.1.1. Změna místa termostatu a časovače Thermostat and timer are located on the front of the heater. If desired they may be moved to the Termostat a časovač jsou standartně umístěny na přední části kamen, v případě nutnosti se dají umísti I na boky right or left side of the heater. -
Page 12: Uchycení Kamen Na Zeď
3.2. Fastening the Heater on a Wall 3.2. Uchycení kamen ke zdi See figure 8. Obr. 8 1. It is simplest to connect the heater connection cable while the heater is loose. Nejjednodušší připojení kamen je když nejsou 2. Fasten the heater to the wall by using screws ještě... -
Page 13: Izolační Odpor Kamen
of PVC-insulated wire as the connecting cable of the heater is forbidden. If the connecting and installation cables • higher than 1000 mm from the floor in the sauna or inside the sauna room walls, they must be able to endure a minimum temperature of 170 °C when loaded (for example, SSJ). - Page 14 N L1 L2 L3 N P 400 V 3N~ Figure 10. Electrical connections Obrázek 10. Elektrické zapojení...
-
Page 15: Náhradní Díly
4. ERSATZTEILE 4. VARUOSAD 4. ÇÀÏÀÑÍÛÅ ×ÀÑÒÈ 4. RezeRves da¦as 4. aTsaRGINÌs deTaLÌs CS60: ZSK-700 (2000 W/230 V) CS80: ZSK-710 (2670 W/230 V) CS60: ZSK-700 (2000 W/230 V) CS80: ZSK-710 (2670 W/230 V) CS60: ZSK-700 (2000 W/230 V) CS80: ZSK-710 (2670 W/230 V)
Need help?
Do you have a question about the CS60 and is the answer not in the manual?
Questions and answers