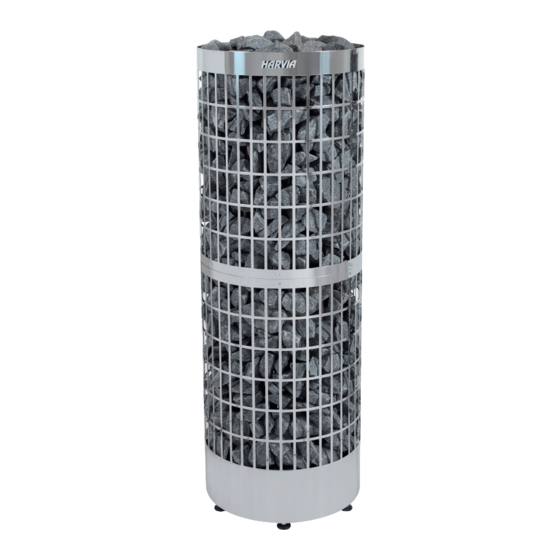
Summary of Contents for Harvia Cilindro Pro
- Page 1 Harvia Cilindro Pro HPCE2642 Instructions for installation and use of Electric Sauna Heater PC264E 28042023 / Y05-1155 B...
-
Page 2: Table Of Contents
CONTENTS These instructions for installation and use are intended for the owner or the person in charge of the sauna, as well as for the electrician in charge of the electrical installation of the heater. After completing the installation, the person in charge of the installation should give these instructions to the owner of the sauna or to the person in charge of its operation. -
Page 3: Installation Images
INSTALLATION IMAGES 1. Safety distances (min. mm) 2300 2. Electrical Connections... - Page 4 3. Installing the heater 4. Installing the sensor (all dimensions in millimeters) A= Overheat protector > (Delivered with the heater) (Blue and white wire) B = Thermostat (Delivered with the control unit) (Red and yellow wire) 350-400 300-400 400-450...
- Page 5 5. Sauna room structure 6. Sauna room ventilation min. 1000 mm 360° min. 500 mm 180° 7. Piling of the sauna stones Stones: 160 kg (10-15 cm) 60 kg (5-10cm, on top)
-
Page 6: Warnings And Notes
WARNINGS AND NOTES READ THE WARNINGS AND MANUAL CAREFULLY BEFORE USING THE PRODUCT! Installation and maintenance • The sauna heater is designed for the heating of a sauna room to bathing temperature. It is not to be used for any other purpose! The control unit is meant for controlling the functions of a sauna and a sauna heater. - Page 7 Instructions for use and bathing • Beware of hot heater. The stones and metal parts of the heater may burn the skin. • Always check that there is no objects on the heater or near the heater before switching it on. •...
-
Page 8: Instructions For Installation
INSTRUCTIONS FOR INSTALLATION See WARNINGS AND NOTES! See INSTALLATION IMAGES! Technical data HPCE2642 Installation details Max. power Circuit 1. = 13.2 kW 26.4 kW Circuit 2. = 13.2 kW Input 200 V, 3-Phase 50 / 60 Hz Connection cable type H07RN-F or equivalent Weight 35 kg... -
Page 9: Electrical Connections
Electrical connections › Image 2 The heater may only be connected to the electrical network in accordance with the current regulations by an authorised, professional electrician. • See installation image 2 • The heater is semi-stationarily connected to the junction box on the sauna wall. The junction box must be splash- proof, and its maximum height from the floor must not exceed 500 mm. -
Page 10: Sauna Room
SAUNA ROOM See WARNINGS AND NOTES! See TECHNICAL DATA! Sauna room structure › Image 5 See image 5. A. Insulation wool, thickness 50–100 mm. The sauna room must be insulated carefully so that the heater output can be kept moderately low. B. -
Page 11: Sauna Room Hygiene
B. Exhaust air vent (Ø 100 – 200 mm). Place the exhaust air vent near the floor, as far away from the heater as possible. The diameter of the exhaust air pipe should be twice the diameter of the supply air pipe. C. -
Page 12: Operating Instructions
OPERATING INSTRUCTIONS See WARNINGS AND NOTES! See TECHNICAL DATA! See INSTALLATION IMAGES! Placing of sauna stones › Image 7 The piling of the sauna stones has a great effect on both the safety and the heating capability of the heater. Important information about sauna stones: •... -
Page 13: Heating Of The Sauna
Heating of the Sauna • When operating the heater for the first time, both the heater and the stones emit smell. To remove the smell, the sauna room needs to be efficiently ventilated. • If the heater output is suitable for the sauna room, it will take about an hour for a properly insulated sauna to reach the required bathing temperature. -
Page 14: Troubleshooting
• Cool your skin down as necessary. If you are in good health, you can have a swim if a swimming place or pool is available. • Wash yourself after bathing. • Rest for a while and let your pulse go back to normal. Have a drink of fresh water or a soft drink to bring your fluid balance back to normal Troubleshooting All service operations must be done by professional maintenance personnel... -
Page 15: Spare Parts
SPARE PARTS Heating element 2200 W/200 V WXZSC-022I Temperature sensor / WX248 Overheat protector 125°C GUARANTEE • The guarantee period for heaters and control equipment used in saunas by families is two (2) years. • The guarantee period for heaters and control equipment used in saunas by building residents is one (1) year. •... - Page 16 P.O.Box 12 Teollisuustie 1-7 40951 Muurame FINLAND +358 207 464 000 harvia@harvia.fi...


Need help?
Do you have a question about the Cilindro Pro and is the answer not in the manual?
Questions and answers