
Related Manuals for Advantech POC-174


Summary of Contents for Advantech POC-174
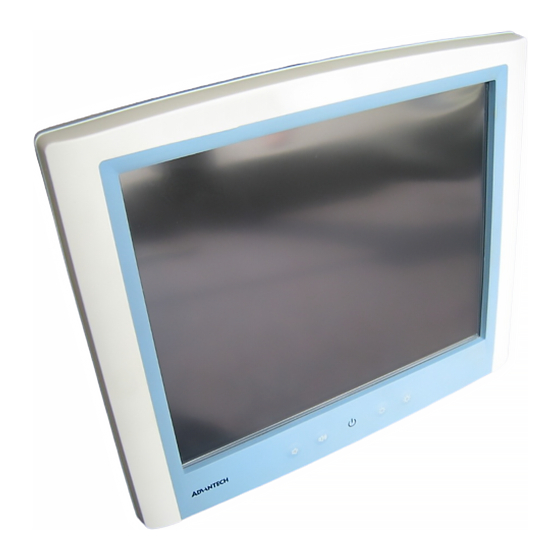
- Page 1 POC-174 Pentium®4-M processor-based panel PC with 17" LCD flat panel display User’s Manual...
-
Page 2: Copyright Notice
Copyright notice This document is copyrighted 2002, by Advantech Co., Ltd. All rights are reserved. Advantech Co., Ltd. reserves the right to alter the products described in this manual at any time without notice. No part of this manual may be reproduced, copied, translated or transmitted in any form or by any means without the prior written permission of Advantech. - Page 3 FCC Class B This equipment has been tested and found to comply with the limits for a Class B digital device, pursuant to Part 15 of the FCC Rules. These limits are designed to provide reasonable protection against harmful interference when the equipment is operated in a residential environment.
-
Page 4: Packing List
Packing List Before installing your Point of Care Terminal, ensure that the following materials have been received: • POC-174 series Point of Care Terminal • User's manual • Accessories for POC-174 Y-shaped adapter for PS/2 mouse and keyboard Power cord (1.8 m) - USA type (other types are available on... - Page 5 Additional Information and Assistance 1. Visit the Advantech websites at www.advantech.com or www.advantech.com.tw where you can find the latest information about the product. 2. Contact your distributor, sales representative, or Advantech's customer service center for technical support if you need additional assistance.
-
Page 6: Safety Instructions
Safety Instructions Read these safety instructions carefully. Keep this User's Manual for later reference. Disconnect this equipment from any AC outlet before cleaning. Use a damp cloth. Do not use liquid or spray detergents for cleaning. For plug-in equipment, the power outlet socket must be located near the equipment and must be easily accessible. - Page 7 The sound pressure level at the operator's position according to IEC 704-1:1982 is no more than 70dB(A). DISCLAIMER: This set of instructions is given according to IEC 704-1. Advantech disclaims all responsibility for the accuracy of any statements contained herein.
- Page 8 60° C (140° F), weil diesen Temperaturen das Gerät zerstören könten. Der arbeitsplatzbezogene Schalldruckpegel nach DIN 45 635 Teil 1000 beträgt 70 dB(A) oder weiger. DISCLAIMER: This set of instructions is given according to IEC704-1. Advantech disclaims all responsibility for the accuracy of any statements contained herein.
-
Page 9: Table Of Contents
LCD Specifications ............9 Dimensions ..............10 Chapter 2 System Setup ........... 11 A Quick Tour of the POC-174 ........12 Installation Procedures ..........15 2.2.1 Connecting the power cord ........15 2.2.2 Installing the DC power insulator with hood .... 16 2.2.3 Connecting the keyboard and mouse ...... - Page 10 CPU Installation ............39 CMOS Clear for External RTC (JP4) ....... 39 COM-port Interface ..........40 4.4.1 COM2 RS-232/422/485 setting (JP1) ...... 40 4.4.2 COM1/COM2/COM3/COM4 pin 9 output type setting (JP5, JP7, JP6, JP8) ..........42 VGA Interface ............43 4.5.1 LCD panel power setting ........
- Page 11 7.2.1 Installation for Windows 95/98 ....... 65 7.2.2 Installation for Windows NT ........67 7.2.3 Installation for Windows 2000/ME ......68 Chapter 8 PCMCIA ..............69 Introduction............... 70 Installation of PCMCIA Driver ........ 70 8.2.1 Installation for Windows 95 ........71 Chapter 9 Touchscreen .............73 Introduction...............
- Page 12 Figure 2-6: Connecting the keyboard and mouse......19 Figure 2-7: Connecting the COM ports (COM 1, 2, 3) ....... 20 Figure 3-1: Disassembling the plastic rear cover of the POC-174 ..27 Figure 3-2: Installing the primary 2.5" HDD ........28 Figure 3-3: Installing the CPU............
- Page 13 Tables Table 4-1: Jumpers and their functions ................ 35 Table 4-2: Panel PC connectors ................... 37 Table 4-3: Clear CMOS / External RTC (JP8) ..............39 Table 4-4: COM2 RS-232/422/485 setting (JP3, JP4) ........... 40 Table 4-5: Serial port default settings ................41 Table 4-6: COM1 / COM2 pin 9 output type setting (IJP4) ..........
-
Page 14: Chapter 1 General Information
GENERAL INFORMATION This chapter gives background information on the POC-174 Point of Care Terminal. • Introduction • How to Use This Manual • Specifications • Dimensions... -
Page 15: Introduction
Ethernet controller, multi-COM port interfaces and a 16-bit stereo audio controller. With a built-in CD-ROM drive, floppy drive and PCMCIA expansion sockets, the POC-174 is as compact and user-friendly as a notebook computer. For system integrators, this simple, complete, compact and highly integrated multimedia system lets you easily build a Point of Care Terminal into your applications. -
Page 16: Specifications
1.2 Specifications General • Dimensions (W x H x D): 437 x 377 x 131mm (17.20" x 14.84"x 5.15 ") • Weight: 12 kg ( 26.5 lb ) • Power supply: AC model: 180 watts Input voltage: 100~240 V , 4 A max. @ 50 ~ 60 Hz Output voltages: +5 V @ 12 A, +12 V @ 12 A, +3.3 V @ 16.8 A, +5 Vsb @ 2.0 A, -12 V @ 0.8 A DC model:... - Page 17 • Watchdog timer: 62-level, interval 1 ~ 62 seconds. Automatically generates system reset or IRQ11 when the system stops due to a program error or EMI. Jumperless selection and software enabled/disabled • Battery: 3.0 V @ 195 mA lithium battery POC-174 User's Manual...
- Page 18 Flat panel interface • Chipset: Intel 845GV • Display memory: 64 MB shared memory • Display type: Simultaneously supports CRT and flat panel displays (EL, LCD and gas plasma) • Display resolution: Supports non-interlaced CRT and TFT LCD displays up to 1280 x 1024 @ 16 M colors Audio function •...
- Page 19 Driver Windows NT4.0 Durability (touches in a 30 million lifetime) Note: The Point of Care Terminal with the optionally in- stalled touchscreen will share COM4. Once the touchscreen is installed, COM4 cannot be used for other purposes. POC-174 User's Manual...
-
Page 20: Optional Modules
Optional modules ® • CPU: Intel Pentium®4 Mobile and Celeron™ up to 2.2GHz • Memory: 256/512 MB DDR333 DRAM • HDD: 2.5" HDD • Touchscreen: Analog resistive • CD-ROM drive: Compact 24X CD-ROM or above • DVD-ROM drive: Compact 6X DVD-ROM or above •... - Page 21 Agents: Green tinctured soap and Enzymatic detergents Steps: 1. Wipe the POC-174 with a clean cloth that has been moistened in the cleaning solution. 2. Prepare agent per manufacturer’s instructions or hospital protocol. 3. Wipe thoroughly with a clean cloth Cautions: Do not immerse or rinse the POC-174 and its peripherals.
-
Page 22: Lcd Specifications
1.3 LCD Specifications Display type: 17" TFTLCD Max. resolution: 1280 x 1024 Colors: 16.7 M (8 bits/color) Dot size (mm): 0.264 x 0.264 Viewing angle: 140° Luminance: 250 cd/m2 Contrast ratio: 400 : 1 LCD MTBF: 50,000 hours Backlight lifetime: 50,000 hours *The VR control is defined by hot key in DOS or BIOS mode as below: Ctrl-Alt-F3, CTRL-Alt-F4. -
Page 23: Dimensions
1.4 Dimensions Unit: mm Figure 1-1: Dimensions of the POC-174 Note: The color LCD display installed in the POC-174 is of high- quality and reliable. However, it may contain a few defective pixels which do not always illuminate. With current technology, it is impossible to completely eliminate defective pixels. -
Page 24: Chapter 2 System Setup
SYSTEM SETUP • A Quick Tour of the POC-174 • Installation Procedures • Running the BIOS Setup Program • Installing System Software • Installing the Drivers... -
Page 25: A Quick Tour Of The Poc-174
2.1 A Quick Tour of the POC-174 Before you start to set up the POC-174, take a moment to become familiar with the locations and purposes of the controls, drives, connectors and ports, which are illustrated in the figures below. -
Page 26: Figure 2-2: Left Side View Of The Point Of Care Terminal
When you look at the left side of the panel PC, you will see the floppy disk drive, CD-ROM drive and PCMCIA expansion sockets, as shown in Fig. 2-2. Figure 2-2: Left side view of the Point of Care Terminal When you turn the Point of Care Terminal around and look at its rear cover, you will find the PCI/ISA expansion slot located on the left side. -
Page 27: Figure 2-3: Rear View Of The Point Of Care Terminal
Figure 2-3: Rear view of the Point of Care Terminal Figure 2-4 shows the I/O section and power switch of the POC-174. Figure 2-4: Rear and side view of the Point of Care Terminal POC-174 User's Manual... -
Page 28: Installation Procedures
2.2 Installation Procedures 2.2.1 Connecting the power cord The POC-174 can only be powered by an AC electrical outlet (100 ~ 240 volts, 50 ~ 60 Hz). Be sure to always handle the power cords by holding the plug ends only. -
Page 29: Installing The Dc Power Insulator With Hood
DC power insulator with hood then make sure to connect the insulator with the system. STEP 1. Connect the three contact pins individually to the negative and positive power cables of the power adaptor, as well as to the frame ground cable. Solder firmly. POC-174 User's Manual... - Page 30 STEP 2: Align the soldered pins and their cables with the correspond- ing polarization marks on the front part of the male insulator (+ / G / -). Now plug the pins separately into the holes of the male insulator. Pin 1 should go into the positive DC power input ( + ), pin 2 connects to the frame ground ( G ), and pin 3 should be plugged into the negative DC power input ( - ).
- Page 31 STEP 5 Attach the upper cap to the bottom tray and secure it with the screws. STEP 6 Now that you have completed the assembly of the male insulator, plug it into the female insulator. POC-174 User's Manual...
-
Page 32: Connecting The Keyboard And Mouse
2.2.3 Connecting the keyboard and mouse 1. Connect the Y-shaped adapter to the PS/2 mouse and keyboard port on the I/O section of the POC-173. (See Fig. 2-6.) 2. Connect the PS/2 mouse and keyboard to the Y-shaped adapter. (See Fig. -
Page 33: Switching On The Power
Figure 2-7: Connecting the COM ports (COM 1, 2, 3) Warning! 1. Screw the protective Earth Conductor (Yellow and green wire) on the nut beside the COM D-Sub connector. (See Fig 2-7) 2. Connect the COM device to POC-174 POC-174 User's Manual... -
Page 34: Running The Bios Setup Program
2.3 Running the BIOS Setup Program Your POC-174 is likely to have been properly set up and configured by your dealer prior to delivery. You may still find it necessary to use the BIOS (Basic Input-Output System) setup program to change system configuration information, such as the current date and time or your type of hard drive. -
Page 35: Installing The Drivers
However, it may contain a few defective pixels which do not always illuminate. With current technology, it is impossible to completely eliminate defective pixels. Advantech is actively working to improve this technology. 2.5 Installing the Drivers After installing your system software, you will be able to set up the Ethernet, SVGA, audio, PCMCIA and touchscreen functions. - Page 36 These files are a very useful supplement to the information in this manual. Note: The drivers and utilities used for the POC-174 panel PCs are subject to change without notice. If in doubt, check Advantech's website or contact our application engineers for the latest information regarding drivers and utlities.
- Page 37 POC-174 User's Manual...
-
Page 38: Chapter 3 Hardware Installation And Upgrading
HARDWARE INSTALLATION AND UPGRADING • Overview of Hardware Installation and Upgrading • Disassembling the Point of Care Terminal • Installing the 2.5" Hard Disk Drive (HDD) • Installing the Central Processing Unit (CPU) • Installing the SDRAM Memory Module • Installing the Floppy Disk Drive (FDD) and Slim CD-ROM Drive •... -
Page 39: Overview Of Hardware Installation And Upgrading
2. Unscrew the screws that secure the CPU cover. 3. Remove the floppy drive, HDD, and CD-ROM cables; then remove the side panel. 4. Unscrew the screws of the shielding case, and remove it. POC-174 User's Manual... -
Page 40: Figure 3-1: Disassembling The Plastic Rear Cover Of The Poc-174
Figure 3-1: Disassembling the plastic rear cover of the POC-174 Chapter 3 Hardware Installation and Upgrading... -
Page 41: Installing The 2.5" Hard Disk Drive (Hdd)
Plug the other end of the cable into the IDE hard drive, with Pin 1 on the cable corresponding to Pin 1 on the hard drive. Figure 3-2: Installing the primary 2.5" HDD POC-174 User's Manual... -
Page 42: Installing The Central Processing Unit (Cpu)
Installing the Central Processing Unit (CPU) The Point of Care Terminal's central processing unit (CPU) can be upgraded to improve system performance. The Point of Care Termi- nal provides one 478-pin ZIF (Zero Insertion Force) socket (Socket 478). The CPU must come with an attached heat sink and CPU fan to prevent overheating. - Page 43 15. Connect the CPU fan power cable to the 3-pin connector (FAN1). 16. Put back the CPU cover, and secure the four screws on it. Note: To remove the CPU, follow steps 1 through 7 above. You should then be able to freely lift out the CPU chip. POC-174 User's Manual...
-
Page 44: Figure 3-3: Installing The Cpu
Figure 3-3: Installing the CPU Chapter 3 Hardware Installation and Upgrading... - Page 45 POC-174 User's Manual...
-
Page 46: Chapter 4 Jumper Settings And Connectors
JUMPER SETTINGS AND CONNECTORS This chapter tells how to set up the Point of Care Terminal hardware, including instruc- tions on setting jumpers and connecting peripherals, switches and indicators. Be sure to read all the safety precautions before you begin the installation proce- dures. -
Page 47: Jumpers And Connectors
A pair of needle-nose pliers may be helpful when working with jumpers. If you have any doubts about the best hardware configuration for your application, contact your local distributor or sales representative before you make any changes. POC-174 User's Manual... -
Page 48: Jumpers And Switches
4.1.2 Jumpers and switches The motherboard of the Point of Care Terminal has a number of jumpers that allow you to configure your system to suit your applica- tions. The table below lists the function of each of the board’s jumpers and switches. -
Page 49: Locating Jumpers And Switches
JP4: CMOS CLEAR FOR EXTERNAL RTC SW1: PANEL TYPE SETTING JP1: COM2 RS-232/422/485 SETTING JP6: COM3 PIN 9 OUTPUT TYPE SETTING JP8: COM4 PIN 9 OUTPUT TYPE SETTING COM1/COM2 PIN9: JP7 OUTPUT TYPE SETTING Figure 4-1: Locating jumpers on the POC-174 motherboard POC-174 User's Manual... -
Page 50: Connectors
4.1.4 Connectors Onboard connectors link the Point of Care Terminal to external devices such as hard disk drives or floppy drives. The table below lists the function of each of the board’s connectors. Table 4-2: Panel PC connectors Label Function CN16 USB3 / USB4 internal connector CN17... -
Page 51: Locating Connectors
CN24: DISPLAY LVDS CONNECTOR CN21: FRONT PANEL CONTROL CONNECTOR CN20: IR CONNECTOR PCI 1: PCI BUS EXPANSION CONNECTOR CN18: CPU +12V POWER CONNECTOR CN16: USB3/USB4 INTERNAL CONNECTOR CN17: FDD CONNECTOR Figure 4-2: Locating connectors on the POC-174 motherboard POC-174 User's Manual... -
Page 52: Cpu Installation
4.2 CPU Installation You can install an Intel® Pentium® 4 Mobile or Celeron™ CPU without setting any frequency ratio or voltage. 4.3 CMOS Clear for External RTC (JP4) Warning: To avoid damaging the computer, always turn off the power supply before setting “Clear CMOS”. Set the jumper back to “Normal operation”... -
Page 53: Com-Port Interface
Table 4-4: COM2 RS-232/422/485 setting (JP3, JP4) RS-232 (default) RS-422 RS-485 The IRQ and the address ranges for COM1, 2, 3, and 4 are fixed. However, if you wish to disable the port or change these parameters POC-174 User's Manual... -
Page 54: Table 4-5: Serial Port Default Settings
later you can do this in the system BIOS setup. The table overleaf shows the default settings for the panel PC’s serial ports. COM1 and COM2 are one set. You can exchange the address range and interrupt IRQ of COM1 for the address range and interrupt IRQ of COM2. -
Page 55: Com1/Com2/Com3/Com4 Pin 9 Output Type Setting (Jp5, Jp7, Jp6, Jp8)
(JP5, JP7, JP6, JP8) Table 4-6: COM1 / COM2 pin 9 output type setting (IJP4) RI (COM1,2) (default) +5V 0.25A (COM1,2) * default setting Note: Pins 1 and 2 are for COM1. Pins 3 and 4 are for COM2. POC-174 User's Manual... -
Page 56: Vga Interface
SW1 is a 4-pin dip switch for selecting panel type and display mode. A 1280 x 1024 TFT LCD is used in the POC-174, so the switch is preset according to the table below. The switch is already defaulted for the POC-174's LCD, so it should not be modified. -
Page 57: Watchdog Timer Configuration
When the watchdog timer activates (i.e. CPU processing has come to a halt), it can reset the system or generate an interrupt on IRQ11. This can be set via jumper JP7 as shown below: Table 4-8: Watchdog activity selection (JP7) System reset (default) IRQ11 POC-174 User's Manual... -
Page 58: Chapter 5 Pci Bus Ethernet Interface
PCI BUS ETHERNET INTERFACE This chapter provides information on Ethernet configuration. • Introduction • Installation of Ethernet Driver for Windows 95 for Windows 98 for Windows NT for Windows 2000/ME/XP • Further Information... -
Page 59: Introduction
5.2 Installation of Ethernet Driver Before installing the Ethernet driver, note the procedures below. You must know which operating system you are using in your POC-174, and then refer to the corresponding installation flow chart. Then just follow the steps described in the flow chart. You will quickly and successfully complete the installation, even if you are not familiar with instructions for Windows. -
Page 60: Installation For Windows 95
5.2.1 Installation for Windows 95 a. Select "Start", "Settings", "Control Panel", "System". b. Click the "Device Manager" and "Other Devices" items. c. Remove the "PCI Ethernet Controller" item. a. Select "Start", "Settings", "Control Panel", and "Network" icons. Click the "Add" button. Select "Adapter", and then click the "Add"... - Page 61 Choose the highlighted "Realtek RTL8139(A/B/C/ 8130)PCI Fast Ethernet". Press the "OK" button. Press the "Add..." button to select suitable services or protocol. Press the "OK" button to finish network configuration. Press the "Yes" button to start your computer. POC-174 User's Manual...
-
Page 62: Installation For Windows 98
5.2.2 Installation for Windows 98 a. Select "Start", "Settings", "Control Panel", "System" b. Click "Device Manager" and highlight "PCI Ethernet Controller" c. Select "Properties" a. Choose "Driver" folder Click "Update Driver" Follow the instructions b. Click "Next" Chapter 5 PCI Bus Ethernet Interface... - Page 63 Click "Next" a. Select "Network Adaptors" b. Click "Next" Choose "Have Disk" Type the path "D:\ 123&153\LAN\WIN98" b. Click "OK" POC-174 User's Manual...
- Page 64 a. Click "OK" a. Click "Next" Click "Finish" Select "Yes" to reboot system Chapter 5 PCI Bus Ethernet Interface...
-
Page 65: Installation For Windows Nt
Select "Start", "Settings", "Control Panel", and then double click the "Network" icon. b. Choose the "Adapters" label. c. Click the "Add" button. a. Press "Have Disk...". Type the path: D:\ PPC123&153\LAN\ WINNT Press the "OK" button. POC-174 User's Manual... - Page 66 Choose the highlighted "RTL8139[A/B/C/ 8130] PCI Fast Ethernet Adapter". Click the "OK" button. Choose a suitable RTL8139 Duplex mode for your application. Finish the network configuration and then click the "OK" button. Chapter 5 PCI Bus Ethernet Interface...
-
Page 67: Installation For Windows 2000/Me/Xp
Ethernet hardware and install the Ethernet driver from the drivers database from Windows 2000/XP or Windows ME when the system reboots. Users are not required to install the Ethernet driver themselves. 5.3 Further Information Realtek website: www.realtek.com.tw Advantech websites: www.advantech.com www.advantech.com.tw POC-174 User's Manual... -
Page 68: Chapter 6 Agp Svga Setup
AGP SVGA Setup • Introduction • Installation of SVGA Driver for Windows 95/98/ME for Windows NT for Windows 2000/XP • Further Information... -
Page 69: Introduction
6.1.1 Chipset The POC-174 uses an Intel 845GV chipset from Intel for its AGP/SVGA controller. It supports many popular LCD, EL, and gas plasma flat panel displays and conventional analog CRT monitors. The Intel 845GV VGA BIOS supports monochrome LCD, EL, color TFT and STN LCD flat panel displays. -
Page 70: Installation Of Svga Driver
Note 2: <Enter> means pressing the "Enter" key on the keyboard. Note 3: Before you install the graphic driver of POC-174, please ensure you have installed the INF driver of the Intel 845GV chipset.You can find this driver in the CD-ROM. -
Page 71: Installation For Windows 95/98/Me
6.2.1 Installation for Windows 95/98/ME a. Select "Start", "Run" 845 Graphic driver\ Type the path "D:\ Win9x_ME\Graphics\ 123&153\VGA(3DM)\ Setup.exe Win9x\Setup.exe Click "OK" a. Click "Next" Click "Finish" to reboot the system POC-174 User's Manual... -
Page 72: Installation For Windows Nt
6.2.2 Installation for Windows NT a. Select "Start", "Run" Type the path "D:\ 845G Graphic driver\ WinNT4\Graphics 123&153\ VGA(3DM)\WinNT\ \Setup.exe Setup.exe Click "OK" a. Click "Next" Click "Finish" to reboot the system Note: Service Pack X (X=3, 4, 5, 6...) must be installed first before you install the Windows NT VGA driver. -
Page 73: Installation For Windows 2000/Xp
6.2.3 Installation for Windows 2000/XP a. Select "Start", "Run" Type the path "D:\ 845GGraphicdriver\ 123&153\VGA(3DM)\ Win2k_XP\Graphics\ Win2000\Setup.exe Setup.exe Click "OK" a. Click "Next" Click "Finish" to reboot the system POC-174 User's Manual... -
Page 74: Further Information
6.3 Further Information For further information about the AGP/SVGA installation in your POC-174, including driver updates, troubleshooting guides and FAQ lists, visit the following web resources: Silicon Motion website: www.siliconmotion.com Advantech websites: www.advantech.com www.advantech.com.tw Chapter 6 PCI SVGA Setup... - Page 75 POC-174 User's Manual...
-
Page 76: Chapter 7 Audio
Audio • Introduction • Installation of Audio Driver for Windows 95/98 for Windows NT for Windows 2000/ME/XP... -
Page 77: Introduction
Before installing the audio driver, please take note of the procedures detailed below. You must know which operating system you are using in your POC-174, and then refer to the corresponding installation flow chart. Just follow the steps in the flow chart. You can quickly and successfully complete the installation, even though you are not familiar with instructions for Windows. -
Page 78: Installation For Windows 95/98
7.2.1 Installation for Windows 95/98 a. Select "Start", "RUN". Enter the driver path: "D:\ ALC202\win95\Setup.exe PPC123&153\ Audio\win9x(only)\ Setup.exe" a. Click "Next" to continue the installation. a. Select "Upgrade Drivers". Click "Next". a. When installation is completed, click "Finish" to restart your computer. - Page 79 After installation, select "Start", "Settings", "Control Panel", "System". Click the "Device Manager" tab to see the result of your installation. POC-174 User's Manual...
-
Page 80: Installation For Windows Nt
7.2.2 Installation for Windows NT a. Select "Start", "Settings", "Control Panel". Double Click the "Multimedia" icon. a. Select the "Devices", item. Click the "Add..." button. a. Choose the "Unlisted or Updated Driven" item. b. Click the "OK" buttom. a. Type the path "D:\ ppc123&153\audio\ ALC202\Winnt\ nt4.0\... -
Page 81: Installation For Windows 2000/Me
After finishing the Windows 2000/XP or Windows ME installation, the system can automatically detect the audio hardware and install the driver from the driver database in Windows 2000/XP or Windows ME when the system reboots. It is not necessary to install the audio driver manually. POC-174 User's Manual... -
Page 82: Chapter 8 Pcmcia
PCMCIA • Introduction • Installation of PCMCIA Driver for Windows 95... -
Page 83: Introduction
8.1 Introduction The POC-174 is equipped with a high performance PCMCIA interface which complies with the 1995 PCMCIA card standard by using the RICOH Cardbus controller. The panel PC supports two PCMCIA card/cardbus slots. Two sockets support both a 16-bit PCMCIA card and a 32-bit Cardbus simultaneously, with hot insertion and removal. -
Page 84: Installation For Windows 95
8.2.1 Installation for Windows 95 a. In "Start", "Run", type the path: D:\ Cardbus\win95osr2\ PPC123&153\ Setup.exe" Cardbus\win95osr2\ Setup.exe a. Click "Next". a. Click "Yes". a. Click "Finish" to reboot the system. Chapter 8 PCMCIA... - Page 85 POC-173 User's Manual...
-
Page 86: Chapter 9 Touchscreen
Touchscreen • Introduction • Installation of Driver for Resistive Touchscreen for Windows 95 for Windows 98/ME for Windows NT for Windows 2000 for Windows XP... -
Page 87: Introduction
9.1 Introduction 9.1.1 General information The POC-174's optional touchscreen incorporates advanced second-generation 5-wire resistive technology. They allow 75% light transmission respectively. The resistive and capacitive models have an antiglare surface. All models provide greatly enhanced visual resolu- tion. They also have new improved scratch-resistant features. -
Page 88: Installation Of Driver For Touchscreen
9.2 Installation of Driver for Touchscreen The touchscreen driver for Windows 95/98 contains a native, 32-bit driver and a 32-bit control panel program for the POC-174 system. To facilitate installation of the touchscreen driver, you should read the instructions in this section carefully before you attempt installation. -
Page 89: Installation For Windows 95
"Run". c. Type the path "D:\ PPC123&153\ Elotouch\Win9x_ME\ Elotouch\Win95\ Setup.exe". Setup.exe". a. Click "Yes". a. Select the "Smart serial Controller on COM4" item. b. Press the "OK" button. a. Click the "Yes" button to restart your computer. POC-174 User's Manual... - Page 90 a. Touch targets to calibrate the touchscreen controller. Chapter 9 Touchscreen...
-
Page 91: Installation For Windows 98/Me
"Run". c. Type the path "D:\ Elotouch\Win9x_ME\ PPC123&153\ Elotouch\Win98\ Setup.exe" Setup.exe". a. Click "Yes". a. Select the "Smart serial Controller on COM4" item. b. Press the "OK" button. a. Click the "Yes" button to restart your computer. POC-174 User's Manual... - Page 92 a. Touch targets to calibrate the touchscreen controller. Chapter 9 Touchscreen...
-
Page 93: Installation For Windows Nt
9.2.3 Installation for Windows NT a. Select "Start", "Run". Type the path "D:\ PPC123&153\ Elotouch\WINNT\ Elotouch\WINNT\ Setup.exe" Setup.exe" a. Press the "Next" button. a. Set the directory path. a. Choose a suitable item. POC-174 User's Manual... - Page 94 a. Choose COM4. b. Press "OK". a. Click "OK" to reboot the system. a. Calibrate the touchscreen. Chapter 9 Touchscreen...
-
Page 95: Intallation For Windows 2000
9.2.4 Intallation for Windows 2000 a. Select "Start", "Run" Type the path "D:\ PPC123&153\ Elotouch\Win2k\ Elotouch\Win2k\ Setup.exe" Setup.exe" Click "OK" a. Press "Next" a. Click "Yes" a. Select "Yes" to accept agreement POC-174 User's Manual... - Page 96 a. Choose "COM4" Then click "Next" a. Press "Finish" Click "Yes" to reboot the system a. Calibrate the touch screen Chapter 9 Touchscreen...
- Page 97 Click "Finish" to complete installation POC-174 User's Manual...
-
Page 98: Installation For Windows Xp
9.2.5 Installation for Windows XP a. Select "Start", "Run" Type the path"D:\ Elotouch\WinXP\ 123&153\Elotouch\ WInME\Setup.exe" Setup.exe" c. Click "OK" a. Click "Next" a. Click "Yes" to accept the agreement. a. Press "Next" Chapter 9 Touchscreen... - Page 99 Choose "COM4" b. Press "Next" a. Calibrate the touch screen a. Click "Finish" to complete the installation POC-174 User's Manual...
-
Page 100: Appendix A Programming The Watchdog Timer
Programming the Watchdog Timer The POC-174 is equipped with a Watchdog Timer that resets the CPU or generates an interrupt if processing comes to a standstill for any reason. This feature ensures system reliability in industrial standalone or unmanned environments. -
Page 101: Programming The Watchdog Timer
A.1 Programming the Watchdog Timer To program the watchdog timer, you must write a program which writes I/O port address 443 (hex). The output data is a time interval value. The value range is from 01 (hex) to 3E (hex), and the related time interval is from 1 sec. - Page 102 The following example shows how you might program the watchdog timer in BASIC: Watchdog timer example program OUT &H443, data REM Start and restart the watchdog GOSUB 1000 REM Your application task #1, OUT &H443, data REM Reset the timer GOSUB 2000 REM Your application task #2, OUT &H443, data REM...
- Page 103 POC-173 User's Manual...
-
Page 104: Appendix B Pin Assignments
Pin Assignments • AT Power Connector (CN26) • TV Output Connector (CN25) (Re- served) • Inverter Power Connector (CN29) • Internal Speaker Connector (CN15) (Reserved) • Front Panel Control Connector (CN21) (Reserved) • IR Connector (CN20)(Reserved) • Floppy Drive Connector (CN17) •... -
Page 105: At Power Connector (J1)
B.1 AT Power Connector (J1) Table B-1: AT power connector (CN26) Signal 3.3 V 3.3 V 5 VSB 12 V 3.3 V -12 V PSON -5 V B.2 TV Output Connector (CN25) (Reserved) Table B-2: TV output connector (CN25) Signal CVBS POC-174 User’s Manual... -
Page 106: Inverter Power Connector (Cn29)
B.3 Inverter Power Connector (CN29) Table B-3: Inverter power connector (CN29) Signal +12 V ENABKL Brightness Adj. +5 V B.4 Internal Speaker Connector (CN15) (*Reserved) Table B-4: Internal speaker connector (CN15) Signal Speaker out_R - Speaker out_R + Speaker out_L + Speaker out_L - Appendix B Pin Assignments... -
Page 107: Front Panel Control Connector (Cn21)(Reserved)
PWR LED HDD LED NC (Reserved) NC (Reserved) NC (Reserved) NC (Reserved) NC (Reserved) NC (Reserved) NC (Reserved) Power SW+ Power SW- Reset SW B.6 IR Connector (CN20) (Reserved) Table B-6: IR connector (CN20) (Reserved) Signal IR_IN IR_OUT POC-174 User’s Manual... -
Page 108: Floppy Drive Connector (Cn17)
B.7 Floppy Drive Connector (CN17) Table B-7: Floppy drive connector (CN17) Signal Signal (+5 V) STEP INDEX (+5 V) WRITE ENABLE DRIVE SELECT (+5 V) WRITE DATA DISK CHANGE TRACK 0 WRITE PROTECT MOTOR ON READ DATA DIRECTION DENSITY SELECT SIDE 1 SELECT Appendix B Pin Assignments... -
Page 109: Eide Hard Disk Drive Connector (Cn31)
SIGNAL GND HDD DREQ IO WRITE IO READ HD READY CABLE SELECT HDACK 0 # IRQ14 ADDR 1 ADDR 0 ADDR 2 HDD SELECT 0 # HDD SELECT 1 # IDE ACTIVE 0 # # low active POC-174 User’s Manual... -
Page 110: Cd-Rom Connector (Cn27)
B.10 CD-ROM Connector (CN27) Table B-10: CD-ROM connector (CN27) Signal Signal Audio_L Audio_R IDE RESET # DATA8 DATA7 DATA9 DATA6 DATA10 DATA5 DATA11 DATA4 DATA12 DATA3 DATA13 DATA2 DATA14 DATA1 DATA15 DATA0 HDD DREQ IO READ IO WRITE HD READY HD ACK 0 # IRQ 15 ADDR1... -
Page 111: Cpu Fan Power Connector (Fan1)
B.11 CPU Fan Power Connector (FAN1) Table B-11: CPU fan power connector (FAN1) Signal +12 V FAN_DET B.12 System Fan Power Connector (FAN2) Table B-12: Fan power connector (FAN2) Signal +12 V FAN_DET POC-174 User’s Manual... -
Page 112: Pci Bus Expansion Connector (Slot1)
B.13 PCI Bus Expansion Connector (SLOT1) Note: This PCI slot uses standard PCI Bus V2.2. If you wish to use this slot, you can connect the add-on cards directly without any issues. Appendix B Pin Assignments... -
Page 113: B.14Touchscreen Connector (Cn19)
B.14Touchscreen Connector (CN19) Table B-13: Internal COM4 and PS/2 Connector (CN19) Signal Signal NRLSD NDSR NRTS NCTS NDTR MSDAT EXT MSDAT MSCLK EXT MSCLK POC-174 User’s Manual... -
Page 114: Com2
B.15 COM2 Table B-14: COM2 Signal RS-232 RS-422 RS-485 DATA- DATA+ Appendix B Pin Assignments... - Page 115 POC-174 User’s Manual...
-
Page 116: Appendix C Mounting Instructions
Mounting Instructions • VESA Mounting... -
Page 117: Vesa Mounting
C.1 VESA Mounting C.1.1 Introduction The POC-174 provides standard VESA mounting to help system integrators conveniently integrate the panel PC into their system. To mount a suitable panel, refer to the following dimensions diagram. Figure C-1: VESA Mounting (75 x 75mm, 100 x 100mm)
Need help?
Do you have a question about the POC-174 and is the answer not in the manual?
Questions and answers