Amantii ZECL-26-2923 Safety Information And Installation Manual
Hide thumbs
Also See for ZECL-26-2923:
- Safety information and installation manual (29 pages) ,
- Safety information and installation manual (10 pages)
Table of Contents
Advertisement
Quick Links
SAFETY INFORMATION AND INSTALLATION MANUAL
ZECL-26-2923, ZECL-30-3226, ZECL-33-3624, ZECL-39-4134, ZECL-2939
INSERT-26-3825, INSERT-30-4026, INSERT-33-4230
ZECL-26--2923-FLUSHMT, ZECL-30-3226-FLUSHMT
ZECL-30-3226-WHTGLS, INSERT-30-4026-WHTGLS, ZECL-39-4134-WHTGLS
Read these instructions completely before beginning installation. Failure to follow them could
cause a heater
malfunction and result in serious injury and/or property damage.
WARNING: All electric heaters have hot or sparking parts inside. Do not use it in areas where
gasoline, paint or flammable liquids are stored.
WARNING: This heater is tested and listed for use only with the optional accessories listed in
these instructions. Use of optional accessories not specifically tested for this heater could void
the heater warranty
and/or result in a safety hazard.
ELECTRIC FIREPLACES
1
Advertisement
Table of Contents

Subscribe to Our Youtube Channel
Related Manuals for Amantii ZECL-26-2923


Summary of Contents for Amantii ZECL-26-2923
- Page 1 ELECTRIC FIREPLACES SAFETY INFORMATION AND INSTALLATION MANUAL ZECL-26-2923, ZECL-30-3226, ZECL-33-3624, ZECL-39-4134, ZECL-2939 INSERT-26-3825, INSERT-30-4026, INSERT-33-4230 ZECL-26--2923-FLUSHMT, ZECL-30-3226-FLUSHMT ZECL-30-3226-WHTGLS, INSERT-30-4026-WHTGLS, ZECL-39-4134-WHTGLS Read these instructions completely before beginning installation. Failure to follow them could cause a heater malfunction and result in serious injury and/or property damage.
-
Page 2: Safety Information
Keep this manual for future reference. SAFETY INFORMATION Due to high temperatures, the insert should be located out of traffic and away from furniture and draperies. Do not place clothing or other flammable material on or near the insert. Never place any objects on the insert. The insert can become very hot when running. -
Page 3: Listing Approvals
12. Use this heater only as described in this manual. Any other use not recommended by the manufacturer may cause fire, electric shock or injury to persons. 13. Avoid the use of an extension cord because the extension cord may overheat and cause a fire. If you have to use an extension cord, the cord should be No. - Page 4 ZECL-26-2923 Description Built-in Appliance This appliance has been tested in accor- Voltage 120V AC, 60 Hz dance with the UL Standand 2021 for Amps Watts 1500 W appliances in the United States and Cana- HIGH 1500W da. If you need assistance during installa-...
- Page 5 ZECL-30-3226 Description Built-in Appliance This appliance has been tested in accor- Voltage 120V AC, 60 Hz dance with the UL Standand 2021 for Amps Watts 1500 W appliances in the United States and Cana- HIGH 1500W HEATER da. If you need assistance during installa- 750W No HEATER 18.5W...
- Page 6 ZECL-33-3624 This appliance has been tested in accor- Description Built-in Appliance dance with the UL Standand 2021 for Voltage 120V AC, 60 Hz Amps appliances in the United States and Cana- Watts 1500 W da. If you need assistance during installa- HIGH 1500W HEATER 750W...
- Page 7 ZECL-39-4134 Description This appliance has been tested in accor- Built-in Appliance Voltage 120V AC, 60 Hz dance with the UL Standand 2021 for Amps Watts 1500 W appliances in the United States and Cana- HIGH 1500W da. If you need assistance during installa- HEATER 750W No HEATER...
- Page 8 ZECL-2939 This appliance has been tested in accor- Description Built-in Appliance dance with the UL Standand 2021 for Voltage 120V AC, 60 Hz Amps appliances in the United States and Cana- Watts 1500 W da. If you need assistance during installa- HIGH 1500W HEATER 750W...
- Page 9 INSERT-26-3825 Description Built-in Appliance This appliance has been tested in accor- Voltage 120V AC, 60 Hz dance with the UL Standand 2021 for Amps Watts 1500 W appliances in the United States and Cana- HIGH 1500W da. If you need assistance during installa- HEATER 750W No HEATER...
- Page 10 INSERT-30-4026 This appliance has been tested in accor- Description Built-in Appliance dance with the UL Standand 2021 for Voltage 120V AC, 60 Hz Amps appliances in the United States and Cana- Watts 1500 W da. If you need assistance during installa- HIGH 1500W HEATER 750W...
- Page 11 INSERT-33-4230 This appliance has been tested in accor- Description Built-in Appliance dance with the UL Standand 2021 for Voltage 120V AC, 60 Hz Amps appliances in the United States and Cana- Watts 1500 W da. If you need assistance during installa- HIGH 1500W HEATER 750W...
- Page 12 ZECL-26-2923-FLUSHMT Description Built-in Appliance This appliance has been tested in accor- Voltage 120V AC, 60 Hz dance with the UL Standand 2021 for Amps Watts 1500 W appliances in the United States and Cana- HIGH 1500W da. If you need assistance during installa-...
- Page 13 ZECL-30-3226-FLUSHMT Description Built-in Appliance This appliance has been tested in accor- Voltage 120V AC, 60 Hz dance with the UL Standand 2021 for Amps Watts 1500 W appliances in the United States and Cana- HIGH 1500W HEATER da. If you need assistance during installa- 750W No HEATER 18.5W...
-
Page 14: Locating The Fireplace Insert
LOCATING THE FIREPLACE INSERT WARNING: Never locate this heater where it may fall into a bathtub or any water container. NOTICE: All clearances must be maintained to combustibles. Illustrations throughout these instructions reflect typical installations and are for design purposes only. Actual installations may vary slightly due to individual preferences. -
Page 15: Clearances When Built-In
CLEARANCES WHEN BUILT-IN MANTEL(maximum 12" (305mm) deep WALL MINIMUM 3/8" (10mm) CLEARANCE TO TOP 2"[50.8 mm] OF APPLIANCE( combustible or non-combustible) FRONT GLASS APPLIANCE SIDE VIEW MINIMUM 1" (25.4mm) CLEARANCE TO SIDES AND BACK OF APPLIANCE (combustible or non-combustible) FLOOR The fireplace insert may be placed within a framed enclosure that is level, dry, and capable of supporting the weight of the appliance and front glass. -
Page 16: Installation
INSTALLATION CAUTION: The unit's power supply cord must be connected to a properly grounded and protected 120-volt outlet. Always use ground fault protection where required by the electrical code. WARNING - RISK OF FIRE! To prevent a possible fire, do not block the grills, louvers, or air openings on the fireplace insert in any manner. -
Page 17: Installation Overview - Masonry Fireplaces
INSTALLATION OVERVIEW – MASONRY FIREPLACES Cover plate is required if chimney does not have suitable rain cap. 2” (50mm) Minimum HINT: Close and seal the damper to prevent air infiltration. Attach the "This fireplace has been altered..." plate to the fireplace (use two screws or other suitable method). -
Page 18: Installation Overview - Zero-Clearance (Metal) Fireplaces
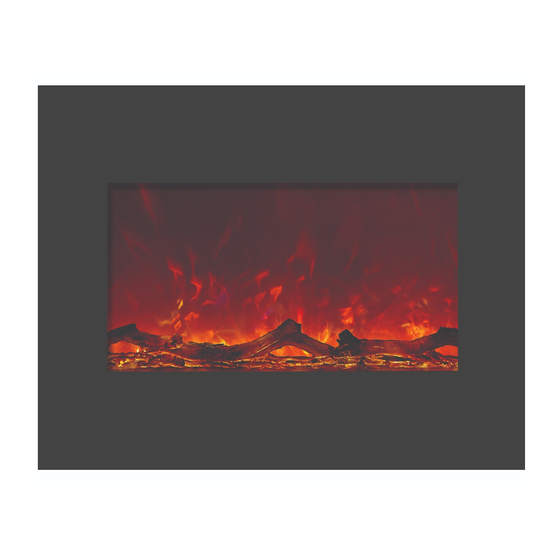
INSTALLATION OVERVIEW – ZERO-CLEARANCE (METAL) FIREPLACES Cover plate is required if chimney does not have suitable rain cap. The log shelf, screen, and doors (if present) must be removed. 2” (50mm) Minimum HINT: Close and seal the damper to prevent air infiltration. HINT: Attach the "This fireplace has been Paint the interior of the... - Page 19 OPTIONAL DECORATIVE INTERIORS This insert is shipped with an under-lit log pre-installed. Glowing embers are also included with the fireplace insert if you want a different appearance. Glowing Embers Harvest Moon Clear Sun Tea Removing The Log The under-lit log is shipped in place. On newer units, the log has tabs on each side that hold it in place. Remove the black interior side panel (or carefully remove the tabs) to remove the log set.
-
Page 20: Remote Control Operation
OPERATING INSTRUCTIONS REMOVING THE SURROUND GLASS Before removing the surround glass, make sure to have a suitable location to place the surround glass once it is removed. Do not place the glass on sharp or uneven areas that may chip or damage the tempered glass. Use both hands to lift the surround glass directly up. - Page 21 REMOTE CONTROL OPERATION The button located at the top position of the remote control is ON/OFF. Press it, the flame and ember will be on. The heater will be off. Press again, the fireplace will turn off. “DISPLAY ON/OFF”: Switching the fireplace flame and tray light ON/OFF. It has functions of setting memory.
- Page 22 REMOTE CONTROL OPERATION The button located at the top position of the remote control is ON/OFF. Press it, the flame and ember will be on. The heater will be off. Press again, the fireplace will turn off. “DISPLAY ON/OFF”: Switching the fireplace flame and tray light ON/OFF. It has functions of setting memory.
-
Page 23: Direct Operation
DIRECT OPERATION 1. Power ON/OFF switch 2. Heat control button 3. Flame control button 4. HEATER LED 5. POWER LED Plug the heater into a suitable outlet. 1) “Power ON/OFF” Set this switch to position I to turn the product ON. Setting it to O to turn the product OFF. The POWER LED will be lit when the fireplace insert is on. -
Page 24: Cleaning And Maintenance
CLEANING AND MAINTENANCE WARNING: Always disconnect the power and allow the heater to cool before performing any cleaning, maintenance or relocation. Turn the controls to OFF and remove the plug from the outlet or turn off the circuit breaker before attempting any cleaning. FRONT GLASS 1. -
Page 25: Troubleshooting
TROUBLE SHOOTING WARNING: Always disconnect power and allow the heater to cool before performing any cleaning, maintenance or relocation. Turn the controls to OFF and remove the plug from the outlet or turn off the circuit breaker before attempting any cleaning. OBSERVED PROBLEM POSSIBLE CAUSE REMEDY... -
Page 26: Parts List
16 10305508 ZECL-33 AND INSERT-33 17 10305509 ZECL-39 18 10305510 ZECL-2939 385010 back tea plastic glass ZECL-26-2923 387010 back tea plastic glass ZECL-30-3226 389005 back tea plastic glass ZECL-33-3624 391010 back tea plastic glass ZECL-39-4134 392010 back tea plastic glass... -
Page 27: Service History
SERVICE HISTORY... -
Page 28: Warranty
Products covered by this limited warranty have been tested and inspected prior to shipment and, subject to the provisions of this war- ranty, Amantii warrants such products to be free from defects in material and workmanship for a period of one (1) year from the date of the first purchase of such products.
Need help?
Do you have a question about the ZECL-26-2923 and is the answer not in the manual?
Questions and answers