Subscribe to Our Youtube Channel
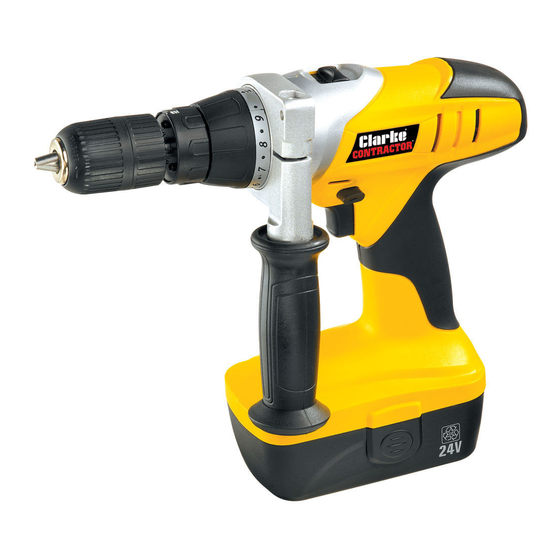
Summary of Contents for Clarke Contractor CON24
-
Page 1: Variable Speed
VARIABLE SPEED JIG SAW CORDLESS IMPACT DRILL CORDLESS IMPACT DRILL Part No. 6460200 MODEL No. CON24 Part No. 6485065 OPERATING & MAINTENANCE INSTRUCTIONS 0608... -
Page 2: Pack Contents
Charger voltage ........230VAC - 50Hz Charging time .......... 1 hour Please note that the details and specifications contained herein, are correct at the time of going to print. However, CLARKE International reserve the right to change specifications at any time without prior notice. -
Page 3: General Safety Precautions
GENERAL SAFETY PRECAUTIONS WARNING: As with all machinery, there are certain hazards involved with their operation and use. Exercising respect and caution will considerably lessen the risk of personal injury. However, if normal safety precautions are overlooked or ignored, personal injury to the operator or damage to property, may result. - Page 4 GENERAL SAFETY PRECAUTIONS 13. ALWAYS keep your proper footing and balance at all times don’t overreach. For best footing, wear rubber soled footwear. Keep floor clear of oil, scrap wood, etc. 14. ALWAYS wear proper apparel. Loose clothing or jewellery may get caught in moving parts. Wear protective hair covering to contain long hair.
-
Page 5: Warning Symbols
WARNING SYMBOLS WARNING! The following symbols are displayed on the unit to remind you of the safety precautions you should take when using this product. The charger has a built-in safety isolating transformer for your safety. The charger has a thermal fuse fitted for your safety. For indoor use only. -
Page 6: Wiring Instructions
If the fuse cover becomes lost or damaged, the plug must not be used until a suitable replacement is obtained. Replacement fuse covers can be obtained from your local Clarke dealer or most electrical stockists. •... -
Page 7: Fitting The Battery
BATTERY CHARGING AND FITTING WARNING! When the battery is removed from the tool after use, it may be hot. Always allow to cool before recharging. Do not recharge a hot battery. The battery pack must be charged before operating the drill. New batteries, or a battery that has been stored for some time, may not initially accept a full charge. -
Page 8: Before Use
BEFORE USE SELECTING THE DRILLING MODE WARNING! Before selecting the drilling mode, or adjusting the torque setting, ensure that the directional control switch is located in the central, locked off position. The drill is equipped with two drilling modes. Hammer drilling mode & rotary drill mode. -
Page 9: Direction Of Rotation
BEFORE USE DIRECTION OF ROTATION The direction control switch is used to alter the direction of rotation of the drill. 1 The direction of rotation is selected by moving the directional control switch to either side of the drill. 2 Reverse direction should only be used for removing screws. -
Page 10: Operation
OPERATION INSERTING DRILL BITS, OR SCREWDRIVER BITS WARNING! Before removing, or installing a drill or screwdriver bit, make sure that the safety locked off button is in the central locked off position. To insert a drill bit, or screwdriver bit, proceed as follows. Grip the chuck collar and rotate the front of the chuck in an anti- Chuck Collar... -
Page 11: Drilling Tips
OPERATION DRILLING TIPS • Always use sharp, good quality drill bits. The performance of your drill is dependant on the quality of the bits used. • Reduce the pressure on the drill bit when it is about to break through. This will prevent the drill from jamming. -
Page 12: Fitting The Auxiliary Handle
FITTING THE AUXILIARY HANDLE Loosen the auxiliary handle by rotating the grip section anticlockwise a few turns. Slide the auxiliary handle over the neck of the drill and into position as shown. Secure the handle in place by rotating the grip section clockwise until the handle is held firm. -
Page 13: Removing The Chuck
REMOVING THE CHUCK Open the jaws as far as possible. Using a cross head screwdriver (inserted, down through the jaws), remove the securing screw. The screw has a LEFT HAND THREAD and must therefore be turned CLOCKWISE. Grasp the chuck and unscrew it from the drill in the normal manner, i.e., by screwing it ANTICLOCKWISE. -
Page 14: Spare Parts Diagram
SPARE PARTS DIAGRAM l i x... -
Page 15: Parts And Service
PARTS & SERVICE For spare parts and service, please contact your nearest dealer, or CLARKE International, on one of the following numbers. PARTS & SERVICE TEL: 020 8988 7400 or e-mail as follows: PARTS: parts@clarkeinternational.com SERVICE: service@clarkeinternational.com DECLARATION OF CONFORMITY...


Need help?
Do you have a question about the Contractor CON24 and is the answer not in the manual?
Questions and answers