Table of Contents
Advertisement
Quick Links
Advertisement
Table of Contents

Related Manuals for Avdel 73200 Tool


Summary of Contents for Avdel 73200 Tool
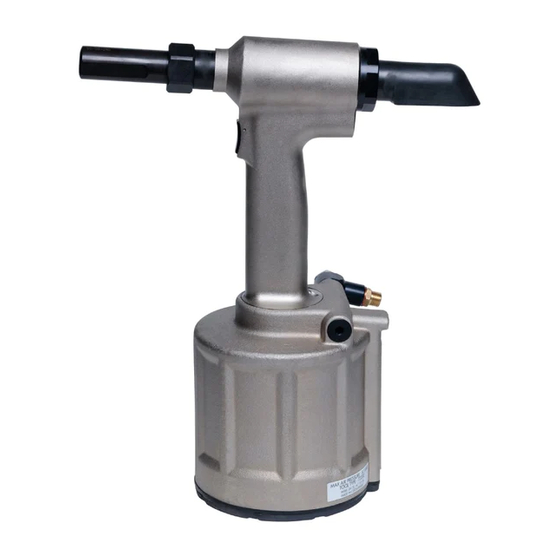
- Page 1 Instruction Manual Original Instruction 73200 Tool Hydro-Pneumatic Power Tool...
-
Page 3: Table Of Contents
OF ALL OTHER WARRANTIES AND REMEDIES. ANY IMPLIED WARRANTY AS TO QUALITY, FITNESS FOR PURPOSE, OR MERCHANTABILITY ARE HEREBY SPECIFICALLY DISCLAIMED AND EXCLUDED BY AVDEL. Avdel UK Limited policy is one of continuous product development and improvement and we reserve the right to change the specification of any product without prior notice. -
Page 4: Safety Instructions
Any modification undertaken by the customer to the tool/machine, nose assemblies, accessories or any equipment supplied by Avdel UK Limited or their representatives, shall be the customer’s entire responsibility. Avdel UK Limited will be pleased to advise upon any proposed modification. -
Page 5: Specification
Intent of Use The hydro-pneumatic 73200 is designed to place Avdel® lockbolt and breakstem fasteners. For a complete tool, order a base tool part number 73200-02000 and select a nose assembly from the Nose Assemblies section on page 7 to suit your application. -
Page 6: Putting Into Service
Putting into Service Air Supply All tools are operated with compressed air at an optimum pressure of 5.5 bar. We recommend the use of pressure regulators and filtering systems on the main air supply. These should be fitted within 3 metres of the tool (see diagram below) to ensure maximum tool life and minimum tool maintenance. -
Page 7: Nose Assemblies
Stepped anvils give a less severe deformation of the collars thus allowing placing of Avdelok® in softer materials like plastics, wood, etc. Standard Nose Assembly Selection The fasteners below can also be placed on the 73200 tool. It is essential that the correct nose assembly is fitted prior to operating the tool. STANDARD NOSE ASSEMBLY SELECTION... -
Page 8: Fitting Instructions
Nose Assemblies Fitting Instructions It is essential that the correct nose assembly is fitted prior to operating the tool. By knowing the details of the fastener to be placed, you will be able to order a new complete nose assembly using the selection tables on pages 7. I M P O R T A N T The air supply must be disconnected when fitting or removing nose assemblies unless specifically instructed otherwise. - Page 9 Collar Splitter, Adaptor Kit (73200-04600) Installation instructions Body Disassembly To fit these collar splitters, disconnect tool from air supply • Remove pin tail deflector 47. • Remove nose assembly, if fitted • Lubricate the collar splitter cam faces, bearing faces and any moving parts with •...
-
Page 10: Servicing The Tool
Servicing the Tool Regular servicing should be carried out and a comprehensive inspection performed annually or every 500,000 cycles, whichever is sooner. I M P O R T A N T Read Safety Instructions on page 4. The employer is responsible for ensuring that tool maintenance instructions are given to the appropriate personnel. The operator should not be involved in maintenance or repair of the tool unless properly trained. -
Page 11: Molykote® 55M Grease Safety Data
Servicing the Tool Molykote® 55m Grease Safety Data First Aid SKIN: Flush with water. Wipe off. INGESTION: No first aid should be needed. EYES: Flush with water. Fire FLASH POINT: Above 101.1°C. (closed cup) Explosive Properties: No Suitable Extinguishing Media: Carbon Dioxide Foam, Dry Powder or fine water spray. Water can be used to cool fire exposed containers. -
Page 12: Service Kit
Servicing the Tool Service Kit For all servicing we recommend the use of the 73200 Service Kit. SERVICE KIT : 73200-99990 PART NO. DESCRIPTION PART NO. DESCRIPTION 07900-01040 AIR PISTON ROD BULLET 07900-01054 SEAL HOUSING PUSH ROD 07900-01041 BASE PLATE EXTRACTOR 07900-01055 SEAL RETAINER WRENCH 07900-01042... -
Page 13: Dismantling Instructions
Servicing the Tool Dismantling Instructions Preparation Connect tool to air supply. • Depress Trigger 29 and hold. • Disconnect air supply and release Trigger 29. • Remove Deflector 47, Retaining Nut 49, Adaptor Ring 50 and Adaptor 48. • Operating Valve Unscrew Swivel Bolt 44 using 22mm A/F spanner or socket and remove Swivel 43. -
Page 14: Assembly Instructions
Servicing the Tool Assembly Instructions All 'O' rings and seals should be renewed and lubricated with Molykote® 55m* for pneumatic sealing or Molykote® 111* for hydraulic • sealing. Head Assembly Using soft jaws to hold the tool Handle, position the tool in the nose-down orientation. •... -
Page 15: General Assembly Of Base Tool 73200-02000
General Assembly of Base Tool 73200-02000... -
Page 16: Parts List For 73200-02000
Parts List for 73200-02000... -
Page 17: Priming
Priming Priming is ALWAYS necessary after the tool has been dismantled and prior to operating. It may also be necessary to restore the full stroke after considerable use, when the stroke may have been reduced and fasteners are not now being fully placed by one operation of the trigger. Oil Details The recommended oil for priming is Hyspin®... -
Page 18: Priming Kit
Priming Priming Kit The 73200 Service Kit includes all of the parts needed to prime the tool. However, if required, a Priming Kit can be supplied separately. PRIMING KIT : 73200-99991 PART NO. DESCRIPTION QTY. 07900-01060 PRIMING SYRINGE 07900-01061 PULL STROKE SETTER 07900-01062 RETURN STROKE SETTER 07900-01063... -
Page 19: Initial Priming Procedure
Priming Initial Priming Procedure Follow these instructions if all of the oil has been emptied from the tool, e.g. following tool disassembly and maintenance. If the tool has stroke loss, follow the Top-up Priming Procedure on page 20. Follow the Hyperlink below or alternatively scan the QR-code for a video of the Initial priming procedure for this tool. http://youtu.be/k4g9iT4hhI8 *Bullet numbering below relates each step to relevant section of the priming video Preparation... -
Page 20: Top-Up Priming Procedure
Priming Top-up Priming Procedure If the tool has stroke loss, follow these instructions. If all of the oil has been emptied from the tool, e.g. following tool disassembly and maintenance, follow the Initial Priming Procedure on page 19. Follow the Hyperlink below or alternatively scan the QR-code for a video of the Initial priming procedure for this tool. http://youtu.be/ZxIkLygiKCI *Bullet numbering below relates each step to relevant section of the priming video Preparation... -
Page 21: Fault Diagnosis
Fault Diagnosis Symptom Possible Cause Remedy Page Ref. Adjust air pressure Short stroke or Reduced air pressure Check for leaks incomplete return Oil level in tool low or air in oil Reprime tool 17 – 20 Incorrect nose assembly fitted Change to correct nose assembly 7 –... -
Page 22: Declaration Of Conformity
Declaration of Conformity We, Avdel UK Limited, Watchmead Industrial Estate, Welwyn Garden City, Herts, AL7 1LY declare under our sole responsibility that the product: 73200 Serial Number to which this declaration relates is in conformity with the following standards: EN ISO 12100 – parts 1 & 2 BS EN ISO 8662 –... - Page 23 The names and logos of other companies mentioned herein may be trademarks of their respective owners. Data shown is subject to change without prior notice as a result of continuous product development and improvement policy. Your local Avdel representative is at your disposal should you need to confirm latest information.
Need help?
Do you have a question about the 73200 Tool and is the answer not in the manual?
Questions and answers