
Subscribe to Our Youtube Channel
Related Manuals for ADA INSTRUMENTS ProDigit 60


Summary of Contents for ADA INSTRUMENTS ProDigit 60
-
Page 1: Operating Manual
Operating manual Digital level Model: ProDigit Manufacturer: ADAINSTRUMENTS Address: WWW.ADAINSTRUMENTS.COM... -
Page 2: Table Of Contents
ProDigit Table of contents 1. Safety symbols ............3 2. -
Page 3: Safety Symbols
ProDigit Safety symbols The purpose of safety symbols is to attract your attention to possible dangers. The safety symbols, and the explana- tions with them, deserve your careful attention and understanding. The symbol warnings DO NOT by themselves elim- inate any danger. The instructions and warnings they give are no substitutes for proper accident prevention measures. WARNING: BE SURE to read and understand all safety instructions in this manual, including all safety alert symbols such as “DANGER”, “WARNING”... -
Page 4: Safety Instructions
ProDigit Safety instructions WARNING: BE SURE to read and understand all instructions in this manual before using this level. Failure to follow all instruc- tions may result in hazardous radiation exposure, electric shock, fire and/or serious personal injury. SAFETY PRECAUTIONS FOR LASERS WARNING: Use of controls, adjustments or performance of procedures other than those specified in this manual may result in hazardous radiation exposure. - Page 5 ProDigit beam back at the operator. Be aware that laser light reflected off a mirror or any other reflective surfaces can also be dangerous. DO NOT place the Digital level in a position that may cause anyone to stare into the laser beam intentionally or uninten- tionally.
-
Page 6: Features
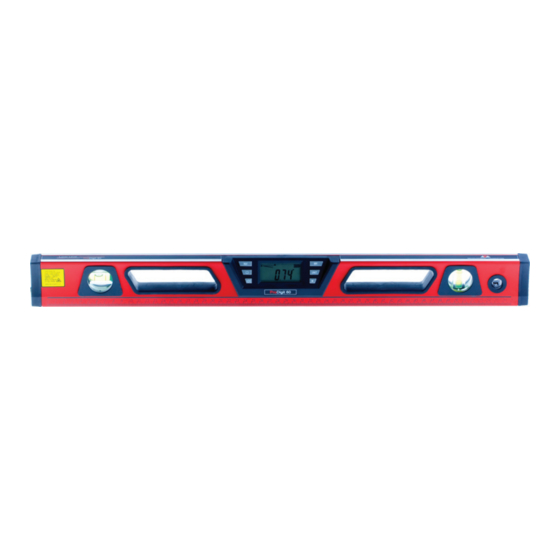
ProDigit NOTE: Before attempting to use your level, familiarize yourself with all of the operating features and safety requirements. This digital level is a highly versatile leveling tool designed for fast, easy operation. Heavy-duty, lightweight aluminum construction, with the LCD digital module constructed of unbreakable ABS polymer that’s sealed against dirt and water, and the toughest acrylic block bubble vials and solid-state laser components all add up to on- the-job durability and long, dependable service. - Page 8 ProDigit Key function (Fig.1b) Power button-press the button to turn the LCD display screen on. Long press it to turn off the LCD display. REF Button - Push the button briefly to set current angle to zero, enter relative angle measurement mode. Push the button for about 3 seconds to start the calibration.
-
Page 9: Specifications
ProDigit LCD SCREEN ICONS Up/Down Indicator - The zero line (0°) indicates the level position. The arrow indicates the current angle’s position, either up or down away from the level (0°). Battery Power Icon - Indicates the amount of battery power in the unit. Replace batteries when the black power bar disappears. - Page 10 ProDigit Battery installation (Fig. 2) This multi-function digital laser level uses two “AAA” batteries (sold separately), to power both the LCD module display and the Laser dot. Fig.2 NOTE: Always ensure the on/off button is in OFF position before installing or replacing the batteries. Open the battery cover, located in the middle of the back of the level (Fig.2).
-
Page 11: Calibration
ProDigit Calibration (Figs.3,4) Place the digital level on a flat and smooth surface, push and hold the REF button for about 3 seconds, the calibration mode is activated. “CAL1” will wink on LCD. Keep it unmoved for seconds until hear the beeper sounds for 1 second, then “CAL2” will show on LCD. Rotate the level 180º... -
Page 12: Measurements
ProDigit Measurements Horizontal and Plumb measurements can use both the bubble vial and the LCD readout features. Horizontal measurements (Fig.5) Use the level on horizontal surfaces to true them up. The level’s bubble vials will show when you have the surface level. The bubbles will be exactly in between the marks on the vial. - Page 13 ProDigit Pitch (Fig.7) The digital level can be used to measure the pitch of a roof. It measures the pitch in inches of rise per foot of run. Push the conversion button to change angle to pitch. The pitch will be read as inches per foot in 1/8-in. increments, with a + or a - sign to indicate if the pitch is above or below the desired measurement.
- Page 14 ProDigit Laser alignment (Fig.10) This digital level contains a laser diode located inside the left endcap of the level. It provides a bright 635-665 nanometer beam with a useful visibility that extends up to 50m indoors or outdoors (This range is only applicable at night or dark environment.) •...
- Page 15 ProDigit Fig.11 Fig.11 Fig.12 Fig.12 • The laser projects a dot on the targeted surface (see Fig. 13) and the size and shape may vary according to tempera- ture, distance and target surface material. ALWAYS use the center point of the dot for your measurement. Rotate the level on the tripod to align chair rail, pictures, etc.
- Page 16 ProDigit Current reading memorize button and memory recall To save the information of the current reading, press the M button. The level can save nine different readings in its memory. To read out the measurements, press the MR button. The last nine measurements can be read out, beginning with the most recently saved.
-
Page 17: Maintenance
ProDigit Turn on the level. The LCD screen indicates the absolute angle between true level and the working surface. Press the REF button to enter relative angle measurement mode. The current angle will be considered to be 0.0° and the display will read 0.0°. -
Page 18: Troubleshooting
ProDigit Troubleshooting Problem Cause Solution Laser point projection is Batteries are low voltage. Replace with new batteries weak Laser point is not projected •Laser on/off button is not in •Check to make sure the switch ON position. is in On position. •Batteries are installed •Re-install batteries with correct incorrectly. -
Page 19: Specific Reasons For Erroneous Measuring Results
ProDigit Specific reasons for erroneous measuring results • Measurements through glass or plastic windows; • Dirty laser emitting window; • After instrument has been dropped or hit. Please check the accuracy. • Large fluctuation of temperature: if instrument will be used in cold areas after it has been stored in warm areas (or the other way round) please wait some minutes before carrying out measurements. -
Page 20: Laser Classification
ProDigit Laser classification The instrument is a laser class 2 laser product accortding to DIN IEC 60825-1:2007. It is allowed to use unit without further safety precautions. Warranty This product is warranted by the manufacturer to the original purchaser to be free from defects in material and work- manship under normal use for a period of two (2) years from the date of purchase. -
Page 21: Exceptions From Responsibility
ProDigit Exceptions from responsibility The user of this product is expected to follow the instructions given in operators’ manual. Although all instruments left our warehouse in perfect condition and adjustment the user is expected to carry out periodic checks of the product’s accuracy and general performance. The manufacturer, or its representatives, assumes no responsibility of results of a faulty or intentional usage or misuse includ- ing any direct, indirect, consequential damage, and loss of profits. - Page 22 WARRANTY DOESN’T EXTEND TO FOLLOWING CASES: 1. If the standard or serial product number will be changed, erased, removed or wil be unreadable. 2. Periodic maintenance, repair or changing parts as a result of their normal runout. 3. All adaptations and modifications with the purpose of improvement and expansion of normal sphere of product ap- plication, mentioned in the service instruction, without tentative written agreement of the expert provider.
- Page 23 WARRANTY CARD Name and model of the product ________________________________________________ Serial number ________________date of sale_______________________ Name of commercial organization _____________________stamp of commercial organization Warranty period for the instrument explotation is 24 months after the date of original retail purchase. It extends to the equipment, imported on the RF territory by official importer.
-
Page 24: Appendix 1- "Certificate Of Acceptance And Sale
Certificate of acceptance and sale __________________________________________________________________________ __________________________________________________________________________ ___________________________________________________________№_____________ name and model of the instrument Corresponds to ______________________________________________________________ designation of standard and technical requirements Data of issue _______________________________________________________________ Stamp of quality control department Price Sold ___________________________________ Date of sale ______________________ name of commercial establishment... - Page 25 Руководство по эксплуатации Электронный уровень Модель: ProDigit Производитель: ADAINSTRUMENTS Адрес: WWW.ADAINSTRUMENTS.COM...
- Page 26 ProDigit Оглавление 1. Приедупреждающие символы ........... .27 2.
-
Page 27: Приедупреждающие Символы
ProDigit Предупреждающие символы Главная задача предупреждающих символов - привлечь ваше внимание к возможной проблеме. Необходимо внимательно прочитать символы безопасности и их объяснения. Сами по себе, предупредительные символы не устраняют опасность. Предупреждение: Перед тем, как приступить к работе с электронным уровнем, внимательно прочитайте инструкцию по... -
Page 28: Меры Предосторожности
ProDigit Меры предосторожности Осторожно: Перед тем, как приступить к работе с электронным уровнем, внимательно прочитайте инструкцию по безопасности в данном руководстве. Пренебрежение всеми перечисленными инструкциями может привести к радиоактивному облучению, электрическому удару, пожару и/или серьезному телесному повреждению. Правила безопасности при работе с лазерным уровнем: Осторожно: использование... - Page 29 ProDigit НЕ смотрите прямо на луч и не направляйте луч в глаза других людей. Это может привести к повреждению глаз. НЕ ставьте лазерный уровень на уровне глаз. Это может привести к повреждению глаз. НЕ используйте никакие оптические инструменты (теодолиты, телескопы) для лучшего видения лазерного луча.
-
Page 30: Описание Прибора
ProDigit Описание прибора Замечание: Перед тем, как приступить к работе с прибором, ознакомьтесь с требованиями по безопасности и правилами пользования. Электронный уровень- это легкий прибор из алюминия с цифровым ЖК дисплеем, с помощью которого вы можете производить угловые измерения, такие как уклон ската крыши и угол среза и т.д. Используйте... - Page 31 ProDigit Рис. 1a Магнитное основание- 4 магнита на рабочем основании для крепления на металле. Резьба под штатив 1/4”- уровень можно поместить на штатив, продается отдельно. Рабочее основание- рабочее основание должно прочно лежать на поверхности. Рабочее основание разработано для плоских поверхностей, а V-образное углубление используется при работе с круглыми предметами, например, трубой.
- Page 32 ProDigit Функции кнопок (Рис.1b) Кнопка ВКЛ/ВЫКЛ прибора - нажмите на кнопку для того, чтобы включить электронный уровень. Длительное нажатие на кнопку выключает прибор. Кнопка REF- нажмите на кнопку для начала калибровки. Нажмите на кнопку и удерживайте ее в течение 3 сек, чтобы...
-
Page 33: Технические Характеристики
ProDigit Иконки на ЖК дисплее Индикатор Вверх/Вниз- нулевая линия (0°) обозначает положение уровня. Стрелка обозначает положение текущего угла, выше оно или ниже уровня (0°). Иконка состояния батареи- обозначает состояние батареи. Замените батарейки, когда появится черный штрих. Иконка звукового сигнала- иконка появляется на экране, когда активируется звуковой сигнал. Иконка... - Page 34 ProDigit Для работы многофункционального электронного уровня необходимо 2 батареи “ААА”. Замечание: Перед тем, как вставить батареи, убедитесь, что прибор выключен. Рис.2 Откройте крышку батарейного отсека, которая расположена с обратной стороны электронного уровня (Рис.2). Вставьте две новые батареи типа “ААА”, соблюдайте полярность (+/-). Закройте...
-
Page 35: Калибровка Электронного Уровня
ProDigit выключается автоматически. ЖК дисплей большой и легко читаемый. Когда вы переворачиваете прибор, дисплей переворачивает изображение значений. Калибровка электронного уровня (рис.3, 4) Поместите уровень на плоскую ровную поверхность, нажмите и удерживайте около 3 сек кнопку REF, функция калибровки активируется. На экране будет мигать “CAL1”. Не... -
Page 36: Измерения
ProDigit Измерения Горизонтальные и вертикальные измерения При проведении горизонтальных и вертикальных измерениях можно использовать как пузырьковый уровень, так и показания ЖК дисплея. Горизонтальное измерение (Рис.5) Положите уровень на горизонтальную поверхность. Пузырьки будут точно между отметками на ампуле. Нажмите кнопку включения цифрового уровня и положите прибор на поверхность. На... - Page 37 ProDigit Уклон ската крыши (Рис.7) Электронный уровень может применяться для измерения уклона ската крыши. Прибор измеряет уклон в градусах; %; дюймах на на футы. Рис.7 Измерение угла (Рис.8) Электронный уровень измеряет любой угол в градусах с точностью до 0.1°, на горизонтальной...
- Page 38 ProDigit Выравнивание лазера (Рис.10) В цифровой уровень встроен лазерный излучатель. Он находится внутри под крышкой с левой стороны прибора. Диапазон работы лазерного луча составляет 50м внутри помещения и на улице (в ночных условиях или в сумерках). 1) Для включения лазерного излучателя, нажмите на кнопку ВКЛ/ВЫКЛ прибора, которая...
- Page 39 ProDigit Рис.11 Fig.11 Fig.12 Рис.12 5) Лазерный излучатель спроецирует точку на заданную поверхность (см. рис.13). Размер и форма лазерной точки будет зависеть от температуры, расстояния и материала заданной поверхности. Рис.13 MEASUREMENT FOUNDATION...
- Page 40 ProDigit Запоминание значения текущего измерения и активизации памяти Чтобы сохранить значение текущего измерения, нажмите на кнопку М. Электронный уровень может сохранить 9 разных измерений. Для обращения к сохраненным значениям измерений, нажмите кнопку MR. Последнее сохраненное измерение будет отображаться первым. Для возвращения в режим измерения нажмите кнопку М. Кнопка...
-
Page 41: Техническое Обслуживание И Указания
ProDigit 2) Включите уровень. На дисплее отобразится угол между уровнем и рабочей поверхностью. 3) Нажмите кнопку REF, чтобы войти в режим измерения относительного угла. Значение текущего угла будет считаться 0.0°. 4) Положите уровень на Вторую рабочую поверхность. На дисплее отобразится относительный угол между Первой и Второй... -
Page 42: Особые Случаи Получения Неверных Результатов Измерения
ProDigit Особые случаи получения неверных результатов измерений • Измерение через стеклянные или пластмассовые окна. • Грязь на окнах, через которые проходит лазерный луч. • Измерение после того, как прибор уронили или ударили (необходимо проверить точность прибора!). • Большие колебания температуры. Если лазерный построитель, находящийся в теплом помещении, будет использоваться... -
Page 43: Устранение Неполадок
ProDigit Устранение неполадок Проблема Причина Решение Слабое проецирование Батареи разряжены Замените батареи на новые лазерной точки Лазерный луч не - Не активирована -убедитесь, что переключатель проецируется кнопка ВКЛ/ВЫКЛ находится в положении ON. лазерного луча. -Переустановите батареи, - Неправильно соблюдайте полярность. вставлены... -
Page 44: Гарантия
ProDigit Гарантия Производитель предоставляет гарантию на продукцию покупателю в случае дефектов материала или качества его изготовления во время использования оборудования с соблюдением инструкции пользователя на срок до 1 года со дня покупки. Во время гарантийного срока, при предъявлении доказательства покупки, прибор будет починен или заменен на такую же... - Page 45 ГАРАНТИЙНЫЕ ОБЯЗАТЕЛЬСТВА НЕ РАСПРОСТРАНЯЮТСЯ НА СЛЕДУЮЩИЕ СЛУЧАИ: 1.Если будет изменен, стерт, удален или будет неразборчив типовой или серийный номер на изделии; 2.Периодическое обслуживание и ремонт или замену запчастей в связи с их нормальным износом; 3.Любые адаптации и изменения с целью усовершенствования и расширения обычной сферы применения изделия, указанной...
- Page 46 ГАРАНТИЙНЫЙ ТАЛОН Наименование изделия и модель _______________________________________________ Серийный номер ___________________Дата продажи_________________ Наименование торговой организации ___________________Штамп торговой организации мп. Гарантийный срок эксплуатации приборов составляет 24 месяца со дня продажи и распространяется на оборудование, ввезенное на территорию РФ официальным импортером. В течении гарантийного срока владелец имеет право на бесплатный ремонт изделия по неисправностям, являющимся...
- Page 47 СВИДЕТЕЛЬСТВО О ПРИЕМКЕ И ПРОДАЖЕ ______________________________________________________________________________________________ ______________________________________________________________________________________________ _____________________________________________________________________________№_______________ НАИМЕНОВАНИЕ И ТИП ПРИБОРА Соответствует __________________________________________________________________________________ обозначение стандарта и технических условий Дата выпуска ___________________________________________________________________________________ Штамп ОТК (клеймо приемщика) Цена Продан(а) ___________________________________________________Дата продажи ______________________...
- Page 48 MEASUREMENT FOUNDATION WWW.ADAINSTRUMENTS.COM...
Need help?
Do you have a question about the ProDigit 60 and is the answer not in the manual?
Questions and answers