Sub-Zero Wine Storage 315W Technical Service And Parts Manual
Wine storage series
Hide thumbs
Also See for Wine Storage 315W:
- Design manual (94 pages) ,
- Installation & operation manual (20 pages) ,
- Installation manual (12 pages)
Table of Contents
Advertisement
© SUB-ZERO FREEZER COMPANY INC.
T T e e c c h h n n i i c c a a l l S S e e r r v v i i c c e e
a a n n d d P P a a r r t t s s M M a a n n u u a a l l
W i i n n e e S S t t o o r r a a g g e e S S e e r r i i e e s s
W
W i i n n e e S S t t o o r r a a g g e e S S e e r r i i e e s s
W
( ( M M o o d d e e l l 3 3 1 1 5 5 W
( ( M M o o d d e e l l 3 3 1 1 5 5 W
2005 ALL RIGHTS RESERVED
W ) )
W ) )
JOB AID #3758664
(First Edition. - July, 2005)
Advertisement
Table of Contents
Troubleshooting

Related Manuals for Sub-Zero Wine Storage 315W


Summary of Contents for Sub-Zero Wine Storage 315W
- Page 1 W ) ) ( ( M M o o d d e e l l 3 3 1 1 5 5 W W ) ) © SUB-ZERO FREEZER COMPANY INC. 2005 ALL RIGHTS RESERVED JOB AID #3758664 (First Edition. - July, 2005)
- Page 3 General Information Model 315W Wine Storage SECTION 1 GENERAL INFORMATION #3758664 - First Edition - July, 2005...
-
Page 4: Introduction
Wine Storage INTRODUCTION This Sub-Zero Technical Service and Parts Manual (Job Aid Part #3758664) for the Model 315W is a compilation of information provided by the Scotsman Company and has been reprinted by Sub-Zero Freezer Company, Inc., with the permission of the Scotsman Company. This manual will provide the most recent service information about the model 315W. -
Page 5: Table Of Contents
General Information Model 315W Wine Storage TABLE OF CONTENTS Page # Page # Section 1 - General Information ........1-1 Compressor Area Mechanical & Sealed System .... 5-8 Condenser Fan Motor and Shroud ......5-8 Introduction ..............1-2 Evaporator Assembly and Filter-Drier ......5-9 Important Safety Information .......... -
Page 6: Warranty Information
Zero is arranged and stored under the unit serial num- ber, and the customer's last name. ONE & FIVE YEAR Non-Residential Warranty Sub-Zero requests that you have the model and serial (Example: Office, Yacht, etc.) number available whenever contacting the factory or parts distributor. -
Page 7: Model Description
General Information Model 315W Wine Storage MODEL DESCRIPTION This section briefly describes the model 315W. 315W #3758664 - First Edition - July, 2005... - Page 8 Sub-Zero Wine Storage Temperature Range, Recommended Wine Storage Temperatures and Recommended Wine Serving Temperatures: The table below shows the temperature range of the Sub-Zero Wine Storage Units. This table also shows the rec- ommended temperatures for “serving” wines. Serving wines at the recommended temperatures will insure that white wines maintain their lively and interesting taste, and red wines will maintain their scent and flavor.
-
Page 9: Section 2 - Installation Information
Installation Information Model 315W Wine Storage SECTION 2 INSTALLATION INFORMATION #3758664 - First Edition - July, 2005... -
Page 10: Pre-Installation Considerations
Installation Information Model 315W Wine Storage PRE-INSTALLATION CONSIDERATIONS Air Flow The model 315W uses a fan to take room air in through the front left side of the kickplate/grille (See Figure 2-1). Airflow through the kickplate/grille must never be obstructed. Doing so will cause a decrease in per- formance and possible damage to the 315W unit. - Page 11 Installation Information Model 315W Wine Storage NOTE: LEFT HAND MODEL SHOWN 101.6" 4" Figure 2-3. Unit Dimensions #3758664 - First Edition - July, 2005...
-
Page 12: Installation
Installation Information Model 315W Wine Storage INSTALLATION Leveling Note: This model must be leveled prior to installation. There are four leveler legs on a model 315W, one at each corner. To level the unit, turn the leveler legs counterclockwise to raise the unit or clockwise to lower the unit. -
Page 13: Section 3 - Operation And Maintenance
Operation and Maintenance Model 315W Wine Storage SECTION 3 OPERATION MAINTENANCE #3758664 - First Edition - July, 2005... -
Page 14: Basic Operation
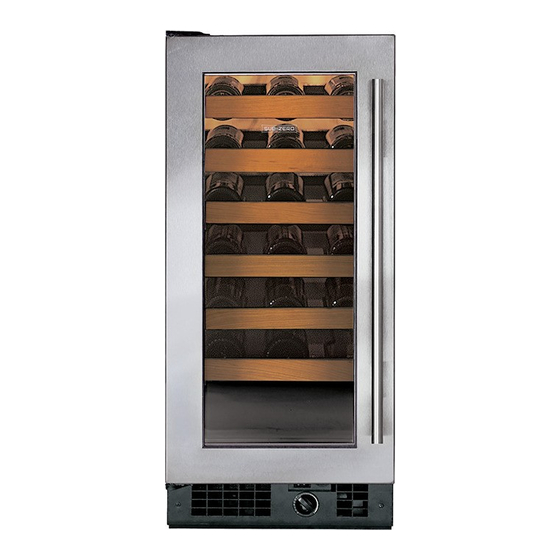
Operation and Maintenance Model 315W Wine Storage Basic Operation Loading The six racks are designed to hold five bottles each with the necks pointing toward the center. (See Figure 3-1) Two additional bottles may be placed sideways on the bottom of the compartment for a total of 32. If large bottles do not fit between the racks, remove an upper- rack and place bottles on the rack below. -
Page 15: Switching Light On Or Off
Operation and Maintenance Model 315W Wine Storage Switching Light On or Off The display light automatically switches on when the door is opened. To have the light on when the door is closed, move light switch to ON position. (See Figure 3-3) Figure 3-3. -
Page 16: Maintenance
Operation and Maintenance Model 315W Wine Storage MAINTENANCE Little maintenance is required other than keeping the unit clean. The evaporator at the back of the compart- ment is an off-cycle-defrost type. Any frost that devel- ops during operation melts and drains away when the unit cycles off. -
Page 17: Drain System Note
Operation and Maintenance Model 315W Wine Storage Drain System Note The 315W has an evaperator drain system below the evaporator. Moisture will form on evaporator panel at the back of the unit, then during off cycles this moisture drains into a trough and down through a hose to the drain pan. - Page 18 Operation and Maintenance Model 315W Wine Storage #3758664 - First Edition - July, 2005...
-
Page 19: Section 4 - Sealed System Information
Sealed System Information Model 315W Wine Storage SECTION 4 SEALED SYSTEM INFORMATION #3758664 - First Edition - July, 2005... -
Page 20: Hfc-134A Refrigerant Service Information
Sealed System Information Model 315W Wine Storage HFC-134a REFRIGERANT SERVICE INFORMATION The sealed system contains HFC-134a refrigerant. This section gives some general rules for working with 134a, and explains procedures to be followed while servicing the sealed system. 134a refrigerant requires synthetic Ester oil in the compressor, and does not tolerate contamination from other refrigerants, moisture, petroleum-based lubricants, silicone lubricants, cleaning compounds, rust inhibitors, leak detection dyes, or any other type of additive. -
Page 21: Sealed System Repair Procedures
Sealed System Information Model 315W Wine Storage SEALED SYSTEM REPAIR PROCEDURES Problem Service Procedures Non-Operating, Inefficient, Capture refrigerant Noisy Compressor Replace compressor Replace filter-drier (NOTE: To check for a non- Evacuate or sweep charge system operating compressor, a hard Recharge system with Virgin 134a refrigerant start kit can be used) High Side leak Capture refrigerant... -
Page 22: Sealed System Operation
Sealed System Information Model 315W Wine Storage SEALED SYSTEM OPERATION The following six diagrams represent the basic model 315W sealed system. The components are listed in order of refrigerant flow, with an explanation of their fun- damental role as part of a sealed system. Compressor (Figure 4-1) The compressor creates a high and low side pressure difference in the sealed system. - Page 23 Sealed System Information Model 315W Wine Storage Capillary Tube (Figure 4-4) CAPILLARY TUBE The high-pressure warm liquid refrigerant travels through the long skinny capillary tube which is soldered to the suction tube (these two tubes soldered together create the heat exchanger). (See Suction Tube & Heat Exchanger below.) As the warm liquid refrigerant trav- els through the capillary tube it gives up heat to the cool refrigerant gas traveling through the suction tube and...
- Page 24 Sealed System Information Model 315W Wine Storage REFRIGERANT FLOW DIAGRAM EVAPORATOR PLATE COMPRESSOR CONDENSER HIGH-SIDE FILTER-DRIER Figure 4-7. Model 315W Refrigerant Flow #3758664 - First Edition - July, 2005...
-
Page 25: Section 5 - Component Access / Removal
Wine Storage Series Component Access / Removal (315W) SECTION 5 COMPONENT ACCESS AND REMOVAL #3758664 - First Edition - July, 2005... - Page 26 Component Access / Removal Model 315W Wine Storage COMPONENT ACCESS AND REMOVAL This section explains how to adjust, access and remove components from a model 315W. This section is arranged as follows: • EXTERIOR COSMETIC AND MECHANICAL COMPONENTS • INTERNAL COMPONENTS •...
-
Page 27: Exterior Cosmetic And Mechanical Components
Component Access / Removal Model 315W Wine Storage EXTERIOR COSMETIC AND MECHANICAL COMPONENTS Kickplate The kickplate, located under the door assembly, is vent- ed to allow air flow through the compressor area. To remove the kickplate (See Figure 5-1): 1. Open door. 2. -
Page 28: Light Switch Actuator
Component Access / Removal Model 315W Wine Storage Light Switch Actuator The light switch actuator is attached to the bottom of the door assembly with screws. To remove the actuator (See Figure 5-4): 1. Open door. 2. Extract screws securing switch actuator to door frame. -
Page 29: Power Cord
Component Access / Removal Model 315W Wine Storage Power Cord NOTE: Electrical shock hazard, take note of WARN- INGS and CAUTIONS on page 5-2. Cabinet Case The power cord is located at the right rear of the unit. To access the power cord, the unit will need to be Insulation moved out from its installation position. -
Page 30: Light Switch And Plunger Switch
Component Access / Removal Model 315W Wine Storage Light Switch and Plunger Switch NOTE: Electrical shock hazard, take note of WARN- INGS and CAUTIONS on page 5-2. The switches are inserted into a bracket located behind the kickplate at the bottom front of unit. To remove the light switch or plunger switch, the unit must be pulled from its installation and the kickplate must be removed first, then (See Figure 5-8):... -
Page 31: Wine Rack
Component Access / Removal Model 315W Wine Storage INTERNAL COMPONENTS Wine Racks To remove a wine rack assembly (See Figure 5-9): 1. Pull rack forward until it stops. 2. Lift front of rack up while pulling forward. 3. After indentations on the wine rack clear the rollers on the cabinet slides, lower front of rack while con- tinuing to pull forward and lifting rear of rack. -
Page 32: Compressor Area Mechanical & Sealed System
Component Access / Removal Model 315W Wine Storage COMPRESSOR AREA MECHANICAL & SEALED SYSTEM COMPONENTS & NOTE: To remove any sealed system component, the unit must be pulled from its installation. NOTE: Always replace the high-side filter-drier when servicing the sealed system. NOTE: Due to the limited access under the 315W, it will be necessary to separate the cabinet case from the unit base to access components in the compressor area. -
Page 33: Evaporator Assembly And Filter-Drier
Component Access / Removal Model 315W Wine Storage Evaporator Assembly and Filter-Drier The evaporator assembly consists of the evaporator and heat exchanger. The evaporator is mounted to the inside rear wall of unit. The heat exchanger is routed out the back wall, down to the unit tray where the capil- Cut Here lary tube is connected to the high-side filter-drier and the suction tube is attached to the compressor suction... -
Page 34: Compressor
Component Access / Removal Model 315W Wine Storage Compressor NOTE: Always replace the high-side filter-drier when Compressor servicing the sealed system. NOTE: Due to the limited access under the 315W, it Hitch Pin and will be necessary to separate the cabinet case from the Washer unit base to access components in the compressor area. -
Page 35: Section 6 - Parts Lists
Parts Lists & Exploded Views Model 315W Wine Storage SECTION 6 PARTS LISTS & EXPLODED VIEWS #3758664 - First Edition - July, 2005... - Page 36 Parts Lists & Exploded Views Model 315W Wine Storage CABINET FRONT AND INTERIOR PART LIST Ref # Part # Description 4135480 Door Assy, Glass 315W/O 4135491 Door Assy, Glass 315W/S-RH 4135492 Door Assy, Glass 315W/S-LH 0880831 Skin, Door Glass-RH,SS 0880832 Skin, Door Glass-LH,SS 3512030 Handle, Door SS 3/4X24.188...
-
Page 37: Cabinet Front And Interior
Parts Lists & Exploded Views Model 315W Wine Storage CABINET FRONT AND INTERIOR #3758664 - First Edition - July, 2005... -
Page 38: Cabinet Back
Model 315W Wine Storage Part Lists & Exploded Views CABINET BACK Ref # Part # Description Assy, Cabinet, Foamed 02325601 Insulation Bag A35546001 Back Panel 03140408 Screw, PH#8X3/8 (Qnty. 5) A35547001 Baffle 12163817 Power Cord 12062908 Bushing 03141926 Self Tapping Type AB Screw (Qty. 6) A38406001 Assy, Suction Line #3758664 - First Edition - July, 2005... -
Page 39: Condensing Unit And Electrical
Parts Lists & Exploded Views Model 315W Wine Storage CONDENSING UNIT AND ELECTRICALS Ref # Part # Description Ref # Part # Description 18880221 Compressor Package A38638002 Base Panel 18880251 Relay 03160801 Leveler Leg (Qnty. 4) 18880252 Overload 03153101 Screw Thread Form Tap (Qty. 21) 03382101 Hitch Pin (Qnty. - Page 40 Parts Lists & Exploded Views Model 315W Wine Storage #3758664 - First Edition - July, 2005...
-
Page 41: Troubleshooting
Troubleshooting Model 315W Wine Storage SECTION 7 TROUBLESHOOTING #3758664 - First Edition - July, 2005... -
Page 42: General Troubleshooting Guide
Troubleshooting Model 315W Wine Storage General Troubleshooting Guide The Table of Contents below indicates how the General Trouble Shooting Guide is arranged. 1. As close as possible, match the complaint, or description of the problem the unit is experiencing, with those in the table of contents below. - Page 43 Troubleshooting Model 315W Wine Storage PROBLEM POSSIBLE CAUSE TEST / ACTION A. Warm Temperatures and/or Unit Switched Off Check Temperature Control Unit Runs too Long Temperature Control Out of Check adjustment. Adjustment Unit Recently Energized Allow time for unit to cool down. Unit Recently Stocked with Wine Allow unit many hours to cool warm product.
- Page 44 Troubleshooting Model 315W Wine Storage PROBLEM POSSIBLE CAUSE TEST / ACTION C. Noise Condenser Fan Noise May be normal. Check for noises made from vibration. Fan Blade Contacting Shroud Check for free fan blade rotation. Adjust or replace components as needed. D.
-
Page 45: Sealed System Diagnostic Information
Troubleshooting Model 315W Wine Storage SEALED SYSTEM DIAGNOSTIC INFORMATION Temperature Pressure NOTE: The temperature/pressure table at right is for reference only. A -30°F (-34°C) 10” Vac unit's temperature/pressure correlation may differ from those listed due -25°F (-32°C) 7” Vac to: set-points, where the sealed system is in the refrigeration cycle, -20°F (-29°C) 4”... - Page 46 Troubleshooting Model 315W Wine Storage #3758664 - First Edition - July, 2005...
-
Page 47: Technical Data
Technical Data Model 315W Wine Storage SECTION 8 TECHNICAL DATA #3758664 - First Edition - July, 2005... - Page 48 Technical Data Model 315W Wine Storage Model 315W CHILLER CHARGE (R-134a Refrigerant) 2.75 oz. (81.33 ml) NOTE: Always check serial tag for exact charge NORMAL OPERATING PRESSURES (At 70°F / 21°C) Low Side 0 psi to 38 psi High Side 90 psi to 115 psi COMPRESSOR NOTE: Always check current parts price list for possible substitutions.
- Page 49 Wire Diagrams Model 315W Wine Storage SECTION 9 WIRE DIAGRAMS #3758664 - First Edition - July, 2005...
-
Page 50: Section 9 - Wiring Diagram
Wire Diagrams Model 315W Wine Storage 315W Wiring Diagram DOOR SWITCH THERMO SWITCH (MANUAL) 115 / 60 / 1 COMPRESSOR RELAY LIGHT THIS UNIT OVERLOAD PROTECTOR MUST BE GROUNDED #3758664 - First Edition - Juyl, 2005...
Need help?
Do you have a question about the Wine Storage 315W and is the answer not in the manual?
Questions and answers