Table of Contents
Advertisement
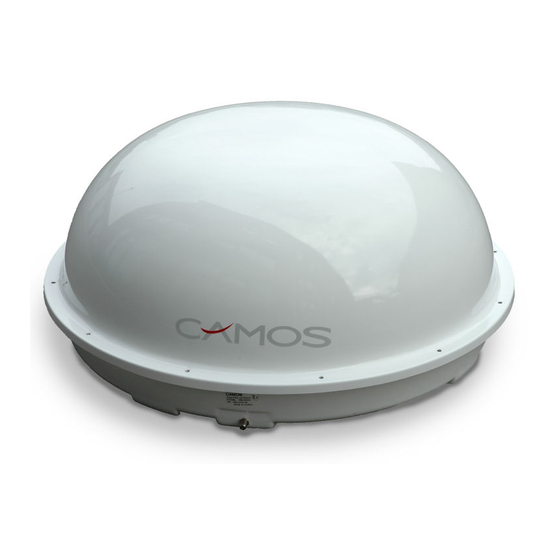
CSA-1300P/1400P
Automatic, auto-adjusting Satellite antenna
Instruction Manual
Vers. 1.5
Thank you for purchasing our product.
Please read this instruction manual carefully before mounting
and operating this antenna!
Please write down the serial number of this antenna.
In case of questions please inform us of this number:
Ser.-Nr.: _________________________________
Advertisement
Chapters
Table of Contents

Related Manuals for Camos CSA-1300P


Summary of Contents for Camos CSA-1300P
- Page 1 CSA-1300P/1400P Automatic, auto-adjusting Satellite antenna Instruction Manual Vers. 1.5 Thank you for purchasing our product. Please read this instruction manual carefully before mounting and operating this antenna! Please write down the serial number of this antenna. In case of questions please inform us of this number:...
-
Page 2: Installing Your Antenna
The Camos CSA-1300P/1400P enables reception of the major European satellites like ASTRA1, ASTRA2, HOTBIRD, SIRIUS, ATLANTIK BIRD 3 and HISPASAT. If you want to watch TV or access the Internet via satellite, here’s the equipment you need. The sat-dome is compact in size, light in weight, reliable in operation and incredibly easy to operate and install: there are just two cables to run. - Page 3 screw hole antenna foot antenna dome 4. Replace the antenna. Clean the mounting place and the antenna feet with the supplied special cleaning fluid "Reiniger1" and the supplied fleece (please wear the supplied Latex gloves!). Grind the marked fixing areas and antenna feet with sandpaper (not too much, the surface must be rough a little bit only), clean the surface and antenna feet with cleaning fluid 1 again and wait another 10 minutes.
- Page 4 12 V DC OUT RS-232 Control box (rearview) Power socket 4. Install your satellite receiver (CAMOS SVR-200 e.g.) according to it's user manual and connect it to the control box via the short white coax cable. Control box Coax antenna...
- Page 5 4. Starting up and operating Satellite select LNB indicator Lock indicator pushbutton On/off switch Power Satellite indicators indicator 1. Switch on your satellite receiver and monitor/TV. Now you can switch on the control box. The green "LNB" indicator lights up after switching on the receiver. 2.
- Page 6 -22° C to +55° C Antenna cable HQ coax, length 10m Diameter: appr. 69,5cm Height: approx. 30cm (CSA-1300P)/ approx. 40cm (CSA-1400P) Weight (without control box): approx. 9kg IMC GmbH (Camos Europe) Tel +49 4154 8083 - 0 Carl-Zeiss-Str. 7 / D-22946 Trittau...
- Page 7 Digital SAT-Receiver blackbox CI USER’S MANUAL Copyright Homecast Europe GmbH V1.6 Technische Änderungen und Irrtümer vorbehalten...
-
Page 8: Table Of Contents
Contents Before Starting Warnings, Cautions and Notes .................... 4 Recycling ..........................7 Accessories ......................... 7 Controls and Functions Front Panel .......................... 8 Rear Panel ........................... 9 Remote Control........................10 Connect Receiver How to connect the Receiver ..................... 11 Menu-Overview Menu Instruction ........................ 12 Menu Help ......................... - Page 9 Contents Viewing General Operation Banner Information ......................30 TV & Radio Changing ......................31 TV or Radio Channel Lists ....................31 6.3.1 Program View ..................32 6.3.2 Delete Mode ..................33 6.3.3 Move Mode ................... 33 6.3.4 Rename Mode ..................34 6.3.5 Lock Mode ....................
-
Page 10: Before Starting
1. Before Starting Read this manual carefully and make sure you understand the provided instructions. For your safety, check what the result each action will be. 1.1 Warnings, Cautions and Notes Throughout the whole manual, pay special attention to the following marks that indicate hazardous situations. - Page 11 1. Before Starting This digital satellite receiver has been manufactured to comply with international safety standards. Please read the following safety precautions carefully. Safety Instructions and Precautions Avoid placing heavy things and blocking ventilation passage. (Passage blocking can cause fire) Avoid scrubbing the surface with Benzene or Volatile gasoline.
- Page 12 1. Before Starting Keep away from the water Clear of the dust. Dust or Metallic particles inside the set can cause fire and electric shock. Avoid dissembling and assembling. Do not open the set. Do not snatch the cable to plug out. Keep the distance from Magnetic items and Audio Speaker.
-
Page 13: Recycling
1. Before Starting 1.2 Recycling Units which are furnished with this icon are not allowed to normal bin. Batteries are also not allowed to normal bin. 1.3 Accessories - Operating Instruction (this Manual) - Batteries (2x Typ AAA 1,5V) - SCART to CHINCH adapter - Remote Control - AC/DC Adapter 230VAC - Car-Adapter 12VDC... -
Page 14: Controls And Functions
2. Controls and Functions 2.1 Front Panel 1. Stand-By indicates stand-by mode 2. Card IN indicates inserted CI-card 3. LED-Display displays channel and/or time 4. IR-Sensor receives signal of the remote control 5. POWER key to switch on or off 6. -
Page 15: Rear Panel
2. Controls and Functions 2.2 Rear Panel 1. DISH IN to connect the lead of your dish 2. AUDIO (L/R) connect to your stereo amplifier 3. IR-Sensor plug in the external IR remote eye 4. LOOP OUT to connect such as additional analog receiver 5. -
Page 16: Remote Control
2. Controls and Functions 2.3 Remote Control 1. POWER: turns the receiver on or off 2. TV/STB: switches between TV and SAT mode 3. Menu: display the main menu of the receiver and come out from inner level to viewing mode (exit all) 4. -
Page 17: Connect Receiver
3. Connect Receiver 3.1 How to connect the receiver Connection of receiver and TV-unit Connect the TV set by using a fully featured SCART cable to the “TV-Scart” socket of your receiver. Connection of receiver and Sat antenna Connect the satellite antenna cable tot he DISH IN socket Connection of receiver and hi-fi system If you want to use your HiFi-System for audio output, connect the „AUDIO OUT“... -
Page 18: Menu-Overview
4. Menu Overview 4.1 Menu Instruction Main menu Sub menu Press the Menu button to display the menu. You can select the Sub menu using / / / button. The selected Sub menu becomes highlighted. When you have selected the Sub menu you want, press the (OK) button. When you want to return tot he previous menu, press the button. -
Page 19: Menu Structure
4. Menu Overview 4.3 Menu-structure Installation Dish: Select the dish and LNB Settings for channel search. Auto Scan: Search the channel oft he selected satellite automatically without inputting the special parameters. Manual Scan: Search the channel manually with user’s supplied parameters. Transponder: Delete, edit and add satellite or transponder parameters. -
Page 20: Menu Operation
5. Menu Operation 5.1 First Installation You can install the receiver using the menu item „First Installation” for your convenience. This menu item allows you to set your receiver using simple procedure. a) Select the desired language using the / button. b) Press the (OK) button to confirm and go tot he next step. - Page 21 5. Menu Operation a) Select LNB Type using the / button. b) Press the (OK) button to confirm and go tot he next step. a) If you use a DiSEqC 1.0 switch, select DiSEqC option using the / button. b) Press the (OK) button to confirm and go tot he next step.
-
Page 22: Installation
5. Menu Operation 5.2 Installation 5.2.1 Dish a) Press the Menu button to display the main menu. b) Press the (OK) button on the sub menu. The password pop-up window appears. All sub menus such as Dish, Auto Scan, Manual Scan and Transponder Edit on the Installation are locked by password. - Page 23 5. Menu Operation a) Press the button to watch the satellite in the pre-programmed list. Press “OK“ button to replace the current satellite with the selected satellite. a) Press the / button, the right screen shows the transponder lists. b) Press the (OK) button to select other transponder. If you select one oft he alternative satellite names, the transponder list is changed automatically according tot he selected satellite name.
- Page 24 5. Menu Operation a) Select Switch Type if used. b) If you use DiSEqC 1.0 switch, select DiSEqC on the Switch Type. c) Select one oft he DiSEqC inputs from the Option. a) Select Switch Type. b) If you use a DiSEqC 1.1 switch, select SMATV on the Switch Type.
-
Page 25: Auto Scan
5. Manu Operation a) Select Switch Type. b) If you use an USALS motor, select from the Switch Type using the button. c) Change position on your USALS motor through the Option. „Go to Position“: Press the (OK) button to move the motor tot he position calculated by the longitude and latitude. -
Page 26: Manual Scan
5. Menu Operation a) Select Free+CAS or CAS using the / / / button. b) Press the Opt, CAS Pop-up window will appear. c) Select the kind of CAS using the / button. d) Press the “OK” button. e) If you want to scan the satellite, move to „Start Scan“... - Page 27 5. Menu Operation Dish: The target satellite for the manual scan.. Frequency: The frequency oft he transponder you want to find manually.. Polarity: The polarity oft he transponder you want to find. Symbol Rate: The Symbol Rate of the transponder you want to find. Code-Rate: The code rate oft he transponder you want to find.
-
Page 28: Transponder Edit
5. Menu Operation 5.2.4 Transponder edit a) Press the Opt button to select the satellite in the left screen or the transponder in the right screen. b) Select one of Delete, Edit or Add from the pop-up window. (The satellite and transponder cannot be deleted it the channels of the selected satellite have already been Downloaded). -
Page 29: Language
5. Menu Operation 5.3.2 Language a) Select the language options using the button. b) Press the (OK) button to change the selected language. Display: Change the language used in the OSD and Menus Audio 1-2: Change the language that you listen to audio in. -
Page 30: Parental Control
5. Menu Operation 5.3.4 Parental Control a) If you want to change the password (0 0 0 0), press the / button, following message requiring new password will be displayed. b) Change the password into new one by numeric button c) To ensure your change, you are supposed to input a password once more. -
Page 31: Osd Display
5. Menu Operation 5.3.5 OSD Display a) Select the options using the / / / button. b) If you press the (OK) button, current changing state will be saved and exit. Banner display time: Banner will disappear after setting time passed Screen Saver: Screen Saver is a function to protect your TV in case Radio status or in Menu (Disable, 5, 10, 20,... -
Page 32: Timer Setting
5. Menu Operation 5.4.2 Timer-Settings How to adjust the timer for recording on VRC. For recording the TV programs you can use the timer-function. Up to 8 programs can be pre-adjusted. a) Open the EPG by using EPG key and choose the desired program by pressing the / / / arrow keys b) Press red OPT key to confirm. -
Page 33: Delete
5. Menu Operation : Just one time action (after action was done, event will be deleted on the list) : Action execution in weekday : Action execution in weekend : Action execution weekly :Action execution daily : TV channel : Radio channel 5.4.2 Delete You can delete channels. -
Page 34: Softwareupdate Via Satellit
5. Menu Operation 5.5.2 Software update via Satellite (OTA) You can upgrade the latest software. The receiver checks whether the new S/W is released when you view channels or select this OTA menu. If the new version is detected, the receiver will be rebooted automatically and the download screen will appear. -
Page 35: Software Upload
5. Menu Operation 5.5.3 Software Upload a) Connect the receiver with another receiver of PC through RS-232. b) For the target receiver, turn the AC Power off, then turn on again. c) You can watch the transfer status of software. 5.6 Status (Receiver) 5.6.1 Information a) You can watch the system information such as... -
Page 36: Banner Information
6. General Operation 6.1 Banner Information Audio Parental Teletext Subtitle Language Lock PayTV Dolby Control Detailed Event Information Channel Number and Current Time Name Current Event Event Progress Bar Name Signal Strength Bar Signal Quality Bar TV or Radio a) Whenever you press the INFO button, the banner information window appears for a few seconds. -
Page 37: Tv & Radio Changing
6. General Operation 6.2 TV & Radio changing While watching TV or listening to Radio, you can change the mode using the TV/Rad button. 6.3 TV or Radio Channel Lists Programmliste Selection Screen Channel Name Information about the membership of the favorite-lists Status der Fav.-Listen Kanaldaten... -
Page 38: Program View
6. General Operation 6.3.1 Program – „View“ a) To open the program list please use OK or A-Z (sorted channels) button. b) Use the buttons to move the cursor. c) Press OK button to choose the desired channel. d) The INFO button shows you detailed information about the current event. -
Page 39: Delete Mode
6. General Operation 6.3.2 Program – „Delete“ a) Use the button to select the Delete Icon. b) Select the channel you want to delete with the / button and confirm with the OK button. c) Press the button to save the adjustment and to exit. 6.3.3 Program –... -
Page 40: Rename Mode
6. General Operation 6.3.6 Programs /Favorites‘ List – „Rename“ a) Please close all menus and press the OK button to open the program list. b) Use the button to select the Rename Icon. c) Select the channel you want to rename and press OK button. -
Page 41: Lock Mode
6. General Operation 6.3.5 Program – „Lock“ a) Please close all menus and press the OK button to open the program list b) Use the button to select the Lock Icon. c) Select the channel you want to lock and press OK button. -
Page 42: Audio Language
6. General Operation 6.4 Option Press the OPT button to open the Option-Menu. Here you have the option between “audio”, “teletext” and “subtitle”. To select please use the / button. 6.4.1 Audio-Language a) Select „Audio“ by using the / button. b) Use the button to select the desired audio-language. -
Page 43: Audio Mode
6. General Operation 6.5 A/V + Press A/V+ to start the Audio/Video menu. 6.5.1 Audio-Mode a) Select the audio mode by using the button. b) Use the button to choose the desired option: STEREO, LEFT, RIGHT and JOINT (Joint Stereo). c) Press OK button to confirm. -
Page 44: Mosaic Display
6. General Operation 6.5.4 Mosaic Screen a) The mosaic screen gives you a brief overview about the current programs. b) Select the menu item mosaic mode by using the / button firstly. c) Select now the desired mosaic mode by using the / button. -
Page 45: Favorites List
6. General Operation 6.6 Favorites List a) By using the Fav button you can start the applied favorites’ lists. b) Use the arrow keys for selection or the ALL button for the complete list. c) Press OK button to confirm. a) The functions within lists will be as same as in the complete list. -
Page 46: Epg
6. General Operation 6.8 EPG (Electronic Program Guide) Press the EPG button to start the electronic program guide. und den elektronischen Programmführer zu starten. The showing information will be provide by the local television station. Title of the broadcast Time bar a) Choose your program by using the / / / arrow keys. -
Page 47: General Information
7. General Information 7.1 Features One CI-Slot 4000 Program Storage Capacity Electronic Program Guide EPG Fast Teletext 8 Favorits‘ Program lists DiSEqC Version 1.0, 1.2 and USALS compatible One-Cable-Solution Software-Update via Satellite and RS-232 connection 1 Scart-Connection multilingual OSD menu Blindscan search all channels received from your antenna External infrared eye with 3 meter length Power supply 12/24VDC... -
Page 48: Technical Data
7. General Information 7.2 Technical Data A. HF-Bereich SAT-ZF-Frequency 950 MHz to 2150 MHz RF Input Signal Level -25 to -65 dBm RF Impedance 75 Ohm Demodulation QPSK HF-Modulator K 21 – K 69 B. Video Video-Decoding MPEG-2 Video-Data Rate 1,5 –... -
Page 49: How To Solve Malfunctions
7. General Information 7.3 Glossary Conditional Access System Common Interface DiSEqC Digital Satellite Equipment Control Electronic Program Guide Forward Error Correction Free to Air Low Noise Blockconverter, MPEG Moving Picture Experts Group Packet Identification PIN-Code Personal Identification Number Copyright Homecast Europe GmbH V1.6 Technische Änderungen und Irrtümer vorbehalten... - Page 50 7. General Information 7.4 How to solve malfuntions There may be various reasons for the abnormal operation oft he receiver. Check the receiver as stated bellow: Problem Cause Measure The display is nothing The power cable is not connected Please check the power cable showing No picture or sound Wrong connection of the audio/video...
- Page 51 INSTRUCTION MANUAL 17” DIGITAL TFT LCD COLOR MONITOR CM-1710D/TM-1710D (Option) Thank you for choosing this product. Please read this instruction manual carefully before operating this product.
- Page 52 Contents 1. Safety Rules Please read the Safety Rules carefully before using this product. Following of the safety rules prevents users from any damage “ ” related with the misuse of this product. It is very important that users follow these safety rules. We state Caution and Warning to clarify any potential for damage “...
- Page 53 Do not use in bathtub. Do not pull the plug with wet hands. ---This may cause electric shock. Do not use unapproved power voltage. Caution ---This may cause fire or electric shock. Do not use unapproved Cigarette Lighter Adapter. --- This may cause fire ,electric shock and/or malfunction. Do not put the product in a place where sudden temperature increase occurs such as the vehicle’s dashboard.
- Page 54 Unplug the product and remove cords when moving. --- It may damage cords and cause fire and/or electric shock. The car engine should be running when you use the product in a car. If you find any strange occurrences or malfunction in the product or any foreign ---Without the engine running, you may have excessive discharge of the car battery.
-
Page 55: Before Use
2. Before Use Precautions (when you use the product in a car) To safely use the product, please read the user’s manual carefully before use. =The driver should not use the product while he/she is driving. =Connect all lines as directed in the product connection map in the manual. =Quality of pictures on screen may vary depending on the radio field strength in different locations. -
Page 56: Special Features Of The Product
3. Special Features of the Product 4. Terms of part Applied high resolution and low reflection DIGITAL TFT LCD (1280 x 1024) ① All electronic control functions Sensor for receiving signal from ① REMOTE SENSOR WINDOW Convenient Graphic OSD the remote control. All functions are displayed on screen (OSD function) ②... -
Page 57: Remote Control
5. Remote Control ① ② ① POWER Power ON/OFF Key ⑫ SOUND Sound selection button ④ ③ TV/AV POWER Select TV, external video, s-video, DVI, D-sub analog ② TV/AV ⑬ 0~9 Changes CHANNEL by selecting numbers directly (only TM-1710D) ⑥ Displays present status and volume level Quick channel scan and channel store (only TM-1710D) ⑤... -
Page 58: Functions
6. Functions ※( ), it means a remote control button. MENU (MENU) POWER (POWER) AV/ S-VIDEO =POWER ON/OFF KEY ① Push POWER(POWER) button POWER is on. PICTURE(PICTURE) ② Push POWER (POWER) button again. POWER is OFF. ※ With VOL ▶, go to SUB MENU. - Page 59 SETUP(SETUP) SOUND(SOUND) ※ With VOL ▶, go to SUB MENU. After adjusting in SUB MENU, ▶ ENGLISH LANGUAGE ※ With VOL ▶, go to SUB MENU. After adjusting in SUB MENU, press MENU to exit. MUTE press MENU to exit. OSD TIME VOLUME TRANSLUCENT...
- Page 60 TV Mode (only TM-1710D) PICTURE(PICTURE) ※ With VOL ▶, go to SUB MENU. After adjusting in SUB MENU, TYPE ① BRIGHTNESS BRIGHTNESS Adjust the brightness of video. press MENU to exit. CHANNEL CONTRAST ② CONTRAST Adjust the ontrast of video. ADD/DELETG ③...
- Page 61 PC (ANALOG) COLOR PICTURE The tone of color can be changed from red-dish white to bluish white. ※ With VOL ▶, go to SUB MENU. After adjusting in SUB MENU, BRIGHTNESS The individual color components are also user customizable. press MENU to exit. CONTRAST ※...
- Page 62 DISPLAY MODES PC (DVI) For the display modes listed below, the screen image has been optimized during manufacture. PICTURE Horizontal Vertical Pixel Clock Sync Polarity Mode Resolution F equency(KHz) F equency(Hz) F equency(MHz) (H/V) ※ With VOL ▶, go to SUB MENU. After adjusting in SUB MENU, BRIGHTNESS press MENU to exit.
- Page 63 RECALL Displays present status and volume level. OSD MESSAGE OUT OF RANGE TV channel scan and memory. AUTO PIC ① The screen shows this when signal is out of range. SLEEP Sleep timer(0/10/20/30/60/90/120) TV/CATV Select TV, external video, s-video, DVI, D-sub analog. NO SIGNAL MUTE ②...
-
Page 64: Connections
7. Connections Backside monitor stand detached CM-1710D/TM-1710D (without monitor stand distance between each mounting hole 75mm) ① ANT IN Ant in for TM-1710D AC/DC SMPS 12V, 5A (option) ② PC-AUDIO IN Audio input DSUB ANALOG, DVI DIGITAL mode ③ DVI IN DVI DIGITAL input ④... -
Page 65: Changing Remote Control Battery
8. Changing Remote Control Battery 9. Specifications CM-1710D/TM-1710D 1. Slide and open the battery cover. I T E M SPECIFICATION SIZE 43.18cm (17.0 INCH) SAMSUNG(LTM170EU-L11 & L21) MAKER NUMBER OF PIXELS 1280 X 1024 LCD PANEL 0.264(H) X 0.264(V)mm PIXEL PITCH BRIGHTNESS 300cd/㎡... - Page 66 MEMO I T E M SPECIFICATION POWER, MENU, SELECT, ▼▲ ◀▶ USER CONTROLS S/BY LED, REMOTE SENSOR WINDOW OSD DISPLAY LANGUAGES 7 LANGUAGES VOLTAGE DC 12V POWER SUPPLY 36WATT CONSUMPTION SOUND SIGNAL WATT STEREO DIMENSION ( W X H X D ) 422(W) X 371(H) X 38.5(D)mm 0 C~ + 50 C OPERATING TEMPERATURE...
Need help?
Do you have a question about the CSA-1300P and is the answer not in the manual?
Questions and answers