Table of Contents
Advertisement
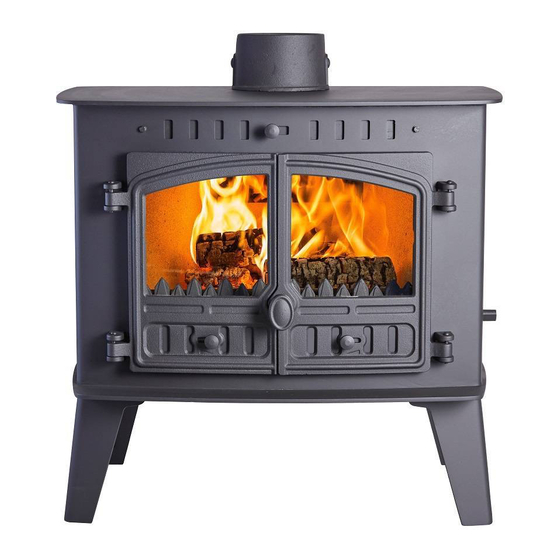
I N G L E N O O K
S T O V E
L O W
O U T P U T
M U L T I F U E L
S T O V E
Installation and Operating
Instructions
Please hand these instructions to the stove user when the installation
is complete. Leave the system ready for operation and instruct the
user in the correct use of the appliance and operation of controls.
Advertisement
Table of Contents

Related Manuals for Hunter Stoves Inglenook Stove


Summary of Contents for Hunter Stoves Inglenook Stove
- Page 1 I N G L E N O O K S T O V E L O W O U T P U T M U L T I F U E L S T O V E Installation and Operating Instructions Please hand these instructions to the stove user when the installation is complete.
-
Page 2: Assembly Instructions
Assembly Instructions PLEASE READ THESE INSTRUCTIONS CAREFULLY It is important that your stove is correctly installed, as Hunter Stoves Limited cannot accept responsibility for any fault arising through incorrect installation. Flue Collar Place the flue collar on the top or rear outlet as required and secure to the four locating tabs inside the flue outlet using the M6 nuts &... - Page 3 Side Plates Right Hand Side Plate Locating Gap Guide the Side Plate into stove and position so that the locating gap, in the Side Plate, is above the locating plate, which is welded into the stove, and lower into position. (This must be done with the Cam Bar in position but may be easier to...
- Page 4 Baffle Plate The baffle plate is factory fitted. Below shows correct orientation of the baffle and the fitting sequence that will need to be used when servicing your Inglenook stove. Back Edge (Lip facing up) Front Edge (Lip with cut out facing down)
-
Page 5: Installation Instructions
INSTALLATION INSTRUCTIONS READ THESE INSTRUCTIONS CAREFULLY BEFORE INSTALLATION These instructions cover the basic principles to ensure satisfactory installation of the stove, although detail may need slight modification to suit particular local site conditions. In all cases the installation must comply with current Building Regulations, Local Authority Byelaws and other specifications or regulations as they affect the installation of the stove. - Page 6 Where the chimney is believed to have previously served an open fire installation, it is possible that the higher flue gas temperature from the stove may loosen deposits that were previously firmly adhered, with the consequent risk of flue blockage. It is therefore recommended that the chimney be swept a second time within a month of regular use after installation.
- Page 7 All non-combustible walls closer than 300mm to the stove should be at least 75mm thick. In all instances the back wall of the fireplace recess and the hearth should be made of non-combustible material. Allow an apron of a least 300mm at the front of the stove and 150mm on either side. The hearth on which the stove is to be placed should not be less than 125mm thick and should be in accordance with the current building regulations.
- Page 8 Clearances to Wooden Beams All dimensions stated are minimum 150 mm and assume that additional heat shielding is not installed Wooden Beam 150 mm 6” Flue Pipe – Twin Wall 120 mm 450 mm 6” Flue Pipe – Single Wall Wooden Beam Inglenook Flat Top Stove 75 mm...
- Page 9 Commissioning and Handover Upon completion of the installation, allow a suitable period of time for any fire cement and mortar to dry out. A small fire may then be lit and checked to ensure the smoke and fumes are taken from the stove up the chimney and emitted safely to atmosphere.
-
Page 10: Operating Instructions
Operating Instructions This appliance is not suitable for use in a shared flue Aerosol Sprays DO NOT USE AN AEROSOL SPRAY ON OR NEAR THE STOVE WHEN IT IS ALIGHT. Air Controls This stove has been designed to burn efficiently with a relatively low output, for it’s size. - Page 11 Damper Assembly (Optional) When burning wood, the flue damper assembly may be fitted. When the damper is set in the open position the chimney draws at full draught, increasing the volume of airflow through the stove and flue. Shutting the damper restricts the flow, slowing the rate of burning.
- Page 12 With some solid mineral fuels a residue of burnt fuel or clinker will accumulate on the grate, allow the fire to go out periodically to remove this. Important! - We cannot stress firmly enough how important it is to empty the ashpan regularly.
- Page 13 Recommended Fuels Anthracite is an approved natural smokeless fuel (not processed) and therefore can vary greatly in quality and performance. It generally requires excellent air supply and above average fire-bed temperatures to maintain maximum performance and with experience we would suggest that it is used in conjunction with other approved manufactured smokeless fuels as per the HETAS approved list.
-
Page 14: Safety Notes For Your Guidance
Safety notes for your guidance FIRES CAN BE DANGEROUS – Always use a fireguard in the presence of children, the elderly or the infirm. The fireguard should be manufactured in accordance with BS 6539 – Fireguards for use with solid fuel appliances. DO NOT OVERFIRE –... -
Page 15: General Maintenance
Check the rope around the door and glass. If rope is becoming detached, use Hunter Stoves rope glue to reattach it. If the rope is in a poor condition, a replacement rope kit may be ordered from the Hunter Stoves spares range. Chimney and Flueways It is important that the chimney, flueways and any connecting flue pipe are swept regularly. -
Page 16: Troubleshooting
Troubleshooting Fire will not burn Check that: 1. The air inlet is not obstructed in any way. 2. Chimneys and flueways are clear. 3. A suitable fuel is being used. 4. There is an adequate air supply into the room. 5. -
Page 17: Right Hand Door
INGLENOOK SPARES RIGHT HAND DOOR Right Hand Door (HHR08/020) Glass Clip (HHR08/046) Door Glass (HHR08/047) Glass Clip Screw (M58CHS/SS) Door Knob (HFR07/028) 8mm Flat Washer (????) M8 Nut (M8NUT) Fan catch (HHR08/018) Door Slider (HHR08/022) Slider Knob (HHR08/045) LEFT HAND DOOR Left Hand Door Glass Clip (HHR08/046) (HHR08/021) - Page 18 BODY ASSEMBLY - PART SECTION – L.H.SIDE Flue Collar (HHR08/023) Flue Cover (HHR08/024) Top Air Slider (HHW08/009) Slider Knob (HCR06/046) Side Bricks (HIN04/038) Baffle Plate (HIN03/013) Rear Bricks (HIN03/014) Riddling Bar – Upper (HHW05/034) Riddling Bar – Lower (HHW05/033) Cam Bar (HIN03/011)
Need help?
Do you have a question about the Inglenook Stove and is the answer not in the manual?
Questions and answers