Table of Contents
Advertisement
Quick Links
Advertisement
Table of Contents

Related Manuals for Permobil Chairman 2k


Summary of Contents for Permobil Chairman 2k
-
Page 1: Service Manual
SERVICE MANUAL Chairman 2k/2s... - Page 3 Head Office of the Permobil group Permobil AB Box 120, 861 23 Timrå, Sweden Tel: +46 60 59 59 00. Fax: +46 60 57 52 50 E-mail: info@permobil.se Produced and published by Permobil AB, Sweden Edition no.7, 2006-01 Article no.: 201158-US-0...
-
Page 4: Table Of Contents
Contents Contents Introduction....................5 Technical support..................5 Spare parts ....................5 Warranties ....................5 Maintenance ..................... 5 Identification plates ..................6 Chassis ..................... 6 Pilot+ output stage..................6 Control panel .................... 6 Operating the seat elevator manually ............7 Covers......................8 Batteries ....................... -
Page 5: Introduction
Permobil to ensure that the correct information is provided. Technical Support In the event of technical problems, you should contact your dealer, or Permobil Inc. USA at 800-736-0925. Spare parts Spare parts must be ordered through your dealer. -
Page 6: Identification Plates
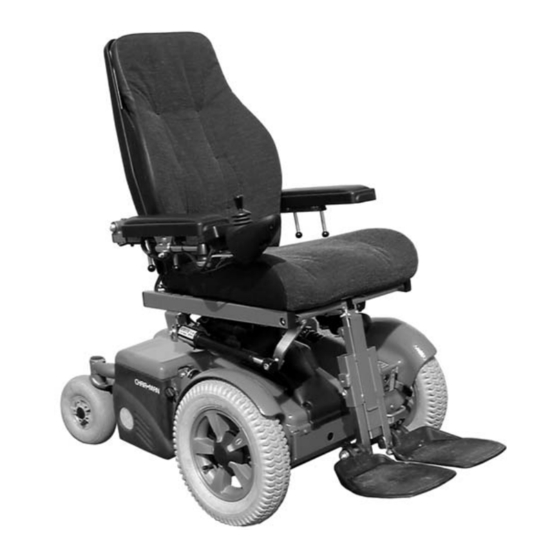
Identification plates Identification plates Chassis Fig. 1. Chassis Serial Number Pilot+ power module (Controller) Fig. 2. Pilot+ Controller Joystick Fig. 3. Joystick/Control Panel... -
Page 7: Operating The Seat Elevator Manually
Operating the seat elevator manually Operating the seat elevator manually Warning! Using a drilling machine during the manual operation of the seat lift is not allowed. There is a risk of material damage. Electric seat elevator If the seat elevator will not move normally because the battery is flat or the adjusting mechanism is broken. -
Page 8: Covers
Covers Covers Detachment 1. Run the seat up to its uppermost position. See page 7 for instructions to manually raise the seat. 2. First remove the seat lift cover. It is mounted with four plastic plugs which can be flipped up using a screwdriver. -
Page 9: Batteries
Batteries Batteries NB! Use protective goggles when working with batteries. Removal 1. Place the wheelchair on a level surface. 2. Put the circuit breaker in the “OFF” position. It is accessible through a cut-out in the chassis cover, see fig. 9. 3. -
Page 10: Drive Wheels
Drive wheels Drive wheels Removal 1. Switch off the main switch. 2. Lift up the chair and support it on blocks, so that the wheels are off the ground. 3. Undo and remove the hubcap (6), bolt (3) and the three washers (1 and 2), see fig. 13. 4. -
Page 11: Replacement And Adjustment Of Shock Absorbers
Shock absorber Replacement and adjustment of shock absorbers Removal Run the seat up to its highest position. See page 7 for instructions to manually raise the seat. Switch off the main power switch. Detach the front fender on the side on which the shock absorber is to be replaced, see page 8. -
Page 12: Wheel Lock Release Cables
Wheel lock release cable Wheel lock release cable Removal Run the seat up to its highest position. See page 7 for instructions to manually raise the seat. Remove the covers, see page 8. Remove the wheel lock release cover, see fig. 16-17. Loosen the locking nut(18:2). -
Page 13: Magnetic Wheel Locks
Magnetic wheel lock Magnetic wheel lock Removal 1. Run the seat up to its highest position. See page 7 for instructions to manually raise the seat. 2. Switch off the main power switch on the control panel. 3. Set the main fuse to the “OFF” position, see page 30, fig. - Page 14 Magnetic wheel lock Fitting 1. Using the adjustment screws, adjust the setting of the magnetic wheel lock as per the instructions on the back side of the magnetic wheel lock, see fig. 22. Fig. 22. The wheel lock setting is adjusted using the two adjustment screws.
- Page 15 Magnetic wheel lock 4. Thread a screw through in order to align the parts. Mount the rubber seal with the drainage hole downwards. Take note of the position of the wheel lock release arm, mount the wheel lock so that the wheel lock release arm is aligned with the motor's cable fastener.
-
Page 16: Drive Motors
Drive motor Drive motor Removal 1. Run the seat up to its highest position. See page 7 for instructions to raise seat manually. 2. Switch off the main power switch on the control panel. 3. Put the circuit breaker in the “OFF” position, see fig. - Page 17 Drive motor 9. Unscrew and remove the screw holding the lower shock absorber fastener (31:1) and bend the shock absorber upwards. 10. Loosen the three screws holding the motor approx. 1 revolution, see fig. 31:2. 11. Detach the spring strut by unscrewing and removing the screw on the back edge of the spring strut, see fig.
-
Page 18: Seat Elevator
Seat lift Seat lift Removal 1. Raise the seat using the accompanying seat lift crank, see page 7. Raise the seat until it will not go any higher while you crank, i.e. the seat lift is “not engaging”. 2. Switch off the main power switch on the control panel. - Page 19 Seat lift The upper part of the seat lift is mounted on the seat and can be detached as described in the following. 12. Unscrew and remove the two screws holding the seat plate, see fig. 36. Fig. 36. The seat plate is mounted with two screws. 13.
-
Page 20: Seat Elevator Cables
Seat lift cable Seat lift cable Removing 1. Remove the seat lift; follow the instructions on page 18. 2. Remove the seat lift sensors. Note the position of the sensors for refitting, see fig. 40-41. Fitting Fitting is the reverse procedure. Fig. -
Page 21: Seat Elevator Motor
Seat lift motor Seat lift motor Removing 1. Remove the seat lift, see page 17. 2. Disconnect the seat lift cable at the motor, Green note position connectors, see fig. 42. 3. Remove the seat lift motor by taking out the three bolts that hold it, see fig. -
Page 22: Seat Elevator Drive Belt
Seat lift drive belt Seat lift drive belt Removing 1. Remove the seat lift, see page 18. 2. Loosen the two bolts holding the shaft to the seat lift motor. Push the shaft sideways to slacken the drive belt. 3. Remove the belt from the motor shaft, then from the toothed wheel on the seat lift screw. -
Page 23: Control Panel
Control panel Control panel Removal Switch off the main power switch on the control panel. Put the circuit breaker in the “OFF” position, see page 30, fig. 66. Disconnect the control panel cable by pulling the connector at the rear of the control panel straight backwards. -
Page 24: Pilot+ Output Stage
Pilot + output stage Pilot+ controller Removal 1. Run the seat up to its highest position. See page 7 for instructions to raise the seat manually. 2. Switch off the main power switch on the control panel. 3. Set the main fuse to the “OFF” position, page 30, fig. -
Page 25: Sls Drive Stage
SLS Drive stage SLS Drive stage Removal 1. Run the seat up to its highest position. See page 7 for instructions to raise seat manually. 2. Switch off the main power switch on the control panel. 3. Put the circuit breaker in the “OFF” position, see page 30, fig.66. -
Page 26: Esp Module
ESP module ESP module (Applies to Chairman 2s) Removal 1. Raise the seat to it highest position, or to raise it manually, see page 7. 2. Turn off the main power switch on the Control Panel. 3. Set the main fuse in the “OFF” position, see page 30. - Page 27 ESP module 5. The ESP module is ready programmed from factory. module reprogrammed, see the technical manual of the ESP module for full details. Warning! The ESP module and the Pilot+ output connection must be correctly programmed when the wheelchair is in use. Otherwise the wheelchair may be very difficult to maneuver, with a high risk of accidents.
- Page 28 ESP module ESP module (Applies to Chairman 2s Lowrider) Removal 1. Raise the seat to it highest position, or to raise it manually, see page 7. 2. Turn off the main power switch on the Control Panel. 3. Set the main fuse in the “OFF” position, see page 30.
- Page 29 ESP module 5. The ESP module is ready programmed from factory. module reprogrammed, see the technical manual of the ESP module for full details. Warning! The ESP module and the Pilot+ output connection must be correctly programmed when the wheelchair is in use. Otherwise the wheelchair may be very difficult to maneuver, with a high risk of accidents.
-
Page 30: Circuit Breaker And Fuses
Check the cause thoroughly before you reset the circuit breaker. Fig. 66. Circuit breaker/Battery isolator. Chairman 2k 63A Changing the circuit breaker Chairman 2s 80A 1. Switch off the main power switch on the control panel. -
Page 31: Charge Fuse
Fuses & circuit breaker Replacement of charging fuse The charging fuse is located at the front edge of the left front fender, under the charging outlet, see fig. 69. Switch off the main power switch on the control panel and disconnect the charger before replacement of the charging fuse is performed. -
Page 32: Distribution Chart
Distribution chart... -
Page 33: Distribution Chart
Distribution chart Distribution chart... -
Page 34: Troubleshooting
Troubleshooting Error signals - Battery voltage indicator Every time the wheelchair is started up, a check is performed on parts of the wheelchair’s electronics. If any faults have arisen in these parts, this is shown on the control panel’s battery voltage indicator by one or more blinking lights. - Page 35 Troubleshooting CAUSE SOLUTION Check the battery and the connections between the High battery voltage battery and the control unit. Green Failure in wheel lock circuit Check the connections to the magnetic wheel lock. Green Check the contacts to the output stage. If the fault Fault in electronics persists, change the output stage.
- Page 36 The troubleshooting guide below describes a number of events that can arise when you use your wheelchair, as well as providing suggestions for solutions. Note that this guide does not describe all the possible events that can arise, and you should always get in touch with your service contact or Permobil when you are unsure...
- Page 40 Article no.: 201158-US-0...
Need help?
Do you have a question about the Chairman 2k and is the answer not in the manual?
Questions and answers