Table of Contents
Advertisement
Quick Links
Advertisement
Table of Contents

Subscribe to Our Youtube Channel
Related Manuals for HomeMatic HM-RC-8


Summary of Contents for HomeMatic HM-RC-8
- Page 1 Operating manual (p. 30) Remote Control 8 buttons HM-RC-8...
-
Page 2: Scope Of Delivery
Scope of delivery Quantity Item HomeMatic Remote Control 8 buttons 1.5 V LR03/micro/AAA batteries Operating manual 1st English edition 06/2014 Documentation © 2014 eQ-3 Ltd., Hong Kong All rights reserved. Translation of the original version in German. This manu- al may not be reproduced in any format, either in whole or in part, nor may it be duplicated or edited by electronic, mechanical or chemical means, without the written consent of the publisher. -
Page 3: Table Of Contents
General information about the HomeMatic system ....33 Function and device overview ... . 34 Start-up. -
Page 4: Information About This Manual
Information about this manual Read this manual carefully before beginning operation with your HomeMatic components. Keep the manual so you can refer to it at a later date if you need to. If you hand over the device to other persons for use, please hand over the operating manual as well. -
Page 5: General Information About The Homematic System
For consequential damages, we assume no liability! General information about the HomeMatic system This device is part of the HomeMatic home control sys- ® tem and works with the bidirectional BidCoS wireless protocol. All devices are delivered in a standard con- figuration. The functionality of the device can also be... -
Page 6: Function And Device Overview
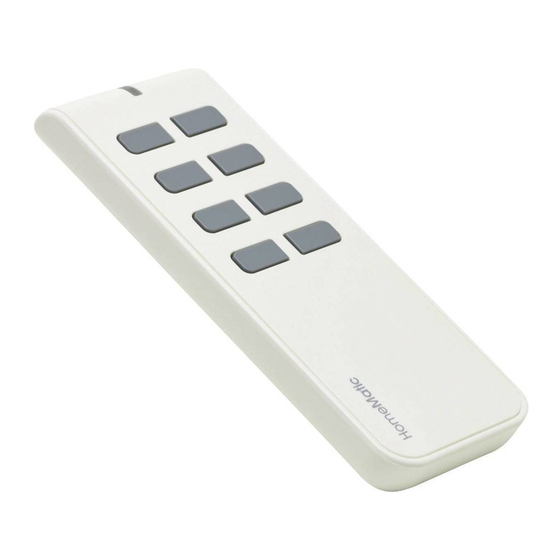
Unit. Thus, lights can be switched on and off and shutters can be moved up or down. You can individually define the functions of all eight buttons. A single button can be taught-in to work with one or more HomeMatic components. At the push of a button, several functions can be executed simultaneously. - Page 7 Function and device overview Controls: A – Button pair 1 B – Button pair 2 C – Button pair 3 D – Button pair 4 E – Device LED F – Release button G – Teach-in button H – Battery compartment...
-
Page 8: Start-Up
Start-up Start-up 5.1 Inserting and replacing batteries 5.1.1 Inserting batteries To start up the device, please insert the batteries. To do this, proceed as follows: • Open the battery compartment on the rear (H) by pressing the release button (F) with you finger (1.) and moving the cover of the remote control to the back (2.). - Page 9 Start-up • Place two LR03/AAA/micro batteries into the bat- tery compartment, using the polarity markings to ensure the polarity is correct. • Close the battery compartment by replacing the cover and pushing it with light pressure to the end of the housing until it latches into place. 5.1.2 Changing batteries If you press a button on the remote control and the flash- ing code indicating empty batteries is displayed (5 x red...
-
Page 10: Teaching-In
Please read this entire section before starting the teach-in procedure! To integrate the remote control into your HomeMatic system and enable it to communicate with other Home- Matic devices, you must teach it in first. You can teach- in the remote control directly to other HomeMatic de- vices or to the HomeMatic Central Control Unit. - Page 11 Start-up 5.2.1 Teaching-in directly to HomeMatic devices If you want to teach-in the remote control to one or more HomeMatic devices, you must put the devices to be taught-in into teach-in mode and select the required button/channel. During teach-in mode, always one left and one right button are taught-in as button pair.
- Page 12 Start-up • The remote control is now in configuration mode. The device LED flashes green to indicate this. (To exit configuration mode, briefly press the teach-in button again.) • To enter teach-in mode, press the remote control button in to which you wish to teach a function. The device LED flashes orange slowly. (Provided the device to be taught-in is not yet in teach-in mode, you can cancel teach-in mode on the remote control...
- Page 13 Home- Matic Central Control Unit first. New devices are taught- in to the central control unit via the HomeMatic „WebUI“. A soon as a component has been taught-in to a central control unit, it can only be connected to other components via this unit.
- Page 14 Start-up During teach-in, please make sure you maintain a distance of at least 50 cm between the devic- es and the central control unit. To teach-in your device to the central control unit, pro- ceed as follows: • Open the "WebUI" user interface in your browser. Click the "Teach in devices"...
- Page 15 Start-up mode of your remote control. Therefore, remove the cover and briefly press the teach-in button (G) of your remote control with a pointed object. • The remote control is now in configuration mode. The device LED flashes green to indicate this. (To exit configuration mode, briefly press the teach-in button again.) • As soon as communication between the remote control and the central control unit has been estab-...
-
Page 16: Configuring Newly Taught-In Devices
• Now configure the newly taught-in devices in the inbox as described in the next section ("Configuring newly taught-in devices"). 5.3 C onfiguring newly taught-in devices Once you have taught-in your device to the HomeMatic Central Control Unit, it is moved to the inbox. Here, you must configure the device and its associated channels in order to make them available for operating and con- figuration tasks. Give the device a name and assign... -
Page 17: Operation
Operation Operation In the factory settings, the 8 buttons are defined as three separate button pairs (BP 1, BP 2, BP 3 and BP 4). The right buttons are defined for the functions „On/ Brighter/Up“, the left buttons for the functions „Off/Dark- er/Down“. With the remote control you can • switch lights on and off • dim lights brighter or darker • move shutters up or down. -
Page 18: Errors And Information Indicated By The Device Led
Errors and information indicated by the device LED Shutters raised Light off Errors and information indica- ted by the device LED 7.1 Flashing codes and error messages This information applies to operation with and without a central control unit. -
Page 19: Error Messages
Errors and information indicated by the device LED Error messages Flashing code Meaning Solution 5 x short red Batteries almost Replace the batter- flashes empty ies (see „5.1.2 Changing batteries“ on page 37). 1 x long, 2 The remote control Please contact your x short red is defective. - Page 20 Errors and information indicated by the device LED 1 s lighting up All actuators You can continue green have confirmed with operation. the (most recent) bidirectional com- mand. 2 s lighting At least one Please try again. up red actuator has not confirmed the (most recent) bidirectional com-...
-
Page 21: Weak Batteries
Slow green Remote control see „5.2.1 flashing and has already been Teaching-in directly red light if but- taught-in to a in to HomeMatic ton is pressed central control unit devices“ on page and is therefore blocked for direct teach-in Slow red... -
Page 22: Command Not Confirmed
Errors and information indicated by the device LED the battery has been allowed a brief recovery period. If you are using weak batteries, the device may perform a restart automatically when you press a button. The device LED then briefly flashes red, green and orange, and follow this with 5 brief red flashes to indicate that the batteries are weak. 7.3 Command not confirmed If a receiver (at least one in cases where multiple de- vices have been taught-in) does not confirm a com-... -
Page 23: Restore Factory Settings
Restore factory settings when they reach the 1% limit until this time restriction comes to an end. HomeMatic devices are designed and produced with 100% conformity to this regulation. During normal operation, the duty cycle is not usually reached. However, repeated and wireless-intensive... - Page 24 Restore factory settings > 5 s • To restore the factory settings of the device, press and hold the teach-in button for at least another five seconds. With the button pressed, the LED starts to flash red faster. • When you release the teach-in button, the reset process is completed. • The red LED stops flashing and the remote control performs a restart.
-
Page 25: Maintenance And Cleaning
Maintenance and cleaning Possible error messages: The errors listed below can only occur if you have taught-in the remote control to a central control unit. If the LED does not start to flash once the button has been held down for 5 seconds but lights up continu- ously instead, this means the remote control cannot be reset as it is taught-in to the central control unit. -
Page 26: General Information About Radio Operation
General information about radio operation 10 General information about radio operation Radio transmission is performed on a non-exclusive transmission path, which means that there is a pos- sibility of interference occurring. Interference can also be caused by switching operations, electrical motors or defective electrical devices. -
Page 27: Technical Specifications
Technical specifications 11 Technical specifications Device short description: HM-RC-8 Supply voltage: 2x 1.5 V LR03/micro/AAA Current consumption: 40 mA (max.) Battery life: > 5 years (based on a usage rate of 10 times per day) Degree of protection: IP20 Ambient temperature: 5 to 35 °C Radio frequency: 868.3 MHz... - Page 28 eQ-3 Entwicklung GmbH Maiburger Straße 36 D-26789 Leer www.eQ-3.de...
Need help?
Do you have a question about the HM-RC-8 and is the answer not in the manual?
Questions and answers