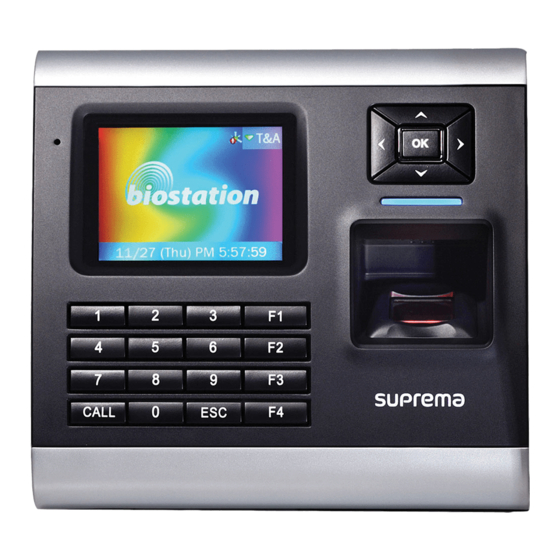
suprema biostation Installation Manual
Innovative fingerprint terminal
Hide thumbs
Also See for biostation:
- User manual (77 pages) ,
- User manual (61 pages) ,
- Installation manual (28 pages)
Table of Contents
Advertisement
Advertisement
Table of Contents

Related Manuals for suprema biostation


Summary of Contents for suprema biostation
- Page 1 www.supremainc.com Innovative Fingerprint Terminal Installation Guide (ver 1.1)
-
Page 2: Table Of Contents
Relay Connection - Automatic Door TTL Input Port Connection – RTE Switches TTL Output Port Connection Wiegand Input Connection – External reader Wiegand Output Connection – Control Panel Ferrite Core Installation System Specification Electrical Specification FCC Rules ⒸCopyright 2007 Suprema Inc. -
Page 3: Product Contents
Basic Contents Wall mounting Star-shape screw for fixing Product Contents screws and holders - 3 ea main body BioStation fingerprint terminal Wall mounting metal bracket USB cable Star-shape small wrench 5pin, 3pin, 6pin, 4pin, 7pin cable – 1 ea Software CD... -
Page 4: Optional Accessories
Product Contents Optional accessories 12V power adaptor Plastic stand type A Plastic stand type B USB fingerprint scanner for enrollment on PC USB memory Wireless LAN Access Point Interphone ⒸCopyright 2007 Suprema Inc. -
Page 5: Connectors For External Interfaces
Ethernet cable connector : RJ45 3pin cable connector - Door 6pin cable connector – Input/Output or Wiegand 4pin cable connector - RS485 7pin cable connector - RS232 or BEACon 5pin cable connector – Power and doorphone 12V power adaptor ⒸCopyright 2007 Suprema Inc. -
Page 6: Cable And Connector Pinout
SHIELD GND GRAY PIN DESCRIPTION WIRE RS485 TRX - YELLOW TRX + BLUE BLACK SHIELD GND GRAY RS232 PIN DESCRIPTION WIRE BLACK RS-232 TX BLUE RS-232 RX YELLOW TTL OUT1 WHITE SHIELD GND GRAY ⒸCopyright 2007 Suprema Inc. Before Start... -
Page 7: Installation Example
Installation Example 6pin cable Network hub Ethernet 3pin cable RS232 7pin cable Door Lock Exit Button ⒸCopyright 2007 Suprema Inc. -
Page 8: Product Dimension
Product Dimension Front Side Bracket (unit : mm) ⒸCopyright 2007 Suprema Inc. -
Page 9: Installation Of Wall-Mount Bracket
Installation of Wall-mount Bracket Fix wall mount bracket on a wall using wall Hook BioStation on the wall mount bracket. mounting screws Fix BioStation and wall mounting bracket using a star shape screw. ⒸCopyright 2007 Suprema Inc. -
Page 10: Power Connection
Method 1 Method 2 Recommended power supply 12V ± 10%, at least 1500mA for BioStation alone installation. Comply with standard IEC/EN 60950-1 To share the power with other devices, use a power supply with higher current ratings. ⒸCopyright 2007 Suprema Inc. -
Page 11: Usb Cable Connection
USB Cable Connection PC USB Port USB Mini Type USB A Type ⒸCopyright 2007 Suprema Inc. Before Start... -
Page 12: Lan Connection
LAN Connection ⒸCopyright 2007 Suprema Inc. -
Page 13: Wireless Lan Connection
Performance of wireless LAN is affected a lot by surrounding environments and the type of AP(Access Point). The list of APs with compatibility tested with BioStation is as follows. Buffalo WHR-HP-G54 Cisco-Linksys WRTH54GS 3COM OfficeConnect 3CRWE554G72T Using an AP other than these lists, wireless LAN communication may not work propeprly. -
Page 14: Rs485 Network Connection
RS485 Network Connection ⒸCopyright 2007 Suprema Inc. Before Start... -
Page 15: Usb Memory Connection
The following is a list of USB memory devices already tested with BioStation. SanDisk cruzer micro 512MB Transcend JF110 512MB Transcend JF150 512MB Samsung PLEOMAX SPUB-S50 1GB Sony Microvault USM512J Imation iFLASH Slim 512MB Imation Swivel Pro 512MB PQI Intelligent Stick 1GB ⒸCopyright 2007 Suprema Inc. -
Page 16: Intercom Connection
Intercom Connection DC12V POWER INTERCOM BIOSTATION Cable Shield (Optional) (1) Power+(Red) (2) GND(Black) (3) Audio(Orange) (4) Data(Blue) (5) Shield(Gray) Connect to Intercom Port REAR VIEW ⒸCopyright 2007 Suprema Inc. Before Start... -
Page 17: Relay Connection - Fail Safe Lock
Relay Connection – Fail Safe Lock ⒸCopyright 2007 Suprema Inc. -
Page 18: Relay Connection - Fail Secure Lock
Relay Connection – Fail Secure Lock ⒸCopyright 2007 Suprema Inc. -
Page 19: Relay Connection - Automatic Door
Relay Connection - Automatic Door ⒸCopyright 2007 Suprema Inc. -
Page 20: Ttl Input Port Connection - Rte Switches
TTL Input Port Connection – RTE Switches BioStation Cable shield(optional) (6) Shield (Gray) (5) GND (Black) (2) TTL IN1/ Wiegand In 1 (Yellow) (1) TTL IN0/ Wiegand In 0 (Blue) Request To Exit #2 Request To Exit #1 ⒸCopyright 2007 Suprema Inc. -
Page 21: Ttl Output Port Connection
TTL Output Port Connection ⒸCopyright 2007 Suprema Inc. -
Page 22: Wiegand Input Connection - External Reader
(6) Shield (Gray) (5) GND (Black) Wiegand Data 1 (White) (2) TTL IN1/ Wiegand In 1 (Yellow) Wiegand Input, Data 1 (1) TTL IN0/ Wiegand In 0 (Blue) Wiegand Input, Data 0 Wiegand Data 0 (Green) ⒸCopyright 2007 Suprema Inc. -
Page 23: Wiegand Output Connection - Control Panel
Wiegand Output Connection – Control Panel ⒸCopyright 2007 Suprema Inc. -
Page 24: Ferrite Core Installation
Ferrite Core Installation ⒸCopyright 2007 Suprema Inc. -
Page 25: System Specification
Product size : 135 x 128 x 50 mm (width x length x depth) ** CAUTION : RISK OF EXPLOSION IF BATTERY IS REPLACED BY AN INCORRECT TYPE. DISPOSE OF USED BATTERY ACCORDING TO THE INSTRUCTIONS ⒸCopyright 2007 Suprema Inc. Appendix... -
Page 26: Electrical Specification
Power Voltage (V) 10.8 13.2 Current (mA) TTL/Wiegand Input Pull-up resistance (Ω) TTL/Wiegand Output = -5mA = 5mA Output resistance (Ω) Relay 30V DC Switching capacity (A) 125V AC Switching power (resistive) 37.5VA Switching voltage (V) ⒸCopyright 2007 Suprema Inc. -
Page 27: Fcc Rules
Increase the separation between the equipment and receiver. Connect the equipment into an outlet on a circuit difference from that to which the receiver is connected. Consult the dealer or an experienced radio/TV technician for help ⒸCopyright 2007 Suprema Inc. - Page 28 16F Parkview Office Tower, Jeongja-dong, Bundang-gu, Seongnam, Gyeonggi, 463-863 Korea E-mail : support@supremainc.com Website : www.supremainc.com Functions and specifications of the product are subject to changes without notice due to quality enhancement or function update. For any inquiry on the product, please contact Suprema Inc.
Need help?
Do you have a question about the biostation and is the answer not in the manual?
Questions and answers