suprema biostation User Manual
Innovative fingerprint terminal
Hide thumbs
Also See for biostation:
- Installation manual (28 pages) ,
- User manual (77 pages) ,
- Installation manual (28 pages)
Table of Contents
Advertisement
Advertisement
Table of Contents

Related Manuals for suprema biostation


Summary of Contents for suprema biostation
- Page 1 www.supremainc.com Innovative Fingerprint Terminal User Guide (ver 1.1)
- Page 2 World’s most reliable fingerprint solution that ranked No. 1 in an international fingerprint algorithm contest (FVC2004) with the lowest error rate. Various fingerprint sensors Supports various fingerprint sensors, including optical, capacitive, and thermal swipe, so users can choose the most suitable fingerprint sensor for their application. ⒸCopyright 2006 Suprema Inc.
-
Page 3: Table Of Contents
Network setup – TCP/IP – Wireless LAN – Serial – USB User management – Enroll new user – Check user info – Edit user info – Delete user – Delete all users – Check User DB ⒸCopyright 2006 Suprema Inc. - Page 4 – T&A event using 1:N mode – T&A event using 1:1 mode – Using extended T&A events View user’s Access/T&A event records Authentication procedure as per operation mode Appendix List of Admin menu Specifications Troubleshooting Device cleaning ⒸCopyright 2006 Suprema Inc.
-
Page 5: Safety Precautions
Clean the device often to remove In cleaning, do not splash water dust on it. on the device but wipe it out with water, drinks or chemicals leak smooth cloth or towel. inside the device. ⒸCopyright 2006 Suprema Inc. Before Start... - Page 6 Do not let children touch the Do not use the device for any Contact your nearest dealer in other purpose than specified. device without supervision. case of a trouble or problem. ⒸCopyright 2006 Suprema Inc. Before Start...
-
Page 7: Glossary
Fingerprint Enrollment A process of extracting features of a fingerprint image obtained from a fingerprint sensor and saving them into the internal memory of a device. The fingerprint data is called a fingerprint template. ⒸCopyright 2006 Suprema Inc. Before Start... -
Page 8: Basics Of Fingerprint Recognition
Fingerprint templates are saved inside the memory of BioStation and used for identification. Secure way to protect personal information To avoid privacy concern, Suprema’s fingerprint products do not save fingerprint images itself. It is impossible to reconstruct a fingerprint image from a fingerprint template which is just numeric data of the features of a fingerprint. -
Page 9: How To Place A Finger
How to place a finger Suprema’s fingerprint products show an outstanding recognition performance regardless of the user’s fingerprint skin condition or the way of fingerprint positioning. However, following tips are recommended to get more optimal fingerprint recognition performance. Select a finger to enroll It is recommended to use an index finger or a middle finger. - Page 10 How to place a finger Tips for different fingerprint conditions Suprema’s fingerprint products are designed to scan fingerprint smoothly regardless of the conditions of a finger skin. However, in case a fingerprint is not read well on the sensor, please refer to the followings tips.
- Page 11 Basic Contents Wall mounting Star-shape screw for fixing Product Contents screws and holders - 3 ea main body BioStation fingerprint terminal Wall mounting metal bracket USB cable Star-shape small wrench 5pin, 3pin, 6pin, 4pin, 7pin cable – 1 ea Software CD ⒸCopyright 2006 Suprema Inc.
-
Page 12: Product Contents
Product Contents Optional accessories 12V power adaptor Plastic stand type A Plastic stand type B USB fingerprint scanner for enrollment on PC USB memory Wireless LAN Access Point Interphone ⒸCopyright 2006 Suprema Inc. Before Start... -
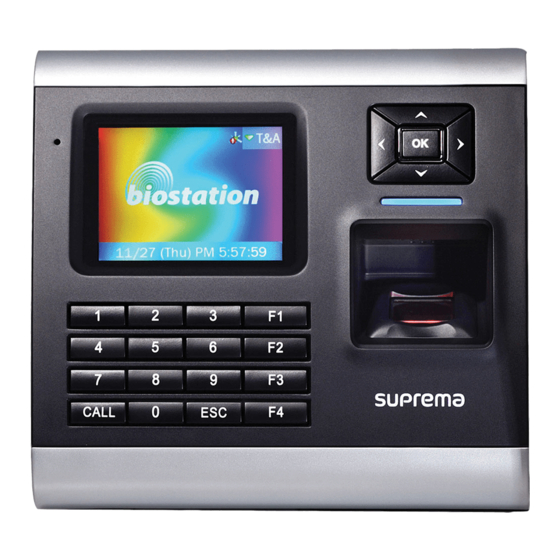
Page 13: Name Of Each Part
Used to input a T&A event and initiate fingerprint scanning. ESC key Used to enter Admin menu from initial display or return to the previous menu from Admin menu. CALL key When connected to interphone, press this button to ring the interphone. ⒸCopyright 2006 Suprema Inc. Before Start... - Page 14 3pin cable connector - Door 6pin cable connector – Input/Output or Wiegand 4pin cable connector - RS485 7pin cable connector - RS232 or BEACon 5pin cable connector – Power and doorphone 12V power adaptor ⒸCopyright 2006 Suprema Inc. Before Start...
-
Page 15: Installation And Cable Spec
Installation Installation example 6pin cable Network hub Ethernet 3pin cable Door Lock RS232 7pin cable Exit Button Product dimension (mm) Front Side Bracket ⒸCopyright 2006 Suprema Inc. Before Start... - Page 16 GRAY PIN DESCRIPTION WIRE RS485 TRX - YELLOW TRX + BLUE BLACK SHIELD GND GRAY RS232 or BEACon PIN DESCRIPTION WIRE BLACK RS-232 TX BLUE RS-232 RX YELLOW TTL OUT1 WHITE SHIELD GND GRAY ⒸCopyright 2006 Suprema Inc. Before Start...
-
Page 17: For Administrators (Basic Functions)
Basic information for the device administrators. It For Administrators - Basic Functions includes key items such as basic menu usage, operation mode setting, network connection, and user management. ⒸCopyright 2006 Suprema Inc. -
Page 18: Enter Admin Menu
PW or place a finger. It is not possible to enter Admin menu by entering his/her PIN. If the master password is entered successfully, initial Admin User menu appears on display. Mode Device Display Network ⒸCopyright 2006 Suprema Inc. For Administrators - Basic Functions... -
Page 19: Using Admin Menu
[Note] For security reasons, the display will automatically return to the initial display after a certain time period without any key input in Admin menu. If you do not want this function or want to change the time period, refer to <Display and sound setting>. ⒸCopyright 2006 Suprema Inc. For Administrators - Basic Functions... -
Page 20: Operation Mode Setting
In case of using the device for access control only, you don’t need to use T&A functions. Shows T&A event set on each function key. T&A key In order to set extended T&A events for a specific application, use BioAdmin program on PC. ⒸCopyright 2006 Suprema Inc. For Administrators - Basic Functions... -
Page 21: Network Setup
Once you designate the server IP, BioAdmin will find the IP address and connect BioStation automatically. If you intend to enter the IP address on BioStation manually, you do not need to designate this server IP. Setting : Use/not use... -
Page 22: Wireless Lan
Shows the authentication mode of wireless LAN AP. Authentication Shows the encryption method of the wireless LAN AP. Encryption Link Quality Shows the network condition of the currently used wireless LAN AP. ⒸCopyright 2006 Suprema Inc. For Administrators - Basic Functions... -
Page 23: Serial
Serial To connect BioStation to the serial port of PC, you need to select the buadrate of the serial communication. To connect the BioStation to the serial port of host PC, Serial designate the buadrate of the serial communication. ◁... -
Page 24: Usb
To connect the BioStation to the USB port of host PC, enable the USB communication. If you select USB on network submenu, USB setting menu appears on the display. ◁ ▷ USB Port Disable Setting : Enable/Disable Used to connect the mini USB port on the bottom of the device to the USB port of PC. -
Page 25: User Management
Enter password used in 1:1 mode. If you want to use fingerprint only, Password leave password as blank. Select access group in which the user belongs to. To edit access Group 1 ~ Group 4 group, use BioAdmin program on PC. ⒸCopyright 2006 Suprema Inc. For Administrators - Basic Functions... - Page 26 To use duress finger, more than two fingerprints should be enrolled, ie., Finger No. should be more than 2. Duress finger should be different from normal finger enrolled in advance. ⒸCopyright 2006 Suprema Inc. For Administrators - Basic Functions...
- Page 27 After enrolling fingerprints of one user, the diplay shows the 123456 next user ID to enroll the next user. If you do not want to enroll more users, press F4 to exit to initial display. ⒸCopyright 2006 Suprema Inc. For Administrators - Basic Functions...
-
Page 28: Check User Info
If you press F1 key, active function keys at this menu are Edit User F1 More displayed, OK, F2 and F3. User ID 123456 Edit User Name Dept. Finger Admin Level Admin Password Registered Delete No of Finger Group 1 None ⒸCopyright 2006 Suprema Inc. For Administrators - Basic Functions... -
Page 29: Edit User Info
If you want to re-enroll fingerprints of the user, press F2 key at Enroll Finger Edit User menu. Finger No You can select the number of fingerprints and duress and then Duress ◀ Last Finger ▶ re-enroll fingerprints. ⒸCopyright 2006 Suprema Inc. For Administrators - Basic Functions... -
Page 30: Delete User
Press OK key to confirm the deletion of the user. Do you want to delete this user? [Note] Deleted user info can’t be retrived unless the info remains in BioAdmin software on PC. ⒸCopyright 2006 Suprema Inc. For Administrators - Basic Functions... -
Page 31: Delete All Users
[Note] The data of administrators who is operating the menu is also deleted by this operation. Therefore, in order to enter Admin menu again, you should remember the master password before deleting all users. ⒸCopyright 2006 Suprema Inc. For Administrators - Basic Functions... -
Page 32: Check User Db
Press OK key to check the user DB. If there is an error on the user DB, it will be automatically corrected by this procedure. If it fails to corret, an error message appear on display. ⒸCopyright 2006 Suprema Inc. For Administrators - Basic Functions... -
Page 33: For Administrators (Advanced Functions)
Detailed information for device administrators. It For Administrators - Advanced Functions includes specific items such as display and sound setting, fingerprint authentication setting, and log check. ⒸCopyright 2006 Suprema Inc. -
Page 34: Display & Sound Setting
Date 20060928 to be downloaded to the device using BioAdmin program on PC. Time 170050 Please contact Suprema for details. Volume Setting : Logo/Slide Show/Notice Background Decide background of initial display. In case of Logo, one photo assigned as logo is displayed all the time. In case of Slide Show, multiple photos are displayed at the interval of 5 seconds in turn. -
Page 35: Device Setup
For general T&A applications, normal level is recommended. However, in case of an access control application requiring a higher security level, it is recommended to apply the security level as secure or most secure. ⒸCopyright 2006 Suprema Inc. For Administrators - Advanced Functions... - Page 36 Setting : Not Use / Use Encryption Shows whether the BioStation is curretnly using the template encryption or not. Encryption can not be set on the device itself, but should be set using BioAdmin program on PC. ⒸCopyright 2006 Suprema Inc.
-
Page 37: I/O Setting
Set the cycle of output signal. Default is 1sec (1000ms). Duration(ms) Setting : None/Lock System Tamper S/W Tamper switch is turned on when a housing(case) of BioStation is opened. If the setting is in “Lock System”, the device is automatically locked when a tamper switch is on. -
Page 38: Door Relay Setting
It also opens in case of authorization without T&A event. In case of Disabled, BioStation does not drive an internal relay to open a door. Once a door is open, the door can be locked again after this Duration (sec) duration. -
Page 39: Change Master Password
Default password is blank (no need to type). [Note] With this master password, one can enroll or delete users and change settings of BioStation. Please be careful not to disclose master password except Administrators. When you forget master password If there is a user enrolled as administrator : you can enter Admin menu using administrator’s fingerprint and return the password as... -
Page 40: View Device Info
Kernel Ver. Overall available storage and currently used storage are displayed. Memory In the internal memory of BioStation, various information like user info, log, background and sounds are stored, so used memory changes by the size of these information. ⒸCopyright 2006 Suprema Inc. -
Page 41: Device Reset
Press OK key to reset device. Device reset takes normally 20-30 seconds and it mayy take a bit longer for network connection. If you change language of BioStation, you should reset BioStation to apply the new language. If device becomes unstable for any reason, in maycases, device reset can solve the problem. -
Page 42: Factory Default
[Note] Be sure that various settings, background, sounds and notice will be deleted. User info and log data are not deleted. To delete user info, refer to <Delete All Users>. To delete log data, refer to <Delete Entire Log>. ⒸCopyright 2006 Suprema Inc. For Administrators - Advanced Functions... -
Page 43: Check Log
Press left/right navigation key to scroll a log by page (8 logs). Press F1 key to display available additional function key. OK : Latest F2 : Filter F3 : Delete Press OK key to display the latest log. ⒸCopyright 2006 Suprema Inc. For Administrators - Advanced Functions... -
Page 44: Filter Log
Select the T&A events to be shown on the log list. T&A Event To check the log events of a specific user, enter the user’s ID. If User you press 0, log events of all users are displyed. ⒸCopyright 2006 Suprema Inc. For Administrators - Advanced Functions... -
Page 45: Delete Entire Log
Do you want to delete all logs? Press OK key to delete all logs. [Note] Be sure that a deleted log can not be retrived unless it remains in BioAdmin program on PC. ⒸCopyright 2006 Suprema Inc. For Administrators - Advanced Functions... -
Page 46: Usb Memory
Refresh Transfer the user information and various settings from the virtual Synchronize terminal of USB memory to the connected BioStation. At the same time, transfer the log data from the connected BioStation to the virtual terminal of USB memory. [Note] Synchronize menu erases the current user information and various settings of the device and overwrite with the information and settings on USB memry. - Page 47 Initialize This menu is enabled only when a USB memory is connected to BioStation. Refresh the connection of the USB memory and the stored Refresh information on the connected USB memory. ⒸCopyright 2006 Suprema Inc. For Administrators - Advanced Functions...
-
Page 48: For General Users
Describes directions for general users. It explains For General Users how to open a door in each operation mode and to enter T&A events. ⒸCopyright 2006 Suprema Inc. -
Page 49: Access Using 1:N Mode
When 1:N mode is set as OK/T&A key If you press OK or T/A key, blue LED flickers and a message Auhentication requesting user’s fingerprint appears on the display. Place a finger to open the door. Place your finger ⒸCopyright 2006 Suprema Inc. For General Users... -
Page 50: Access Using 1:1 Mode
Enter your password and press OK key to open the door. In case 1:1 mode is set as Fingerprint or PIN You can either enter a fingerprint or enter password and press OK key. ⒸCopyright 2006 Suprema Inc. For General Users... -
Page 51: T&A Event Using 1:N Mode
BioAdmin program, a door opens upon the occurance of the T&A events. You can check on ‘Activate Relay by this Event’ in T&A event with BioAdmin program on your PC. ⒸCopyright 2006 Suprema Inc. For General Users... -
Page 52: T&A Event Using 1:1 Mode
Enter your PW and press OK key to apply applicable T&A event. In case 1:1 mode is set as Fingerprint or PIN You can either enter fingerprint or enter password and press OK key. ⒸCopyright 2006 Suprema Inc. For General Users... -
Page 53: Using Extended T&A Events
Factory default T&A events are defined as below. F1 (In), F2 (Out), F3 (In duty), F4 (Out duty) You can edit the default T&A events and extended T&A events with BioAdmin program on your PC. ⒸCopyright 2006 Suprema Inc. For General Users... -
Page 54: View User's Access/T&A Event Records
9/14 12:26 Identify OK (Menu) 1111 Press up/down navigation key to scroll a log one by one. Press left/right navigation key to scroll a log page by page (8 logs). Press OK key to display the latest log. ⒸCopyright 2006 Suprema Inc. For General Users... -
Page 55: Authentication Procedure As Per Operation Mode
(auth. PW) F1~F4 (default T&A event) fingerprint T&A event 1:N mode Down key+16key (extended T&A event) F1~F4 fingerprint (default T&A event) (finger scan) 1:1 mode Down key+16key PW+OK (extended T&A event) (auth. PW) ⒸCopyright 2006 Suprema Inc. For General Users... -
Page 56: Appendix
Initialize Timeout Refresh Network Date LAN Type Time TCP/IP Port Volume Server IP DHCP IP Address OK: Latest gateway F2: Filter Log Filter ID Subnet Time Event RS485 T&A Event Serial RS232 User F3: Delete ⒸCopyright 2006 Suprema Inc. Appendix... -
Page 57: Specifications
Convinent menu navigation key. 4 function keys for user defined functions Operation mode : Fingerprint Only, PIN Only, Fingerprint + PIN Product size : 135 x 128 x 50 mm (width x length x depth) ⒸCopyright 2006 Suprema Inc. Appendix... -
Page 58: Troubleshooting
If LCD display and blue LED are off, it is possible that power is off. Check power condition such as blackout. If LCD display and blue LED are on, something is wrong with machine. In such a case, contact A/S center. ⒸCopyright 2006 Suprema Inc. Appendix... -
Page 59: Device Cleaning
Device cleaning Wipe out machine surface with dry towel or cloth. In case there is dust or impurities on the sensor of the BioStation, wipe off the surface with dry towel. Note that if the sensor is cleaned by detergent, benzine or thinner, surface is damaged and fingerprint can’t be entered. - Page 60 CAUTION: Changes or modifications not expressly approved by the manufacturer responsible for compliance could void the user’s authority to operate the equipment WARNING This device complies with part 15 of the FCC Rules. Operation is subject to the following two conditions: (1) This device may not cause harmful interference, and (2) this device must accept any interference received, including interference that may cause undesired operation.
- Page 61 Seongnam, Gyeonggi, 463-863 Korea E-mail : support@supremainc.com Website : www.supremainc.com Technical Support Inquiry Functions and specifications of the product are subject to changes without notice due to quality enhancement or function update. For any inquiry on the product, please contact Suprema Inc.
Need help?
Do you have a question about the biostation and is the answer not in the manual?
Questions and answers