
Subscribe to Our Youtube Channel
Related Manuals for Sole Fitness FITNESS BIKE


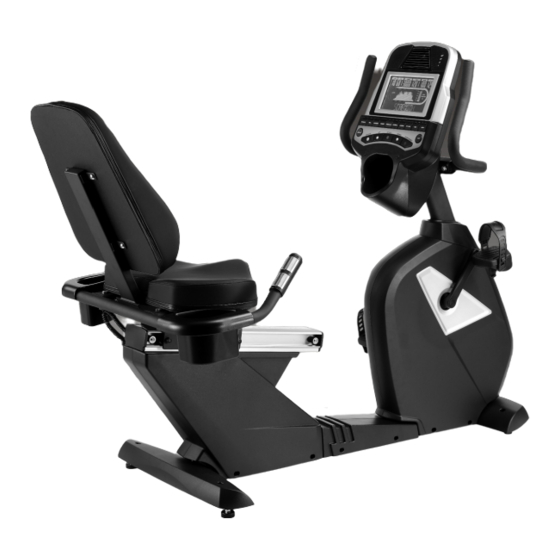
Summary of Contents for Sole Fitness FITNESS BIKE
- Page 1 FITNESS BIKE OWNER’S MANUAL PLEASE CAREFULLY READ THIS ENTIRE MANUAL BEFORE OPERATING YOUR NEW FITNESS BIKE...
-
Page 2: Table Of Contents
Operation of Your New Fitness Bike Programmable Features Using Heart Rate Transmitter(Optional) General Maintenance Exploded View Diagram Parts List ATTENTION THIS FITNESS BIKE IS INTENDED FOR RESIDENTIAL USE ONLY AND IS WARRANTED FOR THE APPLICATION. ANY OTHER APPLICATION VOIDS THIS WARRANTY IN ITS ENTIRETY. SR889-YB12_1111(SL)A... -
Page 3: Important Safety Instructions
Never drop or insert any object into any openings. Do not use outdoors. Do not attempt to use your fitness bike for any purpose other than for the purpose it is intended. The hand pulse sensors are not medical devices. Various factors, including the user’s movement, may affect the accuracy of heart rate readings. -
Page 4: Important Operation Instructions
If you feel the buttons are not functioning properly with normal pressure contact your dealer. TRANSPORT INSTRUCTIONS The fitness bike is equippped with two transport wheels which are engaged when the rear of the fitness bike is lifted. -
Page 5: Hardware Step
ASSEMBLY PACK CHECKLIST HARDWARE STEP 1 #65. 3/8” x 2-1/4” #77. 3/8” x 19 x 1.5T Hex Head Bolt (4 pcs) Flat Washer (6 pcs) #84. 3/8” x 25 x 2T #176. 3/8” x 3/4” #136. M5 x 15mm Flat Washer (4 pcs) Hex Head Bolt (6 pcs) Phillips Head Screw (4 pcs) HARDWARE STEP 2... - Page 6 HARDWARE STEP 3 #68. 5/16” x 5/8” #76. 5/16” x 18 x 1.5T Hex Head Bolt (8 pcs) Flat Washer (6 pcs) #82. 5/16” x 1.5T #83. 5/16” x 19 x 1.5T Split Washer (2 pcs) Curved Washer (2 pcs) HARDWARE STEP 4 #98.
-
Page 7: Assembly Instructions
ASSEMBLY TOOLS #114. Phillips Head Screwdriver #132. 14/15mm Wrench #112. 12/14mm Wrench ASSEMBLY INSTRUCTIONS PRE-ASSEMBLY Using a razor knife (Box Cutter) cut the outside, bottom, edge of box along the dotted Line. Lift Box over the unit and unpack. Carefully remove all parts from carton and inspect for any damage or missing parts. If damaged parts are found, or parts are missing, contact your dealer immediately. - Page 8 REAR STABILIZER & SEAT BACK HARDWARE STEP 1 #65. 3/8” x 2-1/4” Hex Head Bolt (4 pcs) #77. 3/8” x 19 x 1.5T Flat Washer (6 pcs) #84. 3/8” x 25 x 2T Flat Washer (4 pcs) #176. 3/8” x 3/4” Hex Head Bolt (6 pcs) #136.
- Page 9 CONSOLE MAST HARDWARE STEP 3 #68. 5/16” x 5/8” Hex Head Bolt (8 pcs) #76. 5/16” x 18 x 1.5T Flat Washer (6 pcs) #82. 5/16” x 1.5T Split Washer (2 pcs) #83. 5/16” x 19 x 1.5T Curved Washer (2 pcs) Slide the Console Mast Cover (31) onto the Console Mast (2).
- Page 10 SEAT/PEDAL & PLASTIC PARTS HARDWARE STEP 4 #98. M6 x 15mm Phillips Head Screw (4 pcs) #99. M5 x 12mm Phillips Head Screw (8 pcs) #105. 4 x 16mm Sheet Metal Screw (4 pcs) Install the Seat (61) on the Seat Carriage (4) with four Phillips Head Screws (98) using the Phillips Head Screw Driver (114).
-
Page 11: Fitness Bike Features
FITNESS BIKE FEATURES FOOT PEDALS Through research performed with a leading sports scientist and physical rehabilitation expert, engineering has developed a breakthrough in pedal design. Typical stationary exercise bikes are wider than a normal road bike. The reason is to allow for the braking mechanism, pulleys, drive components and plastic covers. -
Page 12: Operation Of Your New Fitness Bike
(Optional) POWER UP The console power is created by a built in generator. When you begin pedaling the fitness bike, the console will automatically power up. If there is no movement at the flywheel, the console will go to stand-by mode. In stand-by mode the console display will turn off. To turn the console on, begin pedaling. -
Page 13: Console Operation
DOT MATRIX CENTER DISPLAY The fitness bike has a built in heart rate monitoring system. Simply grasping the Contact Heart Rate Sensors on the handle bars or wearing a chest strap transmitter (sold separately) will start the heart (see Heart Rate Programs) Icon blinking (this may take a few seconds). The Pulse Window will display your heart rate in beats per minute and the HR bar graph will show your current % in relation to projected heart rate maximum. - Page 14 Weight entered will be saved as the new default settings. If you enter Age and Weight the first time you use the fitness bike you will not have to enter it every time you work out unless either Age...
-
Page 15: Programmable Features
Once the program starts the fitness bike will be set to level one. This is the easiest level and it is a good idea to stay at level one for a while to warm up. If you want to increase the work load at any time press the Up key;... -
Page 16: Fat Burn
PRESET PROGRAMS The fitness bike has five different programs that have been designed for a variety of workouts. These five programs have factory preset work level profiles for achieving different goals. Hill The Hill program simulates going up and down a hill. The resistance in the pedals will steadily increase and then decrease during the program. - Page 17 PROGRAMMING PRESET BUTTONS Press the desired program button then press the Enter key. The message window will ask you to enter your Age. You may adjust the age setting, using the Up and Down keys, then press the Enter key to accept the new number and proceed on to the next screen.
-
Page 18: Fitness Test Program
FITNESS TEST PROGRAM The fitness test is based on the YMCA protocol and is a sub-maximal test that uses pre-determined, fixed work levels that are based on your heart rate readings as the test progresses. The test will take anywhere between 6 to 15 minutes to complete, depending on your level of fitness. - Page 19 b. Work in Watts (1 watt is equal to 6.11829727787 kg-m/min.) c. HR is your actual heart rate; TGT is the target heart rate to reach to end the test. d. Time is the total elapsed time of the test. After the test Cool down for about one to three minutes.
-
Page 20: Heart Rate Programs
MHR on a schedule approved by your physician. Consult your physician before participating in any exercise program. With all Heart Rate fitness bike machines you may use the heart rate monitor feature without using the Heart Rate program. This function can be used during manual mode or during any of the nine different programs. - Page 21 RATE OF PERCEIVED EXERTION Heart rate is important but listening to your body also has a lot of advantages. There are more variables involved in how hard you should workout than just heart rate. Your stress level, physical health, emotional health, temperature, humidity, the time of day, the last time you ate and what you ate, all contribute to the intensity at which you should workout.
-
Page 22: Using Heart Rate Transmitter(Optional)
CR2032. ERRATIC OPERATION Caution! Do not use this fitness bike for Heart Rate Control unless a steady, solid Actual Heart Rate value is being displayed. High, wild, random numbers being displayed indicate a problem. Areas to look for interference which may cause erratic heart rate: 1. - Page 23 HEART RATE CONTROL PROGRAM OPERATION Both programs operate the same, the only difference is the HR1 is set to 60% and HR2 is set to 80% of the maximum heart rate. They both are programmed the same way. To start an HRC program follow the instructions below or just select the HR1 or HR2 program, then the Enter button and follow the directions in the message window.
-
Page 24: General Maintenance
GENERAL MAINTENANCE 1. Wipe down all areas in the sweat path with a damp cloth after each workout. 2. If a squeak, thump, clicking or rough feeling develops the main cause is most likely one of two reasons: I. The hardware was not sufficiently tightened during assembly. All bolts that were installed during assembly need to be tightened as much as possible. -
Page 25: Exploded View Diagram
EXPLODED VIEW DIAGRAM... -
Page 26: Parts List
PARTS LIST DESCRIPTION O'TY Main Frame Console Mast Mast Handle bar Assembly Seat Carriage Seat Back Bracket Seat Handle Bar Rear Stabilizer Crank Axle Seat Wheel Adjustment Plate (L) Seat Wheel Adjustment Plate (R) Idler Wheel Assembly Seat Stop Axle Seat Position Latch Backing Plate Aluminum Track... - Page 27 DESCRIPTION O'TY Crank Arm (L) Crank Arm (R) 6004_Bearing 6203_Bearing Drive Belt Induction Brake Magnet Seat Seat Back Handgrip Foam 3/8" × 2- 1/4"_Hex Head Bolt 1/4" × 3/4"_Hex Head Bolt 5/16" × 5/8"_Hex Head Bolt 3/8" × 1-3/4"_Hex Head Bolt 1/4"...
- Page 28 DESCRIPTION O'TY Pedal (R) Rod End Sleeve Seat Carriage Cover HGP Wire Grommet Seat Carriage Cover M6_Nyloc Nut 14.15m/m_Wrench Aluminum Axle End Cap M5 × 15m/m_Phillips Head Screw Controller Back Plate Handle Bar Cover Seat Track Fixing Plate Block Audio Cable (Optional) Console Holder Assembly 5/16"...
Need help?
Do you have a question about the FITNESS BIKE and is the answer not in the manual?
Questions and answers