Advertisement
Table of Contents
- 1 Table of Contents
- 2 Important Safety Instructions
- 3 Important Electrical Information
- 4 Important Operation Instructions
- 5 B74 Assembly Instructions
- 6 R72 Assembly Instructions
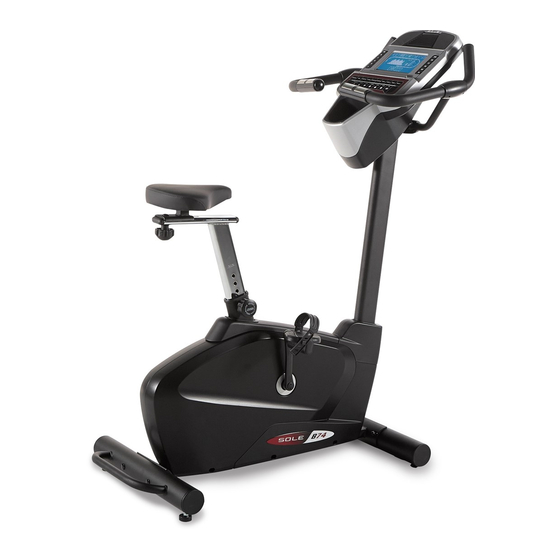
- 7 Fitness Bike Features
- 8 Operation of Your New Fitness Bike
- 9 Programmable Features
- 10 Using Heart Rate Monitor
- 11 General Maintenance
- 12 B74 Exploded View Diagram
- 13 B74 Parts List
- 14 R72 Exploded View Diagram
- 15 R72 Parts List
- Download this manual
Advertisement
Table of Contents

Related Manuals for Sole Fitness B74


Summary of Contents for Sole Fitness B74
- Page 1 OWNER’S MANUAL PLEASE CAREFULLY READ THIS ENTIRE MANUAL BEFORE OPERATINGYOUR NEW BIKE!
-
Page 2: Table Of Contents
Fitness Bike Features Operation of Your New Fitness Bike Programmable Features Using Heart Rate Monitor General Maintenance B74 Exploded View Diagram B74 Parts List R72 Exploded View Diagram R72 Parts List ATTENTION THIS FITNESS BIKE IS INTENDED FOR RESIDENTIAL USE ONLY AND IS WARRANTED FOR THE APPLICATION. -
Page 3: Important Safety Instructions
Wear proper shoes. High heels, dress shoes, sandals or bare feet are not suitable for use on your fitness bike. Quality athletic shoes are recommended to avoid leg fatigue or injury. SAVE THESE INSTRUCTIONS - THINK SAFETY! B74/R72 FITNESS BIKE... -
Page 4: Important Electrical Information
Do not use excessive pressure on console control keys. They are precision set to function properly with little finger pressure. If you feel the buttons are not functioning properly with normal pressure contact your dealer. B74/R72 FITNESS BIKE... - Page 5 B74 ASSEMBLY PACK CHECKLIST HARDWARE STEP 1 #23. 3/8" × 3-1/2" #24. 3/8" Curved #30. 3/8" Cap Nut Carriage Bolt (4 pcs) Washer (4 pcs) (4 pcs) HARDWARE STEP 2 #71. 3/8" × 1-1/2" #72. 3/8" Flat Washer (1 pc)
- Page 6 #41. 5mm × 12mm #33. 5/16" Flat Washer Phillips Head Screw (4 pcs) (2 pcs) ASSEMBLY TOOLS #43. Combination 5mm Allen #79. 13/15mm Wrench Wrench & Phillips Head Screw Driver #87. L Allen Wrench #106. 14/15mm Wrench B74/R72 FITNESS BIKE...
-
Page 7: B74 Assembly Instructions
B74 ASSEMBLY INSTRUCTIONS PRE-ASSEMBLY Using a razor knife (Box Cutter) cut the outside, bottom, edge of box along the dotted Line. Lift Box over the unit and unpack. Carefully remove all parts from carton and inspect for any damage or missing parts. - Page 8 Install the left and right pedals. The left pedal is a reverse thread and will screw into the crank in a counter-clockwise direction. Make sure the pedals are tightened very securely. The pedals may need to be retightened after a few hours of use. B74/R72 FITNESS BIKE...
- Page 9 Secure the console with four 5mm X 12mm screws (41). Make sure you do not pinch the wires between the console and the mounting plate! 3. Snap the handle bar cover (101) onto the back of the handle bar. B74/R72 FITNESS BIKE...
- Page 10 Carriage Bolt (4 pcs) Curved Washer (4 pcs) #127. 3/8” Cap Nut (4 pcs) HARDWARE STEP 2 #130. 3/8” Flat Washer #129. 3/8” x 1-3/4” Button (6 pcs) Head Socket Bolt (6 pcs) #131. 3/8” Nyloc Nut (6 pcs) B74/R72 FITNESS BIKE...
- Page 11 5/16” x 3/4” Socket #104. 5/16” Head Cap Bolt (4 pcs) Split Washer (6 pcs) #123. 5/16” x 5/8” Button Head S crews 87, 89, 104, 123, 124 are ※ Socket Bolt (2 pcs) already on the mainframe B74/R72 FITNESS BIKE...
-
Page 12: R72 Assembly Instructions
Locate the hardware package. Remove the tools first. Remove the hardware for each step as needed to avoid confusion. The numbers in the instructions that are in parenthesis (#) are the item number from the assembly drawing for reference. B74/R72 FITNESS BIKE... - Page 13 Wrench(142) to tighten two Button Head Socket Bolts (129), going through Bolt Washer (8) and two Flat Washers (130), then use 14/15mm Wrench (141) to tighten two Nyloc Nuts,(131). 3. Connect Lower and Upper handpulse wires (75,74). B74/R72 FITNESS BIKE...
- Page 14 Wrench & Phillips Head Screw Driver (140) to tighten four Phillips Head Screws (137). Use 14/15mm Wrench (141) to tighten the two pedals (43) on the crank axle. The left pedal is a reverse thread so you need to turn the threaded shaft counter clockwise to tighten. B74/R72 FITNESS BIKE...
- Page 15 Mast (2) together with two Button Head Socket Bolts (123), Split Washers (104) and Flat Washers (87) each. Be very careful during this step to make sure the cables do not become pinched between the parts. This could cause the wires to short causing damage to the electronics. B74/R72 FITNESS BIKE...
-
Page 16: Fitness Bike Features
Since the bike is wider, so is the distance between the pedals; this width between the pedals is called the Q factor. SEAT ADJUSTMENT B74 To raise the seat position, loosen the knob and pull the knob out. Now lift up from under the rear of the seat. -
Page 17: Operation Of Your New Fitness Bike
OPERATION OF YOUR FITNESS BIKE GETTING FAMILIAR WITH THE CONTROL PANEL COOLING FAN SPEAKER B74/R72 CONSOLE DATA DISPLAY DOT MATRIX DISPLAY PROGRAM BUTTONS (Manual, Hill, Fat Burn, Cardio, Strength, Interval, 2 User, 2HR) MESSAGE WINDOW (Laps, Speed, Lev el, Watts,... - Page 18 )for private listening. PROGRAMMING THE CONSOLE Each of the programs can be customized with your personal information and changed to suit your needs. Some of the information asked for is necessary to ensure the readouts are correct. B74/R72 FITNESS BIKE...
- Page 19 Age and Weight entered will be saved as the new default settings. If you enter Age and Weight the first time you use the fitness bike you will not have to enter it every time you work out unless either Age or Weight has changed or someone else enters a different Age and Weight. B74/R72 FITNESS BIKE...
-
Page 20: Programmable Features
Window by pressing the Display key. 8. When the program ends the Message Window will show a summary of your workout. The summary will be displayed for a short time then the console will return to the start- up display. B74/R72 FITNESS BIKE... - Page 21 The Hill program simulates going up and down a hill. The resistance in the pedals will steadily increase and then decrease during the program. B74/R72 WORK Fat Burn The Fat Burn program is designed, as the name implies, to maximize the burning of fat. There are many schools of thought on the best way to burn fat but most experts agree that a lower exertion level that stays at a steady workload is the best.
- Page 22 During the User 1 or User 2 program you will be able to scroll through the data in the Message Window by pressing the Display key. 10. When the program ends the Message Window will show a summary of your workout. The summary will be displayed for a short time then the console will return to the start-up display. B74/R72 FITNESS BIKE...
- Page 23 With all SOLE Heart Rate Control fitness bike machines you may use the heart rate monitor feature without using the Heart Rate Control program. This function can be used during manual mode or during any of the nine different programs. The Heart Rate Control program automatically controls resistance at the pedals. B74/R72 FITNESS BIKE...
- Page 24 If you are feeling tired and sluggish, it is because your body needs a break. In this condition, your pace will feel harder. Again, this will show up in your RPE and you will train at the proper level for that day. B74/R72 FITNESS BIKE...
-
Page 25: Using Heart Rate Monitor
The antenna that picks up your heart rate is very sensitive. If there is an outside noise source, turning the whole machine 90 degrees may de-tune the interference. Another Individual wearing a transmitter within 3’ of your machine’s console. If you continue to experience problems contact your dealer. B74/R72 FITNESS BIKE... - Page 26 8. During the HR1 or HR2 programs you will be able to scroll through the data in the Message Window by pressing the adjacent Display key. 9. When the program ends you may press Start to begin the same program again or Stop to exit the program. B74/R72 FITNESS BIKE...
-
Page 27: General Maintenance
VI. Pause Mode - Turn on to allow 5 minutes of pause, turn off to have console pause indefinitely VII. Key Tone - Turn on or off the beep sound when a key is pressed D. Security Factory Settings - For Factory use only Exit B74/R72 FITNESS BIKE... -
Page 28: B74 Exploded View Diagram
B74 Exploded View Diagram B74/R72 FITNESS BIKE... -
Page 29: B74 Parts List
B74 Parts List DESCRIPTION Q'TY Main Frame Console Mast Handle Bar Front Stabilizer Rear Stabilizer Inner Slide Slider Crank Axle Idler Bracket Axle for Idler Wheel Crank Arm (L) Crank Arm (R) Crank Arm End Cap M10 × P1.5 × 1.25L_Nut Pedal(L.R) - Page 30 M5 × 12L_Phillips Head Screw L Allen Wrench Axle Ø12.4 × Ø19 × 0.5T_Flat Washer Ø12_C Ring Ø12_Wave Washer Ø3/8" × Ø19 × 1.5T_Flat Washer Ø1" × 285L × 5T_Handgrip Foam Ø1" × 170L × 5T_Handgrip Foam B74/R72 FITNESS BIKE...
- Page 31 Q'TY Handpulse Assembly Handgrip Side Cap (Top) Handgrip Side Cap (Bottom) Button Head Plug Handle Bar Cover Ø3" × 20m/m_Tapping Screw Ø3" × 10m/m_Tapping Screw 5/16" × UNC18 × 5/8"_Button Head Socket Bolt 14/15m/m_Wrench Rubber Foot Pad B74/R72 FITNESS BIKE...
-
Page 32: R72 Exploded View Diagram
R72 Exploded View Diagram B74/R72 FITNESS BIKE... -
Page 33: R72 Parts List
Bottom Cover ( R ) Handle Bar Cover Power Bracket HGP Wire Grommet Crank Cover Magnet Crank Axle Idler Bracket Axle for Idler Wheel Ø15.8 × Ø10 × 9L_Sleeve Crank Arm(L) Crank Arm(R) Crank Arm End Cap Pedal Set(L.R) B74/R72 FITNESS BIKE... - Page 34 5/16" × 2-1/2"_Button Head Socket Bolt 3/8" × 27.5L_Carriage Bolt 3/8" × 7T_Nyloc Nut 5/16" × 20L_Carriage Bolt Ø5/16" × Ø12 × 1.0T_Flat Washer 4 × 12L_Sheet Metal Screw M5 × 12L_Phillips Head Screw 5 × 19L_Tapping Screw 5/16" × 6T_Nyloc Nut B74/R72 FITNESS BIKE...
- Page 35 3/8" × 7T_Nyloc Nut 3/8" × UNF26 × 7T_Nut Ø12.4 × Ø19 × 0.5T_Flat Washer Ø12_C Ring Ø12_Wave Washer 3/8"× 19 × 1.5T_Flat Washer M6 × 35m/m_Phillips Head Screw Combination M5 Allen Wrench & Phillips Head Screw Driver B74/R72 FITNESS BIKE...
- Page 36 DESCRIPTION Q'TY 14/15m/m_Wrench 6 × 27 × 120L_L Allen Wrench Ø5/16" × Ø18 × 1.5T_Flat Washer B74/R72 FITNESS BIKE...
- Page 37 B74/R72 FITNESS BIKE...
Need help?
Do you have a question about the B74 and is the answer not in the manual?
Questions and answers