Advertisement
Table of Contents
- 1 Table of Contents
- 2 Product Registration
- 3 Important Safety Instructions
- 4 Important Electrical Instructions
- 5 Important Operation Instructions
- 6 Assembly Instructions
- 7 Operation of Your New Fitness Bike
- 8 Button Features
- 9 Using Heart Rate Monitor
- 10 Exploded View Diagram
- 11 Parts List
- 12 Manufacturer's Limited Warranty
- Download this manual
Advertisement
Table of Contents

Related Manuals for Sole Fitness B54


Summary of Contents for Sole Fitness B54
- Page 1 Customer Service 1-888-707-1880 Email: customerservice@dyaco.ca...
-
Page 2: Table Of Contents
TABLE OF CONTENTS Product Registration Important Safety Instructions Important Electrical Instructions Important Operation Instructions Assembly Instructions Operation of Your New Fitness Bike Button Features Using Heart Rate Monitor Exploded View Diagram Parts List Manufacturer's limited warranty ATTENTION THIS FITNESS BIKE IS INTENDED FOR RESIDENTIAL USE ONLY AND IS WARRANTED FOR THE APPLICATION. -
Page 3: Product Registration
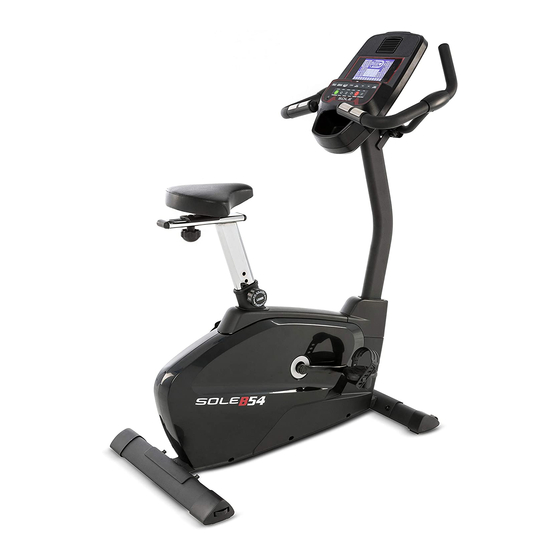
CONGRATULATIONS ON YOUR NEW UPRIGHT AND WELCOME TO THE SOLE FAMILY! Thank you for your purchase of this quality Sole Upright from Dyaco Canada Inc. Your new Upright has been manufactured by one of the leading fitness manufacturers in the world and is backed by one of the most comprehensive warranties available. -
Page 4: Important Safety Instructions
IMPORTANT SAFETY INSTRUCTIONS WARNING - Read all instructions before using this equipment. Do not operate fitness bike on deeply padded, plush or shag carpet. Damage to both carpet and fitness bike may result. Keep children away from the fitness bike. There are obvious pinch points and other caution areas that can cause harm. -
Page 5: Important Electrical Instructions
IMPORTANT ELECTRICAL INSTRUCTIONS WARNING! NEVER remove any cover without first disconnecting AC power. If voltage varies by ten percent (10%) or more, the performance of your fitness bike may be affected. Such conditions are not covered under your warranty. If you suspect the voltage is low, contact your local power company or a licensed electrician for proper testing. - Page 6 ASSEMBLY PACK CHECKLIST HARDWARE STEP 1 #32. 5/16" × 3/4"_Socket #33. 5/16" × 18 × 1.5T_ Flat Washer (8 pcs) Head Cap Bolt (9 pcs) #34. 5/16" × 19 ×1.5T_ #35. 5/16" × 1.5T_ Curved Washer (1 pc) Split Washer (9 pcs) HARDWARE STEP 2 #71.
-
Page 7: Assembly Instructions
ASSEMBLY TOOLS #43. Combination M5 Allen #87. L Allen Wrench Wrench & Phillips Head Screwdriver #107. HGP Wire Grommet #79. 13/15m/m_Wrench ASSEMBLY INSTRUCTIONS PRE-ASSEMBLY 1. Using a razor knife (Box Cutter) cut the outside, bottom, edge of box. Lift Box over the unit and unpack. - Page 8 STEP HARDWARE STEP 1 #32. 5/16" × 3/4"_Socket Head Cap Bolt (9 pcs) #33. 5/16" × 18 × 1.5T_ Flat Washer (8 pcs) #34. 5/16" × 19 × 1.5T_Curved Washer (1 pc) #35. 5/16" × 1.5T_ Split Washer (9 pcs) 1.
- Page 9 STEP HARDWARE STEP 2 #71. 3/8" ×1-1/2"_ Carriage Bolt (1 pc) #72. Ø 3/8" × Ø 30 × 2T_ Flat Washer (1 pc) #104. 5/16" × 5/8"_ Button Head Socket Bolt (2 pc) #33. Ø 5/16" × Ø 18 × 1.5T_Flat Washer (2 pcs) #35.
- Page 10 STEP HARDWARE STEP 3 1. Connect the Computer Cable (80) and the Handpulse #41. M5 × 12L_ Assembly (97) to the Console (48) which is on Console Mast Phillips Head Screw (4 pcs) (2) and use Combination M5 Allen Wrench & Phillips Head Screwdriver (43) to tighten together with 4pcs of M5 ×...
-
Page 11: Operation Of Your New Fitness Bike
Operation of Your Console Console COOLING FAN SPEAKER PROGRAM BUTTONS FAN POWER SWITCH AUDIO IN JACK (MP3, CD, OR SMARTPHONE) Power up: This model requires DC12V transformer power supply. Connect the power cable to the socket on the left side of the machine near the front. With the power on, the console will be turned on, and have a long beep sound with LCD full display for 2 seconds. -
Page 12: Button Features
Button Functions: 1. START: Start workout 2. STOP: Workout pause and press again back to standby mode. Press and hold the button, console will restart. 3. ENTER: Confirm the function or setting value. 4. LEVEL + : Increase the load or upward the setting value such as TIME. 5. - Page 13 In the standby mode, press 【 START】 to QUICK START, and enter Manual mode to start workout. Or, press【LEVEL+/LEVEL-】to select Manual, Program, Fat burn, Cardio, Hill, hitt, HRC and User define (image 6~image 13), then press 【ENTER】 to confirm. Or, directly press function Quick key to quick enter.
- Page 14 image 14 image 15 image 16 image 17 Program mode: In standby mode, press【LEVEL+/LEVEL-】to select PROGRAM, and press 【ENTER】. Or, press【PROGRAM】quick key to enter this mode directly. First, select program profiles (image 18) total 13 sets. Press 【ENTER】to confirm the profiles and set target TIME (image 19) by pressing【LEVEL+/LEVEL-】to adjust.
- Page 15 Cardio mode: In standby mode, press【LEVEL+/LEVEL-】to select CARDIO, and press 【ENTER】. Or, press【CARDIO】quick key to enter this mode directly. Then, set target TIME (image 21) by pressing【LEVEL+/LEVEL-】to adjust. After setting, press【START】to start workout, and press【LEVEL+/LEVEL-】to adjust the load during workout. Press 【STOP】 to pause workout, and press 【STOP】...
- Page 16 HRC mode: In standby mode, press 【LEVEL+/LEVEL-】 to select HRC, and press 【ENTER】 . Or, press【HRC】quick key to enter this mode directly. First, select HRC 50%, 60%, 70%, 80%, 90%, or TARGET HRC (image 24~image 29) total 6 sets. TARGET HRC is able to set the target pulse value.
- Page 17 User Define mode: In standby mode, press【LEVEL+/LEVEL-】to select USER DEFINE, and press 【ENTER】 . Or, press 【USER】 quick key to enter this mode directly. User may press 【 LEVEL +/LEVEL-】 and then press 【ENTER】 to create his own profile from column 1 to column 20 (image 33).
- Page 18 PROGRAM MOTION PROFILES 1~13 PROGRAM 1, Muscle Endurance: Muscle endurance is the ability of a muscle to maintain for a long time under load resistance. The muscular endurance program utilizes overload resistance training to allow the muscles to withstand high loads, stimulate physiological disturbances, and enhance muscle tissue adaptability, which is the most effective way to increase muscle endurance.
- Page 19 PROGRAM 6, X-sport: The X-sport program is designed to increase muscular strength in your lower body with extreme resistance. This program will steadily increase in resistance to high level and then keeps you there. This is to enhance the design of your legs and hips. PROGRAM 7, Cardiopulmonary: The cardiopulmonary procedure is to strengthen the lungs and heart, allowing users to carry oxygen from the air and transport oxygen to tissue cells for use.
- Page 20 PROGRAM 11, Low-intensity Training: The low intensity training program provides comfortable speed. When you maintain this level of strength, you do not tire easily and you train without overworking yourself. Such training does not tax the body and remains safe. Thus, the value of lactic acid does not increase in the blood and it promotes the training necessary to prepare you in several sports.
- Page 21 FAT BURN: The Fat Burn program is designed, as the name implies, to maximize the burning of fat. There are many schools of thought on the best way to burn fat but most experts agree that a lower exertion level that stays at a steady workload is the best. The absolute best way to burn fat is to keep your heart rate at around 60% to 70% of its maximum potential.
- Page 22 Factory Setting mode: In standby mode, press【ENTER】and【LEVEL+】 for 2 seconds to enter factory setting mode. In this mode, press【LEVEL+/LEVEL-】to select, and press【ENTER】to the next setting. When the last option is set by press【ENTER】, or press【STOP】during setting, the setting value will be stored and restarted. Option item UNIT(KM/ML) -Set to English or Metric display readings BRIGHT (0~15) -Adjust backlight brightness2...
- Page 23 Heart Rate The old motto, “no pain, no gain”, is a myth that has been overpowered by the benefits of exercising comfortably. A great deal of this success has been promoted by the use of heart rate monitors. With the proper use of a heart rate monitor, many people find that their usual choice of exercise intensity was either too high or too low and exercise is much more enjoyable by maintaining their heart rate in the desired benefit range.
- Page 24 Rate of Perceived Exertion Heart rate is important but listening to your body also has a lot of advantages. There are more variables involved in how hard you should workout than just heart rate. Your stress level, physical health, emotional health, temperature, humidity, the time of day, the last time you ate and what you ate, all contribute to the intensity at which you should workout.
-
Page 25: Using Heart Rate Monitor
USING HEART RATE TRANSMITTER (Optional) How to wear your wireless chest strap transmitter: Attach the cycle to the elastic strap using the locking parts. 2. Adjust the strap as tightly as possible as long as the strap is not too tight to remain comfortable. -
Page 26: Exploded View Diagram
EXPLODED VIEW DIAGRAM Customer Service 1-888-707-1880 Email: customerservice@dyaco.ca... -
Page 27: Parts List
PARTS LIST 9635401 Main Frame 9635402 Console Mast Handlebar 9635403 9635404 Front Stabilizer 9635405 Rear Stabilizer 9635406 Inner Slide 9635407 Sliding Seat Mount 9635408 Crank Axle Idler Bracket 9635409 9635410 Idler Wheel 9635411 Crank Arm (L) 9635412 Crank Arm (R) 9635413 Crank Arm End Cap 9635414... - Page 28 9635453 Locking Knob Center spatial wrap 9635454 9635455 Slide Spacer Transportation Wheel (L) 9635456 9635457 Transportation Wheel (R) Rear Adjustment Base (R) 9635458 9635459 Rear Adjustment Base (L) Console Mast Cover 9635460 9635461 Front Shroud (R) 9635462 Front Shroud (L) 9635463 Rear Shroud (R) Rear Shroud (L)
- Page 29 96354107 HGP Wire Grommet Audio Cable (Optional) 96354251 96354252 Transformer Power Cord 96354256 Chest Strap (Optional) Customer Service 1-888-707-1880 Email: customerservice@dyaco.ca...
-
Page 30: Manufacturer's Limited Warranty
MANUFACTURER’S LIMITED WARRANTY Dyaco Canada Inc. warrants all its fitness bike parts for a period of time listed below from the date of retail sale, as determined by sale receipt. Dyaco Canada Inc.’s responsibilities include providing new or remanufactured parts, at Dyaco Canada Inc.’s option, and technical support to our independent dealers and servicing organizations. - Page 31 Customer Service 1-888-707-1880 Email: customerservice@dyaco.ca...
- Page 32 Customer Service 1-888-707-1880 Email: customerservice@dyaco.ca...
Need help?
Do you have a question about the B54 and is the answer not in the manual?
Questions and answers