Sole Fitness SB700 Owner's Manual
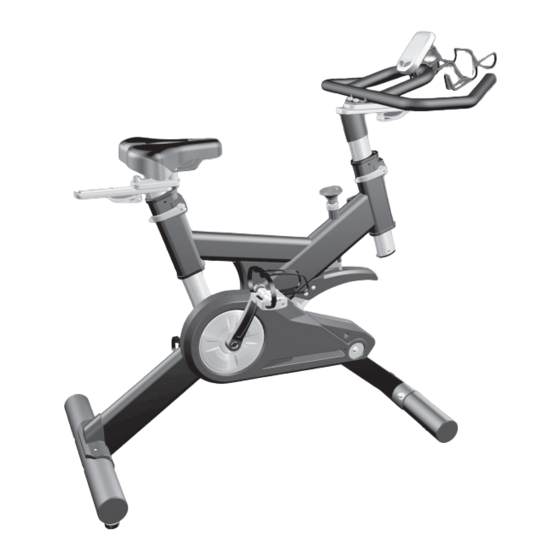
Indoor cycle
Hide thumbs
Also See for SB700:
- Owner's manual (16 pages) ,
- Service manual (17 pages) ,
- Owner's manual (26 pages)

Subscribe to Our Youtube Channel
Related Manuals for Sole Fitness SB700


Summary of Contents for Sole Fitness SB700
- Page 1 SB700 INDOOR CYCLE OWNER’S MANUAL PLEASE CAREFULLY READ THIS ENTIRE MANUAL BEFORE OPERATING YOUR NEW Indoor cycle...
-
Page 2: Table Of Contents
TABLE OF CONTENTS Product Registration Important Safety Instructions Important Operation Instructions SB700 Assembly Instructions Operation of Your New Indoor Cycle Manufacturer’s Limited Warranty ATTENTION THIS INDOOR CYCLE IS INTENDED FOR RESIDENTIAL USE ONLY AND IS WARRANTED FOR THE APPLICATION. ANY OTHER APPLICATION VOIDS THIS WARRANTY IN ITS ENTIRETY. -
Page 3: Product Registration
Serial Number REGISTER YOUR PURCHASE The self-addressed product registration card must be completed in full and returned to SOLE. You can also go to www.soletreadmills.com under the support tab to register online. SB700_20110106 SB700 INDOOR CYCLE... -
Page 4: Important Safety Instructions
Failure to follow all guidelines may compromise the effectiveness of the exercise experience, expose yourself (and possibly others) to injury, and reduce the longevity of the equipment. SAVE THESE INSTRUCTIONS - THINK SAFETY! SB700 INDOOR CYCLE... -
Page 5: Important Operation Instructions
5. Proper installation and regular maintenance are required to ensure user’s safety. Maintenance is the sole responsibility of the owner. SB700 INDOOR CYCLE... -
Page 6: Hardware Step
SB700 ASSEMBLY PACK CHECKLIST HARDWARE STEP 1 #82. 3/8” #81. 3/8” x 3-1/2” #83. 3/8” x 23mm Nut (4 pcs) Button Head Socket Bolt (4 pcs) Flat Washer (4 pcs) HARDWARE STEP 2 #91. M5 x 10mm Screw (2 pcs) HARDWARE STEP 4 #49. -
Page 7: Sb700 Assembly Instructions
SB700 ASSEMBLY INSTRUCTIONS PRE-ASSEMBLY Using a razor knife (Box Cutter) cut the outside, bottom, edge of box along the dotted Line. Lift Box over the unit and unpack. Carefully remove all parts from carton and inspect for any damage or missing parts. - Page 8 Attach the Rear Stabilizer cover with two Screws (91). Tighten using the Combination M5 Allen Wrench & Phillips Head Screw Driver (86). CONSOLE 1 – Console 2 – Mounting Clamp 3 – Clamp mounting screw 4 – Clamping thumb screw 5 – Velcro 6 – Speed transmitter SB700 INDOOR CYCLE...
- Page 9 Install the transmitter, at the angle shown below, onto the pre-installed Velcro strip located on the back of the chain cover. Make sure the sensor wire connection is at the top left when mounting the transmitter. • Make sure the sensor wire is routed away from the spinning flywheel SB700 INDOOR CYCLE...
- Page 10 Attach the handlebars (make sure they are oriented as in the illustration) with four Screws (88), four Split Washers (49), and four Flat Washers (48). Tighten firmly using the Combination M5 Allen Wrench & Phillips Head Screw Driver (86). SB700 INDOOR CYCLE...
- Page 11 Tighten each pedal as firmly as possible with the Wrench (85) provided. If you here a thumping sound when you are pedaling, this usually means one or both pedals are loose. You may need to retighten them after use. SB700 INDOOR CYCLE...
-
Page 12: Operation Of Your New Indoor Cycle
The transmitter counts the number of times the magnet, which is mounted on the crank assembly, passes the sensor. The speed sensor transmitter will then send a coded signal to the console which contains the measured value (Speed and Cadence ). SB700 INDOOR CYCLE... -
Page 13: Console Operation
QUICK START When the console is in Power Saving Mode, hold down any key to wake up the console and go to the start-up screen, also called “QUICK Start” active state. POWER SAVING MODE QUICK START MODE SB700 INDOOR CYCLE... - Page 14 2. Press the right hand key to increase maxi- mum heart rate limit. After setting the max- imum heart rate, press the left hand key to adjust the minimum heart rate limit. SB700 INDOOR CYCLE...
- Page 15 2. Press the left hand key to set the measuring value for weight (Lb or Kg); press the right hand key to select. 3. BODYWEIGHT: Press the left hand key to set the bodyweight. Press the right hand key to increase the weight. Press and hold the right hand key for rapid advance. SB700 INDOOR CYCLE...
- Page 16 Loosen the quick release under the handlebar and slide the handlebar forward or backward as desired. A suitable forward/aft position should allow the rider to comfortably grasp the handlebar with a slight bend at the elbow. Tighten the quick release to secure the handlebar assembly. SB700 INDOOR CYCLE...
- Page 17 Use the opposite side of the pedal from the clip-in side when wearing regular sports training shoes. The regular side can be used with or without toe clips. SB700 INDOOR CYCLE...
- Page 18 2. To apply the brake, press down on the tension knob. 3. Before dismounting, apply the brake to stop flywheel, or increase resistance and let flywheel come to a stop. SB700 INDOOR CYCLE...
- Page 19 1. Do not service internal parts of pedals. If they are found to be worn internally, we recommend replacing the pedal. 2. Use of lubricants or cleaning solutions other than those so specified will result in diminished performance and a shorter life span for that part. SB700 INDOOR CYCLE...
-
Page 20: Manufacturer's Limited Warranty
Submit all service requests including serial number, contact information and a brief description of the problem online at www.soletreadmills. com/technical.php?p=service. If you have any questions about your new product or questions about the warranty contact SOLE Fitness at 1-866-780-SOLE (7653). If you have a technical problem with your new indoor cycle contact SOLE technical service at 866-MYSOLE1 (697-6531).
Need help?
Do you have a question about the SB700 and is the answer not in the manual?
Questions and answers