
Related Manuals for Super Circuits DMR27U


Summary of Contents for Super Circuits DMR27U
-
Page 1: User Manual
H.264 4-Channel DVR User Manual Product: DMR27U Please read this manual before using your recorder, and always follow the instructions for safety and proper use. Save this manual for future reference. DMR27U_RM... - Page 2 Operate this device only in environments where the temperature or humidity is within the recommended range. Operation in extreme temperatures or humidity levels may cause electric shock and shorten the life of the CAUTION product. Installation and servicing should be performed by qualified and experienced personnel only. DVR should always ...
-
Page 3: Table Of Contents
Table of Contents Product Description . . . . . . . . . . . . . . . . . . . . . . . . . . . . . . . . . . . . . . . . . . . . . . . . . . . . . . . . . . . . . . . . . . . . . . . . . . . . . . 1 SECTION 1 1 . - Page 4 7 . 5 MClient – search and playback view . . . . . . . . . . . . . . . . . . . . . . . . . . . . . . . . . . . . . . . . . . . . . . . . . . . . . . . . . 41 Network –...
-
Page 5: Product Description
Product Description The DMR27U is a professional, security grade, real-time, 4-channel digital video recorder . It includes H . 2 64 digital technology providing increased recording capacity, enhanced image quality, and faster video transfer for remote viewing . Recording can be triggered manually, by alarm, by motion detection, or by a preset timer . -
Page 6: Components
SECTION 1: PRODUCT DESCRIPTION 1.2 Components The DVR package contains the following items: DVR unit • QSG (Quick Setup Guide) • DVR power adapter • Power cord • Remote control • AAA batteries (2) • Software CD • 1.2.1 Software CD The software CD included with your DVR contains: Quick Installation Guide •... -
Page 7: Hardware Overview
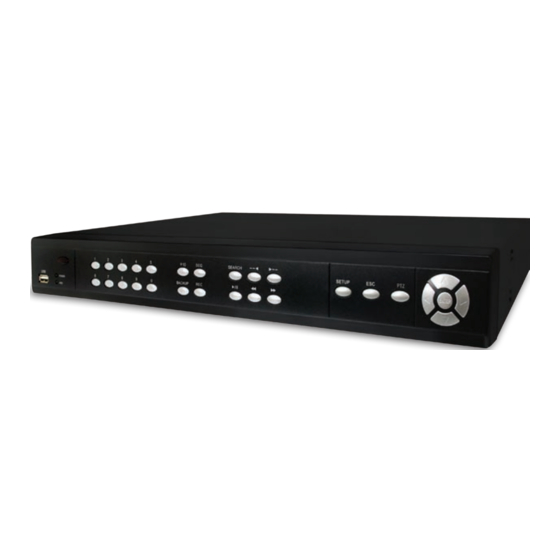
SECTION 2: HARDWARE OVERVIEW SECTION 2 Hardware Overview 2.1 Front panel Channel Number (1~0) Video Display Controls Menu Navigation Controls Playback Motion Controls SETUP, ESC, PTZ Table 1. DVR front panel controls Name Description NUMBER (1~0) Select channel with number button (1 ~ 4 only) Auto sequence of channels in full screen mode . -
Page 8: Backpanel
SECTION 2: HARDWARE OVERVIEW Table 2. Front panel LEDs and connectors Name Description Solid light when DVR is accessing the hard disk . POWER Solid light when DVR is powered on . USB port for backup and software updates . 2.2 Backpanel Audio Channel Inputs Video Channel Inputs... -
Page 9: Dvr Hard Disk Drive
SECTION 2: HARDWARE OVERVIEW 2.3 DVR Hard disk drive The hard disk drive (HDD) included in your system is a security grade device, factory tested and certified to be functional for all operations of the DVR . Do not open the cover of your DVR. Opening the cover will void the warranty. CAUTION If you need to change the HDD installed in your DVR (voids warranty), refer to the HDD Compatibility List in Appendix A for recommended models . -
Page 10: System Setup
SECTION 3: SYSTEM SETUP SECTION 3 System Setup Use the SETUP menu options to configure your DVR to perform optimally within your installation environment and to meet your specific security needs . 3.1 SETUP screen After pressing the SETUP button, the DVR will prompt you for password . The default password is 1111 . ... -
Page 11: Live Mode Setup Options
SECTION 3: SYSTEM SETUP 3.2 LIVE mode setup options In the LIVE mode menu you can adjust how video images from the cameras appear on the monitor . Navigate through the menu items by pressing the buttons . Use the buttons to modify a setting . -
Page 12: Record Setup Options
SECTION 3: SYSTEM SETUP Table 5. Menu items in LIVE mode setup Item Description Enable/disable on-screen displays (OSD) . SEQUENCE Enable/disable sequential display of video channels in full screen mode . SEQ-DWELL TIME Dwell time for each channel display in sequential display mode . EVENT BEEP Enable/disable internal beep alert sound . - Page 13 SECTION 3: SYSTEM SETUP Setup RECORD screen Table 7. Menu items in Setup RECORD Menu item Description RESOLUTION Set resolution to either 704 x 480 or 352 x 240 CHANNEL Select the camera channel for which these settings apply Set the frame rate for the specified channel . The sum of the frames rates of all channels cannot exceed maximum frame rate FRAME RATE for the resolution selected .
- Page 14 SECTION 3: SYSTEM SETUP To receive smooth video during playback, set the frame rate of each channel for more than 3 fps. Switch to full screen NOTE during playback when audio recording is enabled. 3.3.1 PARTIAL ZONE settings After selecting PARTIAL ZONE in the MOTION ZONE menu, select the portion of the camera video within which motion sensing will occur .
-
Page 15: System Setup Mode
SECTION 3: SYSTEM SETUP [COPY FROM, COPY TO]: Copy the Record schedule of one channel to another channel . [ESC]: Return to the RECORD setup menu . SCHEDULE recording setup screen 3.4 SYSTEM SETUP mode SYSTEM setup screen H.264 Network IP Camera User Manual... - Page 16 SECTION 3: SYSTEM SETUP Table 8. Menu items in SYSTEM SETUP screen Item Description DVR ID The name of the system . Press the ENTER to select this item . Select a character position with the and buttons . Press to change the character .
-
Page 17: Network Setup
SECTION 3: SYSTEM SETUP DATE & TIME setup screen PTZ CONTROL screen 3.5 NETWORK setup Setup network parameters on the NETWORK setup screen . NETWORK setup screen Table 9. Menu items in the NETWORK setup screen Item Description PORT Video Port number (default:8000); BACKUP port number is PORT number + 1 . WEB PORT IE Browser port number (default: 80) H.264 Network IP Camera User Manual... - Page 18 SECTION 3: SYSTEM SETUP Item Description CLIENT ACCESS Set to ON or OFF to enable or disable remote access through client software . BANDWIDTH SAVING Set to ON or OFF for key frame transmission . ON is favorable for use in low-bandwidth networks . Set to OFF for normal use . Set the type of network connection: LAN, DHCP, or ADSL .
-
Page 19: Storage Mode
SECTION 3: SYSTEM SETUP ADSL (PPPOE) Select the Asymmetric Digital Subscriber Line (ADSL) Point to Point over Ethernet (PPPoE) option when the network type connected to the DVR is PPPoE . Table 10. ADSL parameters Item Description The user ID for an ADSL connection PASSWORD The password for an ADSL connection When the DVR is installed on an IP sharer connected with ADSL, a user can assign a static IP address to the DVR from an IP sharer... -
Page 20: Storage Setup Screen
SECTION 3: SYSTEM SETUP STORAGE setup screen Table 11. Menu items in the Storage Setup screen Item Description OVERWRITE Overwrite existing data when the hard disk drive is full FORMAT Format the hard disk drive USB UPGRADE DVR firmware can be upgraded through the USB port via USB memory stick . See paragraph 6 . 1 . SAVE SETUP TO A USB User can save the DVR configuration to a USB memory stick . -
Page 21: Live And Search Modes
SECTION 4: LIVE AND SEARCH MODES SECTION 4 LIVE and SEARCH Modes 4.1 LIVE window LIVE window Table 12. Screen icons in LIVE window Icon Description Continuous recording in progress Manual recording in progress Motion recording is triggered Sensor recording is triggered Indicates the HDD is overwriting Indicates alarm output is activated . -
Page 22: Search Window
SECTION 4: LIVE AND SEARCH MODES Icon Description Indicates that a network client is connecting to the DVR . Indicates that sequencing mode is enabled . Graphical representation of the fullness of the HDD . The icon will appear when it matches with remote control ID . 4.2 SEARCH window In LIVE mode, press SEARCH and enter the password to open the SEARCH screen . - Page 23 SECTION 4: LIVE AND SEARCH MODES buttons to move highlight EVENT SEARCH . Press ENTER . In the SEARCH window, use the Use the navigation buttons to move to the date of the target surveillance video event . SEARCH window select channel Press ENTER to select the date to move to the CHANNEL selector .
- Page 24 SECTION 4: LIVE AND SEARCH MODES After the target event is selected, press ENTER to start video playback . In PLAYBACK mode, you can press the CAPTURE (BACKUP) button to launch the archiving function . 4.2.2 TIMELINE Search The TIMELINE search window displays a graph that show when video and audio data was recorded . In the SEARCH window, use the buttons to highlight TIMELINE SEARCH .
- Page 25 SECTION 4: LIVE AND SEARCH MODES GO TO SEARCh window 4.2.4 GO FIRST time You can access the first data recorded on the HDD using this option . 4.2.5 GO LAST time You can access to the last data recorded on the HDD using this option . 4.2.6 LOG The LOG option provides a list of user actions .
-
Page 26: Play Mode
SECTION 4: LIVE AND SEARCH MODES 4.2.7 ARCHIVE The ARCHIVE search window is used to find a stored video . In the SEARCH window, use the buttons to highlight ARCHIVE . Press ENTER . In the SEARCH window, use the navigation buttons to move to the date of the archived video events . Press ENTER to select the date and open the LIST window . - Page 27 SECTION 4: LIVE AND SEARCH MODES Play mode Table 13. Button functions in Play mode Button Description Return to the previous menu screen or exit from the SETUP menu Press to play video in reverse at 1x, 2x, and 4x speeds . Reverse playback speed is shown at the lower right corner of the screen as -1x ...
-
Page 28: Archiving And Backup
SECTION 5: ARCHIVING AND BACKUP SECTION 5 Archiving and Backup To BACKUP a still image or video clip to a USB storage device, it must first be archived on the HDD . 5.1 Archiving still images Still images can be captured and archived to a USB memory stick or hard drive while in LIVE mode and while playing back recorded video . - Page 29 SECTION 5: ARCHIVING AND BACKUP Press ENTER to play the video clip . Press BACKUP . At the ARCHIVE prompt, use the left buttons to highlight STILL or VIDEO . Press ENTER, If backing up a video clip: Use the buttons to highlight the channel you want to archive .
-
Page 30: Backup Still Images Or Video Clip To A Usb Memory Stick
SECTION 5: ARCHIVING AND BACKUP At the DURATION prompt, enter the video clip duration in seconds by using the buttons to select a digit, and buttons to select the value (0 – 9) of the digit . Maximum: 1800 seconds / 30 minutes ... -
Page 31: Playing Backup Video
SECTION 5: ARCHIVING AND BACKUP Use Search and Archive functions to locate and play the target still image or video clip . ARCHIVE and LIST screens While the still image or video clip is playing, press BACKUP . If backing up a video clip: Use the buttons to highlight AVI or DVR (file format) when VIDEO TYPE appears . - Page 32 SECTION 5: ARCHIVING AND BACKUP 5.3.2 Playing video backup in DVR format Video backed up in DVR format can be played on a PC with Microsoft Windows using the Player . e xe player . Player . e xe player is copied to the USB device when you backup a DVR formatted file . To play these files: Insert the USB memory stick with the backed up video into a USB port on your computer .
- Page 33 SECTION 5: ARCHIVING AND BACKUP Date/Time Playback Screen size of data speed controls Filename Open media file Playback controls Volume control VIIEWER.exe Player window To change playback speed, click the icon in the Playback controls. NOTE To select full screen playback, click “F”. H.264 4-Channel DVR User Manual...
-
Page 34: Software Maintenance
SECTION 6: SOFTWARE MAINTENANCE SECTION 6 Software Maintenance 6.1 Firmware upgrade To upgrade DVR firmware, please contact your distributor to obtain the firmware file and for assistance: Obtain the new firmware file from your distributor . Obtain a USB memory stick with a capacity of 1 GB or larger . Format the memory stick to FAT32 . -
Page 35: Backup The Setup Configuration
SECTION 6: SOFTWARE MAINTENANCE On the STORAGE window, select USB UPGRADE and press ENTER . DVR will upgrade to the new firmware automatically 10 . Respond to the screen prompts to allow the USB firmware upgrade process to complete . STORAGE setup - USB UPGRADE 6.2 Backup the setup configuration To backup the DVR setup information, do the following:... -
Page 36: Load Setup Configuration
SECTION 6: SOFTWARE MAINTENANCE Wait until the process completes . A CHECK SUCCESS message will appear . STORAGE setup - SAVE SETUP TO A USB STICK 6.3 Load setup configuration To restore backed up setup configuration data, do the following: Insert a USB memory stick containing backed up setup configuration data into the USB port on the front of the DVR . -
Page 37: Mclient - Network Client Viewer
SECTION 7: MCLIENT – NETWORK CLIENT VIEWER SECTION 7 MClient – Network Client Viewer The DVR provides LIVE remote viewing and other features using the MClient software provided on the CD with your DVR, and with the Microsoft Internet Explorer (IE) browser . ®... -
Page 38: Mclient Installation
SECTION 7: MCLIENT – NETWORK CLIENT VIEWER 7.2 MClient Installation To install MClient software: Log into your PC as a user with administration privileges . Insert the Software CD provided with your DVR into the CD or DVD drive of your PC . Normally the window below will appear . DVR Software CD initial window Click INSTALL CLIENT SOFTWARE . - Page 39 SECTION 7: MCLIENT – NETWORK CLIENT VIEWER Connect/ Disconnect Playback Lock/ Unlock Date/Time HDD Usage Alarm Volume Zoom/Focus Pan/Tilt Setup MClient initial screen Table 15. MClient viewer controls Button Description CONNECT Connect to the DVR PLAYBACK Switch to search for and playback a recorded video . LOCK/ UNLOCK Lock/unlock all operations of the client software .
-
Page 40: Pc Mclient Setup Configuration Options
SECTION 7: MCLIENT – NETWORK CLIENT VIEWER Button Description PLAY/PAUSE Play/pause live video . RECORDING Enable or disable recording of live video to local disk . SETUP Setup configuration of client software . EXIT Exit the client software . 7.3 PC MClient setup configuration options Before using MClient, setup the MClient software configuration . - Page 41 SECTION 7: MCLIENT – NETWORK CLIENT VIEWER 7.3.2 Setup Site options In the Setup window, click Site to list sites added to the MClient configuration . Sites can be added to this list, and modified or removed by clicking the buttons at the top of the window . MClient Setup Site Click Addition to register another site .
- Page 42 SECTION 7: MCLIENT – NETWORK CLIENT VIEWER IP Address – Enter the IP address of your DVR . If your DVR and PC are on the same local network, use the IP address shown in the DVR SETUP NETWORK option list . IF you are accessing your DVR across the Internet, enter the IP address of the router (modem) you use to access the internet from your local network .
- Page 43 SECTION 7: MCLIENT – NETWORK CLIENT VIEWER 7.3.4 Record options Set the recording method to Always, record on Event (for Motion and/or Alarm events), or Auto record . For Always and Event recording, select all channels or individual channels to record . When the Event method is selected, you can set the event for motion and/or alarm with duration .
-
Page 44: Mclient - Live View
SECTION 7: MCLIENT – NETWORK CLIENT VIEWER Setup Record Disk window 7.3.5 Language In the Setup Language window, select the preferred language from the pull-down list . The default language is English . 7.4 MClient – Live view To view real-time images from your DVR, to the following: Double click the MClient icon on your PC desktop to launch the program . -
Page 45: Mclient - Search And Playback View
SECTION 7: MCLIENT – NETWORK CLIENT VIEWER Click OK . Within a few seconds, real-time images from the DVR will appear . MClient Live view 7.5 MClient – search and playback view When MClient is searching for or playing a recorded video, the controls identified on the following screen are significant . LIVE Date/Time Search... - Page 46 SECTION 7: MCLIENT – NETWORK CLIENT VIEWER Table 16. Main controls in Search Button Description LIVE Switch to Live Video mode . DATE TIME Displays the date and time of the recording selected on the time bar at the bottom of the window . SEARCH calendar The calendar shows dates with recorded video in light blue and the selected date in dark blue .
- Page 47 SECTION 7: MCLIENT – NETWORK CLIENT VIEWER AVI backup specification After selecting a channel for backup, click the OK button . The backup will begin . H.264 4-Channel DVR User Manual...
-
Page 48: Network - Ie Browser Viewer
SECTION 8: NETWORK – IE BROWSER VIEWER SECTION 8 Network – IE Browser Viewer The DVR provides remote live monitoring, search, and playback of recorded video . An ActiveX™ control provides a viewer (Web Client) that must be downloaded and installed to interact with the DVR . This procedure assumes that the DVR and its network are setup for access from a PC across a local LAN and/or remotely through the Internet . -
Page 49: Live Mode
SECTION 8: NETWORK – IE BROWSER VIEWER Connect Click Connect . In the webpage dialog, enter the web IP address of your DVR, the video PORT number (from the Setup SYSTEM menu), and the password . Then click Connect in the Dialog pop-up window . A LIVE mode screen will open . Web Client server (DVR) login 8.2 LIVE mode LIVE mode viewing provides real-time images from the cameras connected to the DVR . -
Page 50: Search And Playback Mode
SECTION 8: NETWORK – IE BROWSER VIEWER Date/Time Disconnect Connect Search Pan/Tilt Zoom/ Focus Connection Status LIVE mode controls Table 17. LIVE mode controls Name Description Displays the current date and time . DATE and TIME CONNECT/ DISCONNECT Connect/disconnect the DVR SEARCH Search for recorded video . - Page 51 SECTION 8: NETWORK – IE BROWSER VIEWER Date/Time Disconnect/ Connect Playback Buttons Search Calendar Video Map Marker Main user interface – search and playback Table 18. Main controls – search and playback Name Description DATE and TIME Displays the current date and time . CONNECT / DISCONNECT Connect / Disconnect to the DVR LIVE...
- Page 52 SECTION 8: NETWORK – IE BROWSER VIEWER Slide the marker bar to the time where you want to start playing . Click Play . 8.3.2 Backup video clip To backup recorded video: Click the target date in the Search Calendar . Only days that have recorded video are selectable . Click Backup .
-
Page 53: Specifications
SECTION 9: SPECIFICATIONS SECTION 9 Specifications Table 19. Specifications Item Specification Channel, Input Level 4 channel, Composite 1 . 0 Vp-p, 75 Ohm Input Video Signal Format NTSC Output 1 CH Composite Output / 15 pin D-Sub VGA Output Audio Input / Output 4 Line In / 1 Line Out Sensor Input... -
Page 54: Hdd Compatibility List
APPENDIX A: HDD COMPATIBILITY LIST APPENDIX A HDD Compatibility List The hard disk drives included in the following table are functionally compatible with the DMR27U hardware and acceptable for security system applications . Table 20. HDD compatibility list Manufacturer Model... - Page 55 APPENDIX A: HDD COMPATIBILITY LIST Manufacturer Model Capacity Buffer ST3800-12ACE 80 GB 2 MB ST31200-25ACE 120 GB 2 MB ST3160815AS (Barracuda) 160 GB 8 MB ST3160815AV 160 GB 8 MB ST3250820AV (Surveillance) 250 GB 8 MB ST3250820ACE (Barracuda) 250 GB 8 MB ST3250410AS (Barracuda) 250 GB...
-
Page 56: Install Ffdshow Codec
APPENDIX B: INSTALL FDDSHOW CODEC APPENDIX B Install FFDSHOW Codec The FFDSHOW codec installer is provided on the software CD included with your DVR . Install this codec if the software on your PC does not play AVI formatted files backed up from the DVR . To install FFDSHOW: Insert the Software CD into an optical drive in your PC . - Page 57 APPENDIX B: INSTALL FDDSHOW CODEC In the “Choose Components” window, accept the default settings and click NEXT . Disk space required for installation with default settings is 12.6 MB. NOTE H.264 4-Channel DVR User Manual...
- Page 58 APPENDIX B: INSTALL FDDSHOW CODEC In the “Video decoder” window, uncheck the codecs you do not want to load . Click NEXT . In the “Audio decoder” window, uncheck the codecs you do not want to load . Click NEXT . In the “Video filters”...
- Page 59 APPENDIX B: INSTALL FDDSHOW CODEC 10 . In the “Audio filters” window, accept the default settings and click NEXT . In the “Choose Install Location” window, accept the default Destination Folder and then click NEXT . 11 . H.264 4-Channel DVR User Manual...
- Page 60 APPENDIX B: INSTALL FDDSHOW CODEC 12 . In the “Choose Start Menu Folder” window, define the folder you prefer for ffdshow and then click NEXT . 13 . Wait until the installation is complete and then click NEXT . Click FINISH in the setup wizard window . www.supercircuits.com...
Need help?
Do you have a question about the DMR27U and is the answer not in the manual?
Questions and answers