Table of Contents

Related Manuals for Super Circuits DVRM6


Summary of Contents for Super Circuits DVRM6
-
Page 1: User Manual
Wireless Advanced 4-Channel Digital Video Recorder User Manual Product: DVRM6 Please read this manual before using your camera, and always follow the instructions for safety and proper use. Save this manual for future reference. DVRM6_RM... - Page 2 Operate this device only in environments where the temperature or humidity is within the recommended range. Operation in extreme temperatures or humidity levels may cause electric shock and shorten the life of the product. CAUTION LEGAL NOTICE Supercircuits products are designed to meet safety and performance standards with the use of specific Supercircuits authorized accessories.
-
Page 3: Table Of Contents
2.3.2 Connecting devices to the DVRM6 internal network ....... . . - Page 4 TABLE OF CONTENTS 4.4.4 Setting the clock ............. . .41 4.4.5 LAN Settings .
- Page 5 TABLE OF CONTENTS 7.4 Restoring the default disk allocation ..........104 SECTION 8 Upgrading the Firmware .
- Page 6 www.supercircuits.com...
-
Page 7: Features
SECTION 1 Features The DVRM6 is a compact video gateway that provides state-of-the-art security functionality for vehicles and other moving platforms. Its broad range of features include live video streaming, video recording and playback, motion detection, sensor management, real-time event notification, vehicle tracking via GPS, and device activation. All of these features can be accessed remotely via PC, PDA, or cellular telephone. -
Page 8: What's In The Box
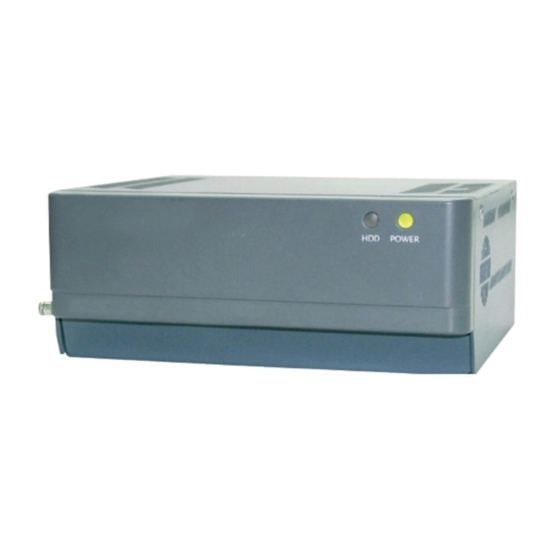
Three 10/100 Base-T LAN connectors for connecting other devices to the internal network managed by the router GPS antenna connector Outputs (Out1, Out2) Activator connectors Power Internal Speaker 1.2 What’s in the box Item Description Illustration DVRM6 unit Video gateway www.supercircuits.com... - Page 9 SECTION 1: FEATURES Item Description Illustration Power supply and cables Connects DVRM6 unit to a power source Power cord Connects the unit to the vehicle battery via the cigarette lighter Ethernet (LAN) cable Connects the unit to a PC (or a cable-based...
-
Page 10: Additional Equipment
1.3 Additional Equipment Up to four video cameras can be connected to the DVRM6. You must acquire the cameras you require; they are not included in the DVRM6 package. For information about camera compatibility and about connecting the cameras to the unit, see Connecting Cameras, page 15, or consult your vendor. -
Page 11: Installing The System
Install the MultiClient software on any other PC from which you want to connect to the DVRM6 as required. Configure the DVRM6 system. Connect to the DVRM6 through the MultiClient in order to check the configuration and make sure the system is working properly. -
Page 12: Installing The Dvrm6 Unit
To install the unit in the vehicle, you will need screws to secure the unit to its anchoring surface (not supplied; see step 2 below). Connect the two side support brackets to either side of the bottom of the DVRM6, using two screws and two washers for each support. -
Page 13: Connecting Cameras
2.2.1 Connecting cameras Up to four cameras can be connected to the DVRM6. If the cameras have PTZ controls for remote aiming and zooming, and the PTZ protocols they use are supported, the control cables can also be connected to the unit. - Page 14 To connect an RS232 PTZ controller: Acquire an RS232 controller cable with a female 9-pin RS232 connector. Attach the cable to the DVRM6. If you are only connecting the RS232 PTZ controller to the unit, and are not connecting any RS485 PTZ controllers, —...
-
Page 15: Connecting Sensors
SECTION 2: INSTALLING THE SYSTEM To connect multiple RS485 controllers to the adapter, insert the positive (+) wires of all of the controllers into one slot in the wire connector, and the negative (-) wires of all of the controllers into the other slot of the wire connector. If multiple PTZ cameras are connected to the unit, configure each camera to use a different ID. -
Page 16: Connecting Activators
If an activator requires an external power supply, you may be able to connect it to the 12 VDC connector on the rear panel of the NOTE unit. However, the DVRM6 unit can supply a maximum of 500 mA of power. If the devices connected to the unit require more than 500 mA, you must power some or all of them independently. -
Page 17: Connecting Microphones
2.2.6 Connecting a Speaker or Headphones The DVRM6 unit contains a built-in, 1-watt, internal speaker on the right side of the unit. You can also connect an external speaker or headphones to the unit. The speakers (and headphones) allow you to hear audio that is transmitted from one of the client applications. -
Page 18: Connecting A Cctv Monitor
You can connect a CCTV monitor to the unit. The monitor offers an alternative way to view live video from the DVRM6. It is primarily useful if you want to view video when the user is near the unit. For example, if the DVRM6 is set up in a bus, the driver can use a CCTV monitor to keep tabs on parts of the bus that cannot been seen from the driver’s seat. -
Page 19: Connecting The Dvrm6 To An External Network
• The DVRM6 has a distinct IP address on each of the external networks to which it is connected. For example, if it is connected to a LAN via Ethernet cable and to a cellular network via cellular modem, it will have two external IP addresses, one on each network. -
Page 20: Connecting Devices To The Dvrm6 Internal Network
DVRM6 via the internet can only be established through a proxy server. To connect the DVRM6 unit to an external network using an Ethernet cable: Connect the Uplink connector on the rear panel of the DVRM6 unit to a LAN connection point (a hub, wall socket, or any other •... -
Page 21: Connecting The Gps Antenna
2.5 Connecting the DVRM6 to a power source The power connector of the DVRM6 can be connected either to the vehicle battery or to a standard electrical outlet. Once it is connected, the unit starts automatically. During the start-up process, the LEDs on the front of the unit flash at various intervals. - Page 22 NOTE To connect the unit only to the battery, 16 AWG red and black cable (not supplied) is required. To connect the DVRM6 to the vehicle battery: Remove the wire connector from the end of the supplied power cord. WIre Connector Plug the wire connector into the Power connector on the rear panel of the unit and tighten the screws to secure it.
- Page 23 Power connector block (the middle connector in the block). Connect to positive (+) Connect to battery connector ignition Connect to negative (-) battery connector IGN connector (-) connector (+) connector Connecting the DVRM6 to battery and ignition Wireless Advanced 4-Channel DVR User Manual...
-
Page 24: Connecting The Dvrm6 To An Electrical Outlet
(-) connector (+) connector Connecting the DVRM6 to battery without connection to ignition To connect the DVRM6 to the vehicle’s cigarette lighter: Use the supplied power cord to connect the Power connector on the rear panel of the unit to the vehicle’s cigarette lighter. - Page 25 SECTION 2: INSTALLING THE SYSTEM Connect to electrical outlet Connect to DVRM6 Power Terminals Switch Push the switch on the cable to the ON position. The “ignition” is on. Wireless Advanced 4-Channel DVR User Manual...
-
Page 26: Installing The Multiclient Software
This chapter explains how to get started with the MultiClient software running on a PC that is on the same LAN as the DVRM6. In this configuration, you can configure the system and make sure it is working properly. Before you can use the MultiClient for these purposes, you must configure the DVRM6 so that it can interact with the devices connected to it and can be accessed remotely by a client. - Page 27 SECTION 3: INSTALLING THE MULTICLIENT SOFTWARE GPS Application Left click the GPS Application icon open the GPS Maps feature. A screen similar to that shown below will open. Wireless Advanced 4-Channel DVR User Manual...
-
Page 28: Connecting To The Dvrm6
Search icon The Find Gateway dialog box opens, displaying a list of all DVRM6 systems it found on the LAN. This operation may take a few minutes. Select the DVRM6 you want to connect to, then click Connect. After MutiClient connects to your DVRM6, an entry will appear in the Connection Panel. - Page 29 SECTION 3: INSTALLING THE MULTICLIENT SOFTWARE For the unit you connected to, click the icon in front of the ID of your DVRM6 to expand the list of element contained in the group. Drag a camera from the Connection Panel to one of the camera panes in the Viewing area to display live video from the camera.
-
Page 30: Configuring The Dvrm6
The configuration utility is a browser-based interface, compatible with Internet Explorer and Mozilla Firefox. When you open it for the first time, the DVRM6 unit and the computer that is used for configuration must be on the same network. No internet connection is required to configure the DVRM6. -
Page 31: Opening The Configuration Utility
4.1 Opening the Configuration Utility When you first open the configuration utility of the DVRM6 unit, you should open it through the MultiClient, as explained in this section. The PC on which the MultiClient is running must either be on the same network or be connected to one another by a network cable. - Page 32 Select the DVRM6, then click Configure. A browser window opens and displays the configuration Login screen. Enter in the USER NAME and PASWORD for the DVRM6 in the appropriate fields, then click LOGIN. The default USER NAME and PASSWORD are svuser and servconf, respectively. After you login, the SYSTEM SUMMARY screen will open.
-
Page 33: Using The Configuration Utility Interface
SECTION 4: CONFIGURING THE DVRM6 Software Version Number Main Menu SYSTEM SUMMARY Screen 4.2 Using the configuration utility interface The configuration utility consists of screens that are displayed on the right side of the window and a Main Menu in a sidebar on the left side of the window. -
Page 34: Using The Configuration Utility
HELP: Opens a browser window and navigates to the Supercircuits website, in which you can find information about • configuring and working with your DVRM6 system, including the most up-to-date version of this manual. These buttons are available whenever the configuration utility is open, regardless of which screen is displayed. - Page 35 SECTION 4: CONFIGURING THE DVRM6 To configure the DVRM6 unit: In the main menu, click one of the links or tabs to open the desired summary screen, e.g., Cameras, Sensors, etc. The configuration summary screen opens. Click a link in the main menu or in the summary screen to open the desired configuration screen. The configuration screen opens.
- Page 36 SECTION 4: CONFIGURING THE DVRM6 On the SAVE SETTINGS screen, click SAVE CHANGES TO THE SYSTEM. The unit stores the changes permanently, and the SYSTEM RESTART PAGE screen opens: Click RESTART SYSTEM. When the unit restarts, the changes are implemented and you are automatically logged out of the configuration utility.
-
Page 37: Opening The Configuration Utility Remotely
Opening the configuration utility manually. If more than one DVRM6 video gateway is connected to the internet through the same router, each of them must use a different port. When you click Config in the MultiClient, the browser automatically connects to port 10000. As a result, the MultiClient may initially connect you to the wrong video gateway unit. -
Page 38: System Settings
(through the same LAN) or a remote connection (through the internet): Local connection: The network address is the private IP address of the DVRM6 on the local network. This can be either its •... -
Page 39: General System Settings
To open the SYSTEM SUMMARY screen, click SYSTEM in the main menu. The following system configuration screens are available: GENERAL: Unit name, port number, and activation of certain options • TV-OUT: Configuration of a closed-circuit monitor (CCTV) connected to the DVRM6) • DATE & TIME: Automatic and manual time setting •... - Page 40 (from Sensor 1) or according to a schedule. LAN OPTIMIZATION: Speeds the transmission of live video from the DVRM6 to PCs on the same LAN. This feature is not •...
- Page 41 System Port Enter the client access port of the DVRM6 unit. If you want to access the unit remotely and cannot set up port forwarding for port 10000 in your network, you can also access the configuration utility using this port.
-
Page 42: Configuring Microphone And Speaker Volume
LAN Optimization If video from the DVRM6 is viewed primarily or exclusively on PCs that are on the same LAN, select this option to minimize the delay between the time a frame of live video is captured and the time it is transmitted to the MultiClient on the PC. When this option is selected, live video will be played as close to real time as possible. - Page 43 Decrease volume Increase volume You can test the volume settings as you configure them by connecting to the DVRM6 using a client application. Volume levels can be adjusted for testing purposes without resetting the DVRM6 unit. To configure the volume of the internal speaker: Listen to the sound from the DVRM6 to listen the speaker.
-
Page 44: Configuring A Cctv Monitor (Tv-Out)
4.4.3 Configuring a CCTV monitor (TV-Out) If you connect a video monitor to your DVRM6, you must activate and configure it before you can see video on it. For additional information about setting up a CCTV monitor and viewing video on it, see Connecting a CCTV monitor, ; Viewing video on a CCTV monitor (TV-Out). - Page 45 SECTION 4: CONFIGURING THE DVRM6 Select ENABLED. The fields required to configure the monitor display are added to the screen: Configure parameters using the following table: Field Description Video mode Select the video format used by the monitor. Some SECAM monitors are compatible with the system. If they are, they should work when the PAL video mode is selected.
- Page 46 SECTION 4: CONFIGURING THE DVRM6 Field Description Rotate delay If you selected the FULL SCREEN – ROTATE display type, specify the number of seconds (dwell time) you want the video from each camera to be displayed before it is replaced with video from the next camera.
-
Page 47: Setting The Clock
DVRM6. For example, if the PC is located in New York, the system should be set to use GMT-5:00 (Eastern Time). If daylight savings time is in effect in New York at the time, daylight savings time must be activated on the DVRM6 or the GMT conversion will not be accurate and the time entered on the unit will not be correct. - Page 48 For example, if you select Saturday, it is implemented at midnight between Friday and Saturday. Under TIME ZONE, select the time zone in which the DVRM6 is located. Click UPDATE, and then save the settings. These changes will be implemented when the unit is restarted...
- Page 49 Updating the date and time manually You should set the unit date and time manually when you first set up the DVRM6 for the first time, and when the DVRM6 has not been used for a while. If an NTP time server is not available, you should update the time manually whenever the date and time are not correct.
- Page 50 SECTION 4: CONFIGURING THE DVRM6 Sync Time Confirmation Message If the unit clock was set ahead more than about 15 minutes, the DVRM6 may display a message indicating that your configuration NOTE session has expired instead of the page. This does not mean that the time was not reset correctly. However, you SYSTEM RESTART should still restart the unit to fully implement the update.
-
Page 51: Lan Settings
If the DVRM6 unit is not connected to the internet and no alternative local time server is accessible, this feature cannot be used to update the clock. - Page 52 SECTION 4: CONFIGURING THE DVRM6 Click the router ENABLE checkbox to select it. (This option is selected by default.) If you want a dynamic IP address to be assigned to the unit by a DHCP server on the LAN, select the ENABLE DYNAMIC IP (DHCP) checkbox.
-
Page 53: Modem Configuration
DVRM6 will automatically establishes a connection to a cellular network. Before you configure the modem, ask your cellular service provider for the preferred settings. If you use a cellular modem to make the DVRM6 accessible remotely, you must use a proxy server to connect to the unit. For NOTE additional information, see Proxy and DDNS settings . - Page 54 Select ENABLED if you want the system to periodically test the network connection after it is established. Click UPDATE. The settings are applied immediately. If a modem is connected to the DVRM6 and the configuration settings are correct, the DVRM6 will connect to the cellular network through the modem.
-
Page 55: Wifi Configuration
You can rank the available networks to indicate the priority of use for outgoing communications. For example, if the DVRM6 can connect to both a LAN and a cellular network, you may want to give the LAN network priority over the cellular network. -
Page 56: Port Forwarding
To connect to the device remotely, use the external IP address of the router (the IP address of the DVRM6 on the external network), and the assigned port number. You must establish a static IP address for the device before configuring the port forwarding to it. -
Page 57: Proxy And Ddns Settings
Typically, this occurs when the DVRM6 connects to the internet through a cellular network. It may also occur if the DVRM6 does not have a public IP address. The proxy server functions as an intermediary that relays requests and data between the DVRM6 and clients. - Page 58 DynDNS, the hostname is supplied to you when you set up your account. If you are using the SV-DDNS service, the default hostname is the DVRM6 default system name. You can modify this name as you wish. The name you choose should not include any spaces and be unique.
-
Page 59: Authentication
SECTION 4: CONFIGURING THE DVRM6 Field Description Hostname Name you choose for your server, appended with .TVG.CC. DDNS SERVER Enter the IP address or hostname of the SV-DDNS SV-DDNS Advanced menu server. DDNS PORT Enter the access port of the SV-DDNS server. -
Page 60: Sms And E-Mail Notifications
SMTP e-mail account that can be used as the “sender” of the e-mail messages. NOTE Web-based e-mail does not always support SMTP settings. The DVRM6 issues e-mail notifications with standard messages that contain the following information: Name of the DVRM6 unit •... -
Page 61: Testing Notification Settings
SECTION 4: CONFIGURING THE DVRM6 After you configure the notification settings, you can test them by sending a sample notification. For additional information, see Testing notification settings. Messages are sent when a device triggering an event (camera, sensor, or activator) is configured to send notifications of events. For... - Page 62 SECTION 4: CONFIGURING THE DVRM6 The default message includes the recipient name, the name of the DVRM6 unit, the name of the device that triggered the event, and the time at which the event was triggered. If the message format was changed and you want to return to the default format, click RESTORE DEFAULT TEMPLATE.
-
Page 63: Sms Message Templates
LAN: The unit should only use a LAN connection. If none is available, the • unit will not send the e-mail message. menu WIFI: The DVRM6 does not support a WiFi connection. • Modem: The unit should only use a Modem connection. If none is •... -
Page 64: Testing Notification Settings
4.4.15 AVV, Alarm Video Verification server setup You can configure the DVRM6 to automatically upload recorded video to an Alarm Video Verification (AVV) web server. After the video is uploaded, you can access the server through the Internet to watch the video. - Page 65 SECTION 4: CONFIGURING THE DVRM6 E-mail at the start of video upload E-mail at the end of video upload Both video files and e-mail notifications are sent using the highest-priority network connection available. Wireless Advanced 4-Channel DVR User Manual...
- Page 66 Port Enter the port used for ftp connections to the AVV server (usually 21). Upload path Enter the path of the ftp directory on the AVV server. The DVRM6 will upload the video files to this directory. Username Enter the username required to access the ftp directory on the AVV server.
- Page 67 SECTION 4: CONFIGURING THE DVRM6 If you want to select different recorder quality settings, clear the USE DEFAULT SETTINGS checkbox. The fields required — to configure the recorder settings are added to the screen. Field Description Maximum Size Select the desired frame size for the downloaded video, as follows: QSIF: Small frame (160 x 120 pixels) •...
- Page 68 SECTION 4: CONFIGURING THE DVRM6 Enter the server username and password, then click OK. A list of the files stored in the download directory appears in the browser window. Viewing video from the AVV server To watch video stored on the AVV server, download the video to a PC and play it with MultiClient. To download and view a video file from the AVV server: If you received an e-mail notification of the event, click either the image or the link in the e-mail.
- Page 69 Disabling AVV To disable AVV uploading: Disable AVV for all cameras and sensors connected to the DVRM6 unit. In the main menu under SYSTEM, click AVV to open the ALARM VIDEO VERIFICATION screen. Clear the AVV ENABLED checkbox. Note: This checkbox is disabled if AVV is enabled in any VMD or video lost settings, or in the settings of any sensor or activator.
-
Page 70: Camera Settings
SECTION 4: CONFIGURING THE DVRM6 4.4.16 Camera Settings The Camera screens are used to configure the cameras connected to the DVRM6 unit. Settings include the name of the camera, brightness, contrast, video format, pan-tilt-zoom (PTZ) settings, video-motion-detection (VMD) settings, video-lost settings, and recording settings. - Page 71 If the DVRM6 is using an SVBackup server, use only English characters in the name. Video type Select either PAL or NTSC. If multiple cameras are connected to the DVRM6, all cameras must be configured for the same video type.
- Page 72 Currently the DVRM6 supports only MEDIUM audio quality. To use the DVRM6 VMD features to detect and respond to motion in the camera’s field of view, click the check the ENABLED box for MOTION DETECTION (VMD). Then follow the instructions below.
-
Page 73: Video Motion Detection (Vmd)
Select the baud rate used by the camera for PTZ control. Refer to documentation provided with your camera for supported communication options. By default, the DVRM6 uses: one start bit, one stop bit, no parity, and 8-bit. If the camera requires different parameters, contact your vendor. - Page 74 If VMD is enabled but regions are not, middle sensitivity is applied to the entire FOV. NOTE If the camera is not connected to the DVRM6, a blank tan FOV is displayed. Select the regions for inclusion in VMD only when you can see an image from the camera.
- Page 75 SECTION 4: CONFIGURING THE DVRM6 Responses to VMD events You can configure the unit to respond to VMD events in any or all of the following ways: Upload video of the event to an AVV server on the internet (see Automatically uploading Video to an AVV server). If •...
- Page 76 SECTION 4: CONFIGURING THE DVRM6 Click the sensitivity level you want to apply to a region or regions of the FOV. The level selected appears in the CURRENT frame. In the figure above, HIGH SENSITIVITY is selected. If you want to set the entire FOV to the specified sensitivity level, click SET ALL REGIONS.
- Page 77 (1 minute – 1 day). If motion is detected continuously for longer than this period of time, a new event is automatically generated at the end of this interval. Under ON MOTION DETECTED, select the actions that the DVRM6 should perform if motion is detected, as follows: Field Description Select this option to send recorded video of the VMD events to an AVV server.
-
Page 78: Configuring Video Loss Response
Description Select this option to have the DVRM6 send SMS notifications when a motion event is detected. Messages are sent to the recipients specified in the SMS AND E-MAIL screen, in the format defined there (see SMS and e-mail notifications). -
Page 79: Video Recording Settings
Description Select this option to have the DVRM6 send video of the seconds preceding the video-lost event to an AVV server. The video is uploaded to the site defined on the AVV screen (see Automatically uploading Video to an AVV server), and e-mail notifications are sent to all e-mail recipients (see SMS and e-mail notifications). - Page 80 The space available on the hard drive limits how much disk space can be allocated for each recorder. When the disk space allocated for a recorder is used up, the DVRM6 will either continue recording by overwriting the oldest recording, or stop recording until space becomes available through manual deletions, per its configuration setup.
- Page 81 Advanced settings allow you to customize the recorder’s video quality settings, the allocation of disk space among all the recorders connected to the DVRM6 unit, and whether or not recordings are automatically erased to make room for new recordings. The...
- Page 82 SECTION 4: CONFIGURING THE DVRM6 Although teal-time demands on system resources may overload the DVR, it regulates itself to ensure the best use of available NOTE resources. When necessary, it may temporarily lower the framerate of a stream to accommodate immediate processing requirements without affecting the quality of individual frames in the stream.
-
Page 83: Sensor And Activator Settings
Up to four sensors and two activators can be connected directly to the DVRM6. These devices are not supplied with the DVRM6. The DVRM6 can be configured to perform any or all of the following actions when a sensor detects an event: Record a camera video stream •... - Page 84 In the main menu under SENSORS, click the sensor or activator you want to configure. Select the ENABLED checkbox to use the sensor as an event trigger and open the configuration menu screen. NOTE Sensors that are ENABLED but not physically connected to the DVRM6 may cause false alarms. www.supercircuits.com...
- Page 85 Otherwise, the DVRM6 may not record the event, and therefore it will not be possible to upload it to the AVV server.
-
Page 86: Configuring Sensor 1 To Switch Outlines
This option only appears if DISPLAY SWITCH VIA SENSOR is enabled (see the TV-OUT screen). Presets All PTZ cameras connected to the DVRM6 that support presets are listed below this heading. To configure a cameras to automatically (Sensors only) aim at a preset location number when a sensor event begins, select the preset number from the drop-down list. -
Page 87: Configuring Sensor 4 To Control Cctv Display
4.5.2 Configuring SENSOR 4 to control CCTV display A push-button switch can be connected to SENSOR 4 instead of a sensor to. If a monitor is connected to the DVRM6, SENSOR 4 can then be used to change the display on the monitor. With each press of the button, the display cycles to the next display type, in the following order: Split screen: The screen is divided into four parts, and live video from each camera is displayed in one of the parts. -
Page 88: Outlines
SECTION 4: CONFIGURING THE DVRM6 Camera 1: Full-screen display of live video from Camera 1. • Camera 2: Full-screen display of live video from Camera 2. • Camera 3: Full-screen display of live video from Camera 3. • Camera 4: Full-screen display of live video from Camera 4. -
Page 89: Creating An Outline
SECTION 4: CONFIGURING THE DVRM6 Outline configuration is an optional feature of the DVRM6. If you do not define outlines, all the event-handling settings are automatically stored in one (DEFAULT) outline. You can define up to five additional outlines. When multiple outlines are defined, the outline currently in use can be switched to another outline in one of three ways: Manually: By selecting the desired outline in the configuration utility, as described below •... - Page 90 SECTION 4: CONFIGURING THE DVRM6 Select ENABLED to display the recording and event-handling settings. Under OUTLINE NAME, enter a name, then click UPDATE. This setting is saved when the unit is restarts. If you want to load the DEFAULT outline settings, click RESTORE DEFAULT OUTLINE, then click UPDATE.
-
Page 91: Activating Outlines Manually
SENSOR 1 in its configuration screen, then select it in the CAMERA 1 configuration screen. Click UPDATE. Repeat steps 5–7 for each camera, sensor and activator connected to the DVRM6. Save the changes. The settings are implemented when the unit restarts. -
Page 92: Schedules
SECTION 4: CONFIGURING THE DVRM6 On the line of the OUTLINE you want to use, click ACTIVATE. To select the start-up outline Open the OUTLINES screen. On the line in which the outline is listed, select LOAD OUTLINE ON SYSTEM START. - Page 93 SECTION 4: CONFIGURING THE DVRM6 The schedule grid contains a row for each day of the week and a column for each hour of the day. Each cell represents an hour of a day and contains two marks, the left for the first half of the hour, and the right for the second half. The color of a mark indicates the outline it represents.
- Page 94 SECTION 4: CONFIGURING THE DVRM6 Selected outline To apply the outline to the entire week’s schedule, click SET ALL SCHEDULES TO CURRENTLY SELECTED OUTLINE. All of the rectangles in the schedule grid are switched to the color representing the selected outline.
-
Page 95: Holiday Schedules
SECTION 4: CONFIGURING THE DVRM6 iii. Click the diagonally opposite corner of the rectangular area that you want to mark. The selected outline is applied to the entire rectangle. To apply the selected outline to individual half-hour time slots, do one of the following: With the CHANGE MULTIPLE TIMES checkbox selected, double-click the rectangle representing the time slot. - Page 96 SECTION 4: CONFIGURING THE DVRM6 In the text field for NEW SCHEDULE to enter a name for the schedule. name Click UPDATE to change the name. Follow the instructions under Configuring a weekly schedule to select the outlines to implement in each time slot.
- Page 97 SECTION 4: CONFIGURING THE DVRM6 Enter the appropriate information as follows: NAME: The name of the holiday, e.g., New Years Day START DATE: The first day of the holiday. END DATE: The last day of the holiday. If the holiday only lasts one day, the start date and end date are the same.
-
Page 98: Saving Configuration Changes
SECTION 4: CONFIGURING THE DVRM6 4.6.5 Saving configuration changes As you make changes in each screen, click the UPDATE to save the changes. To complete the save operation and update the DVRM6, follow the steps described below. Changes to MODEM, and camera brightness, contrast, and saturation settings are applied when you click the UPDATE button. To NOTE save them permanently, the changes must be saved, but restarting the unit is not necessary. -
Page 99: Discarding Changes
SECTION 4: CONFIGURING THE DVRM6 Click RESTART SYSTEM. When the system restarts, you are automatically logged out of the configuration utility and a confirmation message appears: If you do not restart the unit at this time, changes are saved but are not activated. The next time the unit is restarted, the changes NOTE are activated. -
Page 100: Restoring Default Settings
4.6.7 Restoring default settings Restoring default settings returns the DVRM6 to its factory configuration settings. If recent configuration changes made it impossible to access the unit through the local network, the factory settings can be restored as described under Restoring factory settings. - Page 101 SECTION 4: CONFIGURING THE DVRM6 Click RESTART SYSTEM. The unit restarts, and the factory default settings are implemented. You are automatically logged out of the configuration utility, and a confirmation message appears. To reconnect to the system after a factory reset, do one of the following: If the primary IP address of the unit before you restored the default settings was the default, factory-configured IP address, •...
-
Page 102: Viewing Snapshots In A Browser
The Snapshot feature enables you to view live images from cameras through a web browser. Snapshots are transmitted from the DVRM6 to the browser as .JPG files. You can specify the desired image quality during the Snapshot session. Video is not supported by this feature, but snapshots can be updated at frequent intervals for viewing. - Page 103 SECTION 5: VIEWING SNAPSHOTS IN A BROWSER Field Description Quality Enter the preferred snapshot image quality, as a value from 1 through 100. The higher the quality, the larger the file that is created, and the longer it takes to download. A quality setting of 60 is recommended; this settings is equivalent to the quality of the images you receive when viewing a video stream at 10 fps / 128 kbs.
-
Page 104: Viewing Video On A Monitor (Tv-Out)
SECTION 6 Viewing Video on a Monitor (TV-OUT) If a monitor is connected to your DVRM6, you can view live video with it. Live video can be displayed on the monitor in one of the following ways: Full-screen display of live video from one of the cameras •... - Page 105 Sensor and activator settings). Otherwise, the default display is always used. When the DVRM6 unit starts up, the monitor displays a startup screen containing the name of the unit, the IP address 0.0.0.0, the subnet mask, the firmware version, and a video pane displaying live video from one of the cameras connected to the unit. After a few seconds, this display is replaced by the default video display.
-
Page 106: Resetting The Unit
SECTION 7 Resetting the Unit You can reset the DVRM6 at any time. If changes were made to the configuration settings of the unit and then saved, for most setting the unit must be reset to implement the changes. The unit can be reset in one of three ways: Software: Selecting Restart in the configuration utility •... -
Page 107: Restoring Factory Settings
If certain configuration settings are set incorrectly, or you forget the username and password, it may be impossible to connect to the DVRM6 unit. For these situations, you can force all the configuration settings to their default values. When you do this, the unit’s IP address and port are reset to the IP address and port that appear on the label on the underside of the unit, the username and password are reset to svuser and servconf respectively, and all other settings are revert to their original values. -
Page 108: Erasing Recorded Video
Jumper Pin 2 Pin 3 Power on the DVRM6. When the startup process completes, the Power LED on the front of the unit flashes at frequent intervals and the default factory settings are restored. Power off the DVRM6. Remove the jumper from the RS232/485 connector. -
Page 109: Erasing All Recorded Video From One Camera
SECTION 7: RESETTING THE UNIT 7.3.1 Erasing all recorded video from one camera You can erase all the recorded video stored on the unit’s hard drive by one camera. This is useful if you write protect in the camera’s recorded data and the disk space allocated to the camera is full. To erase all recorded video from one camera: In the CAMERA SUMMARY screen, click the ERASE button for the camera who’s recordings you want to erase. -
Page 110: Erasing All Recorded Video From The Hard Drive
On the SYSTEM RESTART PAGE, click RESTART SYSTEM. Allow the system to fully restart before continuing. 7.4 Restoring the default disk allocation To erase all recorded video from the DVRM6 hard drive and restore the disk space allocation to its default settings: In the CAMERA SUMMARY screen, click SET RECORDING DISK SIZE TO DEFAULT. - Page 111 In the warnings screen, click SAVE CHANGES TO THE SYSTEM to save the new settings. After saving changes to the system, all video recordings become inaccessible and no additional recording can occur until the DVRM6 is restarted. Wireless Advanced 4-Channel DVR User Manual...
- Page 112 SECTION 7: RESETTING THE UNIT On the SYSTEM RESTART PAGE, click RESTART SYSTEM to implement the change. Allow the system to fully restart before continuing. www.supercircuits.com...
-
Page 113: Upgrading The Firmware
SECTION 8: UPGRADING THE FIRMWARE SECTION 8 Upgrading the Firmware The DVRM6 includes two different firmware components: the video gateway component and the router component. The upgrade procedure for each is included below. 8.1 Upgrading video gateway firmware Video gateway firmware is installed from a TVG Upload Server using the configuration utility. Upgrading the firmware does not change any of the unit’s settings. -
Page 114: Upgrading Router Firmware
Before upgrading router firmware: Save all configuration changes • Restart the DVRM6 to implement all configuration changes • Ask your distributor for the address (URL) of the download site. •... - Page 115 SECTION 8: UPGRADING THE FIRMWARE Enter the location of the firmware server site provided by your distributor or technical support staff in the UPGRADE URL field. Click UPDATE. The new firmware is downloaded into the unit and then installed. Allow the process to complete before continuing;...
-
Page 116: System Diagnostics
System Summary screen. For additional information notifications, see SMS and e-mail notifications. For information about testing e-mail notifications, see Testing notification settings. Power Log: Lists every time the DVRM6 resets, and indicates what caused the reset and what type of reset it was; lists the •... -
Page 117: Testing Remote Connections
IP address and waits for a reply. If a reply is received, the remote device can receive and transmit data to the DVRM6. Using ping, you can verify that the DVRM6 unit is running and can be accessed remotely. - Page 118 192 . 1 68 .3 .60 Press Enter. The PC will broadcast a ping command to the DVRM6 by sending four test messages to it. The ping command returns responses from the DVRM6 for each message that was successfully sent, as shown in the figure below. If a target device does not respond to a message, the ping command returns a “Request timed out”...
- Page 119 - no response from the remote device To test a remote connection from the DVRM6 unit to a host device using ping: In the PING section of the SYSTEM DIAGNOSTICS screen, enter the target IP address or URL field provided. You can also access the DVRM6 ping utility from the main menu DIAGNOSTICS submenu.
-
Page 120: Traceroute
Microsoft Windows Command window, and from the DVRM6 configuration utility. Using traceroute from a remote PC, you can check the route from the PC to your DVRM6 unit. You can also check the routes of remote connections from the DVRM6 unit to other devices by running traceroute from the DVRM6. - Page 121 SECTION 9: SYSTEM DIAGNOSTICS In the Command Window, type tracert <IP>, where <IP> is the IP address of the DVRM6. For example, type: tracert 216 . 1 0 .244 . 1 1 Press Enter. traceroute sends three packets, and follows their route for up to 30 steps from the sender to the target. For each step in the route, the time it took for each packet to arrive from the previous machine, and the IP of the current machine, are displayed.
- Page 122 - with time outs To test a remote connection from the DVRM6 unit to a host device using traceroute: In the TRACEROUTE section of the SYSTEM DIAGNOSTICS screen, enter the target IP address or URL field provided. You can also access the DVRM6 traceroute utility from the main menu DIAGNOSTICS submenu.
- Page 123 SECTION 9: SYSTEM DIAGNOSTICS Wireless Advanced 4-Channel DVR User Manual...
-
Page 124: Troubleshooting
Solution: Disconnect the power supply from the unit, then reconnect it. Also, see: Resetting the unit. Problem: The firmware update process did not complete properly, and the DVRM6 unit cannot be accessed. Solution: Disconnect the power supply from the unit, then reconnect it. If the LED on the front panel is solid green or orange (not flashing), contact technical support for assistance. - Page 125 Cameras are not configured for the proper video format. Ensure that all cameras are configured with the proper video — format (PAL or NTSC). Cameras that use different video formats (PAL and NTSC) are connected to the DVRM6. All connected cameras should — use the same video format.
- Page 126 Problem: The unit is connected to a LAN but cannot be accessed through the LAN. Solutions: Verify that the Ethernet (network) cable is fully inserted into the Uplink connector on the rear panel of the DVRM6 — unit. For additional information, see: Connecting the DVRM6 to an external network Verify that the LEDs on the rear panel of the unit (in the upper-right corner) are blinking.
- Page 127 Problem: The unit does not turn on – the LEDs on the front panel do not light up and the unit cannot be accessed by any external devices. Solutions: Note: Do not open the DVRM6. It contains no user-serviceable parts. Check the power connections and cables.
Need help?
Do you have a question about the DVRM6 and is the answer not in the manual?
Questions and answers