Table of Contents
Advertisement
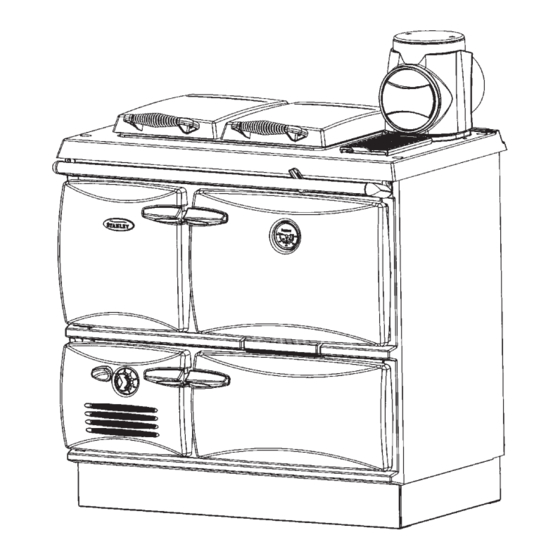
Donard Solid Fuel Cooker
To ensure safety, satisfaction and maximum service, this Cooker should be installed by a suitably qualified
and competent person. The provision of a Central Heating facility, requires that the hot water systems
involved, conform fully to good plumbing practice and established standards.
INSTALLATION AND OPERATING INSTRUCTIONS
The manufacturers reserve the right to make alterations to design, materials or construction for manufacturing or other reasons subsequent to
publication.
Advertisement
Table of Contents

Related Manuals for Stanley Donard


Summary of Contents for Stanley Donard
- Page 1 Donard Solid Fuel Cooker To ensure safety, satisfaction and maximum service, this Cooker should be installed by a suitably qualified and competent person. The provision of a Central Heating facility, requires that the hot water systems involved, conform fully to good plumbing practice and established standards.
-
Page 2: Table Of Contents
TABLE OF CONTENTS Page No. Operating Instructions ........................3 Schematic ............................3 Control of Substances........................3 Summer Operation..........................3 Specification ............................. 4 Technical Data............................4 Installation ............................5 Pre-Installation Check - Location .......................5 Hearth Construction .......................... 5 Chimney /Flues ..........................5 Flue Box ............................6 Flue Pipes/Connections ........................ -
Page 3: Operating Instructions
Notice: Any alteration that is not approved by Waterford Stanley may render the warranty void and can effect your statutory rights. -
Page 4: Specification
SPECIFICATION Note: Dimensions stated above may be subject to a slight +/- variation FEATURE METRIC HOT PLATE 560 x 330 ROASTING OVEN 390W x 310H x 406D SIMMERING OVEN 390W x 220H x 406D FIREBOX 220W x 500H x 400D ASHBOX 220W x 200H x 400D FUEL CAPACITY... -
Page 5: Installation
INSTALLATION Fig.1 Installation must comply with the following: B.S. 8303 - Code of Practice for the installation of domestic heating and cooking appliances burning solid mineral fuels. Building Regulations - Part J. Local Authority by-laws and other specifications as they affect the installation of the cooker. PRE-INSTALLATION CHECK - LOCATION When choosing a location for this appliance you must have:... -
Page 6: Flue Box
THOROUGHLY SEALED. Blocked chimneys are dangerous, use only recommended fuels, keep chimneys and flue ways clear; read the operating instructions. STANLEY CAST IRON PIPES ARE HIGHLY RECOMMENDED FOR INTERIOR USE. DRAUGHT REQUIREMENTS When a draught recorded is over .10 inches W.G. a draught stabiliser should be fitted. -
Page 7: Plumbing
PLUMBING PIPE FUNCTION PIPE FUNCTION RADIATOR FIRST HEATING FLOOR PUMPED FLOW TO RADIATORS HOT WATER FLOW CIRCUITS PUMPED RETURN EX COLD WATER (EX TANK) PUMPED FLOW TO RADIATORS COLD FEED-HEAT SYSTEM GROUND PUMPED RETURN EX OPEN VENT-HEAT SYSTEM CYLINDER FLOOR GRAVITY FLOW TO CYLINDER COLD FEED TO CYLINDER HEATING... -
Page 8: Exploded View
EXPLODED VIEW... -
Page 9: Injector Tee
to give the required temperature differential between INJECTOR TEE the flow and return. The pump should be able to Where the gravity and central heating circuits join meet the requirements of the system design and be together to return to the Cooker we recommend the fitted in a readily accessible position. -
Page 10: Operation
Fig.7 Fig.7a OPERATION LIGHTING THE FIRE of the flue damp so that the soot sticks to the flue and the tarry mixture formed may drip down into the Thoroughly check all pipe work for leaks, especially appliance. It is always a good idea to run at a high the pipe connections to the boiler before lighting. -
Page 11: Ash Removal
The thermostat will close down when the water heat ASH REMOVAL reaches the temperature chosen by the selected Some attention should be paid to the amount of ash setting, it will close fully when the water temperature that is allowed to build up in the firebox. Wood has reaches 90 - 95 C when set at 5 - to prevent boiling. -
Page 12: Ashdoor Spin Valve
SUMMER GRATE & HEAT SHIELD ASSEMBLY Heated secondary air enters the firebox through a INSTALLATION INSTRUCTIONS spin valve in the firedoor back plate while the valve is open to assist combustion of smoke volatiles. To obtain a reduction in boiler output during the Close when burning anthracite. -
Page 13: Hotplate Insulating Covers
Insert the support legs (item 1) through the INTERNAL/FLUE CLEANING fire door and rest them on the shaker grate The flue or chimney will need to be cleaned support lugs. To lock support legs into regularly. How often will depend a lot on how your position, fit legs as per fig. -
Page 14: Grate Removal
Carbon deposits on these Stanley cookers are finished in a high gloss vitreous surfaces will reduce efficiency by up to 20%. All enamel. To keep the enamel in the best condition deposits from the flue pipe and the top of the oven... -
Page 15: Opening Cooker Door
OPENING COOKER DOOR 1. To Open Door Lift handle and pull door open. See Fig. 20. Fig.20 2. To Close Door - Lift handle, push door closed, press down to engage latch and release. See Fig.21. Fig.21... -
Page 16: Fault Finding
FAULT FINDINGS Poor Chimney Draught (a) Obstruction (a) Clear and Clean (b) Too Low (b) Raise Height above Ridge (c) Too Wide (c) Fit Flue Liner 15 to 23 c.m. (d) Crack in Wall (d) Repair Cracks (e) Shared by another unit (e) Cut of other Unit. -
Page 17: Installation Check List
INSTALLATION CHECK LIST √ Tick Flue System 1. Minimum Flue Height of 4.6 metros (15 feet). 2. Appliance should be connected to a minimum of 1.8 metres (6 feet) of 150mm (6”) flue pipe with a horizontal run not exceeding 300mm (12”). 3. -
Page 18: Warranty
WARRANTY CONDITIONS OF WARRANTY Your Stanley cooker is guaranteed against any part that fails (under normal operating conditions) from the date of installation of the appliance. If the unit is not installed within six months of date of purchase, the warranty will commence six months from the date of purchase.
Need help?
Do you have a question about the Donard and is the answer not in the manual?
Questions and answers