Table of Contents
Advertisement
Quick Links
Advertisement
Table of Contents

Related Manuals for SMC Networks EZ Connect SMC8014WG-SI


Summary of Contents for SMC Networks EZ Connect SMC8014WG-SI
- Page 1 EZ Connect™ Wireless Cable Modem Gateway Install Guide SMC8014WG-SI - 1 -...
- Page 2 Copyright Information furnished by SMC Networks, Inc. (SMC) is believed to be accurate and reliable. However, no responsibility is assumed by SMC for its use, nor for any infringements of patents or other rights of third parties which may result from its use. No license is granted by implication or otherwise under any patent or patent rights of SMC.
-
Page 3: Table Of Contents
TABLE OF CONTENTS CHAPTER 1 | Introduction Features and Benefits Package Contents Minimum Requirements CHAPTER 2 | Getting to know the SMC8014WG-SI Gateway LED Indicators Rear Panel Description Resetting and Restoring the SMC8014WG-SI Gateway CHAPTER 3 | Installation Basic Installation Procedure CHAPTER 4 | Configuring your Computer Configuring Windows 95/98/Me Configuring Windows 2000... -
Page 4: Chapter 1 | Introduction
CHAPTER 1 | Introduction Congratulations on your purchase of the SMC8014WG-SI Gateway. SMC is proud to provide you with a powerful yet simple communication device for connecting your local area network (LAN) to the Internet. Features and Benefits • Internet connection to cable modem service via an integrated cable modem port •... -
Page 5: Package Contents
Package Contents Before installing the SMC8014WG-SI Gateway, verify that you have the items listed under below. Also be sure that you have the necessary cabling. If any of the items are missing or damaged, contact your local SMC distributor. • 1 - SMC8014WG-SI Gateway •... -
Page 6: Chapter 2 | Getting To Know The Smc8014Wg-Si Gateway
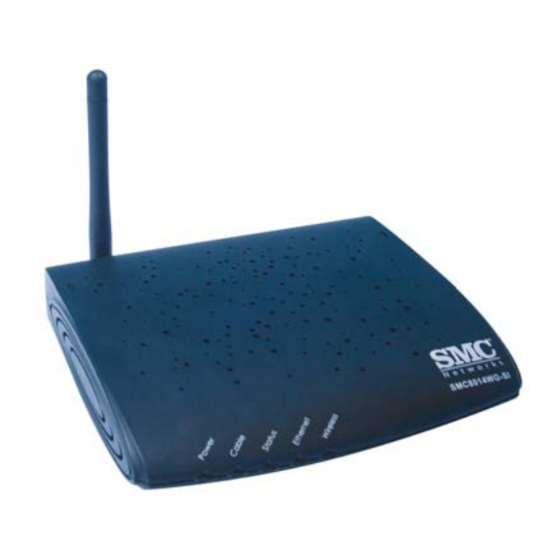
CHAPTER 2 | Getting to Know the SMC8014WG-SI Gateway The SMC8014WG-SI Gateway is the perfect all in one solution, for the home or business environment. This full-featured device has: • An approved DOCSIS 1.1 and 2.0 Cable modem • Advanced SPI Firewall Gateway •... -
Page 7: Rear Panel Description
Rear Panel Description Power CATV Reset Connector Button Port Item Description Power Connect the included power adapter to this port. CATV Connect your cable line to this port. Reset Use this button to reset the power or restore the default factory settings. 10/100 Auto-sensing switch port (RJ-45). -
Page 8: Chapter 3 | Installation
CHAPTER 3 | Installation The SMC8014WG-SI Gateway can be installed in any location where you have cable Internet access, and your cable Internet service provider has approved the Gateway. To confirm you meet these 2 criteria points, please contact your cable operator. For general installation please follow the guidelines outlined below to best performance: •... -
Page 9: Chapter 4 | Configuring Your Computer
CHAPTER 4 | Configuring your Computer The information outlined in this chapter will guide you through the configuration for the following Operating Systems: • Windows 95/98 • Windows Me • Windows 2000 • Windows XP • Apple Macintosh Configuring Windows 95/98/Me 1. -
Page 10: Configuring Windows 2000
and check the correct file location, for example, D:\win98, D:\win9x. (Assume “D” is your CD-ROM drive). 9. Windows may prompt you to restart the PC. If so, click the [Yes] button. If Windows does not prompt you to restart your computer, do so anyways to ensure your settings. Configuring Windows 2000 1. -
Page 11: Configuring A Macintosh Computer
3. On the [Local Area Connection] Properties box, verify the box next to Internet Protocol (TCP/IP) is checked. Then highlight the Internet Protocol (TCP/IP), and click the Properties button. 4. Select Obtain an IP address automatically to configure your computer for DHCP. Click the [OK] button to save this change and close the Properties window. -
Page 12: Chapter 5 | Configuring The Smc8014Wg-Si Gateway
CHAPTER 5 | Configuring the SMC8014WG-SI Gateway After you have configured TCP/IP on a client computer, use a web browser to configure the SMC8014WG-SI Gateway. The Gateway can be configured by any Java-supported browser including Internet Explorer 5.0 or above, or Netscape Navigator 5.0 or above. Using the web management interface, you can configure the Gateway features and view its settings. -
Page 13: Accessing The Smc8014Wg-Si Gateway Web Management
Accessing the SMC8014WG-SI Gateway’s Web Management To access the SMC8014WG-SI Gateway’s web-based management screens, follow the steps below: 1. Launch your web-browser. NOTE: Your computer does not have to be ONLINE to configure the SMC8014WG-SI Gateway. 2. In the Address Bar, type: http://192.168.0.1 3. -
Page 14: Chapter 6 | Navigating The Web-Based Administration
CHAPTER 6 | Navigating the Web-based Administration The SMC8014WG-SI Gateway’s management interface allows you to configure both basic and advanced features and options. Some of these advanced functions include: hacker attack detection, IP and MAC address filtering, intrusion detection, port forwarding setup, virtual DMZ hosts, as well as other advanced functions. - Page 15 • Enable or Disable the integrated DHCP server • Configure the DHCP Lease time for your DHCP clients To access the LAN configuration page, on the Side Navigation bar, click on [LAN] link. LAN IP Use the LAN section to configure the LAN IP address for the Gateway and to enable the DHCP server for dynamic client address allocation.
-
Page 16: Wireless
WIRELESS This section allows you to configure the Gateway’s built-in 54 Mbps 802.11g Access Point. To setup the wireless connections, you will need to do define the Service Set Identifier (SSID), Channel, Encryption options, and other optional settings. To access the Wireless Settings page shown below, on the Side Navigation bar, click on [Wireless] link. - Page 17 Hide SSID: This option will cause the Gateway to not broadcast its SSID. By selecting this option, wireless clients will not be able to use their Site Survey feature to locate this wireless network. Encryption If you are transmitting sensitive data across wireless channels, you should enable either Wired Equivalent Privacy (WEP) or WiFi Protected Access (WPA) encryption.
- Page 18 To automatically generate a 64-bit WEP key, enter in a Passphrase (keyword - ex. Home) and click the [Generate Keys] option. Once you do this, the Gateway will dynamically generate 4 keys. Simply configure the Default Key to the one key that you will be using across your network. On the wireless clients, you can use the passphrase option, and client utility will generate the same 4 keys –...
-
Page 19: Nat
You can also configure a [Device Name] that is associated with a specific MAC address. In doing this, you can easily recognize the computers that you are in your access list. NOTE: MAC filtering only applies to Wireless Clients. Network Address Translation (NAT) allows multiple users at your local site to access the Internet through a single public IP address. - Page 20 Predefined Service The Predefined Service option has a pull-down menu with several popular Service Applications, such as HTTP (80), FTP (20/21), and AIM/ICQ (5190). To configure Port Forwarding with a Predefined Service rule, follow the steps below: 1. Select the [Service] that you want to have access through the firewall to your LAN from the pull-down menu.
- Page 21 Customer Defined Service Rule (Custom) The Customer Defined Service section allows you to custom configure a Port Forwarding rule with any Traffic type (TCP/UDP/TCP and UDP), Public Port, and Private Port. To configure this custom option, follow the steps below: 1.
-
Page 22: Firewall
Below is an example setting for a WEB server on an Internet connection, where port 80 is blocked from the WAN side, but port 8000 is available. Name: Web Server Type: LAN Server IP: 192.168.0.100 Remote IPs: Any (allow access to any public IP) Public Port: 8000 Private Port:... - Page 23 The section is used to configure Access Rules for the Private LAN to the Internet. These rules will block services on the private LAN to the Internet. For convenience, the Access Control section includes 2 filtering options: • Predefined Filtering •...
- Page 24 Customer Defined Filtering Access Rule (Custom): 1. On the Side Navigation bar, click on [Firewall] then select [Access Control] 2. Under the Customer Defined Section, click on the [Add] button 3. On the Customer Defined Filter page, define a Name for the service/application that you want to block.
- Page 25 configured port(s), it dynamically allows all incoming traffic from the server on any port for the specified time. To access the Special Application configuration page, on the Side Navigation bar, click on [Firewall] link and then click on the [Special Application] link. To enable this option, click the [Enable Triggering] checkbox.
- Page 26 7. The last 2 options are for Advanced Users, most users can leave this at the default settings: • IR Replacement – Default Setting: Disable address replacement • Allow sessions initiated from/to the 3 host – Default Setting: unchecked 8. When your configuration is complete, click the [Apply] button to save your changes and return to the main Special Application page.
- Page 27 5. The new keyword or URL address would be listed in the text box below. NOTE: This list will support 50 Keywords or URLs. If you want a PC on your network to bypass these rules you will need to set that PC as an Exempted PC/Trusted Host.
-
Page 28: Tools
To enable this option, click the [Enable DMZ Host] checkbox. To configure a DMZ host, Enter in the LAN IP Address of the PC on your network in the input fields. TOOLS The Tools menu allows a user to Reboot the Gateway. To reboot the Gateway, follow the steps below: 1. - Page 29 The Network Log shows both firewall and network activity. The LAN Client Log shows the clients connected to the Gateway and the type of connection (Ethernet or Wireless). This also shows the IP address assigned to the client and the MAC Address of the client’s network adapter.
- Page 30 The Cable Status page shows the users the initialization process the SMC8014WG-SI has been through, and also includes the information about the downstream channel and the upstream channel on which the modem is connected. - 30 -...
-
Page 31: Appendix B | Troubleshooting
APPENDIX A | Telnet CLI Commands Refer to the 8014WG-SI CLI document for command specifics. APPENDIX B | Troubleshooting This appendix describes common problems you may encounter and possible solutions to them. B.1 | Verify you are connected to the SMC8014WG-SI Gateway If you are unable to access the Gateway’s web-based administration pages, then you may not be properly connected or configured. - Page 32 Confirm that you have a good link light on the Gateway’s port to which this computer is connected. If not, please try another cable. If you have a good link light, please open up a DOS window as described in section A.1 and type “ipconfig /renew”...
- Page 33 If you still are not getting an IP address from the Gateway, please reset the hardware as outlined in Chapter 2 and follow the steps outlined in this appendix again. Note: all configured settings will be erased! If you still cannot access the Gateway once you have reset it, please contact your cable operator for assistance.
- Page 34 There may be something wrong in your installation procedure. Check the following items in sequence: 1. Is the Ethernet cable correctly connected between the Gateway and the computer? 2. The LAN LED on the Gateway and the Link LED of the network card on your computer must be on.
- Page 35 • Disable any firewall or security software that may be running on your PC. • You will also need to verify that the “HTTP Proxy” feature of your web browser is disabled. Refer to Chapter 5 | Configuring the SMC8014WG-SI Gateway for more information.
-
Page 36: Appendix C | Technical Specifications
APPENDIX C | Technical Specifications COMPATIBILITY NETWORKING Platform independent -works with PC or Mac IEEE 802.1d compliant bridging DOCSIS 2.0/Cable Home 1.1 compliant DHCP Client IEEE 802.3, 802.3u and 802.11b/g compliant DHCP Server PORTS SECURITY 1 10/100 BASE-TX RJ45 Autosensing Password protected configuration access 1 IEEE 802.11b/g Stateful Packet Inspection (SPI) Firewall... -
Page 37: Appendix D | Compliances
APPENDIX D | Compliances FCC Interference Statement This equipment has been tested and found to comply with the limits for a Class B digital device pursuant to Part 15 of the FCC Rules. These limits are designed to provide reasonable protection against radio interference in a commercial environment. -
Page 38: Appendix E | Technical Support
APPENDIX E | Technical Support At this time, the SMC8014WG-SI is only distributed through cable operators. Contact your cable operator with any technical support needs you may have. PHONE From U.S.A. and Canada (24 hours a day, 7 days a week) •... - Page 39 SMC Networks, Inc. 38 Tesla Irvine, CA SMC8014WG-SI 92618 - 39 - Rev. 1.0 – 4.03.08...
Need help?
Do you have a question about the EZ Connect SMC8014WG-SI and is the answer not in the manual?
Questions and answers