Dedicated Micros SD Unit Quick Start Manual
Hide thumbs
Also See for SD Unit:
- Installation and operation manual (120 pages) ,
- Installation and operation manual (76 pages) ,
- Installation and operation manual (76 pages)
Table of Contents
Advertisement
Available languages
Available languages
Quick Links
To conTrol PTZ dome cameras
When a dome or PTZ camera is selected, the directional buttons will control the dome movements, putting the
unit in Telemetry mode. There are two speeds supported on the Ir remote control and these can be selected
via the speed key.
Note: To zoom in with the camera, use the Zoom IN button.
SD Quick Start Guide
accessing the menus on a local monitor
The Configuration pages can be displayed on the local monitor by pressing the MENU button on the Remote
Guide de Démarrage Rapide du SD
control.
Note: If the IR Remote Control does not open the menu, press the DVR button on the Remote to make sure it
Guida Di Avviamento Rapida del SD
is in DVR mode, then press the MENU button again.
Guía de Inicio Rápido Del SD
SD Kurzanleitung
Advertisement
Table of Contents

Related Manuals for Dedicated Micros SD Unit


Summary of Contents for Dedicated Micros SD Unit
- Page 1 To conTrol PTZ dome cameras When a dome or PTZ camera is selected, the directional buttons will control the dome movements, putting the unit in Telemetry mode. There are two speeds supported on the Ir remote control and these can be selected via the speed key.
- Page 2 Guía de Inicio rápido del sd ............27 sd Kurzanleitung ................35 Whilst every attempt is made to ensure these manuals are accurate and current, dedicated micros reserve the right to alter or modify the specification of the machine described herein without prejudice.
-
Page 3: Installing The Sd Unit
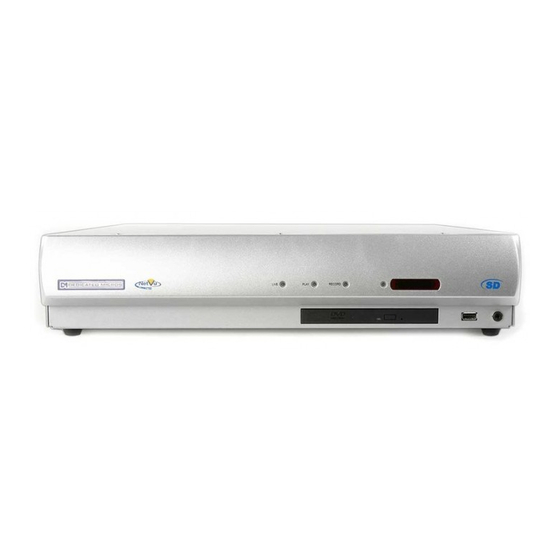
Unit. Use this guide in conjunction with the SD Installation & Operation manual. This document is located on the Product cd supplied with the unit and can also be found on the dedicated micros website. Installing the SD Unit The SD supports Video Inputs via the 75Ω BNC connectors. -
Page 4: Ir Remote Control
Electronic zoom If the DVR is in Live or Playback mode, pressing the Zoom IN button will Zoom (x2) into the image. Once ‘zoomed in’, it is possible to navigate within the image using the Directional buttons. dedicated micros ©2007... -
Page 5: Accessing The Configuration Web Pages
Locating the Unit IP address The IP address of the unit is required to access these pages. The SD unit’s IP address can be identified from the local menu pages. Using the local monitor, press the MENU button and then navigate to the Network menu to find the DHCP assigned IP address. - Page 6 5pps on each camera, out of the box, at a record duration of 7, 14, 30 or 60 days (the default is 14 or 30 days depending on variant). Note: It is the Installer/Owner’s responsibilty to ensure that the record duration is set to the necessary requirements of the application. dedicated micros ©2007...
-
Page 7: Event List
Archive list. To archive to CD/USB, refer to the Copy Menu section on the following page. Start a new search If you wish to start a new search filter, tap the EVENT button to exit the Event list, then re-enter data in the event search filter menu dedicated micros ©2007... - Page 8 1.Press the eVenT button to display the event list screen. 2. Use the Up/Down Directional buttons to highlight the event to be copied. 3. Press the COPY button, the event is then sent to the Copy List. dedicated micros ©2007...
- Page 9 5.On completion the CD will be ejected from the unit. To Copy Events/Images to a USB Device 1.Insert a USB Device into the USB port on the front of the SD unit. 2.Select USB from the Media textbox. 3 select the copy option (red) to start archive.
- Page 10 ©2007...
- Page 11 Le document suivant vous guidera pour l’installation, la configuration et la premiére mise en fonction de l’unité Utilisez ce guide conjointement avec le Manuel díinstallation et díutilisation du SD. Ce manuel est localisé sur le CD fourni avec l’unité; il est également disponible sur le site Internet de Dedicated Micros. Installation de l’unité SD Unit L’unité...
-
Page 12: Télécommande Infrarouge
Si l’enregistreur vidéo numérique est en mode Direct ou en mode Lecture, appuyez sur la touche Zoom IN pour agrandir deux fois l’image. Après avoir effectué un zoom avant, vous pouvez naviguer dans l’image en utilisant les touches de direction. dedicated micros ©2007... - Page 13 Appuyez sur la touche de direction droite pour mettre en surbrillance le premier paramètre éditable à l’écran. Utilisez les touches de direction haut/bas/gauche/droite pour naviguer entre les champs. dedicated micros ©2007...
- Page 14 30 ou 60 jours, ou bien le paramètre de résolution sélectionné (normal, moyen ou faible). Avec des vitesses d’enregistrement pouvant atteindre 100 ips (PAL) ou 120 ips (NTSC), la gamme SD offre par défaut une capacité de 5 ips par caméra. dedicated micros ©2007...
- Page 15 USB, reportez-vous à la section « Menu Copier » à la page suivante. 2.095 FRENCH Nouvelle recherche Si vous souhaitez créer un nouveau filtre de recherche, appuyez sur la touche EVENT pour quitter la liste d’événements, puis saisissez de nouveau les informations dans le menu Filtrage évts. 3.201 FRENCH dedicated micros ©2007...
- Page 16 1. Appuyez sur la touche EVENT pour afficher la page de la liste d’événements. 2. Utilisez les touches de direction haut/bas pour sélectionnez l’événement que vous souhaitez copier. 3. Appuyez sur la touche COPY. L’événement est envoyé dans la liste de copies. dedicated micros ©2007...
- Page 17 OK. Vérifiez si la liste des éléments à supprimer, puis sélectionnez Suppr. (touche bleue) Remarque: La gamme SD prend en charge la plupart des disques flash USB et des disques durs USB pour l’exportation. La liste des périphériques compatibles connus est disponible dans l’Annexe C. TO COPY EVENTS/IMAGES TO CD dedicated micros ©2007...
- Page 18 ©2007...
- Page 19 IP dal server di rete DHCP. La funzione DNS (dynamic name servers) è supportata e pertanto è possibile assegnare un nome all’unità. In questo modo non è necessario che l’unità abbia un indirizzo IP fisso ed è più semplice per un utente remoto individuarla. dedicated micros ©2007...
- Page 20 2.079 ITalIan Zoom elettronico Se il DVR è in modalità Tempo reale o Riproduzione, premendo il pulsante Zoom IN si zooma (x2) l’immagine. Una volta “zoomata”, è possibile navigare all’interno dell’immagine utilizzando i pulsanti direzionali. dedicated micros ©2007...
- Page 21 Utilizzare i pulsanti direzionali sinistra/destra/su/giù per spostarsi nei vari campi. Selezionare OK per avviare la modifica di un campo modificabile. Il campo diventa di colore verde. Utilizzare i pulsanti direzionali su/giù per modificare le impostazioni all’interno di un campo modificabile. dedicated micros ©2007...
- Page 22 30 o 60 giorni e dell’impostazione “normale, media e bassa” selezionata. Con velocità di registrazione globali fino a 100pps (PAL) e 120pps (NTSC), la gamma SD garantisce una registrazione fino a 5pps su ciascuna telecamera dell’unità. dedicated micros ©2007...
-
Page 23: Elenco Degli Eventi
Per l’archiviazione su CD/USB, fare riferimento alla sezione menu copia alla pagina seguente. 2.095 ITalIan Avvio di una nuova ricerca Se si desidera avviare un nuovo filtro di ricerca, premere il pulsante EVENT per chiudere l’elenco eventi quindi reinserire i dati nel menu filtro di ricerca eventi. dedicated micros ©2007... - Page 24 All’interno dell’elenco eventi è possibile evidenziare un evento e inviarlo all’elenco Copia. 1. Premere il pulsante EVENT per visualizzare a video l’elenco eventi. 2. Utilizzare i pulsanti direzionali su/giù per evidenziare l’evento da copiare. 3. Premere il pulsante COPY. L’evento viene così inviato all’elenco Copia. dedicated micros ©2007...
- Page 25 1. Per cancellare un elenco copia, premere il pulsante clear (cancella) 2. Per eliminare singole voci dell’elenco Copia, selezionare le voci da eliminare e premere OK. Spuntare tutte le vaci da eliminare e scegliere delete (elimina) (tasto funzione blu) 3.208 ITalIan dedicated micros ©2007...
- Page 26 ©2007...
- Page 27 IP fija y hace que sea más fácil de encontrar para un usuario remoto. dedicated micros ©2007...
- Page 28 2.079 Zoom electrónico sPanIs Si el DVR se encuentra en modo Directo o Reproducción, pulsar el botón Zoom IN acercará (x) a la imagen. Una vez ‘acercado’, es posible navegar por la imagen usando los botones de dirección. dedicated micros ©2007...
- Page 29 Use los botones de dirección Izquierda/Derecha/Arriba/Abajo para moverse entre campos. seleccione oK para empezar a editar un campo editable. el campo cambia a color verde. Use los botones de dirección Arriba/Abajo para cambiar los parámetros dentro de un campo editable. dedicated micros ©2007...
- Page 30 ‘Normal, medio y bajo’ seleccionado. Con velocidades de grabación globales de hasta 100 pps (PAL) y 120 pps (NTSC), la Gama SD puede ofrecer grabación de hasta 5 pps en cada cámara de la unidad, lista para usar. dedicated micros ©2007...
-
Page 31: Lista De Eventos
Para archivar en CD/USB, consulte la sección del Menú Copiar de la página siguiente. Iniciar una búsqueda nueva. Si desea iniciar un nuevo filtro de búsqueda, pulse el botón EVENT para salir de la lista de eventos, y vuelva a introducir los datos en el menú filtro eventos. dedicated micros ©2007... - Page 32 1. Pulse el botón EVENT para presentar la pantalla de Lista de eventos. 2. Use los botones de dirección arriba/abajo para resaltar el evento a copiar. 3. Pulse el botón COPY, el evento se envía a la Lista de copias. dedicated micros ©2007...
- Page 33 1. Para borrar la lista de copias, pulse el botón CLEAR (borrar) 2. Para borrar elementos individuales de la lista de copias, seleccione los elementos a borrar y pulse oK. Compruebe todos los elementos a eliminar y elija Elim. (Eliminar - tecla soft azul) dedicated micros ©2007...
- Page 34 ©2007...
-
Page 35: Aufstellung Und Installation
DVR vom DHCP-Server des Netzwerks automatisch eine IP-adresse zugeteilt wird. da dns (dynamic name server) unterstützt wird, kann dem Gerät ein name zugewiesen werden. damit ist der dVr nicht auf eine feste IP-adresse angewiesen und kann bei fernzugriff schneller gefunden werden. dedicated micros ©2007... -
Page 36: Verwendung Der Fernbedienung
1 sekunde andauernden Timeouts eingegeben werden. Elektronischer Zoom Befindet sich der DVR im Live- oder Wiedergabemodus, wird beim Drücken der ZOOM IN-Taste in das Bild hineingezoomt (x2). Nach dem Hineinzoomen kann im Bildes mit Hilfe der Richtungstasten navigiert werden. dedicated micros ©2007... - Page 37 Drücken Sie die rechte Richtungstaste, um den ersten bearbeitbaren Parameter auf dem Bildschirm auszuwählen. mit den richtungstasten (nach oben, unten, rechts, links) können sie die Zellen ansteuern. drücken sie oK, um eine Zelle zu bearbeiten. die Zelle wird grün angezeigt. dedicated micros ©2007...
- Page 38 Kameras, der speicheroptionen für 30 oder 60 Tage und der ausgewählten aufnahmerate (normal, mittel oder niedrig) sind verschiedene speichergrößen verfügbar. Mit einer Gesamtaufzeichnungsrate von bis zu 100 Bildern/Sek. (PAL) bzw. 120 Bildern/Sek. (NTSC) ermöglicht die SD-Modellreihe bereits im Lieferzustand eine Aufzeichnung mit bis zu 5 Bildern/Sek. pro angeschlossener Kamera. dedicated micros ©2007...
- Page 39 Zum Kopieren eines ereignisses in die archivliste wählen sie zunächst das entsprechende ereignis aus. Drücken Sie dann die Taste COPY (Kopieren). Die gesamte Zeitdauer des Ereignisses wird in die Archivliste kopiert. Zur Archivierung auf CD/USB lesen Sie den Abschnitt „Menü Kopieren“. dedicated micros ©2007...
- Page 40 Kopierliste hinzugefügt werden. 1. drücken sie die Taste eVenT (ereignis), um die ereignisliste anzuzeigen. 2. Verwenden sie zum markieren des gewünschten ereignisses die richtungstasten (nach oben/unten). 3. Drücken Sie die Taste COPY (Kopieren), um das Ereignis der Kopierliste hinzuzufügen. dedicated micros ©2007...
- Page 41 1. Drücken Sie auf LÖSCHEN, um alle Elemente in der Kopierliste zu löschen. 2. Um einzelne Elemente aus der Kopierliste zu löschen, markieren Sie diese und drücken dann auf OK. Überprüfen sie alle zu löschenden elemente, und wählen sie enTfernen (blau) dedicated micros ©2007...
- Page 42 Notes dedicated micros ©2007...
- Page 43 Notes dedicated micros ©2007...
- Page 44 1200 daresbury Park, daresbury, Cheshire, WA4 4HS, UK Dedicated Micros, Australia PTY. dedicated micros france 5/3 Packard Avenue, Castle Hill, 9-13 rue du moulinet nsW 2154, australia 75013 Paris, france Dedicated Micros, Asia PTY dedicated micros slovenia...
Need help?
Do you have a question about the SD Unit and is the answer not in the manual?
Questions and answers