Foscam FI9821W Quick Installation Manual
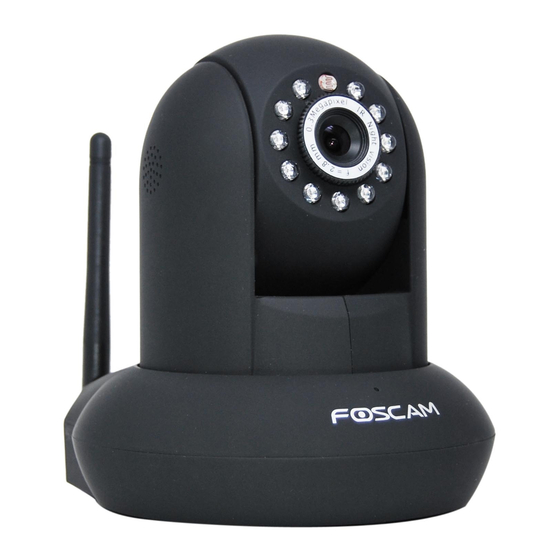
Indoor hd pan/tilt wireless ip camera
Hide thumbs
Also See for FI9821W:
- User manual (104 pages) ,
- Quick installation manual (2 pages) ,
- Quick installation manual (2 pages)

Subscribe to Our Youtube Channel
Related Manuals for Foscam FI9821W


Summary of Contents for Foscam FI9821W
-
Page 1: Quick Installation Guide
V2.01 Model: FI9821W Quick Installation Guide Indoor HD Pan/Tilt Wireless IP Camera Black White For Windows OS ------- Page 1 For MAC OS ------- Page 16 ShenZhen Foscam Intelligent Technology Co., Ltd... -
Page 2: Hardware Installation
FI9821W Quick Installation Guide Quick Installation Guide For Windows OS Package Contents HD IP Camera FI9821W DC Power Adapter (5V-2.0A) Network Cable Wi-Fi Antenna .x 1 Mounting Bracket .x 1 Quick Installation Guide CD-ROM with Setup Software .x 1... - Page 3 The red power light will also turn on. 2. Software Installation Insert the CD into the CD drive of your computer and find the folder“FI9821W”, then go to the folder “For Windows OS”. Copy the IP camera tool to your computer and start the program.
-
Page 4: Login To The Camera
FI9821W Quick Installation Guide 3. Login to the Camera Double click the IP Camera Tool icon and the following screen should appear. Figure 1.4 - IP Camera Tool for Windows The IP camera tool should find the camera’s IP address automatically after you plug in the network cable. - Page 5 FI9821W Quick Installation Guide Click Install Figure 1.6 - Install the ActiveX plugin (Internet Explorer) After installing the plugin, refresh the browser and you will be able to see the live video screen. Figure 1.7 – The Live Video Page www.foscam.com...
-
Page 6: For Firefox
FI9821W Quick Installation Guide If this is your first time logging in on Firefox, it may prompt you to download the plugin. Click here to download the plugin Figure 1.8 - Download the plugin (Firefox) Drag the download file into Firefox web page and it will prompt you to install it. - Page 7 FI9821W Quick Installation Guide 3.3 For Google Chrome If this is your first time logging in to the camera with Google Chrome, it will prompt you to download the plugin as in Figure 1.8. Download the plugin and drag it to the Extensions page of Google Chrome.
- Page 8 FI9821W Quick Installation Guide Congratulations! You have succeeded in accessing the camera by a wired connection. Be sure to leave all other menu options alone until finishing the rest of the installation. If you only see a black screen with a red cross in the center, please try another port number instead of the default “port 88”...
- Page 9 FI9821W Quick Installation Guide Enter password your router 1 Click the SSID of your router and the relevant information will be filled in the fields automatically. Figure 2.3 - Wireless Settings Step 3: Please click on the Save button after all settings have been entered and disconnect the network cable.
- Page 10 FI9821W Quick Installation Guide 5. Remote Access Setup We have been able to access the camera within the LAN network, and have set up a wireless connection, but how do we access the camera via WAN or from outside networks through the...
- Page 11 FI9821W Quick Installation Guide Select which camera you’d like to change the port for, and right click Figure 2.4 – Click on Network Configuration Modify the Http Port. Enter the Username and password, click OK. Figure 2.5 – Changing the port in IP Camera Tool.
- Page 12 FI9821W Quick Installation Guide Figure 2.6 – Static IP address and port 2000 set in IP Camera Tool How do we assign a different Media Port for the camera? Login to the camera; then click on Settings at the top, then click Network on the left side. Next, click the Port section.
- Page 13 FI9821W Quick Installation Guide 5.1 Static IP Addresses Users who have static IP addresses do not need to set DDNS service settings for remote access. When you have finished connecting the camera using the LAN IP address and port forwarding, you can access the camera directly from the Internet using the WAN IP address and port number.
-
Page 14: Dynamic Ip Addresses
FI9821W Quick Installation Guide 5.2 Dynamic IP Addresses DDNS is a service that allows your IP Camera, especially when assigned with a dynamic IP address, to have a fixed host and domain name. This means that even though your WAN IP address is constantly changing, you will have a fixed hostname you can use to access your cameras at all times. - Page 15 Use the embedded DDNS to access the camera via the Internet Each Foscam camera has an embedded unique DDNS domain name, the format of this domain name is xxxxxx.myfoscam.org. On the bottom of the camera, you can see the domain name sticker with this information on it.
- Page 16 CD-ROM for other settings such as Alarm Settings, Email Settings, User Settings, and much more! If you have problem with FOSCAM IP camera, please first contact FOSCAM reseller for solving the problems. If our reseller cannot provide service, pls contact our service department: tech@foscam.com...
- Page 17 FI9821W Quick Installation Guide Quick Installation Guide For MAC OS Package Contents HD IP Camera FI9821W DC Power Adapter (5V-2.0A) Network Cable Wi-Fi Antenna .x 1 Mounting Bracket .x 1 Quick Installation Guide CD-ROM with Setup Software .x 1...
- Page 18 The red power light will also turn on. 2. Software Installation Insert the CD into the CD drive of your Mac and find the folder“FI9821W”, then go to the folder “For MAC OS”. Copy the IP camera tool to your MAC and start the program.
- Page 19 FI9821W Quick Installation Guide 3. Login to the Camera Double click the IP Camera Tool icon and the following screen should appear. Figure 1.4 - IP Camera Tool for Mac The IP camera tool should find the camera’s IP address automatically after you plug in the network cable.
- Page 20 FI9821W Quick Installation Guide Click here to download the plugin Figure 1.6 - Download the plugin for Safari Figure 1.7 - Click Continue to start the installation During the installation, you may receive a pop-up dialogue asking for your password, enter the login password and allow the plugin to install.
- Page 21 FI9821W Quick Installation Guide Type in your password and push OK Figure 1.8 - Enter the password to continue the installation Click Install to finish the installation. After the installation, close and reopen the browser then the plugin will take effect, log into the camera again and you will be able to see the live video screen.
- Page 22 FI9821W Quick Installation Guide NOTE : For MAC OS, here cannot allow Firefox, Google Chrome to access the camera. 4. Wireless Connection Setup Step 1: Choose “Settings” on the top of the surveillance window, and go to the “Network” panel on the left side of the screen, then click “Wireless Settings.”...
- Page 23 FI9821W Quick Installation Guide Enter password your router. Click the SSID of your router and the relevant information will be filled in the fields automatically. Figure 2.1 - Wireless Settings Step 3: Please click on the Save button after all settings have been entered and disconnect the network cable.
- Page 24 FI9821W Quick Installation Guide What is the HTTP Port number and Media Port number, how do we change it? This camera supports HTTP Port and Media Port. The Media port is used to view the camera’s video stream, HTTP Port is used to access the camera remotely. If you want to access the camera and view the video, the Media Port and the HTTP Port must both be configured correctly.
- Page 25 FI9821W Quick Installation Guide Modify the HTTP port. Enter the Username and password, click OK. Figure 2.3 – Changing the port in IP Camera Tool Step 2: Enter the username and password of the Administrator (default username is admin with a blank password), and click “OK”...
- Page 26 FI9821W Quick Installation Guide Figure 2.5 – The Port Settings page. This page allows you to change the Media port and HTTP port, however, remember that the two ports need to be different. Once you change the Media port, click save to save the settings, you may need to wait about 10 seconds for the information to be updated.
- Page 27 FI9821W Quick Installation Guide Figure 2.6 – This is your WAN IP address (external IP address). Access your IP Camera from the Internet You can access the IP Camera from the Internet (remote access). Enter the WAN IP address and port number in your standard browser.
- Page 28 FI9821W Quick Installation Guide What is Port forwarding? If you have never done port forwarding before, you can open and view the following link to understand the basic concept. Port forwarding allows for outside connections to access a specific device on your network from anywhere in the world. Every router automatically blocks any incoming connections for safety purposes.
- Page 29 Use the embedded DDNS to access the camera via the Internet Each Foscam camera has an embedded unique DDNS domain name, the format of this domain name is xxxxxx.myfoscam.org. On the bottom of the camera, you can see the domain name sticker with this information on it.
- Page 30 CD-ROM for other settings such as Alarm Settings, Email Settings, User Settings, and much more! If you have problem with FOSCAM IP camera, please first contact FOSCAM reseller for solving the problems. If our reseller cannot provide service, pls contact our service department: tech@foscam.com...
Need help?
Do you have a question about the FI9821W and is the answer not in the manual?
Questions and answers