Table of Contents
Advertisement
Quick Links
Advertisement
Table of Contents

Subscribe to Our Youtube Channel
Related Manuals for Promise Technology Pegasus J2


Summary of Contents for Promise Technology Pegasus J2
- Page 2 Promise Technologies Pegasus J2 User Manual...
-
Page 3: Table Of Contents
Contents Introduction 1 Install J2 on Windows 12 Support Information 29 cd 12 nStaLL frOM ontACting eChniCAl upport PaM Lite indOWS OWnLOad incLuding river iMited arranty J2 s hunderbolT Technology and The nsTall ofTWare and rIver for IndoWs iScLaiMer Of Other WarrantieS Packing List 1 onnecT The To your... -
Page 4: Introduction
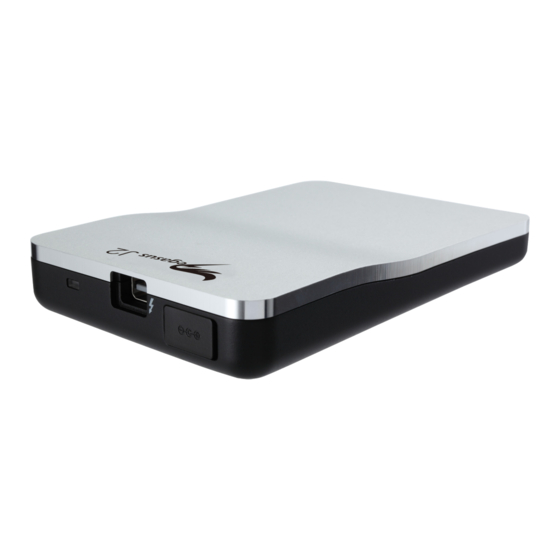
ACking Thank you for purchasing the Pegasus J2 drive from PROMISE Technologies. The sleek design of J2 Check the shipping package to make sure you have the following items: drive enclosure houses a very high performance, versatile, portable and easy to use storage device. For • Pegasus J2 drive... -
Page 5: I Mportant Information For M Ac U Sers
The Pegasus J2 drive for Mac can be used on Mac computers equipped with a Thunderbolt port running Mac OS X 10.7, 10.8 or later with latest firmware updates. The driver for the Thunderbolt™ connection is included with OS firmware updates. It is a good idea to check for any Mac OS or software updates before using the J2. -
Page 6: I Mportant Information For W Indows U Sers
IndoWs sers Before connecting the Pegasus J2 to your Windows computer, it is necessary to first install a driver. The driver is located on the Product CD, or can be downloaded from the PROMISE website. If you are Please read and make sure you understand the entire set up procedure and the system requirements installing from the CD, look for the WebPAM LITE including driver option in the menu that appears before beginning installation of the J2. -
Page 7: J2 Specifications
Promise Technologies Pegasus J2 User Manual J2 s peCifiCAtions Power adapter AC Input: 100-240V DC Output 12V /1.0A (12W) Power consumption 13.68 W with power adapter 9.8 W without power adapter (bus mode) Temperature Operating: 5° ~ 35°C (41° ~ 95°F) Storage: -40°... -
Page 8: J2 Hardware
ArdwAre The Pegasus J2 drive can be used with or without the power adapter. To use the power adapter, first read “Assemble the power adapter” on page 6 to assemble it with the type of plug for the socket used in your electrical system. -
Page 9: A Ssemble The Power Adapter
Promise Technologies Pegasus J2 User Manual ssemble the power AdApter Locate the correct plug adapter for the type of socket used for your electrical power service and slide it into the contact slot on the universal power adapter. It should easily... -
Page 10: C Onnect The Power For Faster Transfer
Promise Technologies Pegasus J2 User Manual onneCt the power for fAster trAnsfer Use the power adapter for faster data transfer. The power adapter is shipped with seven detachable wall plug adapters suitable for most countries. Please read “Assemble the power adapter” on page 6 of this guide for power adapter assembly instructions. -
Page 11: P Erformance Led
Promise Technologies Pegasus J2 User Manual erformAnCe You can check the LED indicator on the front to verify that the device is functioning properly and to monitor the Thunderbolt connection performance. When using the power adapter, the LED shines blue indicating a faster transfer speed. Without the power adapter, the LED shines green indicating a slower connection. -
Page 12: Install J2 On Mac
After the update is complete, restart the computer if necessary. Thunderbolt connection to Mac computer onnecT The To your Connect a Thunderbolt cable to the Thunderbolt port on the Pegasus J2, and connect the other end of the cable to a Thunderbolt port on your computer. -
Page 13: J2 S Oftware U Pdater In M Ac
Support page and click on Download Center in the drop-down menu. In the Download Center menu, scroll down to find two pull-down menus, select the Pegasus J2 in the first and either model in the second pull-down menu (the updater is identical for the different sizes of the J2). -
Page 14: Afely R
Removing the J2 safely from your Mac is a simple procedure, but you need to first install the Pegasus J2 Software Updater for Mac, available at the PROMISE website. Before you disconnect the Thunderbolt cable from the J2 or from your Mac, move your cursor to the Pegasus J2 Updater icon in the menu bar, the Safely Remove menu appears. -
Page 15: Install J2 On Windows
Download Center. In the Download Center page, scroll to find the Pegasus J2 for Windows in the pull-down menu on the left side on the bottom of the menu. In the pull-down menu the right side, choose the 512GB or 256GB model (the software and driver are identical for both models). -
Page 16: I Nstall J2 S Oftware And D River For W Indows
Insert the Product CD into your DVD/CD drive and click on WebPAM LITE including driver in Next to continue. Pegasus J2 menu that appears. Or launch the installation file from the location on your computer where it has been downloaded, and follow these steps. - Page 17 Promise Technologies Pegasus J2 User Manual In the last WebPAM LITE InstallShield Wizard menu, click the Finish button. After In the License Agreement menu, click to select the “I accept the terms of the license agreement” completion, another InstallShield session for the hardware driver will automatically launch.
-
Page 18: C Onnect The J2 To Your W Indows Computer
Promise Technologies Pegasus J2 User Manual onnecT The To your IndoWs compuTer Thunderbolt connection to Windows computer With the driver and software now installed, go ahead and make the Thunderbolt connection. Insert one end of a Thunderbolt cable into the Thunderbolt port on the J2 and connect the other end of the cable to a Thunderbolt port on your computer. -
Page 19: C Onfigure J2 For W Indows
Promise Technologies Pegasus J2 User Manual onfIgure IndoWs Windows 7 Windows 7 - Home Basic Edition Follow the instructions in this section to complete the installation of the J2 on your Windows computer. The procedure to configure the J2 for all supported versions of Windows begins with WebPAM LITE and clicking the Switch to Windows button. - Page 20 Promise Technologies Pegasus J2 User Manual To configure the J2 for Windows: Launch WebPAM LITE. Click the Switch to Windows button in the first WebPAM LITE menu that appears, the Device menu. A pop-up dialog box appears asking for confirmation. All data on the disk will be erased, so you must type “Confirm”...
- Page 21 Promise Technologies Pegasus J2 User Manual Now the WebPAM LITE menu that appears depends on what version of Windows is running. If you are running any of the Windows editions listed below, you should see a message that informs you the J2 has been switched to Windows (see example below), the J2 is ready for use: • Windows 7 Ultimate...
-
Page 22: D Isk M Anagement For W Indows 7 H Ome P Remium And W Indows 8
Promise Technologies Pegasus J2 User Manual anageMent fOr indOWS reMiuM and indOWS The New Striped Volume Wizard menu describes the new striped volume that will be created. To complete the J2 conversion to Windows 7 Home Premium and Windows 8, follow these steps: Click Next to begin. - Page 23 Promise Technologies Pegasus J2 User Manual Assign a drive letter to the drive. Click Next to continue. The Wizard tasks are completed. Click on Finish to format the J2 as a Striped Volume. Make sure the “Format this volume ..” option is selected (this is selected by default), type a name for the drive in the Volume label entry field, leave the default settings for File system (NTFS) and Allocation unit size.
-
Page 24: D Isk M Anagement For W Indows 7 H Ome B Asic And W Indows 7 S Tarter
Promise Technologies Pegasus J2 User Manual anageMent fOr indOWS aSic and indOWS tarter When the striped volume is finished formatting, Disk 1 and Disk 2 appear listed in the Disk To complete the J2 conversion to Windows 7 Home Basic and Windows 7 Starter, follow these steps: Manager. - Page 25 Promise Technologies Pegasus J2 User Manual In the Initialize Disk menu, make sure both Disk 1 and Disk 2 are check marked, and the MBR (Master Boot Record) option is selected this should be selected by default. Click the OK button to In the New Simple Volume Wizard, a description of a simple volume is provided, click Next.
- Page 26 Promise Technologies Pegasus J2 User Manual Assign a drive letter for the disk with the pull-down menu, or use the default. Click Next to A summary of the New Simple Volume appears. Click the Finish button to begin formatting. continue.
- Page 27 Promise Technologies Pegasus J2 User Manual 11. When the formatting has finish, the disk will display Healthy as its status. Now repeat the New Simple Volume creation process with Disk 2. Go to Step 4 above and repeat the steps for Disk 2.
-
Page 28: Afely R Emove J2 From W Indows
Promise Technologies Pegasus J2 User Manual Afely emove from indows To disconnect the J2 drive from your Windows computer while the computer is running, it is necessary to perform the Safely Remove procedure using the WebPAM LITE software. If you remove the Thunderbolt cable while the operating system is running, data on the J2 might be damaged. -
Page 29: Pdate J2 F Irmware In W Indows
Promise Technologies Pegasus J2 User Manual J2 f Pdate irMWare in indOWS Use WebPAM LITE to update device firmware on the J2 or to update the version of WebPAM LITE installed on your computer. To update J2 firmware or software, first check to see if the current versions are out of date. Click on the Admin icon in WebPAM LITE, then click on the Device Update link. -
Page 30: S Witching The J2 From W
The two SSD drives in the J2 appear as unusable disks in the Disk Utility. They need to be formatted If your Pegasus J2 has been switched from the default setup as a Mac Striped RAID to a Windows so the Mac OS can use them. - Page 31 Promise Technologies Pegasus J2 User Manual Click on the unformatted disk and select the RAID key. Type a name in RAID Set Name and The Striped RAID set appears in the disk utility as a Mac compatible drive. The J2 is now ready for choose Striped RAID Set for the RAID Type.
-
Page 32: Support Information
Promise Technologies Pegasus J2 User Manual upport nformAtion ✓ * Contacting Technical Support (below) https://support.promise.com/userRegistration.aspx https://support.promise.com/userRegistration.aspx * Limited Warranty * Returning Product For Repair To view FAQ and information useful for trouble shooting, please visit the Promise Knowledge Base website at http://kb.promise.com/ and locate the product line or use the keyword search function. -
Page 33: Limited Warranty
Limited Warranty Disclaimer of other warranties PROMISE Technology, Inc. (“PROMISE”) warrants that this product, from the time of the delivery of This warranty covers only parts and labor, and excludes coverage on software items as expressly set the product to the original end user: above. -
Page 34: Returning Product For Repair
Promise Technologies Pegasus J2 User Manual Returning Product For Repair If you suspect a product is not working properly, or if you have any questions about your product, contact our Technical Support Staff through one of our Technical Services, making sure to provide the following information: ✓... -
Page 35: Our R Esponsibilities
Promise Technologies Pegasus J2 User Manual Your Responsibilities You must follow the packaging guidelines for returning products: You are responsible for determining whether the product is appropriate for your use and will interface • Use the original shipping carton and packaging with your equipment without malfunction or damage.
Need help?
Do you have a question about the Pegasus J2 and is the answer not in the manual?
Questions and answers