Table of Contents
Advertisement
Quick Links
EXSTREAMER P 5
PRODUCT MANUAL
Universal, Multiformat IP Audio Decoder with
Amplifier, PoE powered
Document version 01.01
Release date
Hardware Rev.
© 2011 Barix AG, all rights reserved. All information is subject to change
without notice. All mentioned trademarks belong to their respective
owners and are used for reference only.
28. Apr. 2011
HW 1.0
Advertisement
Table of Contents

Related Manuals for BARIX Extreamer P5


Summary of Contents for BARIX Extreamer P5
- Page 1 Document version 01.01 Release date 28. Apr. 2011 Hardware Rev. HW 1.0 © 2011 Barix AG, all rights reserved. All information is subject to change without notice. All mentioned trademarks belong to their respective owners and are used for reference only.
-
Page 2: Table Of Contents
Table of Contents Introduction..................... About this document.......................5 Additional documents.....................5 About the Exstreamer P5....................5 Applications........................5 Hardware features......................5 Integrated Barix IP Audio Module...................6 Available Applications and Firmware packages.............6 Quick Installation Guide................ Introduction........................7 Package contents......................7 Firmware..........................7 Support..........................7 Front view........................8 A Reset button........................8 B Status LEDs.........................8... - Page 3 Network Interfaces......................13 Status LEDs........................13 Address........................14 Device Status LEDs.......................14 Reset button........................14 Rebooting the device................Pushing the reset button....................15 Using a web browser....................15 Sending a Reboot Command..................15 Interface.........................15 Interface........................15 Interface........................15 Power-cycling the device....................15 Updating the device................Introduction........................17 Checking the Current Version..................17 Version information.......................17 Downloading the latest firmware..................18...
- Page 4 Network Interfaces......................23 Serial Interfaces......................23 Audio & I/O Interfaces....................24 Speaker Interface......................24 Audio Processor (Codec)....................24 Speaker output and D/A Conversion................24 Built-in Parts........................24 Mechanical........................25 Housing.........................25 Weight...........................25 Dimensions........................25 MTBF Calculations......................25 Environmental........................25 Certifications / Compliances..................25 Ordering Information................Exstreamer P5 NoPSU Package...................26 Legal Information.................. Table of Contents iv...
-
Page 5: Introduction
1.2 Additional documents As several different applications and different standard firmware packages can be used with the Barix Exstreamer P5, the process of loading or updating a software is also covered in this document. For information about the configuration of the loaded application or firmware please refer to the corresponding software user manual. -
Page 6: Integrated Barix Ip Audio Module
1.6 Integrated Barix IP Audio Module The Barix Exstreamer P5 houses the Barix IP audio module “IPAM 300”. For technical details on the audio module please refer to the corresponding product sheet and the development specification. 1.7 Available Applications and Firmware packages The Barix Exstreamer P5 comes preloaded with the Firmware “Streaming Client”... -
Page 7: Quick Installation Guide
2.3 Firmware This device comes preloaded with the Streaming Client firmware. Alternative firmware, such as the iClient ABCL application, can be downloaded from www.barix.com. 2.4 Support For support please contact your local dealer or visit www.barix.com. BARIX AG | 7/26... -
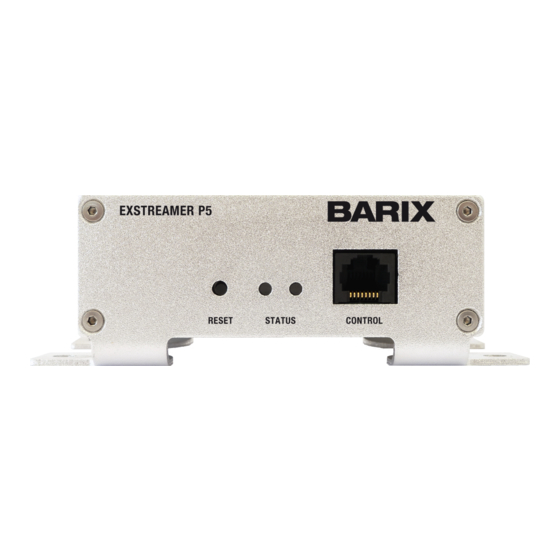
Page 8: Front View
Rx - / PoE a- Not connected PoE b- Ground [GND] PoE b- RS-485 B RS-485 A IR signal input F Ethernet Status LEDs Ground [GND] Green LED for Link status. V+ 10V, 100mA max Yellow LED for Activity status. BARIX AG | 8/26... -
Page 9: Installation
If you did not connect a speaker, launch the Enter the static IP address into the IP address field. “Barix Discovery Tool” and click the “Get” The default is “0.0.0.0” for automatic discovery button to find out which IP address the (DHCP). -
Page 10: Setting Temporary Ip Address Using The Mac Address
“one” must be there for this command to work correctly !!!). The Exstreamer will immediately refuse the connection on port 1, but will be available for browser access as long as the device stays powered. BARIX AG | 10/26... -
Page 11: Hardware
We then do the same from the top right corner. At the same time you will find for each connector informations on how to wire the Barix Exstreamer P5 to external components. We will explain the wiring using the wiring diagram on the next page. -
Page 12: Wiring Diagram
Ground intended for powering an external device consuming less than 1 Watt. To connect to an external RS-485 device or bus a male RJ-45 connector is needed. To connect a Barix VSC Volume Source Controller a standard Cat.5 cable can be used. RS-485... -
Page 13: Speaker Interface
* Note: This traffic could be generated by this device (outgoing), traffic not addressed to this device but to any other device in the network (especially when daisy-chaining) or broadcasted traffic (both incoming traffic but passed on) as well as traffic addressed to this device! BARIX AG | 13/26... -
Page 14: Mac Address
On, Off, Blinking depending on loaded software 3.8 Reset button An reset push button is directly connected to “software reset“ input of the IP Audio Module. Intended use : reset (reboot) / factory defaults (see software manual for details). BARIX AG | 14/26... -
Page 15: Rebooting The Device
Enable the command port first and send the packet to the port number you have set. 4.4 Power-cycling the device To reboot the Exstreamer P5 the voltage on the power supply connector has to drop for approximately one second before coming up again. BARIX AG | 15/26... -
Page 16: Updating The Device
Please keep that in mind when planning a remote “Update over network”. 5.2 Checking the Current Version To find out which version is currently installed check the informations next to the Barix logo on the devices main web page using a standard browser. -
Page 17: Downloading The Latest Firmware
5.4 Web Update Procedure Calculate approximately 2 minutes to complete the “Web Update” procedure. STEP 1 Open your web browser, type in the IP address of the Barix device and press Enter. Example: “192.168.0.12” STEP 2 Click on the UPDATE button to enter the update page. You will see the following screen:... - Page 18 Click on “Upload” to start the upload process which will take approximately 2 minutes. After a successful upload the following window appears: STEP 7 Click on the update link and then click on the "Reboot" button in the following window. The following screen appears: BARIX AG | 18/26...
-
Page 19: Note On Factory Defaults
Note on Factory Defaults The “Web Update” procedure does not change the current configuration. Barix recommends nevertheless checking for correct parameters in the configuration as well as to set parameters for newly added features. If you observe strange behavior after an update Barix recommends resetting the configuration to factory defaults (see chapter “Reverting to Factory Defaults”... -
Page 20: Mechanical Informations
239 mm / 9.4”. 6.3 Mounting For mechanical fixation the Barix Exstreamer P5 features mounting feet with a 2 mm /0.08“ thickness and 4 holes with a diameter of 6.4 mm / 0.25” intended for M5 to M6 screws. -
Page 21: Thermal Considerations
6.4 Thermal considerations The Barix Exstreamer P5 is a low power consumption device (15W max.) with an operating temperature range of 0 ~ 55° C / 32 ~ 131° F . Nevertheless an adequate space around the enclosure is needed to allow for sufficient air flow in order to prevent overheating, especially when mounted in racks with higher power consumption devices or in a high temperature environment. -
Page 22: Technical Data
* The RS-232 interface (COM 1) is internal (header J2) and for production purposes only ! Note that signal lines are shared with the RS-485 transceiver and the additional signal on pin 8 (/RS-485 receive enable) allows for disabling the RS-485 receive data by applying 3.3 VDC. BARIX AG | 22/26... -
Page 23: Audio & I/O Interfaces
Total Harmonic Distortion (THD @ -3dBFS = 1.5W) 0.296 Total Harmonic Distortion (THD @ -0.4dBFS = 2.72W) 0.296 *Output level software controllable Built-in Parts Parameter Value Unit Green Status LED Current (max.) Red Status LED Current (max.) BARIX AG | 23/26... -
Page 24: Mechanical
Storage Humidity Range (non-condensing) 0..70 7.9 Certifications / Compliances Type Certifications/Compliances Complies with RoHS, FCC B, CE B, C-Tick, UL (planned) Immunity according to EN55024, EN61000-4-2,-4-3,-4-4,-4-5,-4-6 Emissions according to EN 55022 Product Safety according to EN 60590 BARIX AG | 24/26... -
Page 25: Ordering Information
8 Ordering Information 8.1 Exstreamer P5 NoPSU Package Barix ordering number 2010.9104 Package contents: Exstreamer P5 • Screw block terminal connector (2 pin) for speaker • Quick Install Guide • BARIX AG | 25/26... -
Page 26: Legal Information
All trademarks belong to their respective owners and are used for reference only. Barix and Barix IP Audio Module are trademarks of Barix AG, Switzerland and are registered in certain countries. Newest information about our devices is available via download from our website, www.barix.com.
Need help?
Do you have a question about the Extreamer P5 and is the answer not in the manual?
Questions and answers